Welcome to Wargaming.net Wiki!
Variants

AMX 12 t

Jump to: navigation, search
Revision as of 17:02, 19 February 2013Revision as of 22:58, 16 April 2013
added some tactics to be effective in a high tier round
Line 18:Line 18:
 * Poor gun elevation * Poor gun elevation
  
?|InTheGame_performance=This tank introduces the concept of feeding the gun with a 6-round drum and using an automatic loader to reload the drum. The drum enables the tank to fire six shots rapidly, with the unfortunate side effect of taking a considerably long time to reload. This would not be a problem if the game allowed firing shells from a partially reloaded drum, but it does not. Therefore, a common tactic for this tank is to charge up next to or behind an enemy that's busy fighting an ally, unload all six rounds (roughly 660 damage over 12 seconds), and run away to reload. At the same time, keep in mind that this tank only holds 36 rounds of ammunition with the stock cannon, and 30 with the upgraded cannon. The gun's penetration is nothing exciting, so use it as a flanker. Plan your route in *and out* before you make your move. This holds true too for engaging combat in 1v1, where you should be sure that you can kill your opponent with a single clip, and if possible not counting on the fact you will score all 6 shots. This tank will not survive hits, so if you hit a wall or anything that brings you to a stop, you're dead.+|InTheGame_performance=This tank introduces the concept of feeding the gun with a 6-round drum and using an automatic loader to reload the drum. The drum enables the tank to fire six shots rapidly, with the unfortunate side effect of taking a considerably long time to reload. This would not be a problem if the game allowed firing shells from a partially reloaded drum, but it does not. Therefore, a common tactic for this tank is to charge up next to or behind an enemy that's busy fighting an ally, unload all six rounds (roughly 660 damage over 12 seconds), and run away to reload. At the same time, keep in mind that this tank only holds 36 rounds of ammunition with the stock cannon, and 30 with the upgraded cannon. The gun's penetration is nothing exciting, so use it as a flanker. If you find yourself in a Tier 10 match, one effective tactic is to drive with the heavies and wait. When the main fight has finished, look and see if a long heavy or medium with only a few hundred hp is foolish enough to wander out in the open. Move behind him using cover, move in from behind and empty that drum magazine. That tank will with he'd stayed put. Plan your route in *and out* before you make your move. This holds true too for engaging combat in 1v1, where you should be sure that you can kill your opponent with a single clip, and if possible not counting on the fact you will score all 6 shots. This tank will not survive hits, so if you hit a wall or anything that brings you to a stop, you're dead.
  
 Some things you should keep in mind when playing this tank: Some things you should keep in mind when playing this tank:

Revision as of 22:58, 16 April 2013


AMX 12 t

AnnoF15_AMX_12t.png
Battle Tier
1234567891011
Overview
Mouse over "
Well, the ones further down, of course.
" for more information
[Client Values; Actual values in
Specifically, the mismatch in crew values caused by commander's 10% crew skill bonus. Outside of a crew of 1 commander only, 100% crew is a fiction. The client values, given for 100% crew, will normally be taken into battle with 110% crew skill members aside from specific functions, causing their actual performance to deviate from the expected client value. These differences are taken into account in tooltip boxes.
]
875,000  Credits Cost
650130 HP Hit Points
11.91/12.357.11/13.5 t Weight Limit
Crew
  1. Commander (Radio Operator, Loader)
  2. Gunner (Loader)
  3. Driver
Mobility
250330 hp Engine Power
60/23 km/h Speed Limit
3638 deg/s Traverse
20.9946.41 hp/t Power/Wt Ratio
NoNo Pivot
Armor
// mm Hull Armor
30/20/2030/20/20 mm Turret Armor
Armament


{{#ifeq:ARMOR_PIERCING_CR|ARMOR_PIERCING||


{{#ifeq:HIGH_EXPLOSIVE|ARMOR_PIERCING||


AP/APCR/HE


{{#ifeq:ARMOR_PIERCING_CR|ARMOR_PIERCING||


{{#ifeq:HIGH_EXPLOSIVE|ARMOR_PIERCING||


AP/APCR/HE
Shells


70/2800/38


109/2800/98
Shell Cost
110/110/175135/135/175 HP Damage
108/148/38144/202/38 mm Penetration


|


|}}

|


|}}


10.21 r/m 

Magazine-fed Gun

Burst Length: 1 rounds
Magazine Size: 4 rounds
Cycle Time: 2.5 s
Magazine Reload Times
Nominal: 16 s
50% Crew: 20.36 s
75% Crew: 17.92 s
100% Crew: 16 s
With Vents: 15.63 s
With Vents and BiA: 15.34 s

Click here for more information.


|


|}}

|


|}}


8.73 r/m 

Magazine-fed Gun

Burst Length: 1 rounds
Magazine Size: 4 rounds
Cycle Time: 2.5 s
Magazine Reload Times
Nominal: 20 s
50% Crew: 25.46 s
75% Crew: 22.4 s
100% Crew: 20 s
With Vents: 19.54 s
With Vents and BiA: 19.18 s

Click here for more information.
Rate of Fire


|


|}}

|


|}}


949.3

Magazine-fed Gun

Using Shell Type 1 (110 Damage):


Theoretical Damage Per Minute
Nominal: 949.3
50% Crew: 862.4
75% Crew: 908.6
100% Crew: 949.3
With Vents: 957
With Vents and BiA: 963.6

Advantageous Damage Per Minute
Loaded-mag DPM: 1109.9
50% Crew: 1049.4
75% Crew: 1082.4
100% Crew: 1109.9
With Vents: 1116.5
With Vents and BiA: 1120.9

Click here for more information.

Magazine-fed Gun

Using Shell Type 2 (110 Damage):


Theoretical Damage Per Minute
Nominal: 949.3
50% Crew: 862.4
75% Crew: 908.6
100% Crew: 949.3
With Vents: 957
With Vents and BiA: 963.6

Advantageous Damage Per Minute
Loaded-mag DPM: 1109.9
50% Crew: 1049.4
75% Crew: 1082.4
100% Crew: 1109.9
With Vents: 1116.5
With Vents and BiA: 1120.9

Click here for more information.

Magazine-fed Gun

Using Shell Type 3 (175 Damage):
With wholly penetrating hits

Theoretical Damage Per Minute
Nominal: 1510.25
50% Crew: 1372
75% Crew: 1445.5
100% Crew: 1510.25
With Vents: 1522.5
With Vents and BiA: 1533

Advantageous Damage Per Minute
Loaded-mag DPM: 1765.75
50% Crew: 1669.5
75% Crew: 1722
100% Crew: 1765.75
With Vents: 1776.25
With Vents and BiA: 1783.25

Click here for more information.


|


|}}

|


|}}


1102.95

Magazine-fed Gun

Using Shell Type 1 (135 Damage):


Theoretical Damage Per Minute
Nominal: 1102.95
50% Crew: 1020.6
75% Crew: 1065.15
100% Crew: 1102.95
With Vents: 1111.05
With Vents and BiA: 1116.45

Advantageous Damage Per Minute
Loaded-mag DPM: 1263.6
50% Crew: 1209.6
75% Crew: 1239.3
100% Crew: 1263.6
With Vents: 1269
With Vents and BiA: 1273.05

Click here for more information.

Magazine-fed Gun

Using Shell Type 2 (135 Damage):


Theoretical Damage Per Minute
Nominal: 1102.95
50% Crew: 1020.6
75% Crew: 1065.15
100% Crew: 1102.95
With Vents: 1111.05
With Vents and BiA: 1116.45

Advantageous Damage Per Minute
Loaded-mag DPM: 1263.6
50% Crew: 1209.6
75% Crew: 1239.3
100% Crew: 1263.6
With Vents: 1269
With Vents and BiA: 1273.05

Click here for more information.

Magazine-fed Gun

Using Shell Type 3 (175 Damage):
With wholly penetrating hits

Theoretical Damage Per Minute
Nominal: 1429.75
50% Crew: 1323
75% Crew: 1380.75
100% Crew: 1429.75
With Vents: 1440.25
With Vents and BiA: 1447.25

Advantageous Damage Per Minute
Loaded-mag DPM: 1638
50% Crew: 1568
75% Crew: 1606.5
100% Crew: 1638
With Vents: 1645
With Vents and BiA: 1650.25

Click here for more information.
Damage Per Minute


|


|}}


0.42 m 

With 50% Crew: 0.52 m
With 75% Crew: 0.454 m
With 100% Crew: 0.403 m
With BiA: 0.394 m
With BiA and Vents: 0.385 m
Maximum possible: 0.369 m

For more details, see Crew


|


|}}


0.4 m 

With 50% Crew: 0.496 m
With 75% Crew: 0.433 m
With 100% Crew: 0.384 m
With BiA: 0.375 m
With BiA and Vents: 0.367 m
Maximum possible: 0.352 m

For more details, see Crew
Accuracy


|


|}}


2.5 s 

With 50% Crew: 3.097 s
With 75% Crew: 2.704 s
With 100% Crew: 2.397 s
With GLD: 2.179 s
With BiA: 2.344 s
With BiA and Vents: 2.293 s
With both and GLD: 2.085 s
Maximum possible: 1.998 s

For more details, see Crew or Equipment


|


|}}


2.3 s 

With 50% Crew: 2.849 s
With 75% Crew: 2.488 s
With 100% Crew: 2.205 s
With GLD: 2.005 s
With BiA: 2.157 s
With BiA and Vents: 2.11 s
With both and GLD: 1.918 s
Maximum possible: 1.839 s

For more details, see Crew or Equipment
Aim time
4444 deg/s Turret Traverse
360° Gun Arc
-6°/+12°-6°/+12° Elevation Arc
3636 rounds Ammo Capacity
General
2020 % Chance of Fire


360 m 

With 50% Crew: 282.8 m
With 75% Crew: 321.5 m
With 100% Crew: 360 m
With Recon and Situational Awareness: 378.2 m
With Coated Optics: 396 m
With Binocular Telescope: 450 m
Maximum possible: 515.4 m

For more details, see Skills or Equipment


360 m 

With 50% Crew: 282.8 m
With 75% Crew: 321.5 m
With 100% Crew: 360 m
With Recon and Situational Awareness: 378.2 m
With Coated Optics: 396 m
With Binocular Telescope: 450 m
Maximum possible: 515.4 m

For more details, see Skills or Equipment
View Range


|


|}}


400 m 

With 50% Crew: 314.3 m
With 75% Crew: 357.2 m
With 100% Crew: 400 m
With 100% Signal Boost: 480 m
When affected by 100% Relaying: 440 m
Maximum possible: 575.6 m

For more details, see Skills or Equipment


|


|}}


750 m 

With 50% Crew: 589.3 m
With 75% Crew: 669.7 m
With 100% Crew: 750 m
With 100% Signal Boost: 900 m
When affected by 100% Relaying: 825 m
Maximum possible: 1079.2 m

For more details, see Skills or Equipment
Signal Range
Values are Stock - click for Top


VI

AnnoF15_AMX_12t.png

875000

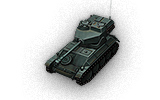
The AMX 12 t is a French tier 6 light tank.

This design of a light high-speed tank was developed in 1946. The vehicle was never actually produced, but became the basis for the well-known AMX 13.

This tank distinguishes itself from the light tanks of other nations by using a 6-round drum. The drum is loaded by an automatic loader, which allows the crew to be reduced by one. This is the first of many French tanks to have an autoloader. Though top speed is high, the AMX 12t has poor acceleration, forcing it to play the role as a passive scout in high tier battles.

The AMX 12 t leads to the AMX 13 75.

Modules / Available Equipment and Consumables

Modules

Ico_gun_alpha.png

Guns

Tier Gun Penetration
(mm)
Damage
(HP)
Rate of fire
(rounds/minute)
Dispersion
(m/100m)
Aiming time
(s)
Weight
(kg)
Price
(Credits)

V 75 mm SA49 108/148/38 110/110/175 10.21 0.42 2.5 1520 35640
VI 75 mm SA50 144/202/38 135/135/175 8.73 0.4 2.3 1740 64200

Ico_engine_alpha.png

Engines

Tier Engine Engine Power
(hp)
Chance of Fire on Impact
(%)
Weight
(kg)
Price
(Credits)

V AMX B 271 250 20 340 18000
VI AMX B 272 330 20 340 25100

Ico_suspension_alpha.png

Suspensions

Tier Suspension Load Limit
(т)
Traverse Speed
(gr/sec)
Rmin Weight
(kg)
Price
(Credits)

V AMX 12 t 1er prototype 12.35 36 B/2 3200 10000
VI AMX 12 t 2e prototype 13.5 38 B/2 3200 16250

Ico_radio_alpha.png

Radios

Tier Radio Signal Range
(m)
Weight
(kg)
Price
(Credits)

X SCR-528 Fr 750 80 54000
VI SCR 508 400 100 21600

Compatible Equipment

Low Noise Exhaust System Class 2 Vertical Stabilizer Class 2 Light Spall Liner Camouflage Net Class 2 Coated Optics Class 2 Stabilizing Equipment System Experimental Optics Wear-Resistant Gun Laying Drive Improved Configuration Venting System Enhanced Gun Laying Drive Class 2 Improved Hardening Class 2 Additional Grousers Class 2 Modified Configuration Class 2 Improved Rotation Mechanism Class 2 Improved Aiming Class 2 Improved Ventilation Class 3 Binocular Telescope Class 2 Turbocharger Class 2 

Compatible Consumables

Stabilizer Greasing Automatic Fire Extinguisher Natural Cover Optical Calibration Aim Tuning Experienced Firefighters 100-octane Gasoline 105-octane Gasoline Manual Fire Extinguisher Strong Coffee Pre-Battle Maintenance Vent Purge Large First Aid Kit Large Repair Kit Duty Comes First Shell Organizer Focus on Target Increased Focus Small First Aid Kit Small Repair Kit Gearbox Intricacy Steady Hand Combat Course 


Player Opinion

Pros and Cons

Pros:


  • Compact size makes it hard to hit
  • 6-round drum permits a high rate of fire
  • Good speed
  • High camo values
  • Excellent signal range


Cons:


  • Terrible accuracy on the move
  • Low ammunition
  • Low power engine
  • Fairly weak penetration
  • Modules are close to each other, increasing risk of single shells damaging several modules


Performance

This tank introduces the concept of feeding the gun with a 6-round drum and using an automatic loader to reload the drum. The drum enables the tank to fire six shots rapidly, with the unfortunate side effect of taking a considerably long time to reload. This would not be a problem if the game allowed firing shells from a partially reloaded drum, but it does not. Therefore, a common tactic for this tank is to charge up next to or behind an enemy that's busy fighting an ally, unload all six rounds (roughly 660 damage over 12 seconds), and run away to reload. At the same time, keep in mind that this tank only holds 36 rounds of ammunition with the stock cannon, and 30 with the upgraded cannon. The gun's penetration is nothing exciting, so use it as a flanker. If you find yourself in a Tier 10 match, one effective tactic is to drive with the heavies and wait. When the main fight has finished, look and see if a long heavy or medium with only a few hundred hp is foolish enough to wander out in the open. Move behind him using cover, move in from behind and empty that drum magazine. That tank will with he'd stayed put. Plan your route in *and out* before you make your move. This holds true too for engaging combat in 1v1, where you should be sure that you can kill your opponent with a single clip, and if possible not counting on the fact you will score all 6 shots. This tank will not survive hits, so if you hit a wall or anything that brings you to a stop, you're dead.

Some things you should keep in mind when playing this tank:

-Never lead a charge unless you want a premature death -Tier 8 matches are commonplace, sometimes, you'll even end up in tier 10 matches -The 12t is NOT a scout -Stay alive as long as possible, the 12t is indispensable in mid-late game battles -Be aware of your surroundings. Before jumping into the fray, make sure the enemy vehicles in the region have been detected -Passive scouting can rack up a decent amount of XP and credits -Be mindful of terrain and slopes when flanking. Make sure that you have enough speed, and NEVER charge uphill-- you don't have the engine power for it. Avoid swamps at all costs.


Early Research

  • Unfortunately, no modules carry over from the ELC AMX
  • First, start by researching the better tracks, AMX 12t Bis
  • Then, research the better gun, 75mm SA50
  • Then, the better engine and finally the better radio


Suggested Equipment


Improved VentilationEnhanced Gun Laying Drive Binocular Telescope Camouflage Net 


Gallery

Historical Info

AMX 12t is the older brother of the legendary AMX-13. The design weight of the tank was 12 tons. The AMX-13 chassis was designed as an example of this very light tank. The rear support roller was an idler wheel. However, this design caused problems with the tension of the tank tracks and, in general, there was less reliable. Subsequently, it was been taken into account when designing the AMX-13: A separate chassis was jacked up and the idler was extended, causing the hull to be lengthened.


Historical Gallery


France
Light Tanks IRenault FT IID1 IIAM 39 Gendron-Somua IIAMR 35 IIFCM 36 IIRenault R35 IIHotchkiss H35 IIIAMX 38 IVAMX 40 VAMX ELC bis VIAMX 12 t VIPanhard AMD 178B VIIAMX 13 75 VIIHotchkiss EBR VIIAMX 13 57 VIIAMX 13 57 GF VIIIPanhard EBR 75 (FL 10) VIIIPanhard AML Lynx 6x6 VIIIBat.-Châtillon 12 t VIIIELC EVEN 90 IXAMX 13 90 IXPanhard EBR 90 XPanhard EBR 105 XAMX 13 105
Medium Tanks IIID2 IIISomua S35 IVSARL 42 VRenault G1 VIBretagne Panther VIM4A1 FL 10 VIIIBat.-Châtillon Bourrasque VIIIAltProto AMX 30 VIIILorraine 40 t VIIIAMX Chasseur de chars VIIIM4A1 Revalorisé IXAMX 30 1er prototype IXChar Futur 4 IXBat.-Châtillon 25 t AP XBat.-Châtillon 25 t XAMX 30 B
Heavy Tanks IVB1 VBDR G1 B VIARL 44 VIIAMX M4 mle. 45 VIIIAMX 50 100 VIIIAMX M4 mle. 49 VIIIAMX M4 mle. 49 Liberté VIIIAMX 65 t VIIISomua SM VIIIFCM 50 t IXAMX 50 120 IXLorraine 50 t IXAMX M4 mle. 51 XAMX 50 B XAMX M4 mle. 54
Tank Destroyers IIRenault FT AC IIIFCM 36 Pak 40 IIIRenault UE 57 IVSomua SAu 40 VM10 RBFM VS35 CA VIARL V39 VIIAMX AC mle. 46 VIIIAMX AC mle. 48 VIIIAMX Canon d'assaut 105 IXAMX 50 Foch XAMX 50 Foch (155) XAMX 50 Foch B
Self-Propelled Artillery IIRenault FT 75 BS IIILorraine 39L AM IVAMX 105 AM mle. 47 VAMX 13 105 AM mle. 50 V105 leFH18B2 VIAMX 13 F3 AM VIILorraine 155 mle. 50 VIIILorraine 155 mle. 51 IXBat.-Châtillon 155 55 XBat.-Châtillon 155 58
Light Tanks
USA IT1 Cunningham IIM2 Light Tank IIT1E6 IIT2 Light Tank IIT7 Combat Car IIIM22 Locust IIIM3 Stuart IIIMTLS-1G14 IVM5 Stuart VM24 Chaffee VM7 VIM24E2 Super Chaffee VIT21 VIT37 VIIT71 CMCD VIIT71 DA VIIIT92 VIIIM41 Walker Bulldog IXT49 XXM551 Sheridan
UK ICruiser Mk. I IIM2 IICruiser Mk. II IILight Mk. VIC IIIValentine IIIStuart I-IV IIICruiser Mk. III IVCruiser Mk. IV VCovenanter VIA46 VICrusader VIIGSR 3301 Setter VIIIFV1066 Senlac VIIILHMTV IXGSOR3301 AVR FS XManticore
Germany ILeichttraktor IIPz.Kpfw. II Ausf. D IIMKA IIPz.Kpfw. 35 R IIPz.Kpfw. 38H 735 (f) IIPz.Kpfw. 35 (t) IIPz.Kpfw. I IIPz.Kpfw. II III43 M. Toldi III IIIPz.Kpfw. M 15 IIIPz.Kpfw. 38 (t) IIIPz.Kpfw. III Ausf. E IIIPz.Kpfw. II Ausf. J IIIPz.Kpfw. I Ausf. C IIIPz.Kpfw. II Ausf. G IIIPz.Kpfw. T 15 IVPz.Kpfw. 38 (t) n.A. IVPz.Kpfw. II Luchs VVK 16.02 Leopard VIVK 28.01 mit 10,5 cm L/28 VIVK 28.01 VIIAufklärungspanzer Panther VIISpähpanzer SP I C VIIIleKpz M 41 90 mm VIIIleKpz M 41 90 mm GF VIIIHWK 12 VIIIHWK 30 IXSpähpanzer Ru 251 XRheinmetall Panzerwagen
France IRenault FT IID1 IIAM 39 Gendron-Somua IIAMR 35 IIFCM 36 IIRenault R35 IIHotchkiss H35 IIIAMX 38 IVAMX 40 VAMX ELC bis VIAMX 12 t VIPanhard AMD 178B VIIAMX 13 75 VIIHotchkiss EBR VIIAMX 13 57 VIIAMX 13 57 GF VIIIPanhard EBR 75 (FL 10) VIIIPanhard AML Lynx 6x6 VIIIBat.-Châtillon 12 t VIIIELC EVEN 90 IXAMX 13 90 IXPanhard EBR 90 XPanhard EBR 105 XAMX 13 105
USSR IMS-1 IIBT-2 IIT-45 IIT-26 IIT-60 IITetrarch IIIBT-SV IIILTP IIIM3 Light IIIBT-7 artillery IIIT-116 IIIBT-5 IIIT-127 IIIT-46 IIIT-70 IVBT-7 IVT-80 IVValentine II VA-20 VT-50 VIMT-25 VIT-50-2 VIILTG VIIILTTB VIIILT-432 IXT-54 ltwt. XT-100 LT
China IIVickers Mk. E Type B IIIType 2597 Chi-Ha IVM5A1 Stuart VI59-16 VIType 64 VIIType 62 VIIWZ-131 VIIIWZ-132 VIIIM41D IXWZ-132A XWZ-132-1
Japan IRenault Otsu IIType 95 Ha-Go IIType 97 Te-Ke IIIType 97 Chi-Ha IIIType 98 Ke-Ni IVType 5 Ke-Ho
Czechoslovakia IKolohousenka IILT vz. 35 IIILT vz. 38
Sweden IStrv fm/21 IIStrv m/38 IIL-60 IIIStrv m/40L IIILago M38
Italy IFiat 3000 IIL6/40
Poland I4TP IITKS z n.k.m. 20 mm II7TP III10TP IV14TP
ja:Tank:F15 AMX 12t