Welcome to Wargaming.net Wiki!
Variants

AMX 65 t

Jump to: navigation, search
Revision as of 06:04, 2 April 2019Revision as of 16:21, 29 November 2019
Line 6:Line 6:
  
 |InTheGame_pros=  |InTheGame_pros=
? +* Good alpha damage
?- Second highest alpha damage in tier/class with the 120 mm D.1203 gun (tied with [[T34]])+* Good gun depression
? +* Reasonably armored turret face
?- Good gun depression+
? +
?- Acceptable stock grind+
? +
?- 1st turret is well armored and has a much smaller cupola weakspot than the 2nd turret+
? +
  
 |InTheGame_cons=  |InTheGame_cons=
? +* Large, poorly armored hull
?- Large and poorly armored hull+* Huge turret weakspots
? +* Poor DPM, gun handling and aim time
?- Poor gun handling with the 100 mm and 120 mm guns+* Abysmal mobility
? +* Poor viewrange
?- Poor mobility, even with top engine due to absurdly high terrain resistances+
? +
?- Bad view range and lower HP on stock turret+
? +
?- 2nd turret worsens armor effectiveness and gun elevation angles +
? +
?- Low alpha damage on the 90 mm gun, only comparable to medium tanks+
? +
?- Low penetration (tied worst) and bad DPM (second worst) on top 120 mm among 400+ damage per hit guns+
? +
  
 |InTheGame_performance=  |InTheGame_performance=

Revision as of 16:21, 29 November 2019


Ambox_important.png This article requires additional modification.
The design and/or content of this article do not conform to wiki standards.
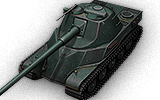
Missing Content:

  • Gallery


AMX 65 t

AnnoF81_Char_de_65t.png
Battle Tier
1234567891011
Overview
Mouse over "
Well, the ones further down, of course.
" for more information
[Client Values; Actual values in
Specifically, the mismatch in crew values caused by commander's 10% crew skill bonus. Outside of a crew of 1 commander only, 100% crew is a fiction. The client values, given for 100% crew, will normally be taken into battle with 110% crew skill members aside from specific functions, causing their actual performance to deviate from the expected client value. These differences are taken into account in tooltip boxes.
]
2,500,000  Credits Cost
1570320 HP Hit Points
61.74/6336.16/72 t Weight Limit
Crew
  1. Commander
  2. Driver
  3. Gunner
  4. Loader
  5. Radio Operator
Mobility
7501100 hp Engine Power
40/15 km/h Speed Limit
2525 deg/s Traverse
12.1530.42 hp/t Power/Wt Ratio
NoNo Pivot
Armor
// mm Hull Armor
250/120/60250/80/60 mm Turret Armor
Armament


{{#ifeq:ARMOR_PIERCING_CR|ARMOR_PIERCING||


{{#ifeq:HIGH_EXPLOSIVE|ARMOR_PIERCING||


AP/APCR/HE


{{#ifeq:ARMOR_PIERCING_CR|ARMOR_PIERCING||


{{#ifeq:HIGH_EXPLOSIVE|ARMOR_PIERCING||


AP/APCR/HE
Shells


255/4800/255


1050/4800/810
Shell Cost
240/240/320400/400/515 HP Damage
212/259/45218/252/65 mm Penetration


|


|}}

|


|}}


8.33 r/m 

Standard Gun

Reload Times
Nominal: 7.2 s
50% Crew: 8.92 s
75% Crew: 7.79 s
100% Crew: 6.9 s
Rammer: 6.21 s
Vents: 6.75 s
Both: 6.07 s
Both and BiA: 5.94 s
Both and Max Crew %: 5.69 s

See Crew, Consumables, or Equipment for more information.


|


|}}

|


|}}


4.8 r/m 

Standard Gun

Reload Times
Nominal: 12.5 s
50% Crew: 15.48 s
75% Crew: 13.52 s
100% Crew: 11.99 s
Rammer: 10.79 s
Vents: 11.73 s
Both: 10.55 s
Both and BiA: 10.32 s
Both and Max Crew %: 9.9 s

See Crew, Consumables, or Equipment for more information.
Rate of Fire


|


|}}

|


|}}


1999.2

Standard Gun

Using Shell Type 1 (240 Damage):


Theoretical Damage Per Minute
Nominal DPM: 1999.2
50% Crew: 1612.8
75% Crew: 1848
100% Crew: 2085.6
100% Crew
Vents: 2133.6
Rammer: 2318.4
Both: 2368.8
Both and BiA: 2421.6
Both and Max Crew %: 2527.2

Advantageous Damage Per Minute
First-shot DPM: 2239.2
50% Crew: 1852.8
75% Crew: 2088
100% Crew: 2325.6
100% Crew
Rammer: 2558.4
Vents: 2373.6
Both: 2608.8
Both and BiA: 2661.6
Both and Max Crew %: 2767.2

See here, here, or here for more information.

Standard Gun

Using Shell Type 2 (240 Damage):


Theoretical Damage Per Minute
Nominal DPM: 1999.2
50% Crew: 1612.8
75% Crew: 1848
100% Crew: 2085.6
100% Crew
Vents: 2133.6
Rammer: 2318.4
Both: 2368.8
Both and BiA: 2421.6
Both and Max Crew %: 2527.2

Advantageous Damage Per Minute
First-shot DPM: 2239.2
50% Crew: 1852.8
75% Crew: 2088
100% Crew: 2325.6
100% Crew
Rammer: 2558.4
Vents: 2373.6
Both: 2608.8
Both and BiA: 2661.6
Both and Max Crew %: 2767.2

See here, here, or here for more information.

Standard Gun

Using Shell Type 3 (320 Damage):
With wholly penetrating hits

Theoretical Damage Per Minute
Nominal DPM: 2665.6
50% Crew: 2150.4
75% Crew: 2464
100% Crew: 2780.8
100% Crew
Vents: 2844.8
Rammer: 3091.2
Both: 3158.4
Both and BiA: 3228.8
Both and Max Crew %: 3369.6

Advantageous Damage Per Minute
First-shot DPM: 2985.6
50% Crew: 2470.4
75% Crew: 2784
100% Crew: 3100.8
100% Crew
Rammer: 3411.2
Vents: 3164.8
Both: 3478.4
Both and BiA: 3548.8
Both and Max Crew %: 3689.6

See here, here, or here for more information.


|


|}}

|


|}}


1920

Standard Gun

Using Shell Type 1 (400 Damage):


Theoretical Damage Per Minute
Nominal DPM: 1920
50% Crew: 1548
75% Crew: 1776
100% Crew: 2004
100% Crew
Vents: 2048
Rammer: 2228
Both: 2276
Both and BiA: 2328
Both and Max Crew %: 2428

Advantageous Damage Per Minute
First-shot DPM: 2320
50% Crew: 1948
75% Crew: 2176
100% Crew: 2404
100% Crew
Rammer: 2628
Vents: 2448
Both: 2676
Both and BiA: 2728
Both and Max Crew %: 2828

See here, here, or here for more information.

Standard Gun

Using Shell Type 2 (400 Damage):


Theoretical Damage Per Minute
Nominal DPM: 1920
50% Crew: 1548
75% Crew: 1776
100% Crew: 2004
100% Crew
Vents: 2048
Rammer: 2228
Both: 2276
Both and BiA: 2328
Both and Max Crew %: 2428

Advantageous Damage Per Minute
First-shot DPM: 2320
50% Crew: 1948
75% Crew: 2176
100% Crew: 2404
100% Crew
Rammer: 2628
Vents: 2448
Both: 2676
Both and BiA: 2728
Both and Max Crew %: 2828

See here, here, or here for more information.

Standard Gun

Using Shell Type 3 (515 Damage):
With wholly penetrating hits

Theoretical Damage Per Minute
Nominal DPM: 2472
50% Crew: 1993.05
75% Crew: 2286.6
100% Crew: 2580.15
100% Crew
Vents: 2636.8
Rammer: 2868.55
Both: 2930.35
Both and BiA: 2997.3
Both and Max Crew %: 3126.05

Advantageous Damage Per Minute
First-shot DPM: 2987
50% Crew: 2508.05
75% Crew: 2801.6
100% Crew: 3095.15
100% Crew
Rammer: 3383.55
Vents: 3151.8
Both: 3445.35
Both and BiA: 3512.3
Both and Max Crew %: 3641.05

See here, here, or here for more information.
Damage Per Minute


|


|}}


0.38 m 

With 50% Crew: 0.471 m
With 75% Crew: 0.411 m
With 100% Crew: 0.364 m
With BiA: 0.356 m
With BiA and Vents: 0.349 m
Maximum possible: 0.334 m

For more details, see Crew


|


|}}


0.36 m 

With 50% Crew: 0.446 m
With 75% Crew: 0.389 m
With 100% Crew: 0.345 m
With BiA: 0.338 m
With BiA and Vents: 0.33 m
Maximum possible: 0.317 m

For more details, see Crew
Accuracy


|


|}}


2.5 s 

With 50% Crew: 3.097 s
With 75% Crew: 2.704 s
With 100% Crew: 2.397 s
With GLD: 2.179 s
With BiA: 2.344 s
With BiA and Vents: 2.293 s
With both and GLD: 2.085 s
Maximum possible: 1.998 s

For more details, see Crew or Equipment


|


|}}


2.5 s 

With 50% Crew: 3.097 s
With 75% Crew: 2.704 s
With 100% Crew: 2.397 s
With GLD: 2.179 s
With BiA: 2.344 s
With BiA and Vents: 2.293 s
With both and GLD: 2.085 s
Maximum possible: 1.998 s

For more details, see Crew or Equipment
Aim time
2326 deg/s Turret Traverse
360° Gun Arc
-10°/+20°-8°/+13° Elevation Arc
7240 rounds Ammo Capacity
General
2020 % Chance of Fire


350 m 

With 50% Crew: 275 m
With 75% Crew: 312.5 m
With 100% Crew: 350 m
With Recon and Situational Awareness: 367.7 m
With Coated Optics: 385 m
With Binocular Telescope: 437.5 m
Maximum possible: 501.1 m

For more details, see Skills or Equipment


370 m 

With 50% Crew: 290.7 m
With 75% Crew: 330.4 m
With 100% Crew: 370 m
With Recon and Situational Awareness: 388.7 m
With Coated Optics: 407 m
With Binocular Telescope: 462.5 m
Maximum possible: 529.7 m

For more details, see Skills or Equipment
View Range


|


|}}


400 m 

With 50% Crew: 322.9 m
With 75% Crew: 369.8 m
With 100% Crew: 417.2 m
With 100% Signal Boost: 480 m
When affected by 100% Relaying: 440 m
Maximum possible: 600.5 m

For more details, see Skills or Equipment


|


|}}


750 m 

With 50% Crew: 605.4 m
With 75% Crew: 693.4 m
With 100% Crew: 782.2 m
With 100% Signal Boost: 900 m
When affected by 100% Relaying: 825 m
Maximum possible: 1125.9 m

For more details, see Skills or Equipment
Signal Range
Values are Stock - click for Top


VIII

AnnoF81_Char_de_65t.png

2500000

The AMX 65 t is a French tier 8 heavy tank.

A heavy tank design was proposed by the AMX company in 1950. The vehicle was developed alongside the AMX 50 100. It was supposed to feature reinforced armor with a "pike nose" and sloped armor plates. The other components and hull configuration resembled the Royal Tiger. Existed only in blueprints.

The AMX 65 t leads to the AMX M4 mle. 51.

Modules / Available Equipment and Consumables

Modules

Ico_gun_alpha.png

Guns

Tier Gun Penetration
(mm)
Damage
(HP)
Rate of fire
(rounds/minute)
Dispersion
(m/100m)
Aiming time
(s)
Weight
(kg)
Price
(Credits)

VIII 90 mm DCA 45 212/259/45 240/240/320 8.82 0.38 2.3 2750 121250
VIII 100 mm SA47 232/263/50 300/300/400 6.45 0.34 3 3000 127550
IX 120 mm D. 1203 218/252/65 400/400/515 4.8 0.36 2.5 3580 185000

Ico_engine_alpha.png

Engines

Tier Engine Engine Power
(hp)
Chance of Fire on Impact
(%)
Weight
(kg)
Price
(Credits)

VIII Maybach HL 230 P45F 750 20 750 55000
IX Maybach HL 295 850 20 750 78000
IX Maybach HL 295 à injection d'essence 1100 20 1200 86000

Ico_suspension_alpha.png

Suspensions

Tier Suspension Load Limit
(т)
Traverse Speed
(gr/sec)
Rmin Weight
(kg)
Price
(Credits)

VII AMX 65 t 63 25 B/2 13000 19000
VIII AMX 65 t bis 72 25 B/2 13000 36000

Ico_radio_alpha.png

Radios

Tier Radio Signal Range
(m)
Weight
(kg)
Price
(Credits)

X SCR-528 Fr 750 80 54000
VI SCR 508 400 100 21600

Compatible Equipment

Low Noise Exhaust System Class 1 Vertical Stabilizer Class 1 Heavy Spall Liner Camouflage Net Class 2 Coated Optics Class 1 Stabilizing Equipment System Experimental Optics Wear-Resistant Gun Laying Drive Improved Configuration Venting System Innovative Loading System Enhanced Gun Laying Drive Class 1 Improved Hardening Class 1 Additional Grousers Class 1 Modified Configuration Class 1 Improved Rotation Mechanism Class 1 Improved Aiming Class 1 Improved Ventilation Class 1 Binocular Telescope Class 1 Gun Rammer Class 1 Turbocharger Class 1 

Compatible Consumables

Stabilizer Greasing Automatic Fire Extinguisher Natural Cover Optical Calibration Aim Tuning Experienced Firefighters 100-octane Gasoline 105-octane Gasoline Manual Fire Extinguisher Strong Coffee Pre-Battle Maintenance Vent Purge Large First Aid Kit Large Repair Kit Duty Comes First Shell Organizer Orderly Ammo Rack Focus on Target Increased Focus Small First Aid Kit Small Repair Kit Gearbox Intricacy Steady Hand Combat Course 


Player Opinion

Pros and Cons

Pros:


  • Good alpha damage
  • Good gun depression
  • Reasonably armored turret face


Cons:


  • Large, poorly armored hull
  • Huge turret weakspots
  • Poor DPM, gun handling and aim time
  • Abysmal mobility
  • Poor viewrange


Performance

The tank is almost immediately considered as one of the worst tier 8s in the entire game. This fact alone makes is viable to either use free xp to skip this tank entirely or simply play at stock and avoid researching the top 120 mm gun, last engine and 2nd suspension to get to tier 9 faster. At the very first glance, it doesn't seem like a bad tank: on first sight it has a capable main gun, bouncy pike nose, rounded turret and on top of these, very high power-to-weight ratio. However, the upgraded guns are limited by poor gun handling as part of French heavy tradition. The pike nose only consists of 100mm armor which is the same as the IS-3, but with worse angling and a taller profile that also ruins the ability to sidescrape. The stock turret has strong frontal armor as long as the commander's cupola on the right of the turret is hidden, but the upgraded turret introduces an extra weakspot in the form of a rangefinder which means you are always vulnerable. Comparing to the premium AMX M4 mle.49 which has the same turret armor, but 180mm front hull armor that's sloped backwards. Mobility is comparable to the T34 and Lowe despite high power to weight ratio due to very high terrain resistances on all terrain. Adding the poor view range and horrible camo leads to a fire support heavy that's not very good at supporting allies comparing to tanks such as the FCM 50t or AMX 50 100.

There are 4 different viable setups:

Stock turret + 100 mm gun is most flexible setup. Stock turret has stronger armor, significantly smaller profile and -10 of gun depression, but the already awful aim time on the 100 mm gun becomes even worse, view range is horrible with stock turret and the cupola has virtually no armor, but is a much smaller target than the one on top turret. It is best to use the vehicle as mid-range hulldown support vehicle. It is hard to position it correctly due to abysmal terrain resistances, as well as gigantic hull, but once positioned right, it can do decent job. The 100 mm gun has utterly awful gun handling, though, so it is recommended to fully aim each shot. Be careful, though, since being stationary means that your cupola is easier to hit. Be especially careful with Japanese heavy tanks, since they can penetrate you through the cupola for full damage with their high-explosive shells.

Stock turret + 90 mm gun gets rid of two of the tank's major flaw: poor gun handling and limited DPM. The turret lets you absorb hits while the good gun handling allows hitting shots when moving the hull back and forth to give the enemy a harder time hitting you. It's also the only gun on this tank that fires frequently enough to perma-track an enemy with a good shot to the tracks. The drawback is that you rely on premium rounds to go against even some tier 8 heavy tanks as you have no hope in flanking them. The top turret improves gun performance, but as it worsens your protection and the gun performance with stock turret is already decent, it's ill-advised.

Top turret + 100 mm gun is less effective when hulldown, but extra DPM, view range, gun stats and HP are more useful at pure damage dealing. Don't rely on turret armor at all against higher or even same tier opponents, since the "lip" is rather weak when not hulldown, and the rangefinder is a weakspot against same tier opponents. Like with the stock turret + 100 mm gun, you want to keep your opponents at mid-long ranges. The AMX 65t is a poor brawler, especially against other heavy tanks.

Top turret + 120 mm gun has an advantage of having alpha damage, giving the 65t ability to outtrade some opponents and makes it slightly more viable against other heavy tanks, though it is still a bad brawler, and will struggle with its lackluster penetration and horrible DPM. Follow a stronger heavy tank, let it take hits. Fight against targets which have lower alpha damage than you to make use of the semi-decent HP (1550) and 400 alpha damage. The gun has rather decent shell velocity so it can still work at mid-ranges, though not as effectively.

All in all, the AMX 65t is a really poor vehicle and doesn't play as a heavily armored heavy tank, as promised. It follows up similar play style as the AMX M4 45, but with worse mobility and better turret armor.


Early Research

The Maybach HL 295 engine and SCR-528 Fr radio carry over from the AMX M4 mle. 45 and should be installed immediately.

If you already have the 100mm SA47 unlocked (from either the main French heavy line or the BatChat/AMX 30 branches) mount it as well. If not, grind it.

If you want the 2nd cupola, last engine or last gun, research the suspension. Otherwise, skip it to save on XP.

Research the upgraded turret - unfortunately you HAVE to do it on your way up to AMX M4 Mle. 51, even if you don't want to use it.

Research the 120mm gun if you want it - if not, you can skip it completely and save on XP (it is not used on any other tank).

If you have researched the suspension previously, you may research the top engine, it is also top engine for AMX M4 Mle. 51. But it is viable to skip it to get to tier 9 faster and research it on the AMX M4 Mle. 51 instead.


Suggested Equipment


Tank Gun Rammer Vertical Stabilizer Improved Ventilation


Documented Tank and Crew Builds

Since this vehicle has only mediocre damage-per-minute on 120mm gun and low alpha damage on 90mm and 100mm guns, a Gun Rammer is mandatory. The rather lousy gun dispersion values on movement and traverse can be greatly compensated by installing a Vertical Stabilizer, but the Gun Laying Drive is not that useful unless one sticks with the 100mm SA47 gun.

The third slot depends mostly on one's playstyle: If not occupied by Enhanced Torsion Bars, it could be Ventilation to further improve overall parameters, or Coated Optics to make up for subpar view range. Toolbox also worths consideration if one gets entangled in crossfire from time to time.


External Reviews and Opinions

Gallery

Historical Info

The AMX 65T is one of the many proposals for a tank destroyer version of the AMX M4, developed in 1950 alongside the oscillating turret. The tank destroyer would have had a "chevron type" upper front plate with a pike nose, a cast turret, and a 100mm gun. The final variant selected for the project would have had 45mm of frontal armor and weighed 51.2 tons, but heavier variants with thicker armor - like the AMX 65t - also were considered. Ultimately, none of these tank destroyers were ever built, though separate elements - such as the pike nose - were later built in metal.


Historical Gallery

Historical Accuracy Errata

The following are consensus errors or inconsistencies which have been identified with the configuration of the vehicle in question and conflict with information available on the public record. The causes for these divergences in the game are normally not disclosed and may be rooted in game balance.

* The AMX 65T was intended to be a tank destroyer, though the designation was arbitrary - the ARL 44 was reclassified as a tank destroyer during the AMX 65T's development.
  • The 120mm gun nor the 90mm gun were ever proposed for the AMX 65T.


France
Light Tanks IRenault FT IID1 IIAM 39 Gendron-Somua IIAMR 35 IIFCM 36 IIRenault R35 IIHotchkiss H35 IIIAMX 38 IVAMX 40 VAMX ELC bis VIAMX 12 t VIPanhard AMD 178B VIIAMX 13 75 VIIHotchkiss EBR VIIAMX 13 57 VIIAMX 13 57 GF VIIIPanhard EBR 75 (FL 10) VIIIPanhard AML Lynx 6x6 VIIIBat.-Châtillon 12 t VIIIELC EVEN 90 IXAMX 13 90 IXPanhard EBR 90 XPanhard EBR 105 XAMX 13 105
Medium Tanks IIID2 IIISomua S35 IVSARL 42 VRenault G1 VIBretagne Panther VIM4A1 FL 10 VIIIBat.-Châtillon Bourrasque VIIIAltProto AMX 30 VIIILorraine 40 t VIIIAMX Chasseur de chars VIIIM4A1 Revalorisé IXAMX 30 1er prototype IXChar Futur 4 IXBat.-Châtillon 25 t AP XBat.-Châtillon 25 t XAMX 30 B
Heavy Tanks IVB1 VBDR G1 B VIARL 44 VIIAMX M4 mle. 45 VIIIAMX 50 100 VIIIAMX M4 mle. 49 VIIIAMX M4 mle. 49 Liberté VIIIAMX 65 t VIIISomua SM VIIIFCM 50 t IXAMX 50 120 IXLorraine 50 t IXAMX M4 mle. 51 XAMX 50 B XAMX M4 mle. 54
Tank Destroyers IIRenault FT AC IIIFCM 36 Pak 40 IIIRenault UE 57 IVSomua SAu 40 VM10 RBFM VS35 CA VIARL V39 VIIAMX AC mle. 46 VIIIAMX AC mle. 48 VIIIAMX Canon d'assaut 105 IXAMX 50 Foch XAMX 50 Foch (155) XAMX 50 Foch B
Self-Propelled Artillery IIRenault FT 75 BS IIILorraine 39L AM IVAMX 105 AM mle. 47 VAMX 13 105 AM mle. 50 V105 leFH18B2 VIAMX 13 F3 AM VIILorraine 155 mle. 50 VIIILorraine 155 mle. 51 IXBat.-Châtillon 155 55 XBat.-Châtillon 155 58
Heavy Tanks
USA VT14 VT1 Heavy Tank VIPawlack Tank VIM6 VIIKing Tiger (Captured) VIIM-II-Y VIIT29 VIIIChrysler K VIIIChrysler K GF VIIIT26E5 VIIIT26E5 Patriot VIIIM54 Renegade VIIIT77 VIIIM-III-Y VIIIM-IV-Y VIIIM6A2E1 VIIIT32 VIIIT34 VIIIT34 B IXAE Phase I IXConcept 1B IXM-VI-Y IXM103 IXT54E1 XM-V-Y XT110E5 XT57 Heavy Tank
UK VChurchill I VExcelsior VIChurchill VII VITOG II* VIIBlack Prince VIIFV201 (A45) VIIICharlemagne VIIICaliban VIIIGonsalo VIIICaernarvon VIIICaernarvon Action X IXFV4201 Chieftain Proto IXConqueror XFV215b XSuper Conqueror XT95/FV4201 Chieftain
Germany IVPz.Kpfw. B2 740 (f) IVDurchbruchswagen 2 VITiger 131 VIVK 30.01 (P) VIVK 36.01 (H) VIIVK 45.03 VIITiger I VIITiger (P) VIIIVK 100.01 (P) VIIIVK 168.01 (P) VIIIVK 168.01 Mauerbrecher VIIIVK 75.01 (K) VIIIE 75 TS VIIILöwe VIIITiger II VIIIVK 45.02 (P) Ausf. A IXE 75 IXMäuschen IXVK 45.02 (P) Ausf. B XE 100 XPz.Kpfw. VII XMaus XVK 72.01 (K)
France IVB1 VBDR G1 B VIARL 44 VIIAMX M4 mle. 45 VIIIAMX 50 100 VIIIAMX M4 mle. 49 VIIIAMX M4 mle. 49 Liberté VIIIAMX 65 t VIIISomua SM VIIIFCM 50 t IXAMX 50 120 IXLorraine 50 t IXAMX M4 mle. 51 XAMX 50 B XAMX M4 mle. 54
USSR VChurchill III VKV-220-2 VKV-220-2 Beta Test VKV-1 VKV-1 shielded VIKV-1S VIKV-2 VIKV-2 (R) VIKV-85 VIObject 244 VIT-150 VIIIS VIIKV-3 VIIKV-122 VIIIS-2M VIIIS-2 shielded VIIIS-2 VIIIIS-3 VIIIIS-6 VIIIIS-6 B VIIIKV-5 VIIIKV-4 VIIIIS-5 (Object 730) VIIIIS-3A VIIIIS-3A Peregrine VIIIKirovets-1 VIIIKV-4 Kreslavskiy VIIIObject 252U Defender VIIIObject 252U VIIIIS-M VIIIObject 703 Version II VIIIIS-2-II IXT-10 IXObject 777 Version II IXObject 257 IXObject 705 IXIS-3-II IXST-I XIS-4 XIS-7 XObject 260 XObject 705A XObject 277 XObject 279 early XST-II XObject 780
China VIIIS-2 VIIIWZ-111 VIIIWZ-111 Alpine Tiger VIII110 VIII112 IXWZ-111 model 1-4 IXWZ-114 X113 X113 Beijing Opera XWZ-111 model 5A XWZ-111 Qilin
Japan IIIType 91 Heavy IVType 95 Heavy VO-I Experimental VIHeavy Tank No. VI VIO-I VIIO-Ni VIIIO-Ho IXType 4 Heavy XType 5 Heavy
Czechoslovakia VIIŠkoda T 45 VIIVz. 44-1 VIIIŠkoda T 56 VIIITNH 105/1000 IXTNH T Vz. 51 XVz. 55
Sweden VIIIEmil I VIIIEMIL 1951 VIIIBofors Tornvagn IXEmil II IXStrv K XKranvagn
Italy VIICarro d'assalto P.88 VIIIProgetto CC55 mod. 54 VIIIBisonte C45 IXProgetto C50 mod. 66 XRinoceronte
Poland VII45TP Habicha VIII50TP prototyp VIII53TP Markowskiego IX50TP Tyszkiewicza X60TP Lewandowskiego
ja:Tank:F81 Char de 65t