Welcome to Wargaming.net Wiki!
Variants

Matilda

Jump to: navigation, search
Revision as of 09:00, 14 June 2013
minor edit
Revision as of 09:01, 14 June 2013
minor edit
Line 62:Line 62:
 image:Mk_2_Matilda_Tank_being_driven_through_Vulcan_Village_to_the_testing_ground.jpg{{!}} Mk 2 Matilda Tank being driven through Vulcan Village to the testing ground image:Mk_2_Matilda_Tank_being_driven_through_Vulcan_Village_to_the_testing_ground.jpg{{!}} Mk 2 Matilda Tank being driven through Vulcan Village to the testing ground
 image:The_A12E1,_the_prototype_of_the_Matilda_II_Heavy_Infantry_Tank_Mark_II.jpg{{!}} The A12E1, the prototype of the Matilda II Heavy Infantry Tank Mark II image:The_A12E1,_the_prototype_of_the_Matilda_II_Heavy_Infantry_Tank_Mark_II.jpg{{!}} The A12E1, the prototype of the Matilda II Heavy Infantry Tank Mark II
?image:The_first_of_the_Waltzing_Matilda_tanks_produced_at_the_foundry_was_completed_and_made_ready_for_trials.jpg{{!}} The A12E1, the prototype of the Matilda II Heavy Infantry Tank Mark II The first of the Waltzing Matilda tanks produced at the foundry was completed and made ready for trials+image:The first of the Waltzing Matilda tanks produced at the foundry was completed and made ready for trials.JPG{{!}} The A12E1, the prototype of the Matilda II Heavy Infantry Tank Mark II The first of the Waltzing Matilda tanks produced at the foundry was completed and made ready for trials


Revision as of 09:01, 14 June 2013


Ambox_important.png This article requires additional modification.
The design and/or content of this article do not conform to wiki standards.

Missing Content:

  • History


Matilda

AnnoGB07_Matilda.png
Battle Tier
1234567891011
Overview
Mouse over "
Well, the ones further down, of course.
" for more information
[Client Values; Actual values in
Specifically, the mismatch in crew values caused by commander's 10% crew skill bonus. Outside of a crew of 1 commander only, 100% crew is a fiction. The client values, given for 100% crew, will normally be taken into battle with 110% crew skill members aside from specific functions, causing their actual performance to deviate from the expected client value. These differences are taken into account in tooltip boxes.
]
140,000  Credits Cost
540114 HP Hit Points
26.52/2713.99/29 t Weight Limit
Crew
  1. Commander (Radio Operator)
  2. Gunner
  3. Driver
  4. Loader
Mobility
174190 hp Engine Power
24/11 km/h Speed Limit
3436 deg/s Traverse
6.5613.58 hp/t Power/Wt Ratio
NoNo Pivot
Armor
// mm Hull Armor
75/75/7575/75/75 mm Turret Armor
Armament


{{#ifeq:ARMOR_PIERCING_CR|ARMOR_PIERCING||


{{#ifeq:HIGH_EXPLOSIVE|ARMOR_PIERCING||


AP/APCR/HE


{{#ifeq:HOLLOW_CHARGE|ARMOR_PIERCING||


{{#ifeq:|ARMOR_PIERCING||


HE/HEAT
Shells


30/1200/15


56/2800/15
Shell Cost
50/50/60175/110/60 HP Damage
78/121/2338/100/23 mm Penetration


|


|}}

|


|}}


28.57 r/m 

Standard Gun

Reload Times
Nominal: 2.1 s
50% Crew: 2.6 s
75% Crew: 2.27 s
100% Crew: 2.01 s
Rammer: 1.81 s
Vents: 1.97 s
Both: 1.77 s
Both and BiA: 1.73 s
Both and Max Crew %: 1.66 s

See Crew, Consumables, or Equipment for more information.


|


|}}

|


|}}


15 r/m 

Standard Gun

Reload Times
Nominal: 4 s
50% Crew: 4.96 s
75% Crew: 4.33 s
100% Crew: 3.84 s
Rammer: 3.46 s
Vents: 3.76 s
Both: 3.38 s
Both and BiA: 3.31 s
Both and Max Crew %: 3.17 s

See Crew, Consumables, or Equipment for more information.
Rate of Fire


|


|}}

|


|}}


1428.5

Standard Gun

Using Shell Type 1 (50 Damage):


Theoretical Damage Per Minute
Nominal DPM: 1428.5
50% Crew: 1153
75% Crew: 1320.5
100% Crew: 1490
100% Crew
Vents: 1523.5
Rammer: 1655.5
Both: 1693
Both and BiA: 1730.5
Both and Max Crew %: 1805.5

Advantageous Damage Per Minute
First-shot DPM: 1478.5
50% Crew: 1203
75% Crew: 1370.5
100% Crew: 1540
100% Crew
Rammer: 1705.5
Vents: 1573.5
Both: 1743
Both and BiA: 1780.5
Both and Max Crew %: 1855.5

See here, here, or here for more information.

Standard Gun

Using Shell Type 2 (50 Damage):


Theoretical Damage Per Minute
Nominal DPM: 1428.5
50% Crew: 1153
75% Crew: 1320.5
100% Crew: 1490
100% Crew
Vents: 1523.5
Rammer: 1655.5
Both: 1693
Both and BiA: 1730.5
Both and Max Crew %: 1805.5

Advantageous Damage Per Minute
First-shot DPM: 1478.5
50% Crew: 1203
75% Crew: 1370.5
100% Crew: 1540
100% Crew
Rammer: 1705.5
Vents: 1573.5
Both: 1743
Both and BiA: 1780.5
Both and Max Crew %: 1855.5

See here, here, or here for more information.

Standard Gun

Using Shell Type 3 (60 Damage):
With wholly penetrating hits

Theoretical Damage Per Minute
Nominal DPM: 1714.2
50% Crew: 1383.6
75% Crew: 1584.6
100% Crew: 1788
100% Crew
Vents: 1828.2
Rammer: 1986.6
Both: 2031.6
Both and BiA: 2076.6
Both and Max Crew %: 2166.6

Advantageous Damage Per Minute
First-shot DPM: 1774.2
50% Crew: 1443.6
75% Crew: 1644.6
100% Crew: 1848
100% Crew
Rammer: 2046.6
Vents: 1888.2
Both: 2091.6
Both and BiA: 2136.6
Both and Max Crew %: 2226.6

See here, here, or here for more information.


|


|}}

|


|}}


2625

Standard Gun

Using Shell Type 1 (175 Damage):
With wholly penetrating hits

Theoretical Damage Per Minute
Nominal DPM: 2625
50% Crew: 2119.25
75% Crew: 2427.25
100% Crew: 2737
100% Crew
Vents: 2798.25
Rammer: 3041.5
Both: 3109.75
Both and BiA: 3178
Both and Max Crew %: 3316.25

Advantageous Damage Per Minute
First-shot DPM: 2800
50% Crew: 2294.25
75% Crew: 2602.25
100% Crew: 2912
100% Crew
Rammer: 3216.5
Vents: 2973.25
Both: 3284.75
Both and BiA: 3353
Both and Max Crew %: 3491.25

See here, here, or here for more information.

Standard Gun

Using Shell Type 2 (110 Damage):


Theoretical Damage Per Minute
Nominal DPM: 1650
50% Crew: 1332.1
75% Crew: 1525.7
100% Crew: 1720.4
100% Crew
Vents: 1758.9
Rammer: 1911.8
Both: 1954.7
Both and BiA: 1997.6
Both and Max Crew %: 2084.5

Advantageous Damage Per Minute
First-shot DPM: 1760
50% Crew: 1442.1
75% Crew: 1635.7
100% Crew: 1830.4
100% Crew
Rammer: 2021.8
Vents: 1868.9
Both: 2064.7
Both and BiA: 2107.6
Both and Max Crew %: 2194.5

See here, here, or here for more information.

Standard Gun

Using Shell Type 3 (60 Damage):


Theoretical Damage Per Minute
Nominal DPM: 900
50% Crew: 726.6
75% Crew: 832.2
100% Crew: 938.4
100% Crew
Vents: 959.4
Rammer: 1042.8
Both: 1066.2
Both and BiA: 1089.6
Both and Max Crew %: 1137

Advantageous Damage Per Minute
First-shot DPM: 960
50% Crew: 786.6
75% Crew: 892.2
100% Crew: 998.4
100% Crew
Rammer: 1102.8
Vents: 1019.4
Both: 1126.2
Both and BiA: 1149.6
Both and Max Crew %: 1197

See here, here, or here for more information.
Damage Per Minute


|


|}}


0.36 m 

With 50% Crew: 0.446 m
With 75% Crew: 0.389 m
With 100% Crew: 0.345 m
With BiA: 0.338 m
With BiA and Vents: 0.33 m
Maximum possible: 0.317 m

For more details, see Crew


|


|}}


0.53 m 

With 50% Crew: 0.657 m
With 75% Crew: 0.573 m
With 100% Crew: 0.508 m
With BiA: 0.497 m
With BiA and Vents: 0.486 m
Maximum possible: 0.466 m

For more details, see Crew
Accuracy


|


|}}


1.7 s 

With 50% Crew: 2.106 s
With 75% Crew: 1.839 s
With 100% Crew: 1.63 s
With GLD: 1.482 s
With BiA: 1.594 s
With BiA and Vents: 1.559 s
With both and GLD: 1.418 s
Maximum possible: 1.359 s

For more details, see Crew or Equipment


|


|}}


1.9 s 

With 50% Crew: 2.354 s
With 75% Crew: 2.055 s
With 100% Crew: 1.822 s
With GLD: 1.656 s
With BiA: 1.782 s
With BiA and Vents: 1.743 s
With both and GLD: 1.584 s
Maximum possible: 1.519 s

For more details, see Crew or Equipment
Aim time
3434 deg/s Turret Traverse
360° Gun Arc
-10°/+20°-10°/+20° Elevation Arc
16055 rounds Ammo Capacity
General
1515 % Chance of Fire


330 m 

With 50% Crew: 259.3 m
With 75% Crew: 294.7 m
With 100% Crew: 330 m
With Recon and Situational Awareness: 346.7 m
With Coated Optics: 363 m
With Binocular Telescope: 412.5 m
Maximum possible: 472.4 m

For more details, see Skills or Equipment


340 m 

With 50% Crew: 267.1 m
With 75% Crew: 303.6 m
With 100% Crew: 340 m
With Recon and Situational Awareness: 357.2 m
With Coated Optics: 374 m
With Binocular Telescope: 425 m
Maximum possible: 486.7 m

For more details, see Skills or Equipment
View Range


|


|}}


350 m 

With 50% Crew: 275 m
With 75% Crew: 312.5 m
With 100% Crew: 350 m
With 100% Signal Boost: 420 m
When affected by 100% Relaying: 385 m
Maximum possible: 503.6 m

For more details, see Skills or Equipment


|


|}}


450 m 

With 50% Crew: 353.6 m
With 75% Crew: 401.8 m
With 100% Crew: 450 m
With 100% Signal Boost: 540 m
When affected by 100% Relaying: 495 m
Maximum possible: 647.5 m

For more details, see Skills or Equipment
Signal Range
Values are Stock - click for Top


IV

AnnoGB07_Matilda.png

140000

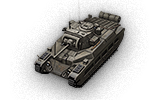
The Matilda is a British tier 4 medium tank.

Developed from 1936 through 1938. A total of 2987 vehicles were manufactured by August 1943. It was the only British tank to remain in service throughout World War II.

Unlike its brother, the Premium Matilda IV, this tank is located a tier Lower and carries the historical 2-Pounder gun, so players used to the Soviet Matilda may judge this tank a bit unfairly, although, in reality, the British Matilda can penetrate even a tier 6 Heavy tank from most distances, and although the damage will be anemic, the extremely fast reload time and excellent accuracy will cause your opponents to seek cover in preference to being punctured to death.

Players new to the Matilda will find this tank very slow moving, and difficult to maneuver in tight corridors. Its 24km/h top speed will negate any effort to keep up any fast paced combat, but you should know that the Matilda is the most heavily armored Tier 4 tank, with only a similar armor can be found on the tier 5 KV-1 Heavy tank, and its comfortable with taking enemies from most distances without much trouble, and poses a difficult target for artillery, due its very small silhouette.

The Matilda leads to the Churchill I, and the Cavalier.

Modules / Available Equipment and Consumables

Modules

Ico_gun_alpha.png

Guns

Tier Gun Penetration
(mm)
Damage
(HP)
Rate of fire
(rounds/minute)
Dispersion
(m/100m)
Aiming time
(s)
Weight
(kg)
Price
(Credits)

IV OQF 3-inch Howitzer Mk. I 38/100/23 175/110/60 15 0.53 1.9 116 30000
IV QF 2-pdr Mk. X-B 121/145/23 55/55/60 28.57 0.36 1.9 175 28000
IV QF 2-pdr Mk. X 78/121/23 50/50/60 28.57 0.36 1.7 130 6000

Ico_engine_alpha.png

Engines

Tier Engine Engine Power
(hp)
Chance of Fire on Impact
(%)
Weight
(kg)
Price
(Credits)

III 2x AEC 174 15 331 1500
III 2x Leyland E164 190 15 331 4000

Ico_suspension_alpha.png

Suspensions

Tier Suspension Load Limit
(т)
Traverse Speed
(gr/sec)
Rmin Weight
(kg)
Price
(Credits)

III Matilda Mk. II 27 34 B/2 7200 2270
IV Matilda Mk. IIA 29 36 B/2 7200 4800

Ico_radio_alpha.png

Radios

Tier Radio Signal Range
(m)
Weight
(kg)
Price
(Credits)

VII WS No. 19 Mk. II 450 40 21000
VI WS No. 19 Mk. I 400 40 15000
V WS No. 9 375 40 3600
III WS No. 11 350 40 600

Compatible Equipment

Low Noise Exhaust System Class 3 Camouflage Net Class 3 Coated Optics Class 3 Experimental Optics Wear-Resistant Gun Laying Drive Venting System Enhanced Gun Laying Drive Class 3 Improved Hardening Class 3 Additional Grousers Class 3 Improved Ventilation Class 3 Binocular Telescope Class 3 Turbocharger Class 3 

Compatible Consumables

Automatic Fire Extinguisher Natural Cover Optical Calibration Aim Tuning Experienced Firefighters Manual Fire Extinguisher Vent Purge Large First Aid Kit Large Repair Kit Duty Comes First Shell Organizer Focus on Target Pudding and Tea Increased Focus Small First Aid Kit Small Repair Kit Gearbox Intricacy Steady Hand Combat Course 


Player Opinion

Pros and Cons

Pros:


  • High HP
  • Best armor for its tier on medium or long distance
  • Excellent gun penetration and accuracy capable of damaging T6 tanks with ease
  • Very good rate of fire
  • Relatively fast rotating turret


Cons:


  • Terrible Top speed and acceleration
  • Low damage per shot
  • Favourite target for artillery


Performance

The Matilda is an excellent tank with great armor that causes most shots to just bounce off of it and has excellent guns to return fire with. With 70mm of sloped frontal armor, it is not uncommon for a Matilda at low health to take down another full health tank or two. The greatest qualm of the Matilda is its speed, for it is abysmal. Even with upgraded track and engine, it only manages 24 km/h, bad even for a heavy tank. Thus, there are two ways to use this tank, one is to slowly but surely follow up the main frontal push taking opportunity shots with its excellent accuracy. The second is to guard a set spot or choke, as it can be difficult to coax out due its armor and small silohuette. Do be aware for artillery though because while the Matilda's small birds-eye silohuette makes it difficult to target, one good shot can disable a track, leaving the tank a sitting duck or leave it a burning husk.

Being top of the tier list, the only ways to outclass a Matilda on a light tank is making it go into the open with numbers, as its fast rotating turret can keep up with tanks that try to outmaneuver it. Attacks from the rear or side also deal damage and another good way to destroy a Matilda is to ground it by taking out either of its track and destroy it with artillery. In a one-on-one duel at the same tier, it is very difficult to outclass a Matilda, so attempt to flank it, call in fire from a friendly tank destroyer or call in the arty to at least pin it down.

Experienced tankers may want to take advantage of the high accuracy-high penetration gun by equipping a Enhanced Gun Laying Drive and either Coated Optics or Binoculars and finally a Rammer or a Ventilation system as it turns the Matilda into a deadly "machinegun" that can shred most tanks with relative ease, at long or short range. Even with low damage per shot, the 40mm cannon fires really fast, and offers a serious danger even for heavily armored tanks, like KV-1; if you keep that in mind and catch every opportunity to deal damage, it's possible to deal above 1000 hitpoints in damage in a single game.

It is important to note, however, that although the 76mm HE gun has low penetration, it has quite good damage for its tier and has a fast reload rate. Using this gun to allow for a more "brawler" playstyle isn't without its benefits. The 76mm gun will one or two shot any tank below tier 4 and some tanks that are tier 4. It is recommended to try the HE gun as even though it is in fact a derp gun, it has a quite good possibility to hit from medium range. Do note that this gun can penetrate and do catastrophic damage to even tier 6s, such as the sides of most tanks and the flimsy armor of TDs and fast medium tanks.


Early Research

  • The WS No. 9 radio is the only thing that carries over from the Vickers Medium Mk. III.
  • Start by researching the 2x Leyland E164 engine since it's cheap and has the same weight.
  • Researching the the Quick Fire 2-Pounder Mk. X-B gun is a priority, as it gives the Matilda the much needed penetration boost it needs.
  • Next research the upgraded suspension.
  • Go from there.
  • Note that the only thing the second turret adds is 10m to view range, but don't forget that it will increase the hitpoints of the tank (from 340hp to 370hp).


Suggested Equipment


Improved VentilationTank Gun Rammer Enhanced Gun Laying Drive Coated Optics Binocular Telescope 


Gallery

History for this tank not found

Historical Gallery


UK
Light Tanks ICruiser Mk. I IIM2 IICruiser Mk. II IILight Mk. VIC IIIValentine IIIStuart I-IV IIICruiser Mk. III IVCruiser Mk. IV VCovenanter VIA46 VICrusader VIIGSR 3301 Setter VIIIFV1066 Senlac VIIILHMTV IXGSOR3301 AVR FS XManticore
Medium Tanks IVickers Medium Mk. I IIVickers Medium Mk. II IIIVickers Medium Mk. III IVMatilda IVMatilda LVT IVGrant IVAC 1 Sentinel VCavalier VValiant VSherman III VMatilda Black Prince VISherman Firefly VICromwell VIAC 4 Experimental VICromwell B VISherman VC Firefly VIIComet VIIICenturion Mk. I VIIIFV4202 VIIIChieftain/T95 VIIICenturion Mk. 5/1 RAAC VIIIChimera IXCobra IXCenturion Mk. 7/1 XCenturion Action X
Heavy Tanks VChurchill I VExcelsior VIChurchill VII VITOG II* VIIBlack Prince VIIFV201 (A45) VIIICharlemagne VIIICaliban VIIIGonsalo VIIICaernarvon VIIICaernarvon Action X IXFV4201 Chieftain Proto IXConqueror XFV215b XSuper Conqueror XT95/FV4201 Chieftain
Tank Destroyers IIUniversal Carrier 2-pdr IVValentine AT IVAlecto VArcher VAT 2 VIChurchill Gun Carrier VIAchilles VIAT 8 VIExcalibur VIIChallenger VIIAT 15A VIIAT 7 VIIIGSOR 1008 VIIIAT 15 VIIICharioteer VIIITurtle Mk. I IXTortoise IXFV4004 Conway XFV215b (183) XFV4005 Stage II XFV217 Badger
Self-Propelled Artillery IILoyd Gun Carriage IIISexton II IIISexton I IVBirch Gun VBishop VIFV304 VIICrusader 5.5-in. SP VIIIFV207 IXFV3805 XConqueror Gun Carriage
Medium Tanks
USA IIT2 Medium Tank IIIConvert. Medium Tank T3 IIIM2 Medium Tank IVT6 Medium IVM3 Lee VM4 Improved VM4A2E4 Sherman VM4A1 Sherman VRam II VIM4A3E8 Fury VIM4A3E8 Thunderbolt VII VIM4A3E8 Sherman VIM4A3E2 Sherman Jumbo VIIT26E3 Eagle 7 VIIT20 VIIT23E3 VIIIT25 Pilot Number 1 VIIITL-1 LPC VIIIT42 VIIIASTRON Rex 105 mm VIIIAMBT VIIIM46 Patton KR VIIIM26 Pershing VIIIT26E4 SuperPershing VIIIT69 VIIIT95E2 IXM46 Patton XM48A5 Patton XM60 XT95E6
UK IVickers Medium Mk. I IIVickers Medium Mk. II IIIVickers Medium Mk. III IVMatilda IVMatilda LVT IVGrant IVAC 1 Sentinel VCavalier VValiant VSherman III VMatilda Black Prince VISherman Firefly VICromwell VIAC 4 Experimental VICromwell B VISherman VC Firefly VIIComet VIIICenturion Mk. I VIIIFV4202 VIIIChieftain/T95 VIIICenturion Mk. 5/1 RAAC VIIIChimera IXCobra IXCenturion Mk. 7/1 XCenturion Action X
Germany IIIGroßtraktor - Krupp IIIPz.Kpfw. IV Ausf. A IIIPz.Kpfw. S35 739 (f) IVPz.Kpfw. III Ausf. J IVPz.Kpfw. IV Ausf. D IVVK 20.01 (D) VPz.Kpfw. III Ausf. K VTurán III prototípus VPz.Kpfw. IV Ausf. H Ankou VPz.Kpfw. III/IV VPz.Kpfw. IV hydrostat. VPz.Kpfw. V/IV VPz.Kpfw. V/IV Alpha VPz.Kpfw. IV Ausf. H VPz.Kpfw. T 25 VVK 30.01 (H) VIPz.Kpfw. IV Schmalturm VIVK 30.01 (D) VIVK 30.02 (M) VIIPanther/M10 VIIPanther VIIVK 30.02 (D) VIIIPanther mit 8,8 cm L/71 VIIIPanzer 58 VIIISchwarzpanzer 58 VIIIPanzer 58 Mutz VIIIM48A2 Räumpanzer VIIIKampfpanzer 07 RH VIIIIndien-Panzer VIIIPanther II IXE 50 IXT 55A IXKampfpanzer 50 t IXKunze Panzer IXLeopard Prototyp A XE 50 Ausf. M XLeopard 1
France IIID2 IIISomua S35 IVSARL 42 VRenault G1 VIBretagne Panther VIM4A1 FL 10 VIIIBat.-Châtillon Bourrasque VIIIAltProto AMX 30 VIIILorraine 40 t VIIIAMX Chasseur de chars VIIIM4A1 Revalorisé IXAMX 30 1er prototype IXChar Futur 4 IXBat.-Châtillon 25 t AP XBat.-Châtillon 25 t XAMX 30 B
USSR IIIT-29 IVA-32 IVT-28E with F-30 IVT-34 with L-11 IVT-28 VMatilda IV VT-34 shielded VM4-85 VT-34 VIA-43 VIT-34-85M VIT-34-85 Rudy VILoza's M4-A2 Sherman VIT-34-85 VIIA-44 VIIKV-13 VIIT-43 VIIT-44-122 VIIIObject 416 VIIIT-54 first prototype VIIIT-44-100 Igrovoy VIIIT-44-100 (R) VIIISTG VIIISTG Guard VIIIObject 274a VIIIT-44 IXObject 430 Version II IXObject 430 IXT-54 XObject 140 XObject 907 XT-22 medium XK-91 XObject 430U XT-62A
China VType T-34 VIType 58 VIIT-34-1 VIIIType 59 VIIIT-34-2 VIIIT-34-3 VIII59-Patton VIII122 TM VIIIType 59 G IXWZ-120 X121 X121B
Japan IIChi-Ni IIType 89 I-Go/Chi-Ro IVType 1 Chi-He VType 3 Chi-Nu VType 3 Chi-Nu Kai VIType 4 Chi-To VIIType 5 Chi-Ri VIIISTA-1 VIIISTA-2 IXType 61 XSTB-1
Czechoslovakia IVST vz. 39 VŠkoda T 24 VIŠkoda T 40 VIŠkoda T 25 VIIKonštrukta T-34/100 VIIITVP VTU Koncept VIIIŠkoda T 27 IXŠkoda T 50 XTVP T 50/51
Sweden IVLago VStrv m/42 VIStrv m/42-57 Alt A.2 VIStrv 74 VIILeo VIIIStrv 81 VIIIPrimo Victoria VIIILansen C VIIIUDES 14 Alt 5 IXUDES 16 XUDES 15/16
Italy IIM14/41 IIIM15/42 IVP26/40 VP.43 VIP.43 bis VIIP.43 ter VIIIProgetto M35 mod. 46 VIIIP.44 Pantera IXPrototipo Standard B XProgetto M40 mod. 65 XCarro da Combattimento 45 t
Poland V25TP KSUST II VDS PZInż VIPudel VI40TP Habicha VIT-34-85 Rudy VIB.U.G.I. VIICS-44 VIIICS-52 LIS VIIICS-53 IXCS-59 XCS-63
ja:Tank:GB07 Matilda