Churchill I
| Revision as of 01:00, 6 February 2013 | Revision as of 01:02, 6 February 2013 | |||
| Line 1: | Line 1: | |||
| {{TankData | {{TankData | |||
| ? | |Following the Rule of "Infantry tanks" and just like the [[Matilda]], the Churchill is one slow moving warehouse, but despite that, its guns boast excellent performance, and it has the thickest frontal armor for its tier. It's an exceptional defender, as it is capable of dealing with any tank that crosses its path up front. Unfortunately the Churchill I has its tracks exposed, increasing its likelihood of becoming tracked, which could potentially be lethal for this tank. It's very prone to artillery fire, and getting to cover will take some time. All of this makes the Churchill easy prey for flankers. | + | |Following the Rule of "Infantry tanks" and just like the [[Matilda]], the Churchill is one slow moving warehouse, but despite that, its top guns boast excellent performance, and it has the thickest frontal armor for its tier. It's an exceptional defender, as it is capable of dealing with any tank that crosses its path up front. Unfortunately the Churchill I has its tracks exposed, increasing its likelihood of becoming tracked, which could potentially be lethal for this tank. It's very prone to artillery fire, and getting to cover will take some time. All of this makes the Churchill easy prey for flankers. | |
| |Gallery= | |Gallery= | |||
Revision as of 01:02, 6 February 2013
| |
This article requires additional modification. The design and/or content of this article do not conform to wiki standards.
|
Churchill I

Mouse over "
[Client Values; Actual values in
| 340,000 |
| 870184 HP Hit Points |
| 38.45/3918.06/43 t Weight Limit |
- Commander (Radio Operator)
- Driver
- Gunner
- Gunner
- Loader
| 300350 hp Engine Power |
| 25.7/14 km/h Speed Limit |
| 2022 deg/s Traverse |
| 7.819.38 hp/t Power/Wt Ratio |
| NoNo Pivot |
| // mm Hull Armor |
| 101.6/88.9/88.988.9/88.9/76.2 mm Turret Armor |
AP/APCR/HE
AP/APCR/HE Shells |
30/1200/15
100/2800/56 Shell Cost |
| 50/50/60135/135/175 HP Damage |
| 78/121/23145/202/38 mm Penetration |
|
28.57 r/m ▲
12.5 r/m Standard Gun ▲ Rate of Fire Standard Gun |
|
1428.5 ▲
Standard Gun
▼
Standard Gun
▲
1687.5 Standard Gun ▲
Standard Gun
▼
Standard Gun
▲ Damage Per Minute Standard Gun |
|
0.36 m ▲
0.36 m With 50% Crew: 0.446 m ▲ Accuracy With 50% Crew: 0.446 m |
| 1.7 s 2.3 s Aim time |
| 3434 deg/s Turret Traverse |
| 360° Gun Arc |
| -10°/+20°-4°/+12° Elevation Arc |
| 265100 rounds Ammo Capacity |
| 2020 % Chance of Fire |
| 330 m 350 m View Range |
| 400 m 550 m Signal Range |
V
340000
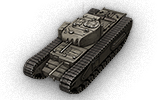
The Churchill I is a British tier 5 heavy tank.
The A22 prototype was built by Vauxhall Motors in the fall of 1940. The vehicle first entered mass production in the summer of 1941. Early modifications had no track fenders, a different fan, and a 3-inch howitzer in the hull. A total of 300 Churchill I tanks were manufactured.
Following the Rule of "Infantry tanks" and just like the Matilda, the Churchill is one slow moving warehouse, but despite that, its top guns boast excellent performance, and it has the thickest frontal armor for its tier. It's an exceptional defender, as it is capable of dealing with any tank that crosses its path up front. Unfortunately the Churchill I has its tracks exposed, increasing its likelihood of becoming tracked, which could potentially be lethal for this tank. It's very prone to artillery fire, and getting to cover will take some time. All of this makes the Churchill easy prey for flankers.
The Churchill I leads to the Churchill VII.
Modules / Available Equipment and Consumables
Modules

Guns
| Tier | Gun | Penetration (mm) |
Damage (HP) |
Rate of fire (rounds/minute) |
Dispersion (m/100m) |
Aiming time (s) |
Weight (kg) |
Price (
| |
|---|---|---|---|---|---|---|---|---|---|
| IV | OQF 3-inch Howitzer Mk. I | 38/100/23 | 175/110/60 | 16.67 | 0.51 | 1.9 | 116 | 30000 | |
| IV | QF 6-pdr Mk. III | 105/170/30 | 75/75/100 | 27.27 | 0.43 | 1.9 | 400 | 27000 | |
| V | QF 6-pdr Gun Mk. V | 110/180/30 | 75/75/100 | 27.27 | 0.41 | 1.9 | 450 | 35000 | |
| V | 75 mm Gun Mk. V | 91/144/38 | 110/110/175 | 20 | 0.42 | 1.9 | 500 | 45000 | |
| VI | 75 mm Vickers HV | 145/202/38 | 135/135/175 | 12.5 | 0.36 | 2.3 | 591 | 50000 | |
| IV | QF 2-pdr Mk. X | 78/121/23 | 50/50/60 | 28.57 | 0.36 | 1.5 | 130 | 6000 |

Engines
| Tier | Engine | Engine Power (hp) |
Chance of Fire on Impact (%) |
Weight (kg) |
Price (
| |
|---|---|---|---|---|---|---|
| IV | Meadows D.A.V. | 300 | 20 | 724 | 9000 | |
| IV | Bedford Twin-Six | 350 | 20 | 1531 | 11000 |

Suspensions
| Tier | Suspension | Load Limit (т) |
Traverse Speed (gr/sec) |
Rmin | Weight (kg) |
Price (
| |
|---|---|---|---|---|---|---|---|
| IV | Churchill I | 39 | 20 | B/2 | 8150 | 4050 | |
| V | Churchill III | 43 | 22 | B/2 | 8150 | 8500 |

Radios
| Tier | Radio | Signal Range (m) |
Weight (kg) |
Price (
| |
|---|---|---|---|---|---|
| VII | WS No. 19 Mk. II | 450 | 40 | 21000 | |
| VI | WS No. 19 Mk. I | 400 | 40 | 15000 | |
| VIII | WS No. 19 Mk. III | 550 | 40 | 22000 |
Compatible Equipment

![]()


![]()
![]()
![]()
![]()
![]()


![]()

![]()

Compatible Consumables
![]()
![]()
![]()
![]()
![]()
![]()
![]()
![]()
![]()
![]()
![]()
![]()
![]()
![]()
![]()
![]()
![]()
![]()
![]()
![]()
![]()
![]()
![]()
Player Opinion
Pros and Cons
Pros:
- Excellent top gun
- High RoF
- Good HP
- Good Frontal Armour
- Inexpensive shells
Cons:
- Vulnerable tracks
- Unsloped armor
- Upgraded turret has poor armor
- Slow, low maneuverability
- Large tank, prone to be targeted by artillery
Performance
The Churchill I can be upgraded from either the Matilda or Valentine and has a relatively similar style of play. An excellent tank, it excels in defending, blocking chokes, long range dueling, providing fire support or leading the assault from the front.
Having excellent frontal armor, most shots will deflect off of the Churchill. Also the high hitpoints of the tank means that this tank will take tons of damage. This durability is made deadly when it is equipped its best gun, the 75mm Vickers HV. The gun has a high rate of fire, high accuracy, good damage and excellent penetration. This makes the Churchill a very deadly tank when it comes to defending choke or dueling at long ranges. Its armor and health are able to deflect or absorb damage, and its gun enables it to return fire. It is possible for a low health Churchill to take on a full health medium tank of the same tier and destroy it.
So in order to make the best use of the Churchill, it should be positioned around cover such as rocks, buildings, other tanks, depressions and hills. From there, it can peek out to snipe at the enemy with impunity. When attacking, Churchill players should be wary of getting flanked, and use their frontal armor to absorb incoming fire.
Now the Churchill is by no means a invincible tank, and has many drawbacks that players can take advantage of. However, there are countermeasures Churchill players can use to cover their tank's vulnerability.
The first drawback most players would notice about the Churchill, are that its initial guns do poor damage and penetration compared to other tanks of its tier and while they do have a high rate of fire, players will still find this a nuisance. Luckily, this problem is mitigated by the 3 inch HE gun and solved when the player mounts the 75 mm Mk.V gun. Players facing Churchills should take note of what gun the Churchill has, for the tank will perform very differently depending on the type of gun.
The Churchill requires an upgraded turret to be compatible with its better guns. This turret has less armor compared to the original turret (though it does provides a better viewing range). Enemy players can take advantage of this weakness to target the Churchill's turret. Churchill players should employ cover, or evasive maneuvers so that their turrets can't be hit so easily.
Another thing to be concerned about with this tank is its speed, which is abysmal. Once the Churchill player sets off in a certain direction, it will be rather difficult to change their path as the Churchill's top speed won't get them there in time. Instead, players should consider where their allies are going and where they can be of most use. Players should not pick long paths as the battle will be over before the Churchill can get to its destination.
The Churchill also has poor maneuverability and very vulnerable tracks. The tank can't turn very well, which makes the Churchill very vulnerable to flanking. Lighter tanks facing Churchills should get it out into the open, then swarm and circle around it, firing flank shots into the tank, and attempting to take out its track. The turret, while having a decent traverse rate, will not be able to contend with multiple targets. The exposed tracks allow enemy tanks to paralyze the Churchill, allowing others to flank it or artillery to finish it off. Churchill players should be constantly aware of their surroundings and protect their vulnerable sides by finding cover, turning to face the enemy, or keep moving. If the Churchill player finds himself confronted with an enemy tank on a slope, use the slope to accelerate the Churchill's speed and turning ability, so that it can keep its front to the enemy. In short, never take a Churchill head on, Churchills should always take their enemies head on
A final problem to the Churchill, is its size. While smaller than the T1 Heavy Tank, the Churchill has a wider bird's eye silhouette, allowing it to be a target for artillery. SPGs should focus Churchills defending choke points, even a glancing it on the Churchill's side will take out its tracks, leaving it a sitting duck. Churchill players should either pick spots that are hard for artillery to hit, or keep moving.
Take note, that when cornering, or doing tight turns, the Churchill's tracks will be exposed long before its turret and gun, allowing enemies to potentially cause devastating damage on your exposed parts. Instead, players should take corners from far off the edge and angle themselves diagonally when taking the turn, this way it will be harder for hidden enemies to make a successful penetration due the high angle of the tanks tracks and mantlet, and will allow its gun to be exposed to inflict damage. This strategy is valid on all Churchill Tank Models.
Early Research
- The WS-19 MkII radio carries over from the Matilda and the Valentine.
- If you came from the Matilda, you can equip the OQF 3-inch Howitzer Mk. I, otherwise you will need to research it, so you can equip it while you research the tracks and turret/guns.
- You will need to research the tracks next, because the 2nd turret + 6 pounder/75mm combination is too heavy for the original tracks.
- Research turret upgrade next, dont equip it unless you came from Valentine and already have the better guns (it is weaker than original turret).
- If you came from the Matilda, research the better guns and equip them together with the 2nd turret.
- Go from there.
Suggested Equipment
![]()
![]()
![]()
![]()
Gallery


History for this tank not found


