Churchill VII
| Revision as of 17:16, 14 May 2013 | Revision as of 19:36, 24 May 2013 | |||
| Line 1: | Line 1: | |||
| {{TankData | {{TankData | |||
| ? | |An upgrade to the Churchill's Equipment, the Mark VII boasts improved frontal armor, track protection, and an above average selection of guns. However the top speed and maneuverability are both still extremely poor; only certain artillery pieces and American TDs can match the Churchills for immobility. Adding to this the Mk. VII comes with the misfortune of stepping up a tier, while receiving incredibly meager improvements to its top armament and HP pool. Being sometimes at a loss for sufficient penetration to hurt enemy Heavy Tanks, some people turn to the 3.7 inch howitzer (whose projectile speed is ludicrously slow) merely as a recourse to be able to deal some amount of damage to the enemy team. Still, by dint of sheer armor and its OQF 77mm's effectiveness against lighter tanks the Mk. VII has the capability to set up deadly blockades at key points of the map and provide withering support fire. | + | |An upgrade to the Churchill's Equipment, the Mark VII boasts improved frontal armor, track protection, and an above average selection of guns. However the top speed and maneuverability are both still extremely poor; only certain artillery pieces and American TDs can match the Churchills for immobility. Adding to this the Mk. VII comes with the misfortune of stepping up a tier, while receiving incredibly meager improvements to its top armament and HP pool. Being sometimes at a loss for sufficient penetration to hurt enemy Heavy Tanks, some people turn to the 3.7 inch howitzer (whose projectile speed is ludicrously slow) merely as a recourse to be able to deal some amount of damage to the enemy team. Most people regard this tank as the worst of the tier VI heavies. Still, by dint of sheer armor and its OQF 77mm's effectiveness against lighter tanks the Mk. VII has the capability to set up deadly blockades at key points of the map, lead attacks, and provide withering support fire. | |
| |Gallery= | |Gallery= | |||
| Line 22: | Line 22: | |||
| |InTheGame_performance= | |InTheGame_performance= | |||
| ? | The upgraded version of the Churchill I has more armor then the previous heavy tank. However, the speed of this tank is even slower then its predecessor. Even the infamous Maus has more speed. When playing this tank, always angle this tank a bit to the right at about 32 degrees. This will cover the frontal weak spot for the tank and also increases the frontal armor. If you are playing stock, play like the Matilda; Use your aim time and fast reload to suppress any enemies you meet. If you are playing with the 75 mm Vickers HV, play like a Churchill I, only a bit slower. The 77 mm will | + | The upgraded version of the Churchill I has more armor then the previous heavy tank. However, the speed of this tank is even slower then its predecessor. Even the infamous Maus has more speed. When playing this tank, always angle this tank a bit to the right at about 32 degrees. This will cover the frontal weak spot for the tank and also increases the frontal armor. If you are playing stock, play like the Matilda; Use your aim time and fast reload to suppress any enemies you meet. If you are playing with the 75 mm Vickers HV, play like a Churchill I, only a bit slower. The 77 mm will slow you down more, but you need the extra penetration and damage. Focus mostly on heavy mediums and light heavies, and aim at their weakspots, because your penetration and damage will do less then expected in higher tier battles. | |
| Generally in a game of its tier, Churchill VII drivers should try to defend or push chokepoints, streets and valleys. They should not try to get onto higher ground due to their horrible gun depression. They should be very wary of getting isolated from their friendlies. In higher tier VII and VIII games, Churchill VII players should get into cover, angle their armor, then stay at a distance and use the superior accuracy of the 77 mm QQF to lay down fire against enemy tanks of the same tiers or of lower tiers. However, they should take any opportunity to target the weakpoints and sides of any higher tier tanks, every point of damage counts and a critical hit can cripple higher tier tanks. Churchill VII's can also defend chokes at higher tier games very effectively, as long as their frontal armor is angled. | Generally in a game of its tier, Churchill VII drivers should try to defend or push chokepoints, streets and valleys. They should not try to get onto higher ground due to their horrible gun depression. They should be very wary of getting isolated from their friendlies. In higher tier VII and VIII games, Churchill VII players should get into cover, angle their armor, then stay at a distance and use the superior accuracy of the 77 mm QQF to lay down fire against enemy tanks of the same tiers or of lower tiers. However, they should take any opportunity to target the weakpoints and sides of any higher tier tanks, every point of damage counts and a critical hit can cripple higher tier tanks. Churchill VII's can also defend chokes at higher tier games very effectively, as long as their frontal armor is angled. | |||
Revision as of 19:36, 24 May 2013
Churchill VII
Mouse over "
[Client Values; Actual values in
| 900,000 |
| 1020216 HP Hit Points |
| 39.19/40.1518.68/43 t Weight Limit |
- Commander
- Gunner
- Driver
- Radio Operator
- Loader
| 300350 hp Engine Power |
| 20/12 km/h Speed Limit |
| 1820 deg/s Traverse |
| 7.6618.74 hp/t Power/Wt Ratio |
| NoNo Pivot |
| // mm Hull Armor |
| 88.9/76.2/76.2152.4/95.3/95.3 mm Turret Armor |
AP/APCR/HE
AP/APCR/HE Shells |
45/2400/32
150/2800/75 Shell Cost |
| 75/75/100140/140/190 HP Damage |
| 110/180/30148/208/38 mm Penetration |
|
27.27 r/m ▲
13.95 r/m Standard Gun ▲ Rate of Fire Standard Gun |
|
2045.25 ▲
Standard Gun
▼
Standard Gun
▲
1953 Standard Gun ▲
Standard Gun
▼
Standard Gun
▲ Damage Per Minute Standard Gun |
|
0.39 m ▲
0.36 m With 50% Crew: 0.483 m ▲ Accuracy With 50% Crew: 0.446 m |
| 1.9 s 2.3 s Aim time |
| 3030 deg/s Turret Traverse |
| 360° Gun Arc |
| -7°/+20°-4°/+12° Elevation Arc |
| 14584 rounds Ammo Capacity |
| 2020 % Chance of Fire |
| 350 m 360 m View Range |
| 400 m 550 m Signal Range |
VI
900000
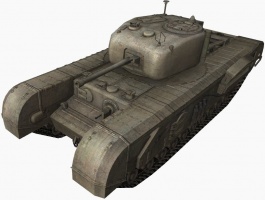
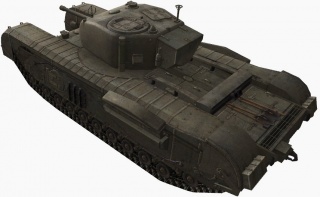
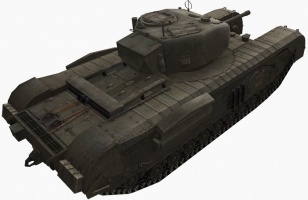
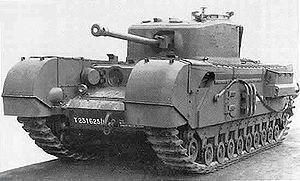
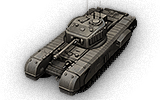
The Churchill VII is a British tier 6 heavy tank.
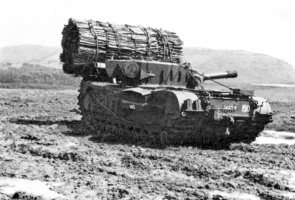
A modification of the A22 with enhanced armor. First vehicles of this type were produced just before the Allied landing in Normandy. This model was also the basis for the Churchill Crocodile flame-throwing tank.
An upgrade to the Churchill's Equipment, the Mark VII boasts improved frontal armor, track protection, and an above average selection of guns. However the top speed and maneuverability are both still extremely poor; only certain artillery pieces and American TDs can match the Churchills for immobility. Adding to this the Mk. VII comes with the misfortune of stepping up a tier, while receiving incredibly meager improvements to its top armament and HP pool. Being sometimes at a loss for sufficient penetration to hurt enemy Heavy Tanks, some people turn to the 3.7 inch howitzer (whose projectile speed is ludicrously slow) merely as a recourse to be able to deal some amount of damage to the enemy team. Most people regard this tank as the worst of the tier VI heavies. Still, by dint of sheer armor and its OQF 77mm's effectiveness against lighter tanks the Mk. VII has the capability to set up deadly blockades at key points of the map, lead attacks, and provide withering support fire.
The Churchill VII leads to the Black Prince.
Modules / Available Equipment and Consumables
Modules
| Tier | Engine | Engine Power (hp) |
Chance of Fire on Impact (%) |
Weight (kg) |
Price (
| |
|---|---|---|---|---|---|---|
| IV | Meadows D.A.V. | 300 | 20 | 724 | 9000 | |
| IV | Bedford Twin-Six | 350 | 20 | 1531 | 11000 |
| Tier | Suspension | Load Limit (т) |
Traverse Speed (gr/sec) |
Rmin | Weight (kg) |
Price (
| |
|---|---|---|---|---|---|---|---|
| V | Churchill IV | 40.15 | 18 | B/2 | 8150 | 8600 | |
| VI | Churchill VII | 43 | 20 | B/2 | 8150 | 18000 |
| Tier | Radio | Signal Range (m) |
Weight (kg) |
Price (
| |
|---|---|---|---|---|---|
| VII | WS No. 19 Mk. II | 450 | 40 | 21000 | |
| VI | WS No. 19 Mk. I | 400 | 40 | 15000 | |
| VIII | WS No. 19 Mk. III | 550 | 40 | 22000 |
Compatible Equipment
Compatible Consumables
Player Opinion
Pros and Cons
Pros:
- Thick frontal armor and thick turret armor
- High rate of fire
- High hit point pool
- Inexpensive shells
- Godly tank versus lower tiers
Cons:
- Low speed and acceleration
- Obvious frontal weak spots
- Poor gun depression
- Large target for artillery
- Lacks penetration in games higher than tier VI
Performance
The upgraded version of the Churchill I has more armor then the previous heavy tank. However, the speed of this tank is even slower then its predecessor. Even the infamous Maus has more speed. When playing this tank, always angle this tank a bit to the right at about 32 degrees. This will cover the frontal weak spot for the tank and also increases the frontal armor. If you are playing stock, play like the Matilda; Use your aim time and fast reload to suppress any enemies you meet. If you are playing with the 75 mm Vickers HV, play like a Churchill I, only a bit slower. The 77 mm will slow you down more, but you need the extra penetration and damage. Focus mostly on heavy mediums and light heavies, and aim at their weakspots, because your penetration and damage will do less then expected in higher tier battles.
Generally in a game of its tier, Churchill VII drivers should try to defend or push chokepoints, streets and valleys. They should not try to get onto higher ground due to their horrible gun depression. They should be very wary of getting isolated from their friendlies. In higher tier VII and VIII games, Churchill VII players should get into cover, angle their armor, then stay at a distance and use the superior accuracy of the 77 mm QQF to lay down fire against enemy tanks of the same tiers or of lower tiers. However, they should take any opportunity to target the weakpoints and sides of any higher tier tanks, every point of damage counts and a critical hit can cripple higher tier tanks. Churchill VII's can also defend chokes at higher tier games very effectively, as long as their frontal armor is angled.
Once a player commits this tank to a path or area it can be difficult to adapt to the changing battle because of the Churchill VII's slow speed and poor maneuverability. Instead, the player should consider the paths their allies choose and either provide support to one side or cover a weak spot in the line. Be very careful about getting isolated though. As an alternative, find an area or path on each map that you can play well and stick to it; ultimately if the player can provide dependable control of one area the team will benefit. The Churchill also does wonders in choke points due to its heavy frontal armor, but players should be wary that artillery is always on the lookout.
Note that when coming around corner cover, such as buildings or rocks, taking the shortest route will expose your tracks and sides for at least several seconds before you can get gun around the corner. If you are tracked before your gun gets around the corner, you're dead. Instead, try to make large turns or angle around the turn so that the enemy sees as little of your sides as possible and your frontal armor is quickly brought to bear.
Keeping your hull angled at about 30 degrees will significantly increase its effectiveness, additionally, high repair skill or a toolbox (or both) is recommended because this tactic uses part of the tracks to cover the front of the tank. The tracks will also absorb a significant amount of damage when angled well. Angling the turret while reloading also adds to the durability of your tank. Even if the armor is penetrated, the damage roll is considerably lower due to the effects of the armor.
While the front of this tank is nigh impenetrable, the sides lack armor and the machine gun port in the front is quite visible. The Churchill VII is also a huge artillery target. Moreover, concentrated fire from enemy tanks can easily bring down this tank. Be ready to take at least some damage if you attempt to attack a Churchill though because the gun reloads very quickly. Churchill VII players need to be very careful should they confront multiple enemies because while the frontal armor is good, it isn't invincible. Moreover, although the turret traverse is decent, the Churchill VII, like its predecessor, can be surrounded by enemy tanks and taken down.
Suggested Equipment
Gallery
Historical Info
The armour on the Churchill, often considered its most important feature, was originally specified to a minimum of 16 millimetres (0.63 in) and a maximum of 102 millimetres (4.0 in); this was increased with the Mk VII to a range from 25 millimetres (0.98 in) to 152 millimetres (6.0 in). Though this armour was considerably thicker than its rivals (including the German Tiger I tank, but not the Tiger II) it was not sloped, reducing its effectiveness. Earlier models were given extra armour by the expedient of welding extra plates on.
On the Mark VII, the hull front armour was made up of a lower angled piece of 5.5 in (140 mm), a nearly flat 2.25 in (57 mm) plate and a vertical 6 inch plate. The hull sides, were for the most part, 3.75 in (95 mm). The rear was 2 in (51 mm) and the hull top 0.525 in (13.3 mm). The turret of the Mark VII was 6 in (150 mm) to the front and 3.75 in (95 mm) for the other sides. The turret roof was 0.79 (20 mm) thick. Plate was specified as IT 80, the cast sections as IT 90.


