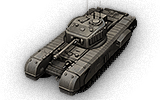
Welcome to Wargaming.net Wiki!
Variants
/
/
Churchill VII

Churchill VII

Jump to: navigation, search


Churchill VII

AnnoGB09_Churchill_VII.png
Battle Tier
1234567891011
Overview
Mouse over "
Well, the ones further down, of course.
" for more information
[Client Values; Actual values in
Specifically, the mismatch in crew values caused by commander's 10% crew skill bonus. Outside of a crew of 1 commander only, 100% crew is a fiction. The client values, given for 100% crew, will normally be taken into battle with 110% crew skill members aside from specific functions, causing their actual performance to deviate from the expected client value. These differences are taken into account in tooltip boxes.
]
900,000  Credits Cost
1020216 HP Hit Points
39.19/40.1518.68/43 t Weight Limit
Crew
  1. Commander
  2. Gunner
  3. Driver
  4. Radio Operator
  5. Loader
Mobility
300350 hp Engine Power
20/12 km/h Speed Limit
1820 deg/s Traverse
7.6618.74 hp/t Power/Wt Ratio
NoNo Pivot
Armor
// mm Hull Armor
88.9/76.2/76.2152.4/95.3/95.3 mm Turret Armor
Armament


{{#ifeq:ARMOR_PIERCING_CR|ARMOR_PIERCING||


{{#ifeq:HIGH_EXPLOSIVE|ARMOR_PIERCING||


AP/APCR/HE


{{#ifeq:ARMOR_PIERCING_CR|ARMOR_PIERCING||


{{#ifeq:HIGH_EXPLOSIVE|ARMOR_PIERCING||


AP/APCR/HE
Shells


45/2400/32


150/2800/75
Shell Cost
75/75/100140/140/190 HP Damage
110/180/30148/208/38 mm Penetration


|


|}}

|


|}}


27.27 r/m 

Standard Gun

Reload Times
Nominal: 2.2 s
50% Crew: 2.73 s
75% Crew: 2.38 s
100% Crew: 2.11 s
Rammer: 1.9 s
Vents: 2.06 s
Both: 1.86 s
Both and BiA: 1.82 s
Both and Max Crew %: 1.74 s

See Crew, Consumables, or Equipment for more information.


|


|}}

|


|}}


13.95 r/m 

Standard Gun

Reload Times
Nominal: 4.3 s
50% Crew: 5.33 s
75% Crew: 4.65 s
100% Crew: 4.12 s
Rammer: 3.71 s
Vents: 4.03 s
Both: 3.63 s
Both and BiA: 3.55 s
Both and Max Crew %: 3.4 s

See Crew, Consumables, or Equipment for more information.
Rate of Fire


|


|}}

|


|}}


2045.25

Standard Gun

Using Shell Type 1 (75 Damage):


Theoretical Damage Per Minute
Nominal DPM: 2045.25
50% Crew: 1650.75
75% Crew: 1890.75
100% Crew: 2133
100% Crew
Vents: 2181
Rammer: 2370
Both: 2423.25
Both and BiA: 2477.25
Both and Max Crew %: 2584.5

Advantageous Damage Per Minute
First-shot DPM: 2120.25
50% Crew: 1725.75
75% Crew: 1965.75
100% Crew: 2208
100% Crew
Rammer: 2445
Vents: 2256
Both: 2498.25
Both and BiA: 2552.25
Both and Max Crew %: 2659.5

See here, here, or here for more information.

Standard Gun

Using Shell Type 2 (75 Damage):


Theoretical Damage Per Minute
Nominal DPM: 2045.25
50% Crew: 1650.75
75% Crew: 1890.75
100% Crew: 2133
100% Crew
Vents: 2181
Rammer: 2370
Both: 2423.25
Both and BiA: 2477.25
Both and Max Crew %: 2584.5

Advantageous Damage Per Minute
First-shot DPM: 2120.25
50% Crew: 1725.75
75% Crew: 1965.75
100% Crew: 2208
100% Crew
Rammer: 2445
Vents: 2256
Both: 2498.25
Both and BiA: 2552.25
Both and Max Crew %: 2659.5

See here, here, or here for more information.

Standard Gun

Using Shell Type 3 (100 Damage):
With wholly penetrating hits

Theoretical Damage Per Minute
Nominal DPM: 2727
50% Crew: 2201
75% Crew: 2521
100% Crew: 2844
100% Crew
Vents: 2908
Rammer: 3160
Both: 3231
Both and BiA: 3303
Both and Max Crew %: 3446

Advantageous Damage Per Minute
First-shot DPM: 2827
50% Crew: 2301
75% Crew: 2621
100% Crew: 2944
100% Crew
Rammer: 3260
Vents: 3008
Both: 3331
Both and BiA: 3403
Both and Max Crew %: 3546

See here, here, or here for more information.


|


|}}

|


|}}


1953

Standard Gun

Using Shell Type 1 (140 Damage):


Theoretical Damage Per Minute
Nominal DPM: 1953
50% Crew: 1576.4
75% Crew: 1806
100% Crew: 2037
100% Crew
Vents: 2083.2
Rammer: 2263.8
Both: 2314.2
Both and BiA: 2366
Both and Max Crew %: 2468.2

Advantageous Damage Per Minute
First-shot DPM: 2093
50% Crew: 1716.4
75% Crew: 1946
100% Crew: 2177
100% Crew
Rammer: 2403.8
Vents: 2223.2
Both: 2454.2
Both and BiA: 2506
Both and Max Crew %: 2608.2

See here, here, or here for more information.

Standard Gun

Using Shell Type 2 (140 Damage):


Theoretical Damage Per Minute
Nominal DPM: 1953
50% Crew: 1576.4
75% Crew: 1806
100% Crew: 2037
100% Crew
Vents: 2083.2
Rammer: 2263.8
Both: 2314.2
Both and BiA: 2366
Both and Max Crew %: 2468.2

Advantageous Damage Per Minute
First-shot DPM: 2093
50% Crew: 1716.4
75% Crew: 1946
100% Crew: 2177
100% Crew
Rammer: 2403.8
Vents: 2223.2
Both: 2454.2
Both and BiA: 2506
Both and Max Crew %: 2608.2

See here, here, or here for more information.

Standard Gun

Using Shell Type 3 (190 Damage):
With wholly penetrating hits

Theoretical Damage Per Minute
Nominal DPM: 2650.5
50% Crew: 2139.4
75% Crew: 2451
100% Crew: 2764.5
100% Crew
Vents: 2827.2
Rammer: 3072.3
Both: 3140.7
Both and BiA: 3211
Both and Max Crew %: 3349.7

Advantageous Damage Per Minute
First-shot DPM: 2840.5
50% Crew: 2329.4
75% Crew: 2641
100% Crew: 2954.5
100% Crew
Rammer: 3262.3
Vents: 3017.2
Both: 3330.7
Both and BiA: 3401
Both and Max Crew %: 3539.7

See here, here, or here for more information.
Damage Per Minute


|


|}}


0.39 m 

With 50% Crew: 0.483 m
With 75% Crew: 0.422 m
With 100% Crew: 0.374 m
With BiA: 0.366 m
With BiA and Vents: 0.358 m
Maximum possible: 0.343 m

For more details, see Crew


|


|}}


0.36 m 

With 50% Crew: 0.446 m
With 75% Crew: 0.389 m
With 100% Crew: 0.345 m
With BiA: 0.338 m
With BiA and Vents: 0.33 m
Maximum possible: 0.317 m

For more details, see Crew
Accuracy


|


|}}


1.9 s 

With 50% Crew: 2.354 s
With 75% Crew: 2.055 s
With 100% Crew: 1.822 s
With GLD: 1.656 s
With BiA: 1.782 s
With BiA and Vents: 1.743 s
With both and GLD: 1.584 s
Maximum possible: 1.519 s

For more details, see Crew or Equipment


|


|}}


2.3 s 

With 50% Crew: 2.849 s
With 75% Crew: 2.488 s
With 100% Crew: 2.205 s
With GLD: 2.005 s
With BiA: 2.157 s
With BiA and Vents: 2.11 s
With both and GLD: 1.918 s
Maximum possible: 1.839 s

For more details, see Crew or Equipment
Aim time
3030 deg/s Turret Traverse
360° Gun Arc
-7°/+20°-4°/+12° Elevation Arc
14584 rounds Ammo Capacity
General
2020 % Chance of Fire


350 m 

With 50% Crew: 275 m
With 75% Crew: 312.5 m
With 100% Crew: 350 m
With Recon and Situational Awareness: 367.7 m
With Coated Optics: 385 m
With Binocular Telescope: 437.5 m
Maximum possible: 501.1 m

For more details, see Skills or Equipment


360 m 

With 50% Crew: 282.8 m
With 75% Crew: 321.5 m
With 100% Crew: 360 m
With Recon and Situational Awareness: 378.2 m
With Coated Optics: 396 m
With Binocular Telescope: 450 m
Maximum possible: 515.4 m

For more details, see Skills or Equipment
View Range


|


|}}


400 m 

With 50% Crew: 322.9 m
With 75% Crew: 369.8 m
With 100% Crew: 417.2 m
With 100% Signal Boost: 480 m
When affected by 100% Relaying: 440 m
Maximum possible: 600.5 m

For more details, see Skills or Equipment


|


|}}


550 m 

With 50% Crew: 444 m
With 75% Crew: 508.5 m
With 100% Crew: 573.6 m
With 100% Signal Boost: 660 m
When affected by 100% Relaying: 605 m
Maximum possible: 825.7 m

For more details, see Skills or Equipment
Signal Range
Values are Stock - click for Top


VI

AnnoGB09_Churchill_VII.png

900000

The Churchill VII is a British tier 6 heavy tank.

A modification of the A22 with enhanced armor. First vehicles of this type were produced just before the Allied landing in Normandy. This model was also the basis for the Churchill Crocodile flame-throwing tank.

The Churchill VII is a huge upgrade from its predecessor, the Churchill I, with far better armor, more track protection, and a larger health pool. The armor on this tank is thick, especially at the turret, but has a lot of weak spots. The armor is good against lower tiers tanks but cannot compete with high penetration guns (+160mm). Additionally, the Churchill VII trades a lot of its mobility for its upgraded armor. The top gun on this tank has low damage per shot with average penetration but great accuracy and rate of fire, resulting in high damage per minute. The Churchill VII’s flat armor combined with that average weak top gun and appalling speed makes it a fairly bad Tier VI heavy tank, especially when fighting Tier VIII tanks on a open map. Consider angling your armor to maximize your chances for survival.

The Churchill VII leads to the Black Prince.

Modules / Available Equipment and Consumables

Modules

Ico_gun_alpha.png

Guns

Tier Gun Penetration
(mm)
Damage
(HP)
Rate of fire
(rounds/minute)
Dispersion
(m/100m)
Aiming time
(s)
Weight
(kg)
Price
(Credits)

V QF 6-pdr Gun Mk. V 110/180/30 75/75/100 27.27 0.39 1.9 450 35000
V 3.7-inch Howitzer 47/110/30 370/280/100 8.57 0.51 2.3 393 35000
V 75 mm Gun Mk. V 91/144/38 110/110/175 20 0.41 1.9 500 45000
VII OQF 77 mm Gun Mk. II 148/208/38 140/140/190 13.95 0.36 2.3 681 63000
VI 75 mm Vickers HV 145/202/38 135/135/175 13.95 0.36 2.3 591 50000

Ico_engine_alpha.png

Engines

Tier Engine Engine Power
(hp)
Chance of Fire on Impact
(%)
Weight
(kg)
Price
(Credits)

IV Meadows D.A.V. 300 20 724 9000
IV Bedford Twin-Six 350 20 1531 11000

Ico_suspension_alpha.png

Suspensions

Tier Suspension Load Limit
(т)
Traverse Speed
(gr/sec)
Rmin Weight
(kg)
Price
(Credits)

V Churchill IV 40.15 18 B/2 8150 8600
VI Churchill VII 43 20 B/2 8150 18000

Ico_radio_alpha.png

Radios

Tier Radio Signal Range
(m)
Weight
(kg)
Price
(Credits)

VII WS No. 19 Mk. II 450 40 21000
VI WS No. 19 Mk. I 400 40 15000
VIII WS No. 19 Mk. III 550 40 22000

Compatible Equipment

Low Noise Exhaust System Class 2 Medium Spall Liner Camouflage Net Class 2 Coated Optics Class 2 Experimental Optics Wear-Resistant Gun Laying Drive Improved Configuration Venting System Innovative Loading System Enhanced Gun Laying Drive Class 2 Improved Hardening Class 2 Additional Grousers Class 2 Modified Configuration Class 2 Improved Rotation Mechanism Class 2 Improved Aiming Class 2 Improved Ventilation Class 2 Binocular Telescope Class 2 Gun Rammer Class 2 Turbocharger Class 2 

Compatible Consumables

Automatic Fire Extinguisher Natural Cover Optical Calibration Aim Tuning Experienced Firefighters 100-octane Gasoline 105-octane Gasoline Manual Fire Extinguisher Pre-Battle Maintenance Vent Purge Large First Aid Kit Large Repair Kit Duty Comes First Shell Organizer Orderly Ammo Rack Focus on Target Pudding and Tea Increased Focus Small First Aid Kit Small Repair Kit Gearbox Intricacy Steady Hand Combat Course 


Player Opinion

Pros and Cons

Pros:


  • Armor is stronger versus the Churchill I, but has no slope, so angling is a must
  • Turret Armor is much better than before; Not as easily penned as the Churchill I's turret
  • Between the RoF and the OK penetration, the top 77 mm gun is far from the best, but acceptable
  • 960 HP pool puts it in 2nd place behind only the O-I for biggest HP pool
  • Top Gun is quite accurate and aims fairly quick; good at sniping or brawling


Cons:


  • Even more slow and cumbersome than its little brother
  • Frontal armor is littered with weakspots; Turret roof gets overmatched by any 60+ mm gun
  • Penetration is mediocre at best; Alpha damage is nothing to gloat over either
  • The spaced armor on the tracks count for HP damage when penned from the front
  • Struggles with awful gun depression like the Churchill I


Performance

Quite possibly the worst tank in the game, the upgraded version of the Churchill I has more armor than the previous heavy tank. However, the speed of this tank is even slower than its predecessor. Even the infamous Maus has more speed. When playing this tank, always angle this tank a bit to the right at about 32 degrees. This will cover the frontal weak spot for the tank and also increases the frontal armor. If you are playing stock, play like the Matilda; Use your aim time and fast reload to suppress any enemies you meet. If you are playing with the 75 mm Vickers HV, play like a Churchill I, only a bit slower. The 77 mm will slow you down more, but you need the extra penetration and damage. Focus mostly on heavy mediums and light heavies, and aim at their weakspots, because your penetration and damage will do less than expected in higher tier battles.

Generally in a game of its tier, Churchill VII drivers should try to defend or push chokepoints, streets and valleys. They should not try to get onto higher ground due to their horrible gun depression. They should be very wary of getting isolated from their friendlies. When the Churchill VII is the top tank of the game. Let her rip. Due to the heaviness of the armor, basically nothing can get through the tank and if one is careful not to be flanked by enemies, they should be able to directly affect the outcome of the battle and rip the enemy team apart.

Once a player commits this tank to a path or area it can be difficult to adapt to the changing battle because of the Churchill VII's terrible speed and very poor maneuverability. Instead, the player should consider the paths their allies choose and either provide support to one side or cover a weak spot in the line. Be extremely careful about getting isolated though.

When placed into higher tier games, the Churchill VII has to rely on placement and team support. As its speed and firepower are extremely limited against most tier 8 tanks, utilize flanking positions by covering positions from the side. Stay at a distance and use the superior accuracy of the 77mm OQF to lay down fire against enemy tanks. As the 77mm OQF will be able to penetrate the sides of most targets, it will provide high DPM support for allies. Try not to get spotted, and or be in the open as enemy tanks and artillery will have little trouble getting through the non-slopped armor. Use its armor as a final resort against higher tier heavy tanks, by side scrapping and baiting shots into your tracks. In higher tier games the Churchill VII has limited options, but in the correct position its sheer DPM can provide large amounts of damage. Like most tanks, if caught in the wrong position there is very little chance of survival against higher tier opponents due to its low speed and health compared to tier 8 tanks.

Note that when coming around corner cover, such as buildings or rocks, even taking the shortest route will expose your tracks and sides for at least several seconds before you can get gun around the corner. If you are tracked before your gun gets around the corner, you're dead. Instead, try to make large turns or angle around the turn so that the enemy sees as little of your sides as possible and your frontal armor is quickly brought to bear. Alternatively, you may drive to the corner, point your tank to the corner and back up and out, using the well armored and high angled side to defend the tank against retaliation. This also protects your tracks and weak points from damage.


Early Research

  • The 75 mm Vickers HV Gun, Bedford Twin-Six Engine, and WS No. 19 Mk. III Radio should already be researched from the Churchill I, and should be mounted immediately.
  • Research the suspension in first and immediately after the turret for thicker armor.
  • With these modules mounted, you have two choices: If you don't mind being even slower but tougher, mount the stock engine and mount the upgraded turret. Or else, research the Churchill VII suspension.
  • Finally research the OQF 77 mm Gun Mk. II Gun.


Suggested Equipment


Improved VentilationTank Gun Rammer Enhanced Gun Laying Drive Toolbox 


Gallery

Historical Info

In the Mark VII, the driver had two periscopes as well as a vision port in the hull front that could be opened. The hull gunner had a single periscope as well as the sighting telescope on the BESA mounting. In the turret the gunner and loader each had single periscope and the commander had two fitted in his hatch cupola.

The armour on the Churchill, often considered its most important feature, was originally specified to a minimum of 16 millimetres (0.63 in) and a maximum of 102 millimetres (4.0 in); this was increased with the Mk VII to a range from 25 millimetres (0.98 in) to 152 millimetres (6.0 in). Though this armour was considerably thicker than its rivals (including the German Tiger I tank, but not the Tiger II) it was not sloped, reducing its effectiveness. Earlier models were given extra armour by the expedient of welding extra plates on.

On the Mark VII, the hull front armour was made up of a lower angled piece of 5.5 in (140 mm), a nearly flat 2.25 in (57 mm) plate and a vertical 6 inch plate. The hull sides, were for the most part, 3.75 in (95 mm). The rear was 2 in (51 mm) and the hull top 0.525 in (13.3 mm). The turret of the Mark VII was 6 in (150 mm) to the front and 3.75 in (95 mm) for the other sides. The turret roof was 0.79 (20 mm) thick. Plate was specified as IT 80, the cast sections as IT 90.


Historical Gallery

Historical Accuracy Errata

The following are consensus errors or inconsistencies which have been identified with the configuration of the vehicle in question and conflict with information available on the public record. The causes for these divergences in the game are normally not disclosed and may be rooted in game balance.

The OQF 77 mm Gun Mk. II gun was only used on the Comet tank, not the Churchill.
  • The 75 mm Vickers HV gun was developed only for the Cromwell tank.


Sources and External Links

UK
Light Tanks ICruiser Mk. I IIM2 IICruiser Mk. II IILight Mk. VIC IIIValentine IIIStuart I-IV IIICruiser Mk. III IVCruiser Mk. IV VCovenanter VIA46 VICrusader VIIGSR 3301 Setter VIIIFV1066 Senlac VIIILHMTV IXGSOR3301 AVR FS XManticore
Medium Tanks IVickers Medium Mk. I IIVickers Medium Mk. II IIIVickers Medium Mk. III IVMatilda IVMatilda LVT IVGrant IVAC 1 Sentinel VCavalier VValiant VSherman III VMatilda Black Prince VISherman Firefly VICromwell VIAC 4 Experimental VICromwell B VISherman VC Firefly VIIComet VIIICenturion Mk. I VIIIFV4202 VIIIChieftain/T95 VIIICenturion Mk. 5/1 RAAC VIIIChimera IXCobra IXCenturion Mk. 7/1 XCenturion Action X
Heavy Tanks VChurchill I VExcelsior VIChurchill VII VITOG II* VIIBlack Prince VIIFV201 (A45) VIIICharlemagne VIIICaliban VIIIGonsalo VIIICaernarvon VIIICaernarvon Action X IXFV4201 Chieftain Proto IXConqueror XFV215b XSuper Conqueror XT95/FV4201 Chieftain
Tank Destroyers IIUniversal Carrier 2-pdr IVValentine AT IVAlecto VArcher VAT 2 VIChurchill Gun Carrier VIAchilles VIAT 8 VIExcalibur VIIChallenger VIIAT 15A VIIAT 7 VIIIGSOR 1008 VIIIAT 15 VIIICharioteer VIIITurtle Mk. I IXTortoise IXFV4004 Conway XFV215b (183) XFV4005 Stage II XFV217 Badger
Self-Propelled Artillery IILoyd Gun Carriage IIISexton II IIISexton I IVBirch Gun VBishop VIFV304 VIICrusader 5.5-in. SP VIIIFV207 IXFV3805 XConqueror Gun Carriage
Heavy Tanks
USA VT14 VT1 Heavy Tank VIPawlack Tank VIM6 VIIKing Tiger (Captured) VIIM-II-Y VIIT29 VIIIChrysler K VIIIChrysler K GF VIIIT26E5 VIIIT26E5 Patriot VIIIM54 Renegade VIIIT77 VIIIM-III-Y VIIIM-IV-Y VIIIM6A2E1 VIIIT32 VIIIT34 VIIIT34 B IXAE Phase I IXConcept 1B IXM-VI-Y IXM103 IXT54E1 XM-V-Y XT110E5 XT57 Heavy Tank
UK VChurchill I VExcelsior VIChurchill VII VITOG II* VIIBlack Prince VIIFV201 (A45) VIIICharlemagne VIIICaliban VIIIGonsalo VIIICaernarvon VIIICaernarvon Action X IXFV4201 Chieftain Proto IXConqueror XFV215b XSuper Conqueror XT95/FV4201 Chieftain
Germany IVPz.Kpfw. B2 740 (f) IVDurchbruchswagen 2 VITiger 131 VIVK 30.01 (P) VIVK 36.01 (H) VIIVK 45.03 VIITiger I VIITiger (P) VIIIVK 100.01 (P) VIIIVK 168.01 (P) VIIIVK 168.01 Mauerbrecher VIIIVK 75.01 (K) VIIIE 75 TS VIIILöwe VIIITiger II VIIIVK 45.02 (P) Ausf. A IXE 75 IXMäuschen IXVK 45.02 (P) Ausf. B XE 100 XPz.Kpfw. VII XMaus XVK 72.01 (K)
France IVB1 VBDR G1 B VIARL 44 VIIAMX M4 mle. 45 VIIIAMX 50 100 VIIIAMX M4 mle. 49 VIIIAMX M4 mle. 49 Liberté VIIIAMX 65 t VIIISomua SM VIIIFCM 50 t IXAMX 50 120 IXLorraine 50 t IXAMX M4 mle. 51 XAMX 50 B XAMX M4 mle. 54
USSR VChurchill III VKV-220-2 VKV-220-2 Beta Test VKV-1 VKV-1 shielded VIKV-1S VIKV-2 VIKV-2 (R) VIKV-85 VIObject 244 VIT-150 VIIIS VIIKV-3 VIIKV-122 VIIIS-2M VIIIS-2 shielded VIIIS-2 VIIIIS-3 VIIIIS-6 VIIIIS-6 B VIIIKV-5 VIIIKV-4 VIIIIS-5 (Object 730) VIIIIS-3A VIIIIS-3A Peregrine VIIIKirovets-1 VIIIKV-4 Kreslavskiy VIIIObject 252U Defender VIIIObject 252U VIIIIS-M VIIIObject 703 Version II VIIIIS-2-II IXT-10 IXObject 777 Version II IXObject 257 IXObject 705 IXIS-3-II IXST-I XIS-4 XIS-7 XObject 260 XObject 705A XObject 277 XObject 279 early XST-II XObject 780
China VIIIS-2 VIIIWZ-111 VIIIWZ-111 Alpine Tiger VIII110 VIII112 IXWZ-111 model 1-4 IXWZ-114 X113 X113 Beijing Opera XWZ-111 model 5A XWZ-111 Qilin
Japan IIIType 91 Heavy IVType 95 Heavy VO-I Experimental VIHeavy Tank No. VI VIO-I VIIO-Ni VIIIO-Ho IXType 4 Heavy XType 5 Heavy
Czechoslovakia VIIŠkoda T 45 VIIVz. 44-1 VIIIŠkoda T 56 VIIITNH 105/1000 IXTNH T Vz. 51 XVz. 55
Sweden VIIIEmil I VIIIEMIL 1951 VIIIBofors Tornvagn IXEmil II IXStrv K XKranvagn
Italy VIICarro d'assalto P.88 VIIIProgetto CC55 mod. 54 VIIIBisonte C45 IXProgetto C50 mod. 66 XRinoceronte
Poland VII45TP Habicha VIII50TP prototyp VIII53TP Markowskiego IX50TP Tyszkiewicza X60TP Lewandowskiego
ja:Tank:GB09 Churchill VII