Welcome to Wargaming.net Wiki!
Variants

Caernarvon

Jump to: navigation, search


Ambox_important.png This article requires additional modification.
The design and/or content of this article do not conform to wiki standards.

Missing Content:

  • Player Opinion: Performance
  • Player Opinion: Equipment
  • Historical Gallery


Caernarvon

AnnoGB11_Caernarvon.png
Battle Tier
1234567891011
Overview
Mouse over "
Well, the ones further down, of course.
" for more information
[Client Values; Actual values in
Specifically, the mismatch in crew values caused by commander's 10% crew skill bonus. Outside of a crew of 1 commander only, 100% crew is a fiction. The client values, given for 100% crew, will normally be taken into battle with 110% crew skill members aside from specific functions, causing their actual performance to deviate from the expected client value. These differences are taken into account in tooltip boxes.
]
2,520,000  Credits Cost
1500400 HP Hit Points
59.18/6026.46/64 t Weight Limit
Crew
  1. Commander
  2. Driver
  3. Gunner
  4. Loader (Radio Operator)
Mobility
650810 hp Engine Power
34.3/12 km/h Speed Limit
2224 deg/s Traverse
10.9830.61 hp/t Power/Wt Ratio
YesYes Pivot
Armor
// mm Hull Armor
152.4/88.9/88.9254/88.9/88.9 mm Turret Armor
Armament


{{#ifeq:ARMOR_PIERCING_CR|ARMOR_PIERCING||


{{#ifeq:HIGH_EXPLOSIVE|ARMOR_PIERCING||


AP/APCR/HE


{{#ifeq:ARMOR_PIERCING_CR|ARMOR_PIERCING||


{{#ifeq:HIGH_EXPLOSIVE|ARMOR_PIERCING||


AP/APCR/HE
Shells


175/3200/75


660/4400/260
Shell Cost
150/150/190280/280/370 HP Damage
171/239/38220/252/47 mm Penetration


|


|}}

|


|}}


13.33 r/m 

Standard Gun

Reload Times
Nominal: 4.5 s
50% Crew: 5.57 s
75% Crew: 4.87 s
100% Crew: 4.31 s
Rammer: 3.88 s
Vents: 4.22 s
Both: 3.79 s
Both and BiA: 3.71 s
Both and Max Crew %: 3.56 s

See Crew, Consumables, or Equipment for more information.


|


|}}

|


|}}


9.23 r/m 

Standard Gun

Reload Times
Nominal: 6.5 s
50% Crew: 8.05 s
75% Crew: 7.03 s
100% Crew: 6.23 s
Rammer: 5.61 s
Vents: 6.09 s
Both: 5.48 s
Both and BiA: 5.36 s
Both and Max Crew %: 5.14 s

See Crew, Consumables, or Equipment for more information.
Rate of Fire


|


|}}

|


|}}


1999.5

Standard Gun

Using Shell Type 1 (150 Damage):


Theoretical Damage Per Minute
Nominal DPM: 1999.5
50% Crew: 1614
75% Crew: 1848
100% Crew: 2085
100% Crew
Vents: 2131.5
Rammer: 2316
Both: 2368.5
Both and BiA: 2421
Both and Max Crew %: 2526

Advantageous Damage Per Minute
First-shot DPM: 2149.5
50% Crew: 1764
75% Crew: 1998
100% Crew: 2235
100% Crew
Rammer: 2466
Vents: 2281.5
Both: 2518.5
Both and BiA: 2571
Both and Max Crew %: 2676

See here, here, or here for more information.

Standard Gun

Using Shell Type 2 (150 Damage):


Theoretical Damage Per Minute
Nominal DPM: 1999.5
50% Crew: 1614
75% Crew: 1848
100% Crew: 2085
100% Crew
Vents: 2131.5
Rammer: 2316
Both: 2368.5
Both and BiA: 2421
Both and Max Crew %: 2526

Advantageous Damage Per Minute
First-shot DPM: 2149.5
50% Crew: 1764
75% Crew: 1998
100% Crew: 2235
100% Crew
Rammer: 2466
Vents: 2281.5
Both: 2518.5
Both and BiA: 2571
Both and Max Crew %: 2676

See here, here, or here for more information.

Standard Gun

Using Shell Type 3 (190 Damage):
With wholly penetrating hits

Theoretical Damage Per Minute
Nominal DPM: 2532.7
50% Crew: 2044.4
75% Crew: 2340.8
100% Crew: 2641
100% Crew
Vents: 2699.9
Rammer: 2933.6
Both: 3000.1
Both and BiA: 3066.6
Both and Max Crew %: 3199.6

Advantageous Damage Per Minute
First-shot DPM: 2722.7
50% Crew: 2234.4
75% Crew: 2530.8
100% Crew: 2831
100% Crew
Rammer: 3123.6
Vents: 2889.9
Both: 3190.1
Both and BiA: 3256.6
Both and Max Crew %: 3389.6

See here, here, or here for more information.


|


|}}

|


|}}


2584.4

Standard Gun

Using Shell Type 1 (280 Damage):


Theoretical Damage Per Minute
Nominal DPM: 2584.4
50% Crew: 2086
75% Crew: 2388.4
100% Crew: 2696.4
100% Crew
Vents: 2758
Rammer: 2996
Both: 3063.2
Both and BiA: 3130.4
Both and Max Crew %: 3267.6

Advantageous Damage Per Minute
First-shot DPM: 2864.4
50% Crew: 2366
75% Crew: 2668.4
100% Crew: 2976.4
100% Crew
Rammer: 3276
Vents: 3038
Both: 3343.2
Both and BiA: 3410.4
Both and Max Crew %: 3547.6

See here, here, or here for more information.

Standard Gun

Using Shell Type 2 (280 Damage):


Theoretical Damage Per Minute
Nominal DPM: 2584.4
50% Crew: 2086
75% Crew: 2388.4
100% Crew: 2696.4
100% Crew
Vents: 2758
Rammer: 2996
Both: 3063.2
Both and BiA: 3130.4
Both and Max Crew %: 3267.6

Advantageous Damage Per Minute
First-shot DPM: 2864.4
50% Crew: 2366
75% Crew: 2668.4
100% Crew: 2976.4
100% Crew
Rammer: 3276
Vents: 3038
Both: 3343.2
Both and BiA: 3410.4
Both and Max Crew %: 3547.6

See here, here, or here for more information.

Standard Gun

Using Shell Type 3 (370 Damage):
With wholly penetrating hits

Theoretical Damage Per Minute
Nominal DPM: 3415.1
50% Crew: 2756.5
75% Crew: 3156.1
100% Crew: 3563.1
100% Crew
Vents: 3644.5
Rammer: 3959
Both: 4047.8
Both and BiA: 4136.6
Both and Max Crew %: 4317.9

Advantageous Damage Per Minute
First-shot DPM: 3785.1
50% Crew: 3126.5
75% Crew: 3526.1
100% Crew: 3933.1
100% Crew
Rammer: 4329
Vents: 4014.5
Both: 4417.8
Both and BiA: 4506.6
Both and Max Crew %: 4687.9

See here, here, or here for more information.
Damage Per Minute


|


|}}


0.34 m 

With 50% Crew: 0.421 m
With 75% Crew: 0.368 m
With 100% Crew: 0.326 m
With BiA: 0.319 m
With BiA and Vents: 0.312 m
Maximum possible: 0.299 m

For more details, see Crew


|


|}}


0.34 m 

With 50% Crew: 0.421 m
With 75% Crew: 0.368 m
With 100% Crew: 0.326 m
With BiA: 0.319 m
With BiA and Vents: 0.312 m
Maximum possible: 0.299 m

For more details, see Crew
Accuracy


|


|}}


2.3 s 

With 50% Crew: 2.849 s
With 75% Crew: 2.488 s
With 100% Crew: 2.205 s
With GLD: 2.005 s
With BiA: 2.157 s
With BiA and Vents: 2.11 s
With both and GLD: 1.918 s
Maximum possible: 1.839 s

For more details, see Crew or Equipment


|


|}}


2.3 s 

With 50% Crew: 2.849 s
With 75% Crew: 2.488 s
With 100% Crew: 2.205 s
With GLD: 2.005 s
With BiA: 2.157 s
With BiA and Vents: 2.11 s
With both and GLD: 1.918 s
Maximum possible: 1.839 s

For more details, see Crew or Equipment
Aim time
2630 deg/s Turret Traverse
360° Gun Arc
-10°/+18°-10°/+18° Elevation Arc
7050 rounds Ammo Capacity
General
2020 % Chance of Fire


370 m 

With 50% Crew: 290.7 m
With 75% Crew: 330.4 m
With 100% Crew: 370 m
With Recon and Situational Awareness: 388.7 m
With Coated Optics: 407 m
With Binocular Telescope: 462.5 m
Maximum possible: 529.7 m

For more details, see Skills or Equipment


400 m 

With 50% Crew: 314.3 m
With 75% Crew: 357.2 m
With 100% Crew: 400 m
With Recon and Situational Awareness: 420.2 m
With Coated Optics: 440 m
With Binocular Telescope: 500 m
Maximum possible: 572.6 m

For more details, see Skills or Equipment
View Range


|


|}}


550 m 

With 50% Crew: 432.1 m
With 75% Crew: 491.1 m
With 100% Crew: 550 m
With 100% Signal Boost: 660 m
When affected by 100% Relaying: 605 m
Maximum possible: 791.4 m

For more details, see Skills or Equipment


|


|}}


750 m 

With 50% Crew: 589.3 m
With 75% Crew: 669.7 m
With 100% Crew: 750 m
With 100% Signal Boost: 900 m
When affected by 100% Relaying: 825 m
Maximum possible: 1079.2 m

For more details, see Skills or Equipment
Signal Range
Values are Stock - click for Top


VIII

AnnoGB11_Caernarvon.png

2520000

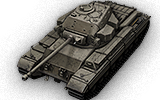
The Caernarvon is a British tier 8 heavy tank.

Development of this infantry support tank started in 1944. The first prototype was ready for trials in 1952. A total of 21 tanks were manufactured but never entered service. Some of the vehicles were later converted into Conqueror heavy tanks.

A big change in the British heavy tank tree, the Caernarvon marks the beginning of the "universal tank" part of the tree. Therefore, its mobility is much better than that of the Black Prince. However the armor is not as thick. Even so, it is sloped in a few places, which is something previous tanks lacked. The top gun is an improvement of the one from its predecessor in terms of aim time, accuracy and rate of fire.

The Caernarvon leads to the Conqueror.

Modules / Available Equipment and Consumables

Modules

Ico_gun_alpha.png

Guns

Tier Gun Penetration
(mm)
Damage
(HP)
Rate of fire
(rounds/minute)
Dispersion
(m/100m)
Aiming time
(s)
Weight
(kg)
Price
(Credits)

VII OQF 17-pdr Gun Mk. VII 171/239/38 150/150/190 14.29 0.34 1.9 826 70000
VIII OQF 32-pdr Gun Mk. II 220/252/47 280/280/370 9.23 0.34 2.3 2972 125000

Ico_engine_alpha.png

Engines

Tier Engine Engine Power
(hp)
Chance of Fire on Impact
(%)
Weight
(kg)
Price
(Credits)

V Rolls-Royce Meteor Mk. IVB 650 20 744 16000
IX Rolls-Royce Meteor M120 810 20 744 92000
IX Rolls-Royce Meteor Mk. IVC 750 20 744 84000

Ico_suspension_alpha.png

Suspensions

Tier Suspension Load Limit
(т)
Traverse Speed
(gr/sec)
Rmin Weight
(kg)
Price
(Credits)

VII FV221 60 22 0 12000 20200
VIII FV221A 64 24 0 12000 30500

Ico_radio_alpha.png

Radios

Tier Radio Signal Range
(m)
Weight
(kg)
Price
(Credits)

VIII WS No. 22 700 40 25000
VIII WS No. 19 Mk. III 550 40 22000
X SR C42 750 40 54000

Compatible Equipment

Low Noise Exhaust System Class 1 Vertical Stabilizer Class 1 Heavy Spall Liner Camouflage Net Class 2 Coated Optics Class 1 Stabilizing Equipment System Experimental Optics Wear-Resistant Gun Laying Drive Improved Configuration Venting System Innovative Loading System Enhanced Gun Laying Drive Class 1 Improved Hardening Class 1 Additional Grousers Class 1 Modified Configuration Class 1 Improved Rotation Mechanism Class 1 Improved Aiming Class 1 Improved Ventilation Class 1 Binocular Telescope Class 1 Gun Rammer Class 1 Turbocharger Class 1 

Compatible Consumables

Stabilizer Greasing Automatic Fire Extinguisher Natural Cover Optical Calibration Aim Tuning Experienced Firefighters 100-octane Gasoline 105-octane Gasoline Manual Fire Extinguisher Pre-Battle Maintenance Vent Purge Large First Aid Kit Large Repair Kit Duty Comes First Shell Organizer Orderly Ammo Rack Focus on Target Pudding and Tea Increased Focus Small First Aid Kit Small Repair Kit Gearbox Intricacy Steady Hand Combat Course 


Player Opinion

Pros and Cons

Pros:


  • Good gun depression
  • Good RoF combined with reasonable Penetration
  • Improved speed
  • Good View Range
  • Ammo price is relatively low


Cons:


  • Traverse speed is bad
  • Bad traverse speed causes the back or the sides of the tank hull to be vulnerable with its low armor.
  • Armor is not sloped on many places
  • Ammo rack is incredibly weak
  • Low Alpha damage compared to the other tier 8 heavys


Gallery

Historical Info

Caernarvon was a British heavy tank of the post-war era. It was developed in a post war period to rival the Soviet IS-3 heavy tank. Compared to Centurion who carried 20 ponder gun, Caernarvon was equipped with a much more powerfull 120 mm gun. Its mail role was to provide long range anti-tank support for Centurion tanks. They were issued at nine for each regiment in Germany; usually grouped in three tank troops.

Development history

The chassis was from the A45 Infantry Support Tank, started in 1944 shortly after that of the A41 Centurion. After the war the project was relocated to that of the "Universal Tank" design of the FV 200 series. The 200 series was to have used a common hull for all uses (self-propelled artillery, armoured personnel carrier, three varieties of tank, etc.). One tank type was to be the heavy FV 201 of 55 tonnes, armed with an 83.4 mm gun.

In 1949 it was decided to bring the armament up to 120 mm. As this delayed the project, in 1952 the FV 201 hull was combined with a 17 pounder-armed Centurion Mk 2 turret to give the FV 221 Caernarvon Mark I. Twenty-one were built with the Mk III 20 pounder turret as the Caernavon Mk II. The FV 221 may originally have been intended to be the "Main Battle Tank" member of the FV 201 series, but with the success of the A41 Centurion such a vehicle was no longer required. In either event, the Caernarvon was only used for chassis development work serving in troop trials. In 1955 the first Conqueror was produced. Twenty Mark 1 and 165 Mark 2 Conquerors were built including conversions of Caernavon MkIIs. Production continued until 1959. It had lost much enthusiasm once the Centurion was upgraded to an L7 105 mm gun.

The gun design was American, the same as used on the US M103 heavy tank; with separate charge and projectile, as would also be the case in the Chieftain that followed. The charge was not bagged but in a brass cartridge, which offered some safety advantages, but reduced shell capacity to 35.The armour was very heavy for the time, especially in the front, where it was seven inches (178 mm) in the horizontal plane. Unfortunately, this, along with the weight of the huge turret required to house the large gun and the very large hull volume, made the vehicle very heavy, giving it a relatively low top speed and making it mechanically unreliable. Also, few bridges could support its weight. However, rather like the Second World War Churchill tank, the Conqueror had exceptional terrain handling characteristics and proved to be as capable cross country as the lighter (and on paper slightly faster) Centurion tank.

One feature of particular note was the rotating commander's cupola, which was at the heart of the Conqueror's fire control system, advanced for its time. The commander could align the cupola on a target independently of the turret, measure the range with a Coincidence rangefinder, and then direct the gunner on to the new lay mechanically indicated to him by the cupola. In theory, when the gunner traversed to the new lay he would find the target already under his sights, ready to be engaged. Meanwhile, the commander was free to search for the next target. (The Soviet bloc also used similar devices, such as the TPKU-2 and TKN-3, on all of their post–World War II tanks though theirs did not use a rangefinder.) The system may have been inspired by a similar device, without range finder, installed in WWII German Panzers which was apparently highly successful, but was not repeated in subsequent tanks until an updated electronic version of the same idea appeared in the American M60A2 variant of the Patton series.


UK
Light Tanks ICruiser Mk. I IIM2 IICruiser Mk. II IILight Mk. VIC IIIValentine IIIStuart I-IV IIICruiser Mk. III IVCruiser Mk. IV VCovenanter VIA46 VICrusader VIIGSR 3301 Setter VIIIFV1066 Senlac VIIILHMTV IXGSOR3301 AVR FS XManticore
Medium Tanks IVickers Medium Mk. I IIVickers Medium Mk. II IIIVickers Medium Mk. III IVMatilda IVMatilda LVT IVGrant IVAC 1 Sentinel VCavalier VValiant VSherman III VMatilda Black Prince VISherman Firefly VICromwell VIAC 4 Experimental VICromwell B VISherman VC Firefly VIIComet VIIICenturion Mk. I VIIIFV4202 VIIIChieftain/T95 VIIICenturion Mk. 5/1 RAAC VIIIChimera IXCobra IXCenturion Mk. 7/1 XCenturion Action X
Heavy Tanks VChurchill I VExcelsior VIChurchill VII VITOG II* VIIBlack Prince VIIFV201 (A45) VIIICharlemagne VIIICaliban VIIIGonsalo VIIICaernarvon VIIICaernarvon Action X IXFV4201 Chieftain Proto IXConqueror XFV215b XSuper Conqueror XT95/FV4201 Chieftain
Tank Destroyers IIUniversal Carrier 2-pdr IVValentine AT IVAlecto VArcher VAT 2 VIChurchill Gun Carrier VIAchilles VIAT 8 VIExcalibur VIIChallenger VIIAT 15A VIIAT 7 VIIIGSOR 1008 VIIIAT 15 VIIICharioteer VIIITurtle Mk. I IXTortoise IXFV4004 Conway XFV215b (183) XFV4005 Stage II XFV217 Badger
Self-Propelled Artillery IILoyd Gun Carriage IIISexton II IIISexton I IVBirch Gun VBishop VIFV304 VIICrusader 5.5-in. SP VIIIFV207 IXFV3805 XConqueror Gun Carriage
Heavy Tanks
USA VT14 VT1 Heavy Tank VIPawlack Tank VIM6 VIIKing Tiger (Captured) VIIM-II-Y VIIT29 VIIIChrysler K VIIIChrysler K GF VIIIT26E5 VIIIT26E5 Patriot VIIIM54 Renegade VIIIT77 VIIIM-III-Y VIIIM-IV-Y VIIIM6A2E1 VIIIT32 VIIIT34 VIIIT34 B IXAE Phase I IXConcept 1B IXM-VI-Y IXM103 IXT54E1 XM-V-Y XT110E5 XT57 Heavy Tank
UK VChurchill I VExcelsior VIChurchill VII VITOG II* VIIBlack Prince VIIFV201 (A45) VIIICharlemagne VIIICaliban VIIIGonsalo VIIICaernarvon VIIICaernarvon Action X IXFV4201 Chieftain Proto IXConqueror XFV215b XSuper Conqueror XT95/FV4201 Chieftain
Germany IVPz.Kpfw. B2 740 (f) IVDurchbruchswagen 2 VITiger 131 VIVK 30.01 (P) VIVK 36.01 (H) VIIVK 45.03 VIITiger I VIITiger (P) VIIIVK 100.01 (P) VIIIVK 168.01 (P) VIIIVK 168.01 Mauerbrecher VIIIVK 75.01 (K) VIIIE 75 TS VIIILöwe VIIITiger II VIIIVK 45.02 (P) Ausf. A IXE 75 IXMäuschen IXVK 45.02 (P) Ausf. B XE 100 XPz.Kpfw. VII XMaus XVK 72.01 (K)
France IVB1 VBDR G1 B VIARL 44 VIIAMX M4 mle. 45 VIIIAMX 50 100 VIIIAMX M4 mle. 49 VIIIAMX M4 mle. 49 Liberté VIIIAMX 65 t VIIISomua SM VIIIFCM 50 t IXAMX 50 120 IXLorraine 50 t IXAMX M4 mle. 51 XAMX 50 B XAMX M4 mle. 54
USSR VChurchill III VKV-220-2 VKV-220-2 Beta Test VKV-1 VKV-1 shielded VIKV-1S VIKV-2 VIKV-2 (R) VIKV-85 VIObject 244 VIT-150 VIIIS VIIKV-3 VIIKV-122 VIIIS-2M VIIIS-2 shielded VIIIS-2 VIIIIS-3 VIIIIS-6 VIIIIS-6 B VIIIKV-5 VIIIKV-4 VIIIIS-5 (Object 730) VIIIIS-3A VIIIIS-3A Peregrine VIIIKirovets-1 VIIIKV-4 Kreslavskiy VIIIObject 252U Defender VIIIObject 252U VIIIIS-M VIIIObject 703 Version II VIIIIS-2-II IXT-10 IXObject 777 Version II IXObject 257 IXObject 705 IXIS-3-II IXST-I XIS-4 XIS-7 XObject 260 XObject 705A XObject 277 XObject 279 early XST-II XObject 780
China VIIIS-2 VIIIWZ-111 VIIIWZ-111 Alpine Tiger VIII110 VIII112 IXWZ-111 model 1-4 IXWZ-114 X113 X113 Beijing Opera XWZ-111 model 5A XWZ-111 Qilin
Japan IIIType 91 Heavy IVType 95 Heavy VO-I Experimental VIHeavy Tank No. VI VIO-I VIIO-Ni VIIIO-Ho IXType 4 Heavy XType 5 Heavy
Czechoslovakia VIIŠkoda T 45 VIIVz. 44-1 VIIIŠkoda T 56 VIIITNH 105/1000 IXTNH T Vz. 51 XVz. 55
Sweden VIIIEmil I VIIIEMIL 1951 VIIIBofors Tornvagn IXEmil II IXStrv K XKranvagn
Italy VIICarro d'assalto P.88 VIIIProgetto CC55 mod. 54 VIIIBisonte C45 IXProgetto C50 mod. 66 XRinoceronte
Poland VII45TP Habicha VIII50TP prototyp VIII53TP Markowskiego IX50TP Tyszkiewicza X60TP Lewandowskiego
ja:Tank:GB11 Caernarvon