Conqueror
| Revision as of 18:00, 9 May 2014 Jiri_Starrider:na moved page Tank:Conqueror to Tank:GB12 Conqueror: Correct naming | Revision as of 23:28, 26 July 2014 not really "good alpha" on tier 9 | |||
| Line 5: | Line 5: | |||
| |Gallery= | |Gallery= | |||
| ? | ||||
| |InTheGame_pros= | |InTheGame_pros= | |||
| ? | * High | + | * High rate of fire and damage-per-minute | |
| ? | * | + | * Very accurate gun (0.33) | |
| ? | * | + | * Superb aiming time for a heavy tank (1.9 seconds) | |
| * Decent maneuverability (for a heavy) with top engine | * Decent maneuverability (for a heavy) with top engine | |||
| * Large health pool | * Large health pool | |||
| ? | * Introduces "HESH" shells ( | + | * Introduces "HESH" shells (120 mm pen, 515 alpha HE rounds); can cause a lot of damage to weakly armoured targets | |
| ? | + | * High penetration APCR round | ||
| |InTheGame_cons= | |InTheGame_cons= | |||
| ? | * Weak armour is actually worse than the Caernavon | + | * Weak armour that is actually worse than the Caernavon's, 2nd turret has weak 'cheeks' and is highly unlikely to bounce anything from a tier 9 or 10 tank | |
| ? | * | + | * Large and weak lower plate with same vulnerable frontal ammo rack as the Caernavon and Centurion line tanks | |
| ? | * | + | * Very large, long and wide with high profile, vulnerable to artillery | |
| * Awful stock grind; you are literally a Caernavon with tier 9 MM until you unlock the suspension, turret, and top gun | * Awful stock grind; you are literally a Caernavon with tier 9 MM until you unlock the suspension, turret, and top gun | |||
| ? | * Second turret | + | * Second turret has worse gun depression than first one | |
| ? | + | |||
| |InTheGame_performance= | |InTheGame_performance= | |||
| Line 32: | Line 30: | |||
| On balance, the Conqueror is a good tank and in the right hands is more than capable of turning the tide of battle or facing any of its tier 9 counterparts. The L1A1 gun is its strongest asset, and will not fail to reward those drivers who can protect the tank's weaknesses. | On balance, the Conqueror is a good tank and in the right hands is more than capable of turning the tide of battle or facing any of its tier 9 counterparts. The L1A1 gun is its strongest asset, and will not fail to reward those drivers who can protect the tank's weaknesses. | |||
| ? | ||||
| |InTheGame_research= | |InTheGame_research= | |||
| If you can afford to buy the Enhanced Springs to increase the load capacity, this will allow you to work through the upgraded turret towards the top gun as soon as possible. The 20-pdr Type B gives a great rate of fire, particularly on the second turret, but the low penetration and alpha means you will struggle to make the most of the 2300dpm, particularly in higher tier matches. | If you can afford to buy the Enhanced Springs to increase the load capacity, this will allow you to work through the upgraded turret towards the top gun as soon as possible. The 20-pdr Type B gives a great rate of fire, particularly on the second turret, but the low penetration and alpha means you will struggle to make the most of the 2300dpm, particularly in higher tier matches. | |||
| ? | ||||
| Once you have the L1A1, the Conqueror really comes alive and feels much more like an end tier heavy tank should. The gun is fast, accurate and deals a respectable amount of damage for a tier 9 tank. | Once you have the L1A1, the Conqueror really comes alive and feels much more like an end tier heavy tank should. The gun is fast, accurate and deals a respectable amount of damage for a tier 9 tank. | |||
| ? | ||||
| After researching the L1A1, you might want to upgrade the suspension to free up an extra equipment slot (if you didn't do suspension first). Then finally grind the top engine, assuming you already researched the Meteor M120 in the Caernarvon. | After researching the L1A1, you might want to upgrade the suspension to free up an extra equipment slot (if you didn't do suspension first). Then finally grind the top engine, assuming you already researched the Meteor M120 in the Caernarvon. | |||
Revision as of 23:28, 26 July 2014
Conqueror
Mouse over "
[Client Values; Actual values in
| 3,600,000 |
| 1850470 HP Hit Points |
| 65.13/65.530.54/68 t Weight Limit |
- Commander
- Gunner
- Driver
- Loader (Radio Operator)
| 650950 hp Engine Power |
| 34.3/12 km/h Speed Limit |
| 2426 deg/s Traverse |
| 9.9831.11 hp/t Power/Wt Ratio |
| YesYes Pivot |
| // mm Hull Armor |
| 254/88.9/69.9254/88.9/69.9 mm Turret Armor |
AP/APCR/HE
AP/APCR/HE Shells |
660/4400/260
1060/4400/1200 Shell Cost |
| 280/280/370400/400/515 HP Damage |
| 220/252/47259/326/120 mm Penetration |
|
10.17 r/m ▲
5.31 r/m Standard Gun ▲ Rate of Fire Standard Gun |
|
2847.6 ▲
Standard Gun
▼
Standard Gun
▲
2124 Standard Gun ▲
Standard Gun
▼
Standard Gun
▲ Damage Per Minute Standard Gun |
|
0.33 m ▲
0.33 m With 50% Crew: 0.409 m ▲ Accuracy With 50% Crew: 0.409 m |
| 2.1 s 1.9 s Aim time |
| 3032 deg/s Turret Traverse |
| 360° Gun Arc |
| -10°/+15°-10°/+15° Elevation Arc |
| 5035 rounds Ammo Capacity |
| 2020 % Chance of Fire |
| 400 m 400 m View Range |
| 550 m 750 m Signal Range |
IX
3600000
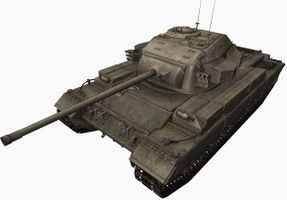
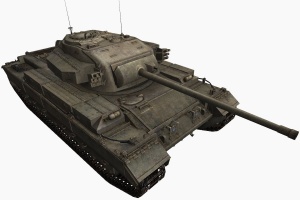
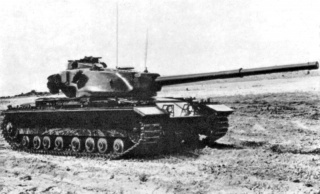
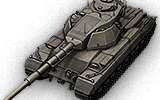
The Conqueror is a British tier 9 heavy tank.
Developed from 1949 through 1952, this tank was intended to confront new Soviet heavy tanks. A total of 185 vehicles were mass-produced from 1955 through 1959.
A potent continuation of the support tank class of heavy British tanks, the Conqueror plays like an overcharged version of the Caernarvon, featuring a significant jump in firing speed and some small improvements to general characteristics. It is unfortunately burdened, however, by having not only the Caernarvon's sub-par hull, but also a second turret that is worse in almost all regards than the Centurion turret it first mounts. Like the Centurions, it is also highly prone to ammo rack damage. However that would appear to simply be the price one has to pay for playing one of the best and most surely damaging support tanks in the game.
The most surprising aspect of this tank is the introduction to HESH shells on its top gun, a nasty surprise for poorly armored tanks, which is basically a High Penetration HE shell which can obliterate any tank in a few shots but it can be costly, and the shell does not benefit from Normalization meaning that its effects can be neutralized if it hits even the tiniest spaced armor.
The Conqueror leads to the Super Conqueror.
Modules / Available Equipment and Consumables
Modules
| Tier | Suspension | Load Limit (т) |
Traverse Speed (gr/sec) |
Rmin | Weight (kg) |
Price (
| |
|---|---|---|---|---|---|---|---|
| VIII | Conqueror Mk. I | 65.5 | 24 | 0 | 12000 | 31500 | |
| IX | Conqueror Mk. II | 68 | 26 | 0 | 12000 | 62000 |
| Tier | Radio | Signal Range (m) |
Weight (kg) |
Price (
| |
|---|---|---|---|---|---|
| VIII | WS No. 22 | 700 | 40 | 25000 | |
| VIII | WS No. 19 Mk. III | 550 | 40 | 22000 | |
| X | SR C42 | 750 | 40 | 54000 |
Compatible Equipment
Compatible Consumables
Player Opinion
Pros and Cons
Pros:
- High rate of fire and damage-per-minute
- Very accurate gun (0.33)
- Superb aiming time for a heavy tank (1.9 seconds)
- Decent maneuverability (for a heavy) with top engine
- Large health pool
Cons:
- Weak armour that is actually worse than the Caernavon's, 2nd turret has weak 'cheeks' and is highly unlikely to bounce anythi
- Large and weak lower plate with same vulnerable frontal ammo rack as the Caernavon and Centurion line tanks
- Very large, long and wide with high profile, vulnerable to artillery
- Awful stock grind; you are literally a Caernavon with tier 9 MM until you unlock the suspension, turret, and top gun
- Second turret has worse gun depression than first one
Performance
The Conqueror can be a fearsome tank once fully upgraded and is a significant improvement over its predecessor. The top L1A1 gun does a respectable amount of damage and the high ROF means that you will often get a second shot in before your enemy has a chance to reload. The decent damage and penetration on the L1A1 will allow you to engage Tier X tanks in high tier matches and still be very effective. It has the same penetration and alpha as the top gun on the M103, but is improved in terms of aiming time, accuracy and rate of fire.
The armour however is weak, and even if you angle your tank, it is unlikely to bounce many shots and is very vulnerable to artillery. While not particularly fast, it is agile enough with the top engine, and so you should use this and your high ROF to deal damage then get back to cover quickly. As top tier it is more than capable of leading the push if it needs to, but assuming a supporting role for a more heavily armoured teammate and moving with a wave will allow you to put down the high DPM whilst protecting your weak hull. The ammo rack is also prone to being damaged, and wet ammo rack is practically a must.
On balance, the Conqueror is a good tank and in the right hands is more than capable of turning the tide of battle or facing any of its tier 9 counterparts. The L1A1 gun is its strongest asset, and will not fail to reward those drivers who can protect the tank's weaknesses.
Early Research
If you can afford to buy the Enhanced Springs to increase the load capacity, this will allow you to work through the upgraded turret towards the top gun as soon as possible. The 20-pdr Type B gives a great rate of fire, particularly on the second turret, but the low penetration and alpha means you will struggle to make the most of the 2300dpm, particularly in higher tier matches.
Once you have the L1A1, the Conqueror really comes alive and feels much more like an end tier heavy tank should. The gun is fast, accurate and deals a respectable amount of damage for a tier 9 tank.
After researching the L1A1, you might want to upgrade the suspension to free up an extra equipment slot (if you didn't do suspension first). Then finally grind the top engine, assuming you already researched the Meteor M120 in the Caernarvon.
Suggested Equipment
Gallery
Historical Info
Development history
The chassis for the new tank was taken from the A45 Infantry Support Tank, started in 1944 shortly after that of the A41 Centurion. After the war the project was relocated to that of the "Universal Tank" design of the FV 200 series. The 200 series was to have used a common hull for all uses (self-propelled artillery, armoured personnel carrier, different varieties of tank, etc.). One tank type was to be the heavy FV 201 of 55 tonnes, armed with an 83.4 mm gun also known as 20 pounder.
In 1949 it was decided to bring the armament up to 120 mm. As this delayed the project, in 1952 the FV 201 hull was combined with a 17 pounder-armed Centurion Mk 2 turret to give the FV 221 Caernarvon Mark I. Twenty-one were built with the Mk III 20 pounder turret as the Caernavon Mk II. The FV 221 may originally have been intended to be the "Main Battle Tank" member of the FV 201 series, but with the success of the A41 Centurion such a vehicle was no longer required. In either event, the Caernarvon was only used for chassis development work serving in troop trials. In 1955 the first Conqueror was produced. Twenty Mark 1 and 165 Mark 2 Conquerors were built including conversions of Caernavon MkIIs. Production continued until 1959. It had lost much enthusiasm once the Centurion was upgraded to an L7 105 mm gun.
The gun design was American, the same as used on the US M103 heavy tank; with separate charge and projectile, as would also be the case in the Chieftain that followed. The charge was not bagged but in a brass cartridge, which offered some safety advantages, but reduced shell capacity to 35 rounds.
The armour was very heavy for the time, especially in the front, where it was seven inches (178 mm) in the horizontal plane. Unfortunately, this, along with the weight of the huge turret required to house the large gun and the very large hull volume, made the vehicle very heavy, giving it a relatively low top speed and making it mechanically unreliable. Also, few bridges could support its weight. However, rather like the Second World War Churchill tank, the Conqueror had exceptional terrain handling characteristics and proved to be as capable cross country as the lighter (and on paper slightly faster) Centurion tank.
One feature of particular note was the rotating commander's cupola, which was at the heart of the Conqueror's fire control system, advanced for its time. The commander could align the cupola on a target independently of the turret, measure the range with a Coincidence rangefinder, and then direct the gunner on to the new lay mechanically indicated to him by the cupola. In theory, when the gunner traversed to the new lay he would find the target already under his sights, ready to be engaged. Meanwhile, the commander was free to search for the next target. (The Soviet bloc also used similar devices, such as the TPKU-2 and TKN-3, on all of their post–World War II tanks though theirs did not use a rangefinder.)
The system may have been inspired by a similar device, without range finder, installed in WII German Panzers which was apparently highly successful, but was not repeated in subsequent tanks until an updated electronic version of the same idea appeared in the American M60A2 variant of the Patton series.
Variants
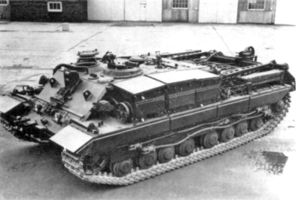
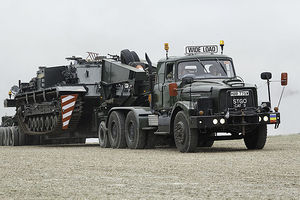
FV 222 Conqueror ARV Mk II The variants of the Conqueror tank and developments directly related to its development are:
FV 214 Conqueror
- Mk I
- Mk II
- Mk II/I/H[verification needed] - rebuilt Caernarvons
- FV 215b
- Design study of Conqueror chassis with limited traverse turret mounting 183mm gun. Wooden mockup produced.
FV 221 Caernarvon
- Mk I – prototype
- Mk II - experimental series, 21 built
FV 222 Conqueror Armoured Recovery Vehicle (ARV)
- Mk I - 8 produced
- Mk II - 20 produced. Weight: 57 tons. Winch capacity: 45 tons (direct pull).
Surviving vehicles
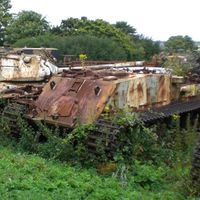
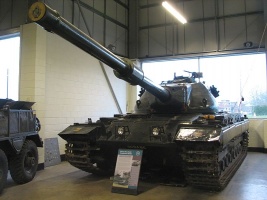
In the United Kingdom, Conqueror tanks are displayed at the Bovington Tank Museum, and the Land Warfare Hall of the Imperial War Museum Duxford. Other tanks are in the collections of the Musée des Blindés in France, the Royal Museum of the Army in Brussels and the Kubinka Tank Museum, Russia. One is privately owned in the United States as part of the Littlefield Collection. There are also two MkII ARVs at the Military History Museum on the Isle of Wight in an unrestored condition. A MkII ARV is held by theREME Museum of Technology, although it is not on display. There used to be a Conqueror at Base Vehicle Depot Ludgershall - a gate guardian named "William". Now believed to be at the Isle of Wight Military Museum. A Conqueror was used at the Amphibious Experimental Establishment AXE, at Instow in North Devon UK, for beach tank recovery practise.
Historical Gallery


