Welcome to Wargaming.net Wiki!
Variants

Comet

Jump to: navigation, search
Revision as of 23:54, 27 December 2012Revision as of 23:16, 11 January 2013
Line 6:Line 6:
  
 |InTheGame_pros= |InTheGame_pros=
?* Good power to weight ratio+* Good power to weight ratio.
?* Decent top speed+* Decent top speed.
?* Low profile+* Low profile.
?* Good second turret+* Second turret mantle can give surprise bounces.
 +* Good accuracy on the move with upgraded gun, turret and vertical stabilizer.
  
 |InTheGame_cons= |InTheGame_cons=
?* Weak armour, especially sides and rear+* Weak armour everyone other than the mantle.
?* Barely adequate gun+* Inadequate gun damage and penetration.
  
 |InTheGame_performance= |InTheGame_performance=

Revision as of 23:16, 11 January 2013


Comet

AnnoGB22_Comet.png
Battle Tier
1234567891011
Overview
Mouse over "
Well, the ones further down, of course.
" for more information
[Client Values; Actual values in
Specifically, the mismatch in crew values caused by commander's 10% crew skill bonus. Outside of a crew of 1 commander only, 100% crew is a fiction. The client values, given for 100% crew, will normally be taken into battle with 110% crew skill members aside from specific functions, causing their actual performance to deviate from the expected client value. These differences are taken into account in tooltip boxes.
]
1,350,500  Credits Cost
1050310 HP Hit Points
30.52/3215.74/34 t Weight Limit
Crew
  1. Commander
  2. Gunner
  3. Driver
  4. Radio Operator
  5. Loader
Mobility
600650 hp Engine Power
51.5/18 km/h Speed Limit
3436 deg/s Traverse
19.6641.3 hp/t Power/Wt Ratio
NoNo Pivot
Armor
// mm Hull Armor
76.2/63.5/57.2101.6/63.5/57.2 mm Turret Armor
Armament


{{#ifeq:ARMOR_PIERCING_CR|ARMOR_PIERCING||


{{#ifeq:HIGH_EXPLOSIVE|ARMOR_PIERCING||


AP/APCR/HE


{{#ifeq:ARMOR_PIERCING_CR|ARMOR_PIERCING||


{{#ifeq:HIGH_EXPLOSIVE|ARMOR_PIERCING||


AP/APCR/HE
Shells


56/2800/56


150/2800/75
Shell Cost
110/110/175140/140/190 HP Damage
91/144/38148/208/38 mm Penetration


|


|}}

|


|}}


20 r/m 

Standard Gun

Reload Times
Nominal: 3 s
50% Crew: 3.72 s
75% Crew: 3.24 s
100% Crew: 2.88 s
Rammer: 2.59 s
Vents: 2.82 s
Both: 2.53 s
Both and BiA: 2.48 s
Both and Max Crew %: 2.38 s

See Crew, Consumables, or Equipment for more information.


|


|}}

|


|}}


15.38 r/m 

Standard Gun

Reload Times
Nominal: 3.9 s
50% Crew: 4.83 s
75% Crew: 4.22 s
100% Crew: 3.74 s
Rammer: 3.37 s
Vents: 3.66 s
Both: 3.29 s
Both and BiA: 3.22 s
Both and Max Crew %: 3.09 s

See Crew, Consumables, or Equipment for more information.
Rate of Fire


|


|}}

|


|}}


2200

Standard Gun

Using Shell Type 1 (110 Damage):


Theoretical Damage Per Minute
Nominal DPM: 2200
50% Crew: 1775.4
75% Crew: 2033.9
100% Crew: 2294.6
100% Crew
Vents: 2346.3
Rammer: 2549.8
Both: 2607
Both and BiA: 2665.3
Both and Max Crew %: 2779.7

Advantageous Damage Per Minute
First-shot DPM: 2310
50% Crew: 1885.4
75% Crew: 2143.9
100% Crew: 2404.6
100% Crew
Rammer: 2659.8
Vents: 2456.3
Both: 2717
Both and BiA: 2775.3
Both and Max Crew %: 2889.7

See here, here, or here for more information.

Standard Gun

Using Shell Type 2 (110 Damage):


Theoretical Damage Per Minute
Nominal DPM: 2200
50% Crew: 1775.4
75% Crew: 2033.9
100% Crew: 2294.6
100% Crew
Vents: 2346.3
Rammer: 2549.8
Both: 2607
Both and BiA: 2665.3
Both and Max Crew %: 2779.7

Advantageous Damage Per Minute
First-shot DPM: 2310
50% Crew: 1885.4
75% Crew: 2143.9
100% Crew: 2404.6
100% Crew
Rammer: 2659.8
Vents: 2456.3
Both: 2717
Both and BiA: 2775.3
Both and Max Crew %: 2889.7

See here, here, or here for more information.

Standard Gun

Using Shell Type 3 (175 Damage):
With wholly penetrating hits

Theoretical Damage Per Minute
Nominal DPM: 3500
50% Crew: 2824.5
75% Crew: 3235.75
100% Crew: 3650.5
100% Crew
Vents: 3732.75
Rammer: 4056.5
Both: 4147.5
Both and BiA: 4240.25
Both and Max Crew %: 4422.25

Advantageous Damage Per Minute
First-shot DPM: 3675
50% Crew: 2999.5
75% Crew: 3410.75
100% Crew: 3825.5
100% Crew
Rammer: 4231.5
Vents: 3907.75
Both: 4322.5
Both and BiA: 4415.25
Both and Max Crew %: 4597.25

See here, here, or here for more information.


|


|}}

|


|}}


2153.2

Standard Gun

Using Shell Type 1 (140 Damage):


Theoretical Damage Per Minute
Nominal DPM: 2153.2
50% Crew: 1738.8
75% Crew: 1990.8
100% Crew: 2245.6
100% Crew
Vents: 2296
Rammer: 2494.8
Both: 2550.8
Both and BiA: 2608.2
Both and Max Crew %: 2720.2

Advantageous Damage Per Minute
First-shot DPM: 2293.2
50% Crew: 1878.8
75% Crew: 2130.8
100% Crew: 2385.6
100% Crew
Rammer: 2634.8
Vents: 2436
Both: 2690.8
Both and BiA: 2748.2
Both and Max Crew %: 2860.2

See here, here, or here for more information.

Standard Gun

Using Shell Type 2 (140 Damage):


Theoretical Damage Per Minute
Nominal DPM: 2153.2
50% Crew: 1738.8
75% Crew: 1990.8
100% Crew: 2245.6
100% Crew
Vents: 2296
Rammer: 2494.8
Both: 2550.8
Both and BiA: 2608.2
Both and Max Crew %: 2720.2

Advantageous Damage Per Minute
First-shot DPM: 2293.2
50% Crew: 1878.8
75% Crew: 2130.8
100% Crew: 2385.6
100% Crew
Rammer: 2634.8
Vents: 2436
Both: 2690.8
Both and BiA: 2748.2
Both and Max Crew %: 2860.2

See here, here, or here for more information.

Standard Gun

Using Shell Type 3 (190 Damage):
With wholly penetrating hits

Theoretical Damage Per Minute
Nominal DPM: 2922.2
50% Crew: 2359.8
75% Crew: 2701.8
100% Crew: 3047.6
100% Crew
Vents: 3116
Rammer: 3385.8
Both: 3461.8
Both and BiA: 3539.7
Both and Max Crew %: 3691.7

Advantageous Damage Per Minute
First-shot DPM: 3112.2
50% Crew: 2549.8
75% Crew: 2891.8
100% Crew: 3237.6
100% Crew
Rammer: 3575.8
Vents: 3306
Both: 3651.8
Both and BiA: 3729.7
Both and Max Crew %: 3881.7

See here, here, or here for more information.
Damage Per Minute


|


|}}


0.41 m 

With 50% Crew: 0.508 m
With 75% Crew: 0.443 m
With 100% Crew: 0.393 m
With BiA: 0.384 m
With BiA and Vents: 0.376 m
Maximum possible: 0.361 m

For more details, see Crew


|


|}}


0.34 m 

With 50% Crew: 0.421 m
With 75% Crew: 0.368 m
With 100% Crew: 0.326 m
With BiA: 0.319 m
With BiA and Vents: 0.312 m
Maximum possible: 0.299 m

For more details, see Crew
Accuracy


|


|}}


1.9 s 

With 50% Crew: 2.354 s
With 75% Crew: 2.055 s
With 100% Crew: 1.822 s
With GLD: 1.656 s
With BiA: 1.782 s
With BiA and Vents: 1.743 s
With both and GLD: 1.584 s
Maximum possible: 1.519 s

For more details, see Crew or Equipment


|


|}}


2.3 s 

With 50% Crew: 2.849 s
With 75% Crew: 2.488 s
With 100% Crew: 2.205 s
With GLD: 2.005 s
With BiA: 2.157 s
With BiA and Vents: 2.11 s
With both and GLD: 1.918 s
Maximum possible: 1.839 s

For more details, see Crew or Equipment
Aim time
4846 deg/s Turret Traverse
360° Gun Arc
-13°/+20°-12°/+20° Elevation Arc
7561 rounds Ammo Capacity
General
2020 % Chance of Fire


360 m 

With 50% Crew: 282.8 m
With 75% Crew: 321.5 m
With 100% Crew: 360 m
With Recon and Situational Awareness: 378.2 m
With Coated Optics: 396 m
With Binocular Telescope: 450 m
Maximum possible: 515.4 m

For more details, see Skills or Equipment


380 m 

With 50% Crew: 298.6 m
With 75% Crew: 339.3 m
With 100% Crew: 380 m
With Recon and Situational Awareness: 399.2 m
With Coated Optics: 418 m
With Binocular Telescope: 475 m
Maximum possible: 544 m

For more details, see Skills or Equipment
View Range


|


|}}


450 m 

With 50% Crew: 363.3 m
With 75% Crew: 416 m
With 100% Crew: 469.3 m
With 100% Signal Boost: 540 m
When affected by 100% Relaying: 495 m
Maximum possible: 675.5 m

For more details, see Skills or Equipment


|


|}}


700 m 

With 50% Crew: 565.1 m
With 75% Crew: 647.2 m
With 100% Crew: 730.1 m
With 100% Signal Boost: 840 m
When affected by 100% Relaying: 770 m
Maximum possible: 1050.8 m

For more details, see Skills or Equipment
Signal Range
Values are Stock - click for Top


VII

AnnoGB22_Comet.png

1350500

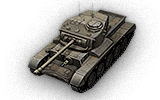
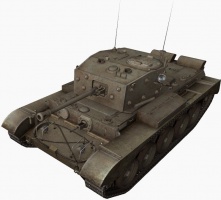
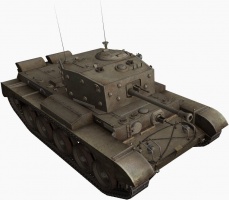
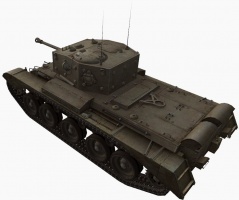
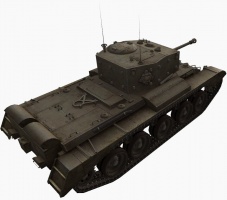
The Comet is a British tier 7 medium tank.

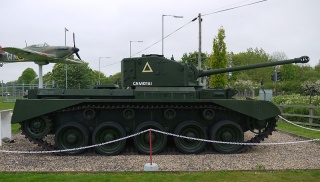
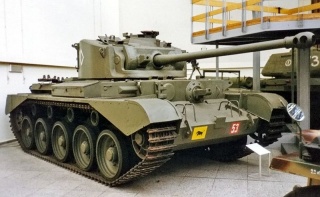
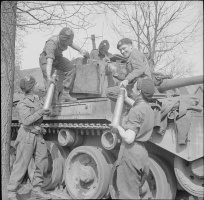
A further development of the Cromwell cruiser tank, this British tank saw service in World War II. A total of 1,186 vehicles were manufactured from September 1944 through to late 1945.

The Comet is a tank well suited for flanking, as its armor is neither good nor bad for its class it wont survive brawls for long periods of time. It sports a couple of advantages over the Cromwell, such as a gun mantlet and lowered profile on the upgraded turret. However, it gets an "almost" inadequate top gun, barely an upgrade over the 75mm HV. What is more, in the footsteps of its predecessor, its handling and speed are somewhat slower, being barely better than those on the Panther and not quite as good as those of the T20. Clever use of flanking tactics and gun depression are necessary to successfully play this tank.

The Comet leads to the Centurion Mk. I.

Modules / Available Equipment and Consumables

Modules

Ico_gun_alpha.png

Guns

Tier Gun Penetration
(mm)
Damage
(HP)
Rate of fire
(rounds/minute)
Dispersion
(m/100m)
Aiming time
(s)
Weight
(kg)
Price
(Credits)

V 3.7-inch Howitzer 47/110/38 370/280/175 8.57 0.51 2.3 393 35000
V 75 mm Gun Mk. V 91/144/38 110/110/175 20 0.39 1.5 500 45000
VII OQF 77 mm Gun Mk. II 148/208/38 140/140/190 15.38 0.34 2.3 681 63000
VI 75 mm Vickers HV 145/202/38 135/135/175 15.38 0.34 2.3 591 50000

Ico_engine_alpha.png

Engines

Tier Engine Engine Power
(hp)
Chance of Fire on Impact
(%)
Weight
(kg)
Price
(Credits)

V Rolls-Royce Meteor 600 20 744 14000
V Rolls-Royce Meteor Mk. IVB 650 20 744 16000

Ico_suspension_alpha.png

Suspensions

Tier Suspension Load Limit
(т)
Traverse Speed
(gr/sec)
Rmin Weight
(kg)
Price
(Credits)

VI A34 32 34 B/2 7000 11690
VII A34A 34 36 B/2 7000 18000

Ico_radio_alpha.png

Radios

Tier Radio Signal Range
(m)
Weight
(kg)
Price
(Credits)

VII WS No. 19 Mk. II 450 40 21000
VIII WS No. 22 700 40 25000
VIII WS No. 19 Mk. III 550 40 22000

Compatible Equipment

Low Noise Exhaust System Class 2 Vertical Stabilizer Class 2 Medium Spall Liner Camouflage Net Class 2 Coated Optics Class 2 Stabilizing Equipment System Experimental Optics Wear-Resistant Gun Laying Drive Improved Configuration Venting System Innovative Loading System Enhanced Gun Laying Drive Class 2 Improved Hardening Class 3 Additional Grousers Class 2 Modified Configuration Class 2 Improved Rotation Mechanism Class 2 Improved Aiming Class 2 Improved Ventilation Class 2 Binocular Telescope Class 2 Gun Rammer Class 2 Turbocharger Class 2 

Compatible Consumables

Stabilizer Greasing Automatic Fire Extinguisher Natural Cover Optical Calibration Aim Tuning Experienced Firefighters 100-octane Gasoline 105-octane Gasoline Manual Fire Extinguisher Pre-Battle Maintenance Vent Purge Large First Aid Kit Large Repair Kit Duty Comes First Shell Organizer Orderly Ammo Rack Focus on Target Pudding and Tea Increased Focus Small First Aid Kit Small Repair Kit Gearbox Intricacy Steady Hand Combat Course 


Player Opinion

Pros and Cons

Pros:


  • Good power to weight ratio.
  • Decent top speed.
  • Low profile.
  • Second turret mantle can give surprise bounces.
  • Good accuracy on the move with upgraded gun, turret and vertical stabilizer.


Cons:


  • Weak armour everyone other than the mantle.
  • Inadequate gun damage and penetration.


Performance

The Comet has a nearly similar playing technique to the Cromwell, although it is not as nimble. It is a mobile medium tank with decent traverse and a good ratio of Horsepowers per Ton which allow you to reach high speeds to assist allies. However, the gun is lacking for its tier; with only 148mm of penetration, it is outclassed by the T20 and Panther. The OQF 77mm is barely adequate on the Churchill Mk. VII, which is a Tier 6, and you will be stuck with it until you can make the step up to the next tier.

Stock, the Comet starts off better than the other Tier 7 mediums, and your upgraded turret allows you to use gun depression tactics with impunity, much like the better American tanks, thanks to your gun mantlet and low profile. It doesn't get much in the way of upgrades though, and ends up significantly weaker for its tier than e.g. the Panther. Still, it is maneuverable, and appears to have fairly good camouflage characteristics. Use this to your advantage at all times.


Suggested Equipment


Tank Gun Rammer Vertical Stabilizer Coated Optics Toolbox 


Gallery

Historical Info

Combat experience against the Germans in the Western Desert Campaign demonstrated to the British many shortcomings with their cruiser tanks. Hence a request was made in 1941 to the Nuffield Organisation and Leyland Motors Ltd for a new heavy cruiser tank that could achieve battle superiority over German models. For reasons of economy and efficiency, it had to use as many components as possible from the current A15 Cruiser tank Mk VI Crusader tank.

The initial designs submitted were the A24 Cruiser Tank Mk VII Cavalier tank from Nuffield powered by a Nuffield-Liberty L-12 engine and the A27L Cruiser tank Mk VII Centaur tank from Leyland, which was also powered by the Liberty L-12 but would be able to use the more powerful Rolls-Royce Meteor when it became available.

The Cruiser tank Mk VII A27M Cromwell was the third parallel development to the Cavalier and Centaur. The Cromwell's Meteor engine proved to be very reliable and gave the Cromwell good mobility, but some problems did appear. The tank was prone to throwing its tracks if track tension was not maintained properly or if it turned at too high a speed or too sharply. There were also some problems with suspension breakage, partly due to the Cromwell's high speed.

A 17 pounder version of the Cromwell, the A30 Cruiser Mk VIII Challenger tank, was under development. To handle the large gun, the Cromwell hull had to be lengthened and a large turret set on top. Due to the slow production of Challengers, the Sherman Firefly (a Sherman tank fitted with the 17 pounder gun) conversion received official support. Until the Challenger was available, one Firefly would be issued to each Cromwell troop (giving three Cromwells and one Sherman Firefly); but this was unsatisfactory due to the different maintenance requirements and associated supply complication of two tank models, as well as the performance difference between Cromwell and Sherman.

A34

With the A34 (the General Staff specification), later named Comet, the tank designers opted to correct some of the Cromwell's flaws (the track shedding and broken suspension problems) and enhance the Cromwell's main strengths, low height and high speed. Originally, it had been expected that the tank would use a new gun from Vickers: the "High Velocity 75mm". However, as designed, the gun would not fit into the turret size available. So the gun was changed to a different gun, the "77mm HV". This gun used the same calibre (76.2 mm) projectile as the 17-pounder but the shell casing was from the older QF 3 inch 20 cwt gun loaded to higher pressures. The resulting round was completely different to 17-pounder ammunition. It had a lower muzzle velocity than the 17-pounder but the ammunition was much more compact and more easily stored and handled within the tank. This made it possible to mount the gun on a smaller turret ring - the Challenger turret had been so large to allow space for two loaders - without making the hull wider. Several other improvements were made: armour protection was increased, the hull and turret were welded[2] with a cast gun mantlet, ammunition was stored in armoured bins, the suspension was strengthened, return rollers were added and the turret was electrically traversed (a design feature taken from the Churchill tank), with a generator powered by the main engine rather than the hydraulic system of the Cromwell.

Armour on the Comet ranged from 32 mm to 74 mm on the hull, while the turret was from 57 to 102 mm.

The Comet tank's top speed was limited from the Cromwell's 40+ mph to a slower, but respectable 32 mph (51 km/h) to preserve suspension and engine components and to reduce track wear.

The mild steel prototype was ready in February 1944 and entered trials. Although concerns about the hull gunner and belly armour were put to one side (to avoid redesign), there was still sufficient delay caused by minor modifications and changes that production models did not begin to be delivered until September 1944. Intended to be in service by December 1944, crew training was delayed by the German Ardennes Offensive. By the end of the war, 1,200 had been produced.

Comet was fitted with two radio sets: a No. 19 Wireless, for communication with the regiment and the troop, and a No. 38 Wireless for communication with infantry units. Like many British tanks, it also had a telephone handset mounted on the rear so that accompanying infantry could talk to the crew.


Historical Gallery

Sources and External Links

UK
Light Tanks ICruiser Mk. I IIM2 IICruiser Mk. II IILight Mk. VIC IIIValentine IIIStuart I-IV IIICruiser Mk. III IVCruiser Mk. IV VCovenanter VIA46 VICrusader VIIGSR 3301 Setter VIIIFV1066 Senlac VIIILHMTV IXGSOR3301 AVR FS XManticore
Medium Tanks IVickers Medium Mk. I IIVickers Medium Mk. II IIIVickers Medium Mk. III IVMatilda IVMatilda LVT IVGrant IVAC 1 Sentinel VCavalier VValiant VSherman III VMatilda Black Prince VISherman Firefly VICromwell VIAC 4 Experimental VICromwell B VISherman VC Firefly VIIComet VIIICenturion Mk. I VIIIFV4202 VIIIChieftain/T95 VIIICenturion Mk. 5/1 RAAC VIIIChimera IXCobra IXCenturion Mk. 7/1 XCenturion Action X
Heavy Tanks VChurchill I VExcelsior VIChurchill VII VITOG II* VIIBlack Prince VIIFV201 (A45) VIIICharlemagne VIIICaliban VIIIGonsalo VIIICaernarvon VIIICaernarvon Action X IXFV4201 Chieftain Proto IXConqueror XFV215b XSuper Conqueror XT95/FV4201 Chieftain
Tank Destroyers IIUniversal Carrier 2-pdr IVValentine AT IVAlecto VArcher VAT 2 VIChurchill Gun Carrier VIAchilles VIAT 8 VIExcalibur VIIChallenger VIIAT 15A VIIAT 7 VIIIGSOR 1008 VIIIAT 15 VIIICharioteer VIIITurtle Mk. I IXTortoise IXFV4004 Conway XFV215b (183) XFV4005 Stage II XFV217 Badger
Self-Propelled Artillery IILoyd Gun Carriage IIISexton II IIISexton I IVBirch Gun VBishop VIFV304 VIICrusader 5.5-in. SP VIIIFV207 IXFV3805 XConqueror Gun Carriage
Medium Tanks
USA IIT2 Medium Tank IIIConvert. Medium Tank T3 IIIM2 Medium Tank IVT6 Medium IVM3 Lee VM4 Improved VM4A2E4 Sherman VM4A1 Sherman VRam II VIM4A3E8 Fury VIM4A3E8 Thunderbolt VII VIM4A3E8 Sherman VIM4A3E2 Sherman Jumbo VIIT26E3 Eagle 7 VIIT20 VIIT23E3 VIIIT25 Pilot Number 1 VIIITL-1 LPC VIIIT42 VIIIASTRON Rex 105 mm VIIIAMBT VIIIM46 Patton KR VIIIM26 Pershing VIIIT26E4 SuperPershing VIIIT69 VIIIT95E2 IXM46 Patton XM48A5 Patton XM60 XT95E6
UK IVickers Medium Mk. I IIVickers Medium Mk. II IIIVickers Medium Mk. III IVMatilda IVMatilda LVT IVGrant IVAC 1 Sentinel VCavalier VValiant VSherman III VMatilda Black Prince VISherman Firefly VICromwell VIAC 4 Experimental VICromwell B VISherman VC Firefly VIIComet VIIICenturion Mk. I VIIIFV4202 VIIIChieftain/T95 VIIICenturion Mk. 5/1 RAAC VIIIChimera IXCobra IXCenturion Mk. 7/1 XCenturion Action X
Germany IIIGroßtraktor - Krupp IIIPz.Kpfw. IV Ausf. A IIIPz.Kpfw. S35 739 (f) IVPz.Kpfw. III Ausf. J IVPz.Kpfw. IV Ausf. D IVVK 20.01 (D) VPz.Kpfw. III Ausf. K VTurán III prototípus VPz.Kpfw. IV Ausf. H Ankou VPz.Kpfw. III/IV VPz.Kpfw. IV hydrostat. VPz.Kpfw. V/IV VPz.Kpfw. V/IV Alpha VPz.Kpfw. IV Ausf. H VPz.Kpfw. T 25 VVK 30.01 (H) VIPz.Kpfw. IV Schmalturm VIVK 30.01 (D) VIVK 30.02 (M) VIIPanther/M10 VIIPanther VIIVK 30.02 (D) VIIIPanther mit 8,8 cm L/71 VIIIPanzer 58 VIIISchwarzpanzer 58 VIIIPanzer 58 Mutz VIIIM48A2 Räumpanzer VIIIKampfpanzer 07 RH VIIIIndien-Panzer VIIIPanther II IXE 50 IXT 55A IXKampfpanzer 50 t IXKunze Panzer IXLeopard Prototyp A XE 50 Ausf. M XLeopard 1
France IIID2 IIISomua S35 IVSARL 42 VRenault G1 VIBretagne Panther VIM4A1 FL 10 VIIIBat.-Châtillon Bourrasque VIIIAltProto AMX 30 VIIILorraine 40 t VIIIAMX Chasseur de chars VIIIM4A1 Revalorisé IXAMX 30 1er prototype IXChar Futur 4 IXBat.-Châtillon 25 t AP XBat.-Châtillon 25 t XAMX 30 B
USSR IIIT-29 IVA-32 IVT-28E with F-30 IVT-34 with L-11 IVT-28 VMatilda IV VT-34 shielded VM4-85 VT-34 VIA-43 VIT-34-85M VIT-34-85 Rudy VILoza's M4-A2 Sherman VIT-34-85 VIIA-44 VIIKV-13 VIIT-43 VIIT-44-122 VIIIObject 416 VIIIT-54 first prototype VIIIT-44-100 Igrovoy VIIIT-44-100 (R) VIIISTG VIIISTG Guard VIIIObject 274a VIIIT-44 IXObject 430 Version II IXObject 430 IXT-54 XObject 140 XObject 907 XT-22 medium XK-91 XObject 430U XT-62A
China VType T-34 VIType 58 VIIT-34-1 VIIIType 59 VIIIT-34-2 VIIIT-34-3 VIII59-Patton VIII122 TM VIIIType 59 G IXWZ-120 X121 X121B
Japan IIChi-Ni IIType 89 I-Go/Chi-Ro IVType 1 Chi-He VType 3 Chi-Nu VType 3 Chi-Nu Kai VIType 4 Chi-To VIIType 5 Chi-Ri VIIISTA-1 VIIISTA-2 IXType 61 XSTB-1
Czechoslovakia IVST vz. 39 VŠkoda T 24 VIŠkoda T 40 VIŠkoda T 25 VIIKonštrukta T-34/100 VIIITVP VTU Koncept VIIIŠkoda T 27 IXŠkoda T 50 XTVP T 50/51
Sweden IVLago VStrv m/42 VIStrv m/42-57 Alt A.2 VIStrv 74 VIILeo VIIIStrv 81 VIIIPrimo Victoria VIIILansen C VIIIUDES 14 Alt 5 IXUDES 16 XUDES 15/16
Italy IIM14/41 IIIM15/42 IVP26/40 VP.43 VIP.43 bis VIIP.43 ter VIIIProgetto M35 mod. 46 VIIIP.44 Pantera IXPrototipo Standard B XProgetto M40 mod. 65 XCarro da Combattimento 45 t
Poland V25TP KSUST II VDS PZInż VIPudel VI40TP Habicha VIT-34-85 Rudy VIB.U.G.I. VIICS-44 VIIICS-52 LIS VIIICS-53 IXCS-59 XCS-63
ja:Tank:GB22 Comet