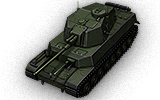
Type 5 Chi-Ri
| Revision as of 00:11, 12 September 2017 | Revision as of 00:13, 12 September 2017 | |||
| Line 60: | Line 60: | |||
| * Turret and autoloading gun | * Turret and autoloading gun | |||
| * Engine next, as it adds only 50 horsepower | * Engine next, as it adds only 50 horsepower | |||
| ? | |InTheGame_equipment= gun rammer, vents, optics, gun laying drive. | + | |InTheGame_equipment= medium caliber | |
| + | gun rammer, vents, coated optics, advanced gun laying drive. | |||
Revision as of 00:13, 12 September 2017
- For the Japanese Tier X Super-Heavy tank, see Type 5 Heavy.
- For the Japanese Tier IV Light tank, see Type 5 Ke-Ho.
Type 5 Chi-Ri

Mouse over "
[Client Values; Actual values in
| 1,440,000 |
| 1150330 HP Hit Points |
| 35.29/42.328.46/44.8 t Weight Limit |
- Commander
- Gunner
- Driver
- Radio Operator
- Loader
| 500550 hp Engine Power |
| 42/18 km/h Speed Limit |
| 3034 deg/s Traverse |
| 14.1719.33 hp/t Power/Wt Ratio |
| YesYes Pivot |
| // mm Hull Armor |
| 75/50/5075/50/50 mm Turret Armor |
AP//HE
AP//HE Shells |
82/2800/60
140/3200/68 Shell Cost |
| 125/125/175130/130/175 HP Damage |
| 124/155/38155/186/38 mm Penetration |
|
12.77 r/m ▲
15 r/m Standard Gun ▲ Rate of Fire Magazine-fed Gun |
|
1596.25 ▲
Standard Gun
▼
Standard Gun
▲
1017.9 Standard Gun ▲
Magazine-fed Gun
▼
Magazine-fed Gun
▲ Damage Per Minute Magazine-fed Gun |
|
0.36 m ▲
0.35 m With 50% Crew: 0.446 m ▲ Accuracy With 50% Crew: 0.434 m |
| 2.1 s 1.7 s Aim time |
| 3636 deg/s Turret Traverse |
| 360° Gun Arc |
| -10°/+20°-10°/+20° Elevation Arc |
| 115105 rounds Ammo Capacity |
| 1520 % Chance of Fire |
| 360 m 370 m View Range |
| 400 m 750 m Signal Range |
VII
1440000
The Type 5 Chi-Ri is a Japanese tier 7 medium tank.
A single prototype was manufactured at the beginning of 1945. The vehicle underwent trials and was recommended for service. However, Japan was defeated before mass production could begin. After the surrender, the prototype was confiscated by American occupation authorities and was shipped to the United States.
At a glance, the Type 5 Chi-Ri is not much of an upgrade from the Type 4 Chi-To. It is an even larger target, has more or less the same armor, and is in most other ways similar or identical to the Chi-To. The main difference, however, is that the Chi-Ri receives an auto-loader version of the Chi-To's gun. This gun has impressive burst damage combined with a short magazine reload, which gives the Chi-Ri quite a unique play style for a tier 7 medium.
The Type 5 Chi-Ri leads to the STA-1.
Modules / Available Equipment and Consumables
Modules

Guns
| Tier | Gun | Penetration (mm) |
Damage (HP) |
Rate of fire (rounds/minute) |
Dispersion (m/100m) |
Aiming time (s) |
Weight (kg) |
Price (
| |
|---|---|---|---|---|---|---|---|---|---|
| V | 7.5 cm Tank Gun Type 5 | 124/155/38 | 125/125/175 | 13.33 | 0.35 | 1.7 | 1489 | 42500 | |
| VI | 7.5 cm Tank Gun Type 5 Model I | 155/186/38 | 130/130/175 | 16.67 | 0.35 | 1.7 | 1764 | 57000 | |
| VI | 7.5 cm Autoloading Tank Gun Type 5 | 155/186/38 | 130/130/175 | 15 | 0.35 | 1.7 | 1764 | 62000 |

Engines
| Tier | Engine | Engine Power (hp) |
Chance of Fire on Impact (%) |
Weight (kg) |
Price (
| |
|---|---|---|---|---|---|---|
| VII | Kawasaki Type 98 V-12 | 550 | 20 | 510 | 36500 | |
| VII | Mitsubishi AL Type 4 Kakyuu V-12 | 500 | 15 | 1000 | 33000 |

Suspensions
| Tier | Suspension | Load Limit (т) |
Traverse Speed (gr/sec) |
Rmin | Weight (kg) |
Price (
| |
|---|---|---|---|---|---|---|---|
| VI | Type 5 Chi-Ri Plan 1 | 42.3 | 30 | 0 | 11600 | 12000 | |
| VII | Type 5 Chi-Ri Plan 2 | 44.8 | 34 | 0 | 11600 | 19500 |

Radios
| Tier | Radio | Signal Range (m) |
Weight (kg) |
Price (
| |
|---|---|---|---|---|---|
| V | Hei | 400 | 130 | 3800 | |
| VI | Type 96 Mk. 4 Bo | 425 | 50 | 14000 | |
| VIII | Type 3 Otsu | 550 | 240 | 22000 | |
| X | Type 3 Ko | 750 | 560 | 54000 |
Compatible Equipment

![]()


![]()
![]()
![]()
![]()
![]()


![]()

![]()

Compatible Consumables
![]()
![]()
![]()
![]()
![]()
![]()
![]()
![]()
![]()
![]()
![]()
![]()
![]()
![]()
![]()
![]()
![]()
![]()
![]()
![]()
![]()
![]()
Player Opinion
Pros and Cons
Pros:
- High burst damage and short magazine reload with the 7.5 cm autoloading gun
- Very high rate-of-fire with the non-autoloading gun
- Large hit point pool
- Excellent gun depression
- Very accurate gun with short aim time and good dispersion values
- Can mount Gun Rammer, unusual for an autoloader tank
Cons:
- Exceptionally thin and flat armor, easily demolished by HE shells
- Very large target with low camo
- Underpowered engine, almost never reaches top speed
- Low shell damage with low penetration considering its poor mobility
- Turret is mounted fairly far back, making it difficult to poke corners without being hit
Performance
Up to the Chi-To, Japanese medium tanks usually have had fairly good guns for their class and tier, but mounted on sluggish platforms with relatively poor armor. The Chi-Ri breaks from this tradition, using the same gun as the Chi-To but now sometimes facing powerful Tier IX tanks like the T-54 or E 75.
The most unique thing about the Chi-Ri is its three-round autoloading gun; which is similar to the gun on the Skoda T 25. At 130 damage per shell, this gives an effective average damage per clip of 390, the same damage that the powerful IS at the same tier does in one shot. Unfortunately, with only 155 penetration using standard AP, this gun will struggle against higher tier tanks, and is almost useless against all but the lightest armored Tier IXs. Even the premium AP has only 186 penetration. The intra-clip reload is very short at 1 s, but this is shorter than the aim time (1.7 s), which means that the reticle does not settle completely by the time the next shot is ready. Thus, the gun is not likely to accurately land all three shots unless fighting at very close ranges, or the reticle is allowed to settle, cutting down the rate-of-fire. The non-autoloading version of the same 7.5 cm gun is also an option. It has a very high rate-of-fire, and is more consistent, at the cost of being a rather boring standard medium tank gun. The shell velocity and lack of penetration makes both guns less than ideal at long range sniping.
The Chi-Ri has almost no armor to speak of beyond a small gun mantlet around the gun, which is 150 mm thick and will bounce the occasional shot if the enemy is unlucky enough to hit it. Other than that, the frontal armor has a maximum thickness of only 75 mm, and it is extremely vulnerable to the HE shells of 152 mm and larger guns. Artillery is an extremely dangerous threat, compounded by the fact that the Chi-Ri with the autoloader has to expose itself for a considerable amount of time to get all three shots off. It is also a very big and tempting target with poor camouflage values, which a lot of enemies will switch their attention to thinking it is an easy kill. The excellent gun depression can mitigate this somewhat with good use of terrain, but the turret is still quite a large target and its armor is no better than that of the hull.
The Chi-Ri has fairly good terrain resistance values to compensate for the underpowered engine, but it will struggle to reach its top speed on all but the flattest and hardest terrain. It is by far the slowest medium of its tier, and has a hard time flanking targets thanks to its huge size and poor mobility.
In terms of playstyle, the Chi-Ri has almost nothing in common with the other mediums of its tier. With relatively weak guns, huge size, no armor, and poor mobility, the Chi-Ri absolutely should not allow itself to be drawn into slugfests. It is heavily dependent on cover, using obstacles and terrain to hide while reloading. The autoloading gun is good for minimizing exposure, and also for finishing off low health targets. This promotes a rather opportunistic playstyle, keeping behind cover and only emerging to shoot at targets while they are distracted or reloading. As noted previously, while the Chi-Ri's guns are reasonably accurate at range, they do not have the penetration to be viable for long range sniping. With no effective armor, the Chi-Ri has to rely on its relatively large HP pool to stay alive.
Although the gun resembles the three-round autoloader on the Skoda T 25, the Chi-Ri cannot be played in similar style. Unlike the Skoda T 25 you lack the mobility for hit-and-run tactics, which means that, once you engage the enemy you are committed. Keep in mind that most opponents will be able to survive two clips, more if some of your shots hit or bounce. Focus on single enemy tanks and avoid engagements with multiple opponents, or you will be quickly overwhelmed.
Early Research
- Should have the second gun and top radio unlocked from the Chi-To, mount immediately
- Tracks first, as they are required to mount the turret
- Turret and autoloading gun
- Engine next, as it adds only 50 horsepower
Suggested Equipment
medium caliber
gun rammer![]()
![]() advanced gun laying drive.
advanced gun laying drive.
Gallery


Historical Info
In 1942, Japan initiated a new medium tank program of 3 projects, each being a different class of medium tank: a 47mm medium tank, a 57mm medium tank, and a 75mm medium tank. These tanks were supposed to be a new breed of anti-tank capable medium tanks. In short time, the 47mm class was seen obsolete and was upgrading to a 57mm tank project, whereas the remaining two projects merged into a single 75mm tank project. This 57mm tank project and 75mm tank project were the Chi-To and Chi-Ri tanks respectively.
Design
During 1943, by looking at the tank battles between Germany and Russia, there was fear that the Chi He and the Chi To could be underpowered by the time they would enter production. At this time, many technological inspections and planning have occurred for the Chi Ri. These included ventilation, transmission, suspension, 550 HP gasoline engine, and easy access to the engine for maintenance. Targeted top speed was 42kph. Improved ventilation was necessary because of the anticipated increased influx of poisonous gas when using the high rate of fire from an auto loading cannon. The main armament would become the Type 5 75mm cannon. It was planned to attach an auto loader to it. Here is a picture of it being tested with the single tray auto loader.

75 mm Gun Type 5
- Shell Weight: 6.615 kg
- Muzzle Velocity: 821 m/s
- Kinetic Energy: 2229 kj
- Historical Pen: 75 mm (1,000 meters) goal (met), 80 mm (1,000 meters) expected
- Gun Depression in Chi-Ri: -6.5 +20
However, steps were taking to ensure an even more advance design could be made available.
In September 1943, a plan 1 and a plan 2 were outlined for the Chi Ri. The goal of plan 1 was to use the current technology developed so far to produce a finished Chi Ri within 1 year. Plan 2 was an ambitious plan to push the edge of technology. The Chi Ri tank discovered by the American forces was the Plan 2 tank.
 Chi-Ri Plan 1
 Chi-Ri Plan 2
The biggest difference between plan 1 and plan 2 was the suspension and the turret.
Chi-Ri Plan 2 Suspension Options
There was a total of 6 suspension plans examined. Three plans from the Technology Research Institution (TRI) and three from Mitsubishi Heavy industries (MHI).
One plan from TRI was a common Japanese style coil spring suspension which was already proven to work on other Japanese tanks. The other two plans were staggered arranged road wheels much like the notorious suspensions found in German tanks like the Tiger and Panther. One with coil springs like this picture and another with torsion bars.
 Example of staggered road wheels with coil springs suspension
The three plans from MHI were 6 large road wheels. One was with coil springs and one with torsion bars. Ultimately, the Japanese went with what they were used too.
 Six road wheel style coil spring suspension
The Suspension used very wide treads. The width was 600mm. For a 35 ton class tank, this would have produced a very impressive ground pressure value. The goal was a ground pressure of about 0.6 to 0.7 kg/cm². Compared to other tanks, this was a very good value. It should be noted that the plan 2 prototype ended up weighing far more than 35 tons.
- M46 has: 0,986 kg/cm²
- KT has: 1.03 kg/cm²
- Conqueror has: 0.84kg/cm²
- Crusader Cruiser has: 1.04 kg/cm²
- Centurion (1 I suppose) has: 1,04 kg/cm²
- M48 has: 0.92 kg/cm²
- T-54 has: 0.81 kg/cm²
- T-34/76: 0.66 kg/cm²
- M103 has: .908kg/cm²
- M5 Stuart has: 0.856kg/cm²
- M4A1 Sherman has: 0.962kg/cm²
- M4A3 (76mm + HVSS) has: 0.772kg/cm²
- M26 Pershing had: 0.878kg/cm²
Chi-Ri Plan 2 Turret
In order to accommodate a load of 100 75mm rounds and to fit in a belt style auto loader, the turret was enlarged. The plan 1 turret would likely not be capable of handling this task, therefore the large turret was designed. To increase the speed of target acquisition, the turret would rotate by an electric motor, increasing the speed of turret rotation. Another advanced feature was the gyro-stabilizer for the 75mm cannon. It was demanded for the Chi-Ri to be able to engage targets up to 2000 meters away so a long range observation device was installed. One other feature is that it was the first Japanese tank, and one of the few tanks in all of WWII, to have a turret basket built in.
Probably the most controversial feature was the secondary 37mm cannon. It was likely intended to be used for soft targets that would be overkill for the 75mm cannon and thus free up the 75mm for more critical targets.
In 1944, the belt fed auto-loading cannon was abandoned. Likely due to the anxiety of trying to create a belt system that would move 900mm long shells around within the turret. However the large turret was already designed. In its place, a single tray auto loader was to be attached to the Type 5 75mm cannon instead thus still maintaining a fast rate of fire. It is believed that very likely the Chi-Ri underwent running and shooting trials in March 1945. However, the simpler Type 4 Chi-To was selected over the Chi-Ri for production, as that autoloader was found to be a failure as well. The likely reason why the Chi-Ri was found without armament is because the Chi-To mounted the same 75mm cannon and thus the Chi-Ri’s 75mm cannon was likely moved to a Chi-To tank. The Chi-Ri was later redesigned, sharing many of the same components with the Chi-To. Three of these redesigned "production model" Chi-Ri's were started before the end of the war.
In 1945 development was stopped due to the Japanese surrender. The prototype Chi-Ri plan II was taken by Americans to be tested at the Aberdeen Proving Grounds, but the tank was lost and its fate is unknown. Similarly, the fate of the prototype Chi-Ri plan I as well as the partially-completed production models are unknown as well. It should be noted that while many sources describe the Chi-Ri's turret as having been planned to eventually house Type 99 88 mm AA Gun similarly to the German Tiger tank, there are no such plans listed in any original Japanese documents on the tank. This speculation originated from Americans who inspected the tank.
Related developments include the Ho-Ri, a tank destroyer based on the Chi-Ri chassis, and the Chi-Se, a plan re-use the plan II turret on the Ho-Ri. Both of these were to use the Experimental 105mm gun.
Historical Gallery


Historical Accuracy Errata
* The gun depression with the 75 mm Type 5 gun is listed as being only 6.5 degrees.
Sources and External Links
| Light Tanks | IRenault Otsu • IIType 95 Ha-Go • IIType 97 Te-Ke • IIIType 97 Chi-Ha • IIIType 98 Ke-Ni • IVType 5 Ke-Ho |
| Medium Tanks | IIChi-Ni • IIType 89 I-Go/Chi-Ro • IVType 1 Chi-He • VType 3 Chi-Nu • VType 3 Chi-Nu Kai • VIType 4 Chi-To • VIIType 5 Chi-Ri • VIIISTA-1 • VIIISTA-2 • IXType 61 • XSTB-1 |
| Heavy Tanks | IIIType 91 Heavy • IVType 95 Heavy • VO-I Experimental • VIHeavy Tank No. VI • VIO-I • VIIO-Ni • VIIIO-Ho • IXType 4 Heavy • XType 5 Heavy |
| Tank Destroyers | |
| Self-Propelled Artillery |