Welcome to Wargaming.net Wiki!
Variants

Type 5 Heavy

Jump to: navigation, search
Revision as of 10:27, 4 August 2016
removed the image; it is clear that it is NOT the turret of Type 4/5
Revision as of 10:28, 4 August 2016
Line 57:Line 57:
 |HistoricalGallery=  |HistoricalGallery=
 image:Type_3_140mm_Gun_from_Battleship_Mutsu_-_1-wp.jpg{{!}}14 cm/50 3rd Year Type naval gun from the battleship Mutsu; also main armament of Type 4/5 image:Type_3_140mm_Gun_from_Battleship_Mutsu_-_1-wp.jpg{{!}}14 cm/50 3rd Year Type naval gun from the battleship Mutsu; also main armament of Type 4/5
?image:Type_4_and_5_turret_bunker_mode.jpg{{!}}Another picture of the turret-bunker.+image:Type_4_and_5_turret_bunker_mode.jpg{{!}}The only known picture of the turret-bunker.
  
 |Ref_references= |Ref_references=

Revision as of 10:28, 4 August 2016


Ambox_important.png This article requires additional modification.
The design and/or content of this article do not conform to wiki standards.
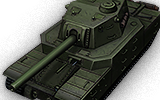
Missing Content:

  • Gallery


Type 5 Heavy

AnnoJ20_Type_2605.png
Battle Tier
1234567891011
Overview
Mouse over "
Well, the ones further down, of course.
" for more information
[Client Values; Actual values in
Specifically, the mismatch in crew values caused by commander's 10% crew skill bonus. Outside of a crew of 1 commander only, 100% crew is a fiction. The client values, given for 100% crew, will normally be taken into battle with 110% crew skill members aside from specific functions, causing their actual performance to deviate from the expected client value. These differences are taken into account in tooltip boxes.
]
6,100,000  Credits Cost
2900580 HP Hit Points
151.1/16083.48/160 t Weight Limit
Crew
  1. Commander
  2. Gunner
  3. Driver
  4. Radio Operator
  5. Loader
  6. Loader
Mobility
13701370 hp Engine Power
25/15 km/h Speed Limit
2020 deg/s Traverse
9.0716.41 hp/t Power/Wt Ratio
NoNo Pivot
Armor
// mm Hull Armor
280/210/200280/210/200 mm Turret Armor
Armament


{{#ifeq:HIGH_EXPLOSIVE|ARMOR_PIERCING||


{{#ifeq:ARMOR_PIERCING|ARMOR_PIERCING||


HE/HE


{{#ifeq:ARMOR_PIERCING|ARMOR_PIERCING||


{{#ifeq:HIGH_EXPLOSIVE|ARMOR_PIERCING||


AP//HE
Shells


0/6400/1200


0/0/905
Shell Cost
900/900/680600/600/770 HP Damage
75/192/252257/290/70 mm Penetration


|


|}}

|


|}}


3 r/m 

Standard Gun

Reload Times
Nominal: 20 s
50% Crew: 24.78 s
75% Crew: 21.63 s
100% Crew: 19.18 s
Rammer: 17.26 s
Vents: 18.76 s
Both: 16.88 s
Both and BiA: 16.52 s
Both and Max Crew %: 15.83 s

See Crew, Consumables, or Equipment for more information.


|


|}}

|


|}}


3.51 r/m 

Standard Gun

Reload Times
Nominal: 17.1 s
50% Crew: 21.18 s
75% Crew: 18.5 s
100% Crew: 16.4 s
Rammer: 14.76 s
Vents: 16.04 s
Both: 14.43 s
Both and BiA: 14.12 s
Both and Max Crew %: 13.54 s

See Crew, Consumables, or Equipment for more information.
Rate of Fire


|


|}}

|


|}}


2700

Standard Gun

Using Shell Type 1 (900 Damage):
With wholly penetrating hits

Theoretical Damage Per Minute
Nominal DPM: 2700
50% Crew: 2178
75% Crew: 2493
100% Crew: 2817
100% Crew
Vents: 2880
Rammer: 3132
Both: 3204
Both and BiA: 3276
Both and Max Crew %: 3411

Advantageous Damage Per Minute
First-shot DPM: 3600
50% Crew: 3078
75% Crew: 3393
100% Crew: 3717
100% Crew
Rammer: 4032
Vents: 3780
Both: 4104
Both and BiA: 4176
Both and Max Crew %: 4311

See here, here, or here for more information.

Standard Gun

Using Shell Type 2 (900 Damage):
With wholly penetrating hits

Theoretical Damage Per Minute
Nominal DPM: 2700
50% Crew: 2178
75% Crew: 2493
100% Crew: 2817
100% Crew
Vents: 2880
Rammer: 3132
Both: 3204
Both and BiA: 3276
Both and Max Crew %: 3411

Advantageous Damage Per Minute
First-shot DPM: 3600
50% Crew: 3078
75% Crew: 3393
100% Crew: 3717
100% Crew
Rammer: 4032
Vents: 3780
Both: 4104
Both and BiA: 4176
Both and Max Crew %: 4311

See here, here, or here for more information.

Standard Gun

Using Shell Type 3 (680 Damage):


Theoretical Damage Per Minute
Nominal DPM: 2040
50% Crew: 1645.6
75% Crew: 1883.6
100% Crew: 2128.4
100% Crew
Vents: 2176
Rammer: 2366.4
Both: 2420.8
Both and BiA: 2475.2
Both and Max Crew %: 2577.2

Advantageous Damage Per Minute
First-shot DPM: 2720
50% Crew: 2325.6
75% Crew: 2563.6
100% Crew: 2808.4
100% Crew
Rammer: 3046.4
Vents: 2856
Both: 3100.8
Both and BiA: 3155.2
Both and Max Crew %: 3257.2

See here, here, or here for more information.


|


|}}

|


|}}


2106

Standard Gun

Using Shell Type 1 (600 Damage):


Theoretical Damage Per Minute
Nominal DPM: 2106
50% Crew: 1698
75% Crew: 1950
100% Crew: 2196
100% Crew
Vents: 2244
Rammer: 2442
Both: 2496
Both and BiA: 2550
Both and Max Crew %: 2658

Advantageous Damage Per Minute
First-shot DPM: 2706
50% Crew: 2298
75% Crew: 2550
100% Crew: 2796
100% Crew
Rammer: 3042
Vents: 2844
Both: 3096
Both and BiA: 3150
Both and Max Crew %: 3258

See here, here, or here for more information.

Standard Gun

Using Shell Type 2 (600 Damage):


Theoretical Damage Per Minute
Nominal DPM: 2106
50% Crew: 1698
75% Crew: 1950
100% Crew: 2196
100% Crew
Vents: 2244
Rammer: 2442
Both: 2496
Both and BiA: 2550
Both and Max Crew %: 2658

Advantageous Damage Per Minute
First-shot DPM: 2706
50% Crew: 2298
75% Crew: 2550
100% Crew: 2796
100% Crew
Rammer: 3042
Vents: 2844
Both: 3096
Both and BiA: 3150
Both and Max Crew %: 3258

See here, here, or here for more information.

Standard Gun

Using Shell Type 3 (770 Damage):
With wholly penetrating hits

Theoretical Damage Per Minute
Nominal DPM: 2702.7
50% Crew: 2179.1
75% Crew: 2502.5
100% Crew: 2818.2
100% Crew
Vents: 2879.8
Rammer: 3133.9
Both: 3203.2
Both and BiA: 3272.5
Both and Max Crew %: 3411.1

Advantageous Damage Per Minute
First-shot DPM: 3472.7
50% Crew: 2949.1
75% Crew: 3272.5
100% Crew: 3588.2
100% Crew
Rammer: 3903.9
Vents: 3649.8
Both: 3973.2
Both and BiA: 4042.5
Both and Max Crew %: 4181.1

See here, here, or here for more information.
Damage Per Minute


|


|}}


0.47 m 

With 50% Crew: 0.582 m
With 75% Crew: 0.508 m
With 100% Crew: 0.451 m
With BiA: 0.441 m
With BiA and Vents: 0.431 m
Maximum possible: 0.413 m

For more details, see Crew


|


|}}


0.38 m 

With 50% Crew: 0.471 m
With 75% Crew: 0.411 m
With 100% Crew: 0.364 m
With BiA: 0.356 m
With BiA and Vents: 0.349 m
Maximum possible: 0.334 m

For more details, see Crew
Accuracy


|


|}}


2.9 s 

With 50% Crew: 3.592 s
With 75% Crew: 3.137 s
With 100% Crew: 2.781 s
With GLD: 2.528 s
With BiA: 2.719 s
With BiA and Vents: 2.66 s
With both and GLD: 2.418 s
Maximum possible: 2.318 s

For more details, see Crew or Equipment


|


|}}


2.5 s 

With 50% Crew: 3.097 s
With 75% Crew: 2.704 s
With 100% Crew: 2.397 s
With GLD: 2.179 s
With BiA: 2.344 s
With BiA and Vents: 2.293 s
With both and GLD: 2.085 s
Maximum possible: 1.998 s

For more details, see Crew or Equipment
Aim time
1818 deg/s Turret Traverse
360° Gun Arc
-10°/+20°-10°/+20° Elevation Arc
4060 rounds Ammo Capacity
General
2020 % Chance of Fire


400 m 

With 50% Crew: 314.3 m
With 75% Crew: 357.2 m
With 100% Crew: 400 m
With Recon and Situational Awareness: 420.2 m
With Coated Optics: 440 m
With Binocular Telescope: 500 m
Maximum possible: 572.6 m

For more details, see Skills or Equipment


400 m 

With 50% Crew: 314.3 m
With 75% Crew: 357.2 m
With 100% Crew: 400 m
With Recon and Situational Awareness: 420.2 m
With Coated Optics: 440 m
With Binocular Telescope: 500 m
Maximum possible: 572.6 m

For more details, see Skills or Equipment
View Range


|


|}}


750 m 

With 50% Crew: 605.4 m
With 75% Crew: 693.4 m
With 100% Crew: 782.2 m
With 100% Signal Boost: 900 m
When affected by 100% Relaying: 825 m
Maximum possible: 1125.9 m

For more details, see Skills or Equipment


|


|}}


750 m 

With 50% Crew: 605.4 m
With 75% Crew: 693.4 m
With 100% Crew: 782.2 m
With 100% Signal Boost: 900 m
When affected by 100% Relaying: 825 m
Maximum possible: 1125.9 m

For more details, see Skills or Equipment
Signal Range
Values are Stock - click for Top
Type 5 Heavy


X

AnnoJ20_Type_2605.png

6100000

The Type 5 Heavy is a Japanese tier 10 heavy tank.

The Type 5, also known as the Type 2605, was one of the variants of the O-I superheavy tank, developed during WWII. The vehicle was planned to be used for breaking through fortified enemy lines and for coastal defense.

The Type 5 Heavy marks the end of its Japanese heavy line.

Modules / Available Equipment and Consumables

Modules

Ico_gun_alpha.png

Guns

Tier Gun Penetration
(mm)
Damage
(HP)
Rate of fire
(rounds/minute)
Dispersion
(m/100m)
Aiming time
(s)
Weight
(kg)
Price
(Credits)

X 14 cm/50 3rd Year Type 257/290/70 600/600/770 3.51 0.38 2.5 5600 332000
X 15 cm/45 41st Year Type 75/192/252 900/900/680 3 0.47 2.9 6700 330000

Ico_engine_alpha.png

Engines

Tier Engine Engine Power
(hp)
Chance of Fire on Impact
(%)
Weight
(kg)
Price
(Credits)

X 2x Kawasaki Type 98 V-12 Kai (600) 1370 20 1020 132000

Ico_suspension_alpha.png

Suspensions

Tier Suspension Load Limit
(т)
Traverse Speed
(gr/sec)
Rmin Weight
(kg)
Price
(Credits)

X Type 5 Heavy 160 20 B/2 40000 82500

Ico_radio_alpha.png

Radios

Tier Radio Signal Range
(m)
Weight
(kg)
Price
(Credits)

X Type 3 Ko 750 560 54000

Compatible Equipment

Low Noise Exhaust System Class 1 Vertical Stabilizer Class 1 Superheavy Spall Liner Camouflage Net Class 2 Coated Optics Class 1 Stabilizing Equipment System Experimental Optics Wear-Resistant Gun Laying Drive Improved Configuration Venting System Innovative Loading System Enhanced Gun Laying Drive Class 1 Improved Hardening Class 1 Additional Grousers Class 1 Modified Configuration Class 1 Improved Rotation Mechanism Class 1 Improved Aiming Class 1 Improved Ventilation Class 1 Binocular Telescope Class 1 Gun Rammer Class 1 Turbocharger Class 1 

Compatible Consumables

Stabilizer Greasing Automatic Fire Extinguisher Natural Cover Optical Calibration Aim Tuning Experienced Firefighters Manual Fire Extinguisher Pre-Battle Maintenance Vent Purge Large First Aid Kit Large Repair Kit Duty Comes First Shell Organizer Quality Oil Orderly Ammo Rack Focus on Target Onigiri Increased Focus Small First Aid Kit Small Repair Kit Gearbox Intricacy Steady Hand Combat Course 


Player Opinion

Pros and Cons

Pros:


  • Incredible armor: can withstand most normal ammo, sides have spaced armor and cupola is tough
  • Second largest caliber and alpha damage of tier 10 heavies
  • Second highest HP in the game
  • Best gun depression among all tier 10 tanks, tied with STB-1 and Centurion AX
  • Extreme height allows it to hit roofs of some tanks when facehugging


Cons:


  • Biggest tier 10 in the game; very vulnerable to artillery
  • Flat armor makes it vulnerable to gold ammo; its own gold ammo has low penetration
  • Low DPM even for its alpha damage
  • Weak P/W ratio and low top speed
  • Hull cheeks are weak (only 210mm) and severely limits its angling capacities; ammo rack is located behind these cheeks


Performance

Type 5 Heavy improves from Type 4 Heavy by having its armor increased 10mm in front hull and turret, turret sides, cheeks, and mantle armor by 20mm, having much better mobility, +750 HP and better gun stats. Also, in many ways, Type 5 Heavy is between 2 other tier X superheavies, Maus and E 100. It has higher HP than E 100 but lower than Maus, its gun deals more damage and reloads slower than Maus but deals less and reloads faster than E 100, and has top speed between both (25). Type 5 Heavy however brings several attributes, both good and bad, to make it overall more different than those two.

The Type 5 lacks any real frontal weak spot; lower plate is NOT a weakspot at all, and the cupola is only reliably pennable with 240 - 250mm penetration and even still has to be penetrated in center. Type 5 also has the thickest armor out of all heavies in the game. However, unlike E 100 and Maus, the Type 5's armor is nearly completely flat. Combined with weak 210mm cheeks on hull which limits its ability to sidescrape, Type 5 is lot more vulnerable to gold ammo than German super heavies.

Instead of sidescraping, Type 5 Heavy should "peek" from corner at proper angle (where cheeks are hidden and sides aren't exposed) to increase its armor effectiveness.The Type 5 also can angle its turret when it reloads, like Maus and E 100, although slightly less. Type 5 excels at hull-down position, thanks to -10 degree gun depression and tough turret. In hull-down position, its cupola becomes even harder to penetrate.

Thanks to Type 5's massive size (even bigger than the Maus!) and 25kph top speed, Type 5 is juicy target for artillery. Try to stay in cover from artillery ALWAYS when possible. Also, try to avoid going anywhere without allies. Type 5 which is left alone is easy target for medium tanks like T-62A. Try to also avoid tanks getting into your sides, since The Type is so tall that some tanks can avoid it's gun despite the great -10 degree depression.


Early Research

None needed.


Suggested Equipment


Improved VentilationSpall Liner Tank Gun Rammer "Wet" Ammo Rack Vertical Stabilizer 


Gallery

Historical Info

Type 4/5, also known as Type 2604/2605, was Japanese super heavy tank project in WW2. It is rumored that one prototype was built in Japan at end of 1944, then shipped into Manchuria. It is said to have been served in 1945 at Koto defenses against the Red Army. Later on, its turret was removed from hull and moved to be an immobile bunker. Hull itself was likely scrapped. Later on, the bunker with Type 4/5 turret was found and then destroyed by Red Army.


Type 4 had two 12 cylinder BMW marine engines with a rather complicated cooling system of three radiators per engine and one oil radiator, cooled by two central massive ventilators, powered by the drive train. The air is sucked in via massive grilles, positioned in the center over the engine compartment. The main advantage of the design was high protection of the engine from overheating.

Type 5 is variant of Type 4 with 35 percent smaller engine compartment volume for the same kind of engine, apparently keeping the same cooling abilities. Smaller engine compartment would have save tank's massive weight. Again, most of what is described is the cooling system with a ventilator of 950mm diameter.


Historical Gallery

Historical Accuracy Errata

The following are consensus errors or inconsistencies which have been identified with the configuration of the vehicle in question and conflict with information available on the public record. The causes for these divergences in the game are normally not disclosed and may be rooted in game balance.

Due to lack of information, many aspects of tanks such as armor values, top speed and weight are made up by Wargaming. Hull itself is based on rough sketch, meaning it also most likely has historical inaccuracies.
  • In-game description is also inaccurate, as Type 4/5 was its own design, not modification of O-I.


Japan
Light Tanks IRenault Otsu IIType 95 Ha-Go IIType 97 Te-Ke IIIType 97 Chi-Ha IIIType 98 Ke-Ni IVType 5 Ke-Ho
Medium Tanks IIChi-Ni IIType 89 I-Go/Chi-Ro IVType 1 Chi-He VType 3 Chi-Nu VType 3 Chi-Nu Kai VIType 4 Chi-To VIIType 5 Chi-Ri VIIISTA-1 VIIISTA-2 IXType 61 XSTB-1
Heavy Tanks IIIType 91 Heavy IVType 95 Heavy VO-I Experimental VIHeavy Tank No. VI VIO-I VIIO-Ni VIIIO-Ho IXType 4 Heavy XType 5 Heavy
Tank Destroyers
Self-Propelled Artillery
Heavy Tanks
USA VT14 VT1 Heavy Tank VIPawlack Tank VIM6 VIIKing Tiger (Captured) VIIM-II-Y VIIT29 VIIIChrysler K VIIIChrysler K GF VIIIT26E5 VIIIT26E5 Patriot VIIIM54 Renegade VIIIT77 VIIIM-III-Y VIIIM-IV-Y VIIIM6A2E1 VIIIT32 VIIIT34 VIIIT34 B IXAE Phase I IXConcept 1B IXM-VI-Y IXM103 IXT54E1 XM-V-Y XT110E5 XT57 Heavy Tank
UK VChurchill I VExcelsior VIChurchill VII VITOG II* VIIBlack Prince VIIFV201 (A45) VIIICharlemagne VIIICaliban VIIIGonsalo VIIICaernarvon VIIICaernarvon Action X IXFV4201 Chieftain Proto IXConqueror XFV215b XSuper Conqueror XT95/FV4201 Chieftain
Germany IVPz.Kpfw. B2 740 (f) IVDurchbruchswagen 2 VITiger 131 VIVK 30.01 (P) VIVK 36.01 (H) VIIVK 45.03 VIITiger I VIITiger (P) VIIIVK 100.01 (P) VIIIVK 168.01 (P) VIIIVK 168.01 Mauerbrecher VIIIVK 75.01 (K) VIIIE 75 TS VIIILöwe VIIITiger II VIIIVK 45.02 (P) Ausf. A IXE 75 IXMäuschen IXVK 45.02 (P) Ausf. B XE 100 XPz.Kpfw. VII XMaus XVK 72.01 (K)
France IVB1 VBDR G1 B VIARL 44 VIIAMX M4 mle. 45 VIIIAMX 50 100 VIIIAMX M4 mle. 49 VIIIAMX M4 mle. 49 Liberté VIIIAMX 65 t VIIISomua SM VIIIFCM 50 t IXAMX 50 120 IXLorraine 50 t IXAMX M4 mle. 51 XAMX 50 B XAMX M4 mle. 54
USSR VChurchill III VKV-220-2 VKV-220-2 Beta Test VKV-1 VKV-1 shielded VIKV-1S VIKV-2 VIKV-2 (R) VIKV-85 VIObject 244 VIT-150 VIIIS VIIKV-3 VIIKV-122 VIIIS-2M VIIIS-2 shielded VIIIS-2 VIIIIS-3 VIIIIS-6 VIIIIS-6 B VIIIKV-5 VIIIKV-4 VIIIIS-5 (Object 730) VIIIIS-3A VIIIIS-3A Peregrine VIIIKirovets-1 VIIIKV-4 Kreslavskiy VIIIObject 252U Defender VIIIObject 252U VIIIIS-M VIIIObject 703 Version II VIIIIS-2-II IXT-10 IXObject 777 Version II IXObject 257 IXObject 705 IXIS-3-II IXST-I XIS-4 XIS-7 XObject 260 XObject 705A XObject 277 XObject 279 early XST-II XObject 780
China VIIIS-2 VIIIWZ-111 VIIIWZ-111 Alpine Tiger VIII110 VIII112 IXWZ-111 model 1-4 IXWZ-114 X113 X113 Beijing Opera XWZ-111 model 5A XWZ-111 Qilin
Japan IIIType 91 Heavy IVType 95 Heavy VO-I Experimental VIHeavy Tank No. VI VIO-I VIIO-Ni VIIIO-Ho IXType 4 Heavy XType 5 Heavy
Czechoslovakia VIIŠkoda T 45 VIIVz. 44-1 VIIIŠkoda T 56 VIIITNH 105/1000 IXTNH T Vz. 51 XVz. 55
Sweden VIIIEmil I VIIIEMIL 1951 VIIIBofors Tornvagn IXEmil II IXStrv K XKranvagn
Italy VIICarro d'assalto P.88 VIIIProgetto CC55 mod. 54 VIIIBisonte C45 IXProgetto C50 mod. 66 XRinoceronte
Poland VII45TP Habicha VIII50TP prototyp VIII53TP Markowskiego IX50TP Tyszkiewicza X60TP Lewandowskiego
ja:Tank:J20 Type 2605