Welcome to Wargaming.net Wiki!
Variants
/
/
O-I Experimental

O-I Experimental

Jump to: navigation, search


Ambox_important.png This article requires additional modification.
The design and/or content of this article do not conform to wiki standards.

Missing Content:

  • Gallery
  • Player Opinion: Equipment


O-I Experimental

AnnoJ23_Mi_To.png
Battle Tier
1234567891011
Overview
Mouse over "
Well, the ones further down, of course.
" for more information
[Client Values; Actual values in
Specifically, the mismatch in crew values caused by commander's 10% crew skill bonus. Outside of a crew of 1 commander only, 100% crew is a fiction. The client values, given for 100% crew, will normally be taken into battle with 110% crew skill members aside from specific functions, causing their actual performance to deviate from the expected client value. These differences are taken into account in tooltip boxes.
]
445,000  Credits Cost
920184 HP Hit Points
99.1/100.530/105.5 t Weight Limit
Crew
  1. Commander
  2. Gunner
  3. Driver
  4. Radio Operator
  5. Radio Operator
  6. Loader
Mobility
11001200 hp Engine Power
25/12 km/h Speed Limit
2022 deg/s Traverse
11.140 hp/t Power/Wt Ratio
NoNo Pivot
Armor
// mm Hull Armor
125/75/75125/75/75 mm Turret Armor
Armament


{{#ifeq:HOLLOW_CHARGE|ARMOR_PIERCING||


{{#ifeq:HIGH_EXPLOSIVE|ARMOR_PIERCING||


AP/HEAT/HE


{{#ifeq:HOLLOW_CHARGE|ARMOR_PIERCING||


{{#ifeq:HIGH_EXPLOSIVE|ARMOR_PIERCING||


AP/HEAT/HE
Shells


130/4800/240


130/4800/240
Shell Cost
360/360/440360/360/440 HP Damage
60/140/6060/140/60 mm Penetration


|


|}}

|


|}}


5.71 r/m 

Standard Gun

Reload Times
Nominal: 10.5 s
50% Crew: 13.01 s
75% Crew: 11.36 s
100% Crew: 10.07 s
Rammer: 9.06 s
Vents: 9.85 s
Both: 8.86 s
Both and BiA: 8.67 s
Both and Max Crew %: 8.31 s

See Crew, Consumables, or Equipment for more information.


|


|}}

|


|}}


5.71 r/m 

Standard Gun

Reload Times
Nominal: 10.5 s
50% Crew: 13.01 s
75% Crew: 11.36 s
100% Crew: 10.07 s
Rammer: 9.06 s
Vents: 9.85 s
Both: 8.86 s
Both and BiA: 8.67 s
Both and Max Crew %: 8.31 s

See Crew, Consumables, or Equipment for more information.
Rate of Fire


|


|}}

|


|}}


2055.6

Standard Gun

Using Shell Type 1 (360 Damage):


Theoretical Damage Per Minute
Nominal DPM: 2055.6
50% Crew: 1659.6
75% Crew: 1900.8
100% Crew: 2145.6
100% Crew
Vents: 2192.4
Rammer: 2383.2
Both: 2437.2
Both and BiA: 2491.2
Both and Max Crew %: 2599.2

Advantageous Damage Per Minute
First-shot DPM: 2415.6
50% Crew: 2019.6
75% Crew: 2260.8
100% Crew: 2505.6
100% Crew
Rammer: 2743.2
Vents: 2552.4
Both: 2797.2
Both and BiA: 2851.2
Both and Max Crew %: 2959.2

See here, here, or here for more information.

Standard Gun

Using Shell Type 2 (360 Damage):


Theoretical Damage Per Minute
Nominal DPM: 2055.6
50% Crew: 1659.6
75% Crew: 1900.8
100% Crew: 2145.6
100% Crew
Vents: 2192.4
Rammer: 2383.2
Both: 2437.2
Both and BiA: 2491.2
Both and Max Crew %: 2599.2

Advantageous Damage Per Minute
First-shot DPM: 2415.6
50% Crew: 2019.6
75% Crew: 2260.8
100% Crew: 2505.6
100% Crew
Rammer: 2743.2
Vents: 2552.4
Both: 2797.2
Both and BiA: 2851.2
Both and Max Crew %: 2959.2

See here, here, or here for more information.

Standard Gun

Using Shell Type 3 (440 Damage):
With wholly penetrating hits

Theoretical Damage Per Minute
Nominal DPM: 2512.4
50% Crew: 2028.4
75% Crew: 2323.2
100% Crew: 2622.4
100% Crew
Vents: 2679.6
Rammer: 2912.8
Both: 2978.8
Both and BiA: 3044.8
Both and Max Crew %: 3176.8

Advantageous Damage Per Minute
First-shot DPM: 2952.4
50% Crew: 2468.4
75% Crew: 2763.2
100% Crew: 3062.4
100% Crew
Rammer: 3352.8
Vents: 3119.6
Both: 3418.8
Both and BiA: 3484.8
Both and Max Crew %: 3616.8

See here, here, or here for more information.


|


|}}

|


|}}


2055.6

Standard Gun

Using Shell Type 1 (360 Damage):


Theoretical Damage Per Minute
Nominal DPM: 2055.6
50% Crew: 1659.6
75% Crew: 1900.8
100% Crew: 2145.6
100% Crew
Vents: 2192.4
Rammer: 2383.2
Both: 2437.2
Both and BiA: 2491.2
Both and Max Crew %: 2599.2

Advantageous Damage Per Minute
First-shot DPM: 2415.6
50% Crew: 2019.6
75% Crew: 2260.8
100% Crew: 2505.6
100% Crew
Rammer: 2743.2
Vents: 2552.4
Both: 2797.2
Both and BiA: 2851.2
Both and Max Crew %: 2959.2

See here, here, or here for more information.

Standard Gun

Using Shell Type 2 (360 Damage):


Theoretical Damage Per Minute
Nominal DPM: 2055.6
50% Crew: 1659.6
75% Crew: 1900.8
100% Crew: 2145.6
100% Crew
Vents: 2192.4
Rammer: 2383.2
Both: 2437.2
Both and BiA: 2491.2
Both and Max Crew %: 2599.2

Advantageous Damage Per Minute
First-shot DPM: 2415.6
50% Crew: 2019.6
75% Crew: 2260.8
100% Crew: 2505.6
100% Crew
Rammer: 2743.2
Vents: 2552.4
Both: 2797.2
Both and BiA: 2851.2
Both and Max Crew %: 2959.2

See here, here, or here for more information.

Standard Gun

Using Shell Type 3 (440 Damage):
With wholly penetrating hits

Theoretical Damage Per Minute
Nominal DPM: 2512.4
50% Crew: 2028.4
75% Crew: 2323.2
100% Crew: 2622.4
100% Crew
Vents: 2679.6
Rammer: 2912.8
Both: 2978.8
Both and BiA: 3044.8
Both and Max Crew %: 3176.8

Advantageous Damage Per Minute
First-shot DPM: 2952.4
50% Crew: 2468.4
75% Crew: 2763.2
100% Crew: 3062.4
100% Crew
Rammer: 3352.8
Vents: 3119.6
Both: 3418.8
Both and BiA: 3484.8
Both and Max Crew %: 3616.8

See here, here, or here for more information.
Damage Per Minute


|


|}}


0.54 m 

With 50% Crew: 0.669 m
With 75% Crew: 0.584 m
With 100% Crew: 0.518 m
With BiA: 0.506 m
With BiA and Vents: 0.495 m
Maximum possible: 0.475 m

For more details, see Crew


|


|}}


0.54 m 

With 50% Crew: 0.669 m
With 75% Crew: 0.584 m
With 100% Crew: 0.518 m
With BiA: 0.506 m
With BiA and Vents: 0.495 m
Maximum possible: 0.475 m

For more details, see Crew
Accuracy


|


|}}


2.9 s 

With 50% Crew: 3.592 s
With 75% Crew: 3.137 s
With 100% Crew: 2.781 s
With GLD: 2.528 s
With BiA: 2.719 s
With BiA and Vents: 2.66 s
With both and GLD: 2.418 s
Maximum possible: 2.318 s

For more details, see Crew or Equipment


|


|}}


2.9 s 

With 50% Crew: 3.592 s
With 75% Crew: 3.137 s
With 100% Crew: 2.781 s
With GLD: 2.528 s
With BiA: 2.719 s
With BiA and Vents: 2.66 s
With both and GLD: 2.418 s
Maximum possible: 2.318 s

For more details, see Crew or Equipment
Aim time
2020 deg/s Turret Traverse
360° Gun Arc
-10°/+20°-10°/+20° Elevation Arc
120120 rounds Ammo Capacity
General
2020 % Chance of Fire


360 m 

With 50% Crew: 282.8 m
With 75% Crew: 321.5 m
With 100% Crew: 360 m
With Recon and Situational Awareness: 378.2 m
With Coated Optics: 396 m
With Binocular Telescope: 450 m
Maximum possible: 515.4 m

For more details, see Skills or Equipment


360 m 

With 50% Crew: 282.8 m
With 75% Crew: 321.5 m
With 100% Crew: 360 m
With Recon and Situational Awareness: 378.2 m
With Coated Optics: 396 m
With Binocular Telescope: 450 m
Maximum possible: 515.4 m

For more details, see Skills or Equipment
View Range


|


|}}


300 m 

With 50% Crew: 242.2 m
With 75% Crew: 277.4 m
With 100% Crew: 312.9 m
With 100% Signal Boost: 360 m
When affected by 100% Relaying: 330 m
Maximum possible: 450.4 m

For more details, see Skills or Equipment


|


|}}


425 m 

With 50% Crew: 343.1 m
With 75% Crew: 392.9 m
With 100% Crew: 443.2 m
With 100% Signal Boost: 510 m
When affected by 100% Relaying: 467.5 m
Maximum possible: 638 m

For more details, see Skills or Equipment
Signal Range
Values are Stock - click for Top
O-I Experimental


V

AnnoJ23_Mi_To.png

445000

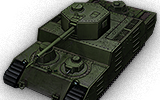
The O-I Experimental is a Japanese tier 5 heavy tank.

Development of this superheavy tank was initiated by Colonel Iwakuro from the Army Ministry of Japan. The project was carried out by the Mitsubishi company, therefore the vehicle became known as the Mi-To. In the army, the tank was designated the O-I. Details of the project are largely unknown.

The O-I Experimental marks the end of its Japanese heavy line.

Modules / Available Equipment and Consumables

Modules

Ico_gun_alpha.png

Guns

Tier Gun Penetration
(mm)
Damage
(HP)
Rate of fire
(rounds/minute)
Dispersion
(m/100m)
Aiming time
(s)
Weight
(kg)
Price
(Credits)

IV 7.5 cm Tank Gun Type 3 90/112/38 115/115/175 16.67 0.4 2.1 1400 30500
V 7.5 cm Tank Gun Type 5 124/155/38 125/125/175 16.22 0.39 2.3 1489 42500
V 12 cm Short Barrel Gun 60/140/60 360/360/440 5.71 0.54 2.9 634 44000

Ico_engine_alpha.png

Engines

Tier Engine Engine Power
(hp)
Chance of Fire on Impact
(%)
Weight
(kg)
Price
(Credits)

VII 2x Kawasaki Type 98 V-12 (550) 1100 20 1020 51000
VIII 2x Kawasaki Type 98 V-12 (600) 1200 20 1020 77500

Ico_suspension_alpha.png

Suspensions

Tier Suspension Load Limit
(т)
Traverse Speed
(gr/sec)
Rmin Weight
(kg)
Price
(Credits)

IV O-I Experimental 100.5 20 B/2 20000 4000
V O-I Experimental Kai 105.5 22 B/2 20000 11400

Ico_radio_alpha.png

Radios

Tier Radio Signal Range
(m)
Weight
(kg)
Price
(Credits)

II Type 94 Mk. 4 Otsu 300 40 0
IV Type 94 Mk. 4 Hei 350 90 2350
VI Type 96 Mk. 4 Bo 425 50 14000

Compatible Equipment

Low Noise Exhaust System Class 2 Medium Spall Liner Camouflage Net Class 2 Coated Optics Class 2 Experimental Optics Wear-Resistant Gun Laying Drive Improved Configuration Venting System Innovative Loading System Enhanced Gun Laying Drive Class 2 Improved Hardening Class 2 Additional Grousers Class 2 Modified Configuration Class 2 Improved Rotation Mechanism Class 2 Improved Aiming Class 2 Improved Ventilation Class 2 Binocular Telescope Class 2 Gun Rammer Class 2 Turbocharger Class 2 

Compatible Consumables

Automatic Fire Extinguisher Natural Cover Optical Calibration Aim Tuning Experienced Firefighters Manual Fire Extinguisher Pre-Battle Maintenance Vent Purge Large First Aid Kit Large Repair Kit Duty Comes First Shell Organizer Quality Oil Orderly Ammo Rack Focus on Target Onigiri Increased Focus Small First Aid Kit Small Repair Kit Gearbox Intricacy Steady Hand Combat Course 


Player Opinion

Pros and Cons

Pros:

- 300Alpha damage, best in class - Good Fire control - Good reload time, essentially providing good DPM with minimal exposure - Good top speed that is easily reached on flat ground - 100 ton tank that can deal serious ramming damage - Decent frontal armor with no real weakspot - 10 degrees of gun depression - High module and crew HP, module damage and crew death are rare


Cons:

- Largest tank ever at Tier5, easy to hit - Poor Camouflage value - Armor isn't great - Poor Premium round pen - Slow acceleration, although given the weight and size it is still unreasonably good - Armour is very flat, turret seems very weak


Performance

Fully upgraded, the Mighty Bentobox is a very strong tank. 300 alpha is unheard of for tier 5 heavies since the removal of 107mm on the KV tank way back then, and the only other tank to have 300 alpha at tier 5 is the French S-35CA with the 105mm gun. Coupled with surprisingly good mobility and extremely good gun handling, it is very very good at peek-a-boom and midrange snapshots. Another important feature to be noted is the -10 degrees of gun depression: You can hulldown peek-a-boom very easily and without a giant cupola on the turret, exposure while doing so is minimal. Last but not least, the armor is decent, there is no frontal "weakspot" to speak of, with some angling it will bounce same tier 75mm~76mm rounds with reliability.


Early Research

Suspension does not have to be researched to mount other modules; therefore players can straight up research the 10cm first and then do the engine/suspension in the order they please.

The two 7.5cm may already be unlocked if you have played the medium line. Otherwise, you have the stock 12cm derp gun to use. The stock derp gun is similar to the Russian U-11 122mm derp gun in performance, but has noticeably slower shell velocity; therefore players should try to get close to the enemy to have a decent chance of hitting the enemy. The stock 12cm leads to both the 75mm guns and the main feature of this Bento box of a tank: the 10cm. The 10cm cannon is required to unlock the O-I and is well worth the upgrade as it is the only heavy tank that does 300 damage per shot in tier 5, and does it with good precision, fire control, and good reload rate to boot. The only drawback of this gun is that the premium AP round does not offer significant penetration advantage over the standard AP, and may run into trouble facing heavily armored tanks in higher tiers, so be sure to read the teamlist for expected enemies at each map location and plan ahead.

Stock suspension is good enough to handle every module, but upgraded one can make the tank noticeably more nimble.


The upgraded engine is quite expensive in terms of XP, but this engine carries over right up the line of heavy tanks, so it's well worth the investment. The radios also carry over up the line.


Gallery

Historical Info

After the Battles of Khalkhin Gol with Soviet Union in 1939, Japan tried to improve its tank design using lessons learnt from this battle. Many Japanese tanks such as Type 95 Ha-Go light tank and Type 97 Chi-Ha medium tanks were proven to be insufficient to encounter Soviet armored forces. Larger tank design was urgently needed. A super heavy tank project was proposed along with new medium tank designs.


In 1940, Hideo Iwakuro Colonel from the Army Ministry of Japan (陸軍省 Rikugun-shō) ordered the Army Engineering Division to develop a new super heavy tank. Iwakuro Colonel also indicated that the new tank should be at least two times larger than the current Type 95 Heavy Tank(26 tonnes).

The fifth Army Engineering Division carried out the project secretly and completed a prototype by the end of 1940. The 100 tonne prototype was equipped with a 105mm cannon and could carry over one hundred shells for its main gun. Its secondary armament consisted of a 75 mm cannon and a 7.7 mm machine gun.

The frontal hull of the tank was protected by a 75 mm thick armor and another 75 mm steel plate could be attached to provide additional protection. The side armor of the tank was only 35 mm but it could also attach 35 mm steel plate if needed.

During test trials, engineers realized that it would be highly challenging to deploy this tank. The weight of O-I tank added too much pressure on its suspension system and made it impossible to pass through uneven terrain. The prototype was therefore left in the factory and was scrapped in 1944 and its blueprint was later lost in the war.


Historical Gallery


Japan
Light Tanks IRenault Otsu IIType 95 Ha-Go IIType 97 Te-Ke IIIType 97 Chi-Ha IIIType 98 Ke-Ni IVType 5 Ke-Ho
Medium Tanks IIChi-Ni IIType 89 I-Go/Chi-Ro IVType 1 Chi-He VType 3 Chi-Nu VType 3 Chi-Nu Kai VIType 4 Chi-To VIIType 5 Chi-Ri VIIISTA-1 VIIISTA-2 IXType 61 XSTB-1
Heavy Tanks IIIType 91 Heavy IVType 95 Heavy VO-I Experimental VIHeavy Tank No. VI VIO-I VIIO-Ni VIIIO-Ho IXType 4 Heavy XType 5 Heavy
Tank Destroyers
Self-Propelled Artillery
Heavy Tanks
USA VT14 VT1 Heavy Tank VIPawlack Tank VIM6 VIIKing Tiger (Captured) VIIM-II-Y VIIT29 VIIIChrysler K VIIIChrysler K GF VIIIT26E5 VIIIT26E5 Patriot VIIIM54 Renegade VIIIT77 VIIIM-III-Y VIIIM-IV-Y VIIIM6A2E1 VIIIT32 VIIIT34 VIIIT34 B IXAE Phase I IXConcept 1B IXM-VI-Y IXM103 IXT54E1 XM-V-Y XT110E5 XT57 Heavy Tank
UK VChurchill I VExcelsior VIChurchill VII VITOG II* VIIBlack Prince VIIFV201 (A45) VIIICharlemagne VIIICaliban VIIIGonsalo VIIICaernarvon VIIICaernarvon Action X IXFV4201 Chieftain Proto IXConqueror XFV215b XSuper Conqueror XT95/FV4201 Chieftain
Germany IVPz.Kpfw. B2 740 (f) IVDurchbruchswagen 2 VITiger 131 VIVK 30.01 (P) VIVK 36.01 (H) VIIVK 45.03 VIITiger I VIITiger (P) VIIIVK 100.01 (P) VIIIVK 168.01 (P) VIIIVK 168.01 Mauerbrecher VIIIVK 75.01 (K) VIIIE 75 TS VIIILöwe VIIITiger II VIIIVK 45.02 (P) Ausf. A IXE 75 IXMäuschen IXVK 45.02 (P) Ausf. B XE 100 XPz.Kpfw. VII XMaus XVK 72.01 (K)
France IVB1 VBDR G1 B VIARL 44 VIIAMX M4 mle. 45 VIIIAMX 50 100 VIIIAMX M4 mle. 49 VIIIAMX M4 mle. 49 Liberté VIIIAMX 65 t VIIISomua SM VIIIFCM 50 t IXAMX 50 120 IXLorraine 50 t IXAMX M4 mle. 51 XAMX 50 B XAMX M4 mle. 54
USSR VChurchill III VKV-220-2 VKV-220-2 Beta Test VKV-1 VKV-1 shielded VIKV-1S VIKV-2 VIKV-2 (R) VIKV-85 VIObject 244 VIT-150 VIIIS VIIKV-3 VIIKV-122 VIIIS-2M VIIIS-2 shielded VIIIS-2 VIIIIS-3 VIIIIS-6 VIIIIS-6 B VIIIKV-5 VIIIKV-4 VIIIIS-5 (Object 730) VIIIIS-3A VIIIIS-3A Peregrine VIIIKirovets-1 VIIIKV-4 Kreslavskiy VIIIObject 252U Defender VIIIObject 252U VIIIIS-M VIIIObject 703 Version II VIIIIS-2-II IXT-10 IXObject 777 Version II IXObject 257 IXObject 705 IXIS-3-II IXST-I XIS-4 XIS-7 XObject 260 XObject 705A XObject 277 XObject 279 early XST-II XObject 780
China VIIIS-2 VIIIWZ-111 VIIIWZ-111 Alpine Tiger VIII110 VIII112 IXWZ-111 model 1-4 IXWZ-114 X113 X113 Beijing Opera XWZ-111 model 5A XWZ-111 Qilin
Japan IIIType 91 Heavy IVType 95 Heavy VO-I Experimental VIHeavy Tank No. VI VIO-I VIIO-Ni VIIIO-Ho IXType 4 Heavy XType 5 Heavy
Czechoslovakia VIIŠkoda T 45 VIIVz. 44-1 VIIIŠkoda T 56 VIIITNH 105/1000 IXTNH T Vz. 51 XVz. 55
Sweden VIIIEmil I VIIIEMIL 1951 VIIIBofors Tornvagn IXEmil II IXStrv K XKranvagn
Italy VIICarro d'assalto P.88 VIIIProgetto CC55 mod. 54 VIIIBisonte C45 IXProgetto C50 mod. 66 XRinoceronte
Poland VII45TP Habicha VIII50TP prototyp VIII53TP Markowskiego IX50TP Tyszkiewicza X60TP Lewandowskiego
ja:Tank:J23 Mi To