Welcome to Wargaming.net Wiki!
Variants

Object 705

Jump to: navigation, search
Revision as of 07:56, 23 June 2019Revision as of 14:00, 6 August 2019
10 intermediate revisions by 3 users not shown
Line 1:Line 1:
 {{TankData|Tank=  {{TankData|Tank=
  
?| The little brother of [[Tank:R145_Object_705_A|Object 705A]], sporting smaller yet better handling guns. yet having more downside than its big brother.+| The little brother of [[Tank:R145_Object_705_A|Object 705A]], sporting smaller yet better handling guns. It has more downsides than its big brother, however.
  
 |Gallery=  |Gallery=
Line 7:Line 7:
 |InTheGame_pros=  |InTheGame_pros=
  
?- Hull armor is decently sloped all around, can mostly bounce lower tiers and badly aimed shots+* Choice of two guns - 130mm has high alpha damage, and 122mm has good DPM and gun handling
? +* Extremely strong turret armor
?- Strong rear-emplaced turret, very hand to penetrate from the front+* Large healthpool for a Tier 9 heavy tank
? +* Painless stock grind if one has previously researched the IS-7 line
?- Above average HP pool (2000)+
? +
?- S-70 gun has good alpha damage, while BL-13-1A gun has good gun handling and DPM+
  
  
 |InTheGame_cons=  |InTheGame_cons=
  
?- Sluggish due to horrible terrain resistance+* Poor mobility, regardless of acceptable top speed
? +* Poor gun depression
?- BL-13-1A gun has sub-par penetration (unless HEAT is used); S-70 gun has appalling accuracy and gun handling+* Sidescraping is not viable due to weak frontal hull cheeks
? +* Vulnerable to artillery and flanking
?- Bad gun depression on both guns+* Top 130mm gun has poor accuracy, DPM and gun handling
? +
?- Hull armour will generally struggle against tier 10 guns and gold rounds.+
? +
?- Sidescraping is not viable; front hull corners are quite soft. Lower side hull becomes cheese if even slightly overangled.+
? +
?- Poor signal range even when equipped with top radio (625 meters)+
? +
?- Large and weak roof, vulnerable against arty and taller tanks+
? +
?- Harsh stock grind if one have not previously researched through the [[IS-7]] line+
  
 |InTheGame_performance=  |InTheGame_performance=
  
?Coming from IS-M which was truly an excellent sidescraper, one would assume the same case is with this tank. Not so, unfortunately. In fact, virtually the only 3 things this tank has in its favor are frontal turret armor, alpha damage (provided 130mm gun is used) and upper side hull armor when sidescraping. Virtually everything else is either mediocre or bad.+Coming from IS-M which was truly an excellent sidescraper, one would assume the same case is with this tank. Not so, unfortunately. In fact, virtually the only 3 things this tank has in its favor are frontal turret armor, alpha damage (provided 130mm gun is used) and upper side hull armor when sidescraping. Most other things are either mediocre or downright bad.
  
?122mm BL-13-1A gun has good DPM and gun handling, but lacks alpha and penetration (unless HEAT rounds are used). 130mm gun is bad in all departments except alpha damage. And as a cherry on top, gun depression is bad on both guns.+122mm BL-13-1A gun has good DPM and gun handling, but lacks alpha and penetration (unless HEAT rounds are used). 130mm gun is bad in all departments except alpha damage. Gun depression is bad on both guns, so you have to play on flat ground to put the gun to use.
  
?Frontal hull is no match against premium ammo, or even standard ammo of some tanks at this tier. It can only sustain lower tiers without any issues. Lower plate is made of wet toilet tissue paper, even when angled.+Frontal hull is unfortunately no match against premium ammo, or even standard ammo of some tanks at this tier. It can only sustain lower tiers without any issues. Lower plate is approximately 200mm effective, and gets only 30-40mm better with angling; it gets frequently penetrated if left uncovered.
  
?The real dealbreaker on this tank, however, is sidescraping, which is indeed strange as it is a signature manouver of IS-M before it and 705A after it, and both tanks are very effective when using it. On Object 705, however, it is simply unreliable - angling makes your frontal hull cheeks flat and easily penetrable. To make things worse, even lower side armor is easily pentrable when sidescraping and overangle a bit. ALways try not to overangle, but frontal cheeks will be visible even then, so you have to choose which of the 2 weakspots to expose. Moving forward and backwards all the time will sometimes help prevent taking damage, but not always. This tank could really use a rework on frontal hull cheeks to become viable in this line. Until it does, you are stuck with very low number of tactical options.+The real dealbreaker on this tank, however, is sidescraping, which is indeed strange as it is a signature manouver of IS-M before it and 705A after it, and both tanks are quite effective when using it. On Object 705, however, it is very unreliable - angling makes your frontal hull cheeks flat and easily penetrable. To make things worse, even lower side armor is penetrable when sidescraping if you overangle. Moving forward and backwards while sidescraping can sometimes prevent taking damage, as this makes hull cheek harder to hit. This tank could really use a rework on frontal hull cheeks to become viable in this line. Until it does (if ever), you can only play as support for other, better armored heavies.
  
?Mobility is bad, so the tank cannot flex around battlefield. Turret roof is easily overmatchable by taller tanks and arty will love you if you try to hulldown on arty-safe spot.+Mobility is generally mediocre, as the tank cannot flex around battlefield fast as heaviums can. It is still acceptable for a heavy, though.
  
?As you can see, it is really hard to put this tank to effective use. You can only play in heavy packs, never go alone, and do not expose yourself too much because armor on this tank simply doesnt work against anyone in tiers IX and X, especially if your enemy knows the weakspots or simply switches to premium ammo.+Turret roof is easily overmatchable by taller tanks and arty will hammer you mercilessly if you try to hulldown on any open spot. Never go anywhere alone, and try not to get shot at too much because hull armor on this tank simply does not work against most enemies in tiers IX and X, especially if they switch to premium ammo. But when you are top tier, armor works beautifully, and you can dominate in city brawls.
  
 |InTheGame_research=  |InTheGame_research=
Line 61:Line 48:
  
 |HistoricalGallery=  |HistoricalGallery=
?File:Object_705_turret_and_122_mm_BL-13_gun.jpg{{!}}Object 705 turret with the 122mm BL-13+File:Object_705_turret_and_122_mm_BL-13_gun.jpg{{!}}Blueprint of what likely is the Object 705 turret with 152mm M51
 File:Object_705_Armor_profile.jpg{{!}}Object 705 armor profile File:Object_705_Armor_profile.jpg{{!}}Object 705 armor profile
 File:Object_705_profile_area_calculations.jpg File:Object_705_profile_area_calculations.jpg

Revision as of 14:00, 6 August 2019


Ambox_important.png This article requires additional modification.
The design and/or content of this article do not conform to wiki standards.

Missing Content:

  • Gallery
  • History


Object 705

AnnoR153_Object_705.png
Battle Tier
1234567891011
Overview
Mouse over "
Well, the ones further down, of course.
" for more information
[Client Values; Actual values in
Specifically, the mismatch in crew values caused by commander's 10% crew skill bonus. Outside of a crew of 1 commander only, 100% crew is a fiction. The client values, given for 100% crew, will normally be taken into battle with 110% crew skill members aside from specific functions, causing their actual performance to deviate from the expected client value. These differences are taken into account in tooltip boxes.
]
3,570,000  Credits Cost
1900480 HP Hit Points
62.81/6530.39/70 t Weight Limit
Crew
  1. Commander (Radio Operator)
  2. Driver
  3. Gunner
  4. Loader
Mobility
800900 hp Engine Power
40/15 km/h Speed Limit
2224 deg/s Traverse
12.7429.62 hp/t Power/Wt Ratio
NoNo Pivot
Armor
// mm Hull Armor
270/150/100300/150/100 mm Turret Armor
Armament


{{#ifeq:ARMOR_PIERCING_CR|ARMOR_PIERCING||


{{#ifeq:HIGH_EXPLOSIVE|ARMOR_PIERCING||


AP/APCR/HE


{{#ifeq:ARMOR_PIERCING_CR|ARMOR_PIERCING||


{{#ifeq:HIGH_EXPLOSIVE|ARMOR_PIERCING||


AP/APCR/HE
Shells


1025/4800/608


1118/4800/978
Shell Cost
390/390/530490/490/640 HP Damage
212/240/68250/303/68 mm Penetration


|


|}}

|


|}}


4.62 r/m 

Standard Gun

Reload Times
Nominal: 13 s
50% Crew: 16.1 s
75% Crew: 14.06 s
100% Crew: 12.46 s
Rammer: 11.21 s
Vents: 12.19 s
Both: 10.97 s
Both and BiA: 10.73 s
Both and Max Crew %: 10.28 s

See Crew, Consumables, or Equipment for more information.


|


|}}

|


|}}


4.08 r/m 

Standard Gun

Reload Times
Nominal: 14.7 s
50% Crew: 18.21 s
75% Crew: 15.9 s
100% Crew: 14.09 s
Rammer: 12.68 s
Vents: 13.78 s
Both: 12.4 s
Both and BiA: 12.13 s
Both and Max Crew %: 11.63 s

See Crew, Consumables, or Equipment for more information.
Rate of Fire


|


|}}

|


|}}


1801.8

Standard Gun

Using Shell Type 1 (390 Damage):


Theoretical Damage Per Minute
Nominal DPM: 1801.8
50% Crew: 1454.7
75% Crew: 1665.3
100% Crew: 1879.8
100% Crew
Vents: 1922.7
Rammer: 2090.4
Both: 2137.2
Both and BiA: 2184
Both and Max Crew %: 2277.6

Advantageous Damage Per Minute
First-shot DPM: 2191.8
50% Crew: 1844.7
75% Crew: 2055.3
100% Crew: 2269.8
100% Crew
Rammer: 2480.4
Vents: 2312.7
Both: 2527.2
Both and BiA: 2574
Both and Max Crew %: 2667.6

See here, here, or here for more information.

Standard Gun

Using Shell Type 2 (390 Damage):


Theoretical Damage Per Minute
Nominal DPM: 1801.8
50% Crew: 1454.7
75% Crew: 1665.3
100% Crew: 1879.8
100% Crew
Vents: 1922.7
Rammer: 2090.4
Both: 2137.2
Both and BiA: 2184
Both and Max Crew %: 2277.6

Advantageous Damage Per Minute
First-shot DPM: 2191.8
50% Crew: 1844.7
75% Crew: 2055.3
100% Crew: 2269.8
100% Crew
Rammer: 2480.4
Vents: 2312.7
Both: 2527.2
Both and BiA: 2574
Both and Max Crew %: 2667.6

See here, here, or here for more information.

Standard Gun

Using Shell Type 3 (530 Damage):
With wholly penetrating hits

Theoretical Damage Per Minute
Nominal DPM: 2448.6
50% Crew: 1976.9
75% Crew: 2263.1
100% Crew: 2554.6
100% Crew
Vents: 2612.9
Rammer: 2840.8
Both: 2904.4
Both and BiA: 2968
Both and Max Crew %: 3095.2

Advantageous Damage Per Minute
First-shot DPM: 2978.6
50% Crew: 2506.9
75% Crew: 2793.1
100% Crew: 3084.6
100% Crew
Rammer: 3370.8
Vents: 3142.9
Both: 3434.4
Both and BiA: 3498
Both and Max Crew %: 3625.2

See here, here, or here for more information.


|


|}}

|


|}}


1999.2

Standard Gun

Using Shell Type 1 (490 Damage):


Theoretical Damage Per Minute
Nominal DPM: 1999.2
50% Crew: 1612.1
75% Crew: 1847.3
100% Crew: 2087.4
100% Crew
Vents: 2136.4
Rammer: 2317.7
Both: 2371.6
Both and BiA: 2425.5
Both and Max Crew %: 2528.4

Advantageous Damage Per Minute
First-shot DPM: 2489.2
50% Crew: 2102.1
75% Crew: 2337.3
100% Crew: 2577.4
100% Crew
Rammer: 2807.7
Vents: 2626.4
Both: 2861.6
Both and BiA: 2915.5
Both and Max Crew %: 3018.4

See here, here, or here for more information.

Standard Gun

Using Shell Type 2 (490 Damage):


Theoretical Damage Per Minute
Nominal DPM: 1999.2
50% Crew: 1612.1
75% Crew: 1847.3
100% Crew: 2087.4
100% Crew
Vents: 2136.4
Rammer: 2317.7
Both: 2371.6
Both and BiA: 2425.5
Both and Max Crew %: 2528.4

Advantageous Damage Per Minute
First-shot DPM: 2489.2
50% Crew: 2102.1
75% Crew: 2337.3
100% Crew: 2577.4
100% Crew
Rammer: 2807.7
Vents: 2626.4
Both: 2861.6
Both and BiA: 2915.5
Both and Max Crew %: 3018.4

See here, here, or here for more information.

Standard Gun

Using Shell Type 3 (640 Damage):
With wholly penetrating hits

Theoretical Damage Per Minute
Nominal DPM: 2611.2
50% Crew: 2105.6
75% Crew: 2412.8
100% Crew: 2726.4
100% Crew
Vents: 2790.4
Rammer: 3027.2
Both: 3097.6
Both and BiA: 3168
Both and Max Crew %: 3302.4

Advantageous Damage Per Minute
First-shot DPM: 3251.2
50% Crew: 2745.6
75% Crew: 3052.8
100% Crew: 3366.4
100% Crew
Rammer: 3667.2
Vents: 3430.4
Both: 3737.6
Both and BiA: 3808
Both and Max Crew %: 3942.4

See here, here, or here for more information.
Damage Per Minute


|


|}}


0.4 m 

With 50% Crew: 0.496 m
With 75% Crew: 0.433 m
With 100% Crew: 0.384 m
With BiA: 0.375 m
With BiA and Vents: 0.367 m
Maximum possible: 0.352 m

For more details, see Crew


|


|}}


0.44 m 

With 50% Crew: 0.545 m
With 75% Crew: 0.476 m
With 100% Crew: 0.422 m
With BiA: 0.413 m
With BiA and Vents: 0.404 m
Maximum possible: 0.387 m

For more details, see Crew
Accuracy


|


|}}


3 s 

With 50% Crew: 3.716 s
With 75% Crew: 3.245 s
With 100% Crew: 2.877 s
With GLD: 2.615 s
With BiA: 2.813 s
With BiA and Vents: 2.752 s
With both and GLD: 2.502 s
Maximum possible: 2.398 s

For more details, see Crew or Equipment


|


|}}


3 s 

With 50% Crew: 3.716 s
With 75% Crew: 3.245 s
With 100% Crew: 2.877 s
With GLD: 2.615 s
With BiA: 2.813 s
With BiA and Vents: 2.752 s
With both and GLD: 2.502 s
Maximum possible: 2.398 s

For more details, see Crew or Equipment
Aim time
2426 deg/s Turret Traverse
360° Gun Arc
-5°/+20°-5°/+20° Elevation Arc
4030 rounds Ammo Capacity
General
1515 % Chance of Fire


370 m 

With 50% Crew: 290.7 m
With 75% Crew: 330.4 m
With 100% Crew: 370 m
With Recon and Situational Awareness: 388.7 m
With Coated Optics: 407 m
With Binocular Telescope: 462.5 m
Maximum possible: 529.7 m

For more details, see Skills or Equipment


380 m 

With 50% Crew: 298.6 m
With 75% Crew: 339.3 m
With 100% Crew: 380 m
With Recon and Situational Awareness: 399.2 m
With Coated Optics: 418 m
With Binocular Telescope: 475 m
Maximum possible: 544 m

For more details, see Skills or Equipment
View Range


|


|}}


440 m 

With 50% Crew: 345.7 m
With 75% Crew: 392.9 m
With 100% Crew: 440 m
With 100% Signal Boost: 528 m
When affected by 100% Relaying: 484 m
Maximum possible: 633.1 m

For more details, see Skills or Equipment


|


|}}


625 m 

With 50% Crew: 491.1 m
With 75% Crew: 558.1 m
With 100% Crew: 625 m
With 100% Signal Boost: 750 m
When affected by 100% Relaying: 687.5 m
Maximum possible: 899.3 m

For more details, see Skills or Equipment
Signal Range
Values are Stock - click for Top
Object 705


IX

AnnoR153_Object_705.png

3570000

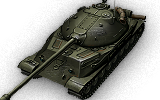
The Object 705 is a Soviet tier 9 heavy tank.

One of the first versions of the Object 705 heavy tank. The vehicle was developed by the Design Bureau of the Chelyabinsk Kirov Plant. Existed only in blueprints.

The little brother of Object 705A, sporting smaller yet better handling guns. It has more downsides than its big brother, however.

The Object 705 leads to the Object 705A.

Modules / Available Equipment and Consumables

Modules

Ico_gun_alpha.png

Guns

Tier Gun Penetration
(mm)
Damage
(HP)
Rate of fire
(rounds/minute)
Dispersion
(m/100m)
Aiming time
(s)
Weight
(kg)
Price
(Credits)

X 130 mm S-70 250/303/68 490/490/640 4.08 0.44 3 2980 297000
X 122 mm BL-13-1 A 248/315/68 440/440/530 5 0.4 3 2790 280000
IX 122 mm D-25BM 212/240/68 390/390/530 4.62 0.4 3 2800 144000

Ico_engine_alpha.png

Engines

Tier Engine Engine Power
(hp)
Chance of Fire on Impact
(%)
Weight
(kg)
Price
(Credits)

IX TD-30 800 15 2000 82000
IX KCh-30 900 15 2000 88000

Ico_suspension_alpha.png

Suspensions

Tier Suspension Load Limit
(т)
Traverse Speed
(gr/sec)
Rmin Weight
(kg)
Price
(Credits)

VIII Object 705 65 22 B/2 11000 30000
IX Object 705 Version 2 70 24 B/2 11000 62800

Ico_radio_alpha.png

Radios

Tier Radio Signal Range
(m)
Weight
(kg)
Price
(Credits)

VII 10RK 440 100 18600
IX 12RT 625 110 33600

Compatible Equipment

Low Noise Exhaust System Class 1 Vertical Stabilizer Class 1 Heavy Spall Liner Camouflage Net Class 2 Coated Optics Class 1 Stabilizing Equipment System Experimental Optics Wear-Resistant Gun Laying Drive Improved Configuration Venting System Innovative Loading System Enhanced Gun Laying Drive Class 1 Improved Hardening Class 1 Additional Grousers Class 1 Modified Configuration Class 1 Improved Rotation Mechanism Class 1 Improved Aiming Class 1 Improved Ventilation Class 1 Binocular Telescope Class 1 Gun Rammer Class 1 Turbocharger Class 1 

Compatible Consumables

Stabilizer Greasing Automatic Fire Extinguisher Natural Cover Optical Calibration Aim Tuning Experienced Firefighters Manual Fire Extinguisher Pre-Battle Maintenance Vent Purge Large First Aid Kit Large Repair Kit Duty Comes First Lend-Lease Oil Shell Organizer Orderly Ammo Rack Focus on Target Extra Combat Rations Removed Speed Governor Increased Focus Small First Aid Kit Small Repair Kit Gearbox Intricacy Steady Hand Combat Course 


Player Opinion

Pros and Cons

Pros:


  • Choice of two guns - 130mm has high alpha damage, and 122mm has good DPM and gun handling
  • Extremely strong turret armor
  • Large healthpool for a Tier 9 heavy tank
  • Painless stock grind if one has previously researched the IS-7 line


Cons:


  • Poor mobility, regardless of acceptable top speed
  • Poor gun depression
  • Sidescraping is not viable due to weak frontal hull cheeks
  • Vulnerable to artillery and flanking
  • Top 130mm gun has poor accuracy, DPM and gun handling


Performance

Coming from IS-M which was truly an excellent sidescraper, one would assume the same case is with this tank. Not so, unfortunately. In fact, virtually the only 3 things this tank has in its favor are frontal turret armor, alpha damage (provided 130mm gun is used) and upper side hull armor when sidescraping. Most other things are either mediocre or downright bad.

122mm BL-13-1A gun has good DPM and gun handling, but lacks alpha and penetration (unless HEAT rounds are used). 130mm gun is bad in all departments except alpha damage. Gun depression is bad on both guns, so you have to play on flat ground to put the gun to use.

Frontal hull is unfortunately no match against premium ammo, or even standard ammo of some tanks at this tier. It can only sustain lower tiers without any issues. Lower plate is approximately 200mm effective, and gets only 30-40mm better with angling; it gets frequently penetrated if left uncovered.

The real dealbreaker on this tank, however, is sidescraping, which is indeed strange as it is a signature manouver of IS-M before it and 705A after it, and both tanks are quite effective when using it. On Object 705, however, it is very unreliable - angling makes your frontal hull cheeks flat and easily penetrable. To make things worse, even lower side armor is penetrable when sidescraping if you overangle. Moving forward and backwards while sidescraping can sometimes prevent taking damage, as this makes hull cheek harder to hit. This tank could really use a rework on frontal hull cheeks to become viable in this line. Until it does (if ever), you can only play as support for other, better armored heavies.

Mobility is generally mediocre, as the tank cannot flex around battlefield fast as heaviums can. It is still acceptable for a heavy, though.

Turret roof is easily overmatchable by taller tanks and arty will hammer you mercilessly if you try to hulldown on any open spot. Never go anywhere alone, and try not to get shot at too much because hull armor on this tank simply does not work against most enemies in tiers IX and X, especially if they switch to premium ammo. But when you are top tier, armor works beautifully, and you can dominate in city brawls.


Suggested Equipment


Tank Gun Rammer Vertical Stabilizer Enhanced Gun Laying Drive Improved Ventilation


Gallery

History for this tank not found

Historical Gallery

USSR
Light Tanks IMS-1 IIBT-2 IIT-45 IIT-26 IIT-60 IITetrarch IIIBT-SV IIILTP IIIM3 Light IIIBT-7 artillery IIIT-116 IIIBT-5 IIIT-127 IIIT-46 IIIT-70 IVBT-7 IVT-80 IVValentine II VA-20 VT-50 VIMT-25 VIT-50-2 VIILTG VIIILTTB VIIILT-432 IXT-54 ltwt. XT-100 LT
Medium Tanks IIIT-29 IVA-32 IVT-28E with F-30 IVT-34 with L-11 IVT-28 VMatilda IV VT-34 shielded VM4-85 VT-34 VIA-43 VIT-34-85M VIT-34-85 Rudy VILoza's M4-A2 Sherman VIT-34-85 VIIA-44 VIIKV-13 VIIT-43 VIIT-44-122 VIIIObject 416 VIIIT-54 first prototype VIIIT-44-100 Igrovoy VIIIT-44-100 (R) VIIISTG VIIISTG Guard VIIIObject 274a VIIIT-44 IXObject 430 Version II IXObject 430 IXT-54 XObject 140 XObject 907 XT-22 medium XK-91 XObject 430U XT-62A
Heavy Tanks VChurchill III VKV-220-2 VKV-220-2 Beta Test VKV-1 VKV-1 shielded VIKV-1S VIKV-2 VIKV-2 (R) VIKV-85 VIObject 244 VIT-150 VIIIS VIIKV-3 VIIKV-122 VIIIS-2M VIIIS-2 shielded VIIIS-2 VIIIIS-3 VIIIIS-6 VIIIIS-6 B VIIIKV-5 VIIIKV-4 VIIIIS-5 (Object 730) VIIIIS-3A VIIIIS-3A Peregrine VIIIKirovets-1 VIIIKV-4 Kreslavskiy VIIIObject 252U Defender VIIIObject 252U VIIIIS-M VIIIObject 703 Version II VIIIIS-2-II IXT-10 IXObject 777 Version II IXObject 257 IXObject 705 IXIS-3-II IXST-I XIS-4 XIS-7 XObject 260 XObject 705A XObject 277 XObject 279 early XST-II XObject 780
Tank Destroyers IIAT-1 IIISU-76I IVSU-85A IVSU-76M VSU-85 VSU-85I VISU-100 VISU-100Y VIIISU-122S VIISU-152 VIISU-100M1 VIISU-122-44 VIIIISU-152 VIIIISU-130 VIIIKV-4 KTTS VIIIT-103 VIIISU-130PM VIIIISU-152K VIIISU-101 IXK-91-PT IXObject 704 IXObject 263 XObject 268 XObject 268 Version V XObject 268 Version 4
Self-Propelled Artillery IISU-18 IIISU-26 IVSU-5 VSU-122A VISU-8 VIIS-51 VIISU-14-1 VIIISU-14-2 IX212A XObject 261
Heavy Tanks
USA VT14 VT1 Heavy Tank VIPawlack Tank VIM6 VIIKing Tiger (Captured) VIIM-II-Y VIIT29 VIIIChrysler K VIIIChrysler K GF VIIIT26E5 VIIIT26E5 Patriot VIIIM54 Renegade VIIIT77 VIIIM-III-Y VIIIM-IV-Y VIIIM6A2E1 VIIIT32 VIIIT34 VIIIT34 B IXAE Phase I IXConcept 1B IXM-VI-Y IXM103 IXT54E1 XM-V-Y XT110E5 XT57 Heavy Tank
UK VChurchill I VExcelsior VIChurchill VII VITOG II* VIIBlack Prince VIIFV201 (A45) VIIICharlemagne VIIICaliban VIIIGonsalo VIIICaernarvon VIIICaernarvon Action X IXFV4201 Chieftain Proto IXConqueror XFV215b XSuper Conqueror XT95/FV4201 Chieftain
Germany IVPz.Kpfw. B2 740 (f) IVDurchbruchswagen 2 VITiger 131 VIVK 30.01 (P) VIVK 36.01 (H) VIIVK 45.03 VIITiger I VIITiger (P) VIIIVK 100.01 (P) VIIIVK 168.01 (P) VIIIVK 168.01 Mauerbrecher VIIIVK 75.01 (K) VIIIE 75 TS VIIILöwe VIIITiger II VIIIVK 45.02 (P) Ausf. A IXE 75 IXMäuschen IXVK 45.02 (P) Ausf. B XE 100 XPz.Kpfw. VII XMaus XVK 72.01 (K)
France IVB1 VBDR G1 B VIARL 44 VIIAMX M4 mle. 45 VIIIAMX 50 100 VIIIAMX M4 mle. 49 VIIIAMX M4 mle. 49 Liberté VIIIAMX 65 t VIIISomua SM VIIIFCM 50 t IXAMX 50 120 IXLorraine 50 t IXAMX M4 mle. 51 XAMX 50 B XAMX M4 mle. 54
USSR VChurchill III VKV-220-2 VKV-220-2 Beta Test VKV-1 VKV-1 shielded VIKV-1S VIKV-2 VIKV-2 (R) VIKV-85 VIObject 244 VIT-150 VIIIS VIIKV-3 VIIKV-122 VIIIS-2M VIIIS-2 shielded VIIIS-2 VIIIIS-3 VIIIIS-6 VIIIIS-6 B VIIIKV-5 VIIIKV-4 VIIIIS-5 (Object 730) VIIIIS-3A VIIIIS-3A Peregrine VIIIKirovets-1 VIIIKV-4 Kreslavskiy VIIIObject 252U Defender VIIIObject 252U VIIIIS-M VIIIObject 703 Version II VIIIIS-2-II IXT-10 IXObject 777 Version II IXObject 257 IXObject 705 IXIS-3-II IXST-I XIS-4 XIS-7 XObject 260 XObject 705A XObject 277 XObject 279 early XST-II XObject 780
China VIIIS-2 VIIIWZ-111 VIIIWZ-111 Alpine Tiger VIII110 VIII112 IXWZ-111 model 1-4 IXWZ-114 X113 X113 Beijing Opera XWZ-111 model 5A XWZ-111 Qilin
Japan IIIType 91 Heavy IVType 95 Heavy VO-I Experimental VIHeavy Tank No. VI VIO-I VIIO-Ni VIIIO-Ho IXType 4 Heavy XType 5 Heavy
Czechoslovakia VIIŠkoda T 45 VIIVz. 44-1 VIIIŠkoda T 56 VIIITNH 105/1000 IXTNH T Vz. 51 XVz. 55
Sweden VIIIEmil I VIIIEMIL 1951 VIIIBofors Tornvagn IXEmil II IXStrv K XKranvagn
Italy VIICarro d'assalto P.88 VIIIProgetto CC55 mod. 54 VIIIBisonte C45 IXProgetto C50 mod. 66 XRinoceronte
Poland VII45TP Habicha VIII50TP prototyp VIII53TP Markowskiego IX50TP Tyszkiewicza X60TP Lewandowskiego
ja:Tank:R153 Object 705