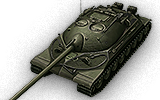
IS-7
| Revision as of 01:58, 11 November 2018 | Revision as of 13:19, 6 December 2018 | |||
| Line 2: | Line 2: | |||
| |With it's well angled "pike-nose" frontal armor layout and a rounded, highly sloped turret front, the IS-7 is one of the toughest nuts to crack when engaged from the front. If positioned behind a piece of cover which shields it's lower glacis plate, it becomes a hardened object with so few weak points that successfully damaging the tank turns into a most frustrating experience. Therein lies a weakness, however - the IS-7 cannot angle it's armor, because if it does, the sloping of the frontal plate will become significantly worsened and enable most guns to punch through with relative ease. The side armor of the tank is comprised of spaced plates which are not only small but angled as well, making even perfectly landed shots to the hull's midsection fail to do any sort of damage at times. The rear armor is quite thin, however, and will rarely deflect even lower tier guns. The IS-7 mounts a very potent 130mm S-70 naval cannon as it's main gun. While its potentially high damage output can seem quite formidable, the gun itself is largely inaccurate, has a rather long aiming time, takes awhile to load and is actually much less effective than it seems. Nevertheless, at close and medium ranges the gun can still inflict very serious damage. Sustainability of said damage is difficult, though, due to the aforementioned long reload and aim times. | |With it's well angled "pike-nose" frontal armor layout and a rounded, highly sloped turret front, the IS-7 is one of the toughest nuts to crack when engaged from the front. If positioned behind a piece of cover which shields it's lower glacis plate, it becomes a hardened object with so few weak points that successfully damaging the tank turns into a most frustrating experience. Therein lies a weakness, however - the IS-7 cannot angle it's armor, because if it does, the sloping of the frontal plate will become significantly worsened and enable most guns to punch through with relative ease. The side armor of the tank is comprised of spaced plates which are not only small but angled as well, making even perfectly landed shots to the hull's midsection fail to do any sort of damage at times. The rear armor is quite thin, however, and will rarely deflect even lower tier guns. The IS-7 mounts a very potent 130mm S-70 naval cannon as it's main gun. While its potentially high damage output can seem quite formidable, the gun itself is largely inaccurate, has a rather long aiming time, takes awhile to load and is actually much less effective than it seems. Nevertheless, at close and medium ranges the gun can still inflict very serious damage. Sustainability of said damage is difficult, though, due to the aforementioned long reload and aim times. | |||
| ? | When compared to it's | + | When compared to it's Soviets counterparts, the [[IS-4]], the [[Object 277]] and [[Object 705A]], the IS-7 instantly feels like a middle gap between the IS-4 and Object 277. Overall, the IS-7 is definitely an up-close-and-personal fighter and should be used as such. Your teammates will rely on you to take and deflect the majority of incoming fire while they in turn support your advance and use their (hopefully) more accurate guns to assist in whittling down the enemy team. Expect to do some heavy lifting when driving the IS-7 and use it's key advantages to fight on your own terms and dictate the flow of the battle, improving your performance and probability of success. | |
| |InTheGame_pros= | |InTheGame_pros= | |||
| ? | * Amazingly thick and angled frontal | + | * Amazingly thick and angled frontal hull armor, very resilient when its lfp its covered. | |
| ? | * Side armor is very angled and spaced; difficult for HEAT and HE shells to penetrate | + | * Side armor is very angled and spaced; difficult for HEAT and HE shells to penetrate. Hilarious sidescrap capabilities. | |
| ? | * Hard hitting main gun with good alpha damage | + | * One of the best (if not the best), turrets in the game. Nigh invincible in hull down positions. | |
| ? | * | + | * Hard hitting main gun with good alpha damage. | |
| ? | * | + | * Very high top speed in flat surfaces and rolling down hills. Excellent p/w ratio. | |
| + | * Good combination of weight, speed, and armor. Make it excellent for ramming tanks. | |||
| Line 17: | Line 18: | |||
| |InTheGame_cons= | |InTheGame_cons= | |||
| ? | * Very low DPM, one of the worst at tier X | + | * Very low DPM, one of the worst at tier X. | |
| ? | * Low penetration for a tier X heavy tank, even when using premium APCR ammunition | + | * Low penetration for a tier X heavy tank, horrible even when using premium APCR ammunition. | |
| ? | + | * Extraordinarily high terrain resistance making the top speed not easy to achieve. | ||
| ? | * Extraordinarily high terrain resistance making the top speed not easy to achieve | + | * Damage taken from front lower hull will certainly kill the driver, further worsening its already bad terrain resistance. | |
| ? | * Damage taken from front lower hull will certainly kill the driver, further worsening its already bad terrain resistance | + | * Extremely prone to being ammo racked, can be done from the front and side hull. | |
| ? | * Extremely prone to being ammo racked, can be done from the front | + | * High penetrating ammunition can penetrate the upper glacis plate with ease when the tank is angled. Also has a big lfp. | |
| ? | * | + | ||
Revision as of 13:19, 6 December 2018
IS-7

Mouse over "
[Client Values; Actual values in
| 6,100,000 |
| 2400480 HP Hit Points |
| 68.19/70.9529.34/70.95 t Weight Limit |
- Commander
- Gunner
- Driver
- Loader (Radio Operator)
- Loader
| 12001200 hp Engine Power |
| 59.6/15 km/h Speed Limit |
| 2828 deg/s Traverse |
| 17.640.9 hp/t Power/Wt Ratio |
| NoNo Pivot |
| // mm Hull Armor |
| 240/185/94240/185/94 mm Turret Armor |
AP/APCR/HE
AP/APCR/HE Shells |
1118/4800/978
1118/4800/978 Shell Cost |
| 490/490/640490/490/640 HP Damage |
| 250/303/68250/303/68 mm Penetration |
|
4.38 r/m ▲
4.38 r/m Standard Gun ▲ Rate of Fire Standard Gun |
|
2146.2 ▲
Standard Gun
▼
Standard Gun
▲
2146.2 Standard Gun ▲
Standard Gun
▼
Standard Gun
▲ Damage Per Minute Standard Gun |
|
0.4 m ▲
0.4 m With 50% Crew: 0.496 m ▲ Accuracy With 50% Crew: 0.496 m |
| 2.9 s 2.9 s Aim time |
| 2525 deg/s Turret Traverse |
| 360° Gun Arc |
| -6°/+18°-6°/+18° Elevation Arc |
| 3030 rounds Ammo Capacity |
| 1515 % Chance of Fire |
| 400 m 400 m View Range |
| 720 m 720 m Signal Range |
Additional Statistics
(Top Configuration)
Camouflage
- Stationary: 6.9%
- When Moving: 3.4%
- When Firing: 1.1%
Terrain Resistance
- On Hard Ground: 1.25
- On Medium Ground: 1.73
- On Soft Ground: 2.97
Dispersion Change Values
- Turret Contribution
- Rotation: 0.08
- Shot Recoil: 3.84
- Suspension Contribution
- Acceleration: 0.2
- Turning: 0.2
With 100% Crew
X
6100000
The IS-7 is a Soviet tier 10 heavy tank.
Development of the IS-7 started in the spring of 1945. Prototypes successfully underwent trials in 1946 and 1947. However, the IS-7 never saw mass production.
With it's well angled "pike-nose" frontal armor layout and a rounded, highly sloped turret front, the IS-7 is one of the toughest nuts to crack when engaged from the front. If positioned behind a piece of cover which shields it's lower glacis plate, it becomes a hardened object with so few weak points that successfully damaging the tank turns into a most frustrating experience. Therein lies a weakness, however - the IS-7 cannot angle it's armor, because if it does, the sloping of the frontal plate will become significantly worsened and enable most guns to punch through with relative ease. The side armor of the tank is comprised of spaced plates which are not only small but angled as well, making even perfectly landed shots to the hull's midsection fail to do any sort of damage at times. The rear armor is quite thin, however, and will rarely deflect even lower tier guns. The IS-7 mounts a very potent 130mm S-70 naval cannon as it's main gun. While its potentially high damage output can seem quite formidable, the gun itself is largely inaccurate, has a rather long aiming time, takes awhile to load and is actually much less effective than it seems. Nevertheless, at close and medium ranges the gun can still inflict very serious damage. Sustainability of said damage is difficult, though, due to the aforementioned long reload and aim times.
When compared to it's Soviets counterparts, the IS-4, the Object 277 and Object 705A, the IS-7 instantly feels like a middle gap between the IS-4 and Object 277. Overall, the IS-7 is definitely an up-close-and-personal fighter and should be used as such. Your teammates will rely on you to take and deflect the majority of incoming fire while they in turn support your advance and use their (hopefully) more accurate guns to assist in whittling down the enemy team. Expect to do some heavy lifting when driving the IS-7 and use it's key advantages to fight on your own terms and dictate the flow of the battle, improving your performance and probability of success.
The IS-7 marks the end of its Soviet heavy line.
Modules / Available Equipment and Consumables
Modules

Guns
| Tier | Gun | Penetration (mm) |
Damage (HP) |
Rate of fire (rounds/minute) |
Dispersion (m/100m) |
Aiming time (s) |
Weight (kg) |
Price (
| |
|---|---|---|---|---|---|---|---|---|---|
| X | 130 mm S-70 | 250/303/68 | 490/490/640 | 4.38 | 0.4 | 2.9 | 2980 | 297000 |

Engines
| Tier | Engine | Engine Power (hp) |
Chance of Fire on Impact (%) |
Weight (kg) |
Price (
| |
|---|---|---|---|---|---|---|
| X | M-50TI | 1200 | 15 | 700 | 132000 |

Suspensions
| Tier | Suspension | Load Limit (т) |
Traverse Speed (gr/sec) |
Rmin | Weight (kg) |
Price (
| |
|---|---|---|---|---|---|---|---|
| X | IS-7 | 70.95 | 28 | B/2 | 11000 | 82500 |

Radios
| Tier | Radio | Signal Range (m) |
Weight (kg) |
Price (
| |
|---|---|---|---|---|---|
| X | 10RK-26 | 720 | 160 | 51600 |
Compatible Equipment


![]()


![]()
![]()
![]()
![]()
![]()
![]()


![]()

![]()

Compatible Consumables
![]()
![]()
![]()
![]()
![]()
![]()
![]()
![]()
![]()
![]()
![]()
![]()
![]()
![]()
![]()
![]()
![]()
![]()
![]()
![]()
![]()
![]()
![]()
![]()
Player Opinion
Pros and Cons
Pros:
- Amazingly thick and angled frontal hull armor, very resilient when its lfp its covered.
- Side armor is very angled and spaced; difficult for HEAT and HE shells to penetrate. Hilarious sidescrap capabilities.
- One of the best (if not the best), turrets in the game. Nigh invincible in hull down positions.
- Hard hitting main gun with good alpha damage.
- Very high top speed in flat surfaces and rolling down hills. Excellent p/w ratio.
Cons:
- Very low DPM, one of the worst at tier X.
- Low penetration for a tier X heavy tank, horrible even when using premium APCR ammunition.
- Extraordinarily high terrain resistance making the top speed not easy to achieve.
- Damage taken from front lower hull will certainly kill the driver, further worsening its already bad terrain resistance.
- Extremely prone to being ammo racked, can be done from the front and side hull.
Performance
IS-7 is a fast heavy tank that delivers mediocre damage while being hard to kill due to its heavily sloped front armor. The IS-7 has some of the best angled frontal armor in the game, however this is somewhat nullified at close range by the equally thick but much less angled lower plate. All these strengths come with a weakness; the IS-7's main gun, while having the same listed accuracy as the E-100's 15cm, in practice seems to be worse at actually hitting the target, let alone hitting a weakspot, thus requiring the player to get fairly close to their target in order to lessen the impact of its poor dispersion values. This in turn makes you a much easier target to hit as well, with a lot of the frontal armor being penetrable by the high penetration premium ammunition found on a lot of tier IX and X tanks from the range the IS-7 prefers to play in. The IS-7 uses the 130 mm S-70, which has better alpha damage than the 122mm M62-T2 mounted on IS-4, but worse stats elsewhere. The main difference between the IS-7 and the IS-4 is that the IS-7 is much faster, with a top speed of 60 km/h (though this is difficult to reach under normal driving conditions), as well as having good turret traverse. A more modern comparison would be with the Object 277, which completely outclasses the IS-7 in terms of mobility, has a better gun complimented nicely by 340mm penetration HEAT rounds, but loses out on hull armor whilst still having extremely strong turret armor (better than the 113 and WZ-111 5A). This makes the Object 277 picked far more frequently in competitive modes because of the high penetration and superior speed.
However, these sloping plates also add a disadvantage: You cannot angle the frontal armor of IS-7 as you expose the well-sloped-but-weak armor plate to the enemy, the effective armor when fighting angled drops a fair amount, allowing tier 8, 9, and 10 guns to punch through if they strike at a shallow enough angle to the plate. This in turn makes your lower plate incredibly easy to penetrate as it is just as thin as the upper plate but with far worse sloping. When fighting one at an angle, prefer its flatter front armor sections than is angled side armor, or shoot the sprocket, dealing damage and throwing off the track. If fighting in an urban environment with many street corners that force you to turn to shoot you opponent, it's advised that you bait them into shooting your thick and spaced side armor by sidescraping, then returning fire as they reload. Alternatively, if your weak lower hull is exposed to enemy fire, try to wiggle or shake it so that it's harder to penetrate. This can even sometime bounces tier X TD shots. The IS-7 is frequently viewed as one of the easiest tier X tanks in the game to play (particularly in random battles), because of the decent mobility, high alpha damage and armor that always has weak points and strong points making it so that it is difficult to play the tank wrong, and it being very forgiving to mistakes the average player is likely to make. However these more generic traits that the IS-7 has (that being that it isn't excellent at any one thing) means that in competitive game modes the IS-7 is rarely seen, because tanks that are better at one job are frequently used in place (e.g. the Super Conqueror might be used if good turret armor is required, because of the better gun it has, or the T110E4 might be used if high alpha damage with armor that can bounce some shots is required, as in these game modes the IS-7's hull armor is frequently unable to hold up against the high penetration premium ammunition the majority of competitive tanks have. Also, if a tank is required in order to be flexible and possibly do one of several jobs, the 113, Object 277, and WZ-111 5A are all picked in favor of the IS-7 because of their power level. That being said, the IS-7 is picked when a fast tank with excellent turret armor is needed, and the position it will be using is unable to hide the weaker upper plate of the Object 277, making the IS-7 able to tank a huge amount of damage.
All-in-all, the IS-7 is a relatively strong tier X heavy tank that is forgiving to play in random battles making it an excellent choice for a first tier X for newer players (on top of the fact that the tanks leading up to it are also all forgiving to play and powerful in their own tiers), but more capable players may find the IS-7 quite boring to play because of this 'low skill floor, low skill ceiling' that the tank has, and so may well get more consistently excellent games by driving one of the Chinese heavy tanks or the Object 277.
Suggested Equipment
![]()
![]()
![]()
![]()
Gallery


Historical Info
Only three were built and it was the largest tank ever produced by the USSR. In spite of its weight, it was easy to drive due to numerous hydraulic assists. The loaders noted that the IS-7 was comfortable and that the autoloader was easy to use. Its armor was not only immune to the Jagdtiger's 12.8 cm L/55 PaK 44 but was even proof to its own 130mm. Due to the reasons unknown, most likely because of the political repression against Leningrad bosses in the same year, the tank never reached the production lines. The tank housed a crew of five.
It must be noted that the Slostin gun was to be installed as its AA armament.
Historical Gallery


Historical Accuracy Errata
*Like many soviet tanks in game the IS-7 has increased gun depression. In reality it had -3° instead of -6°
- Although the IS-7 was planned to feature a 1200 hp engine (B-16) it was instead equipped with a 1050 hp engine (M-50T)