Nicholas

| Research price11000 exp |
| Purchase price1 620 000 |
| Hit Points12 000 |
| 127 mm/51 Mk7 mod. 25 х 1 pcs. |
| Rate of Fire9.23 shots/min. |
| Reload Time6.5 sec. |
| Rotation Speed15 deg./sec. |
| 180 Degree Turn Time12 sec. |
| Firing Range10.93 km. |
| Maximum Dispersion96 m. |
| HE Shell127 mm HE/HC Mk39 |
| Maximum HE Shell Damage1800 |
| Chance of Fire on Target Caused by HE Shell4 % |
| Initial HE Shell Velocity960 m./s. |
| HE Shell Weight22.7 kg. |
| AP Shell127 mm AP Mk15 |
| Maximum AP Shell Damage2200 |
| Initial AP Shell Velocity960 m./s. |
| AP Shell Weight22.7 kg. |
| 533 mm Triple4 х 3 pcs. |
| Rate of Fire0.91 shots/min. |
| Reload Time66 sec. |
| Rotation Speed25 deg./sec. |
| 180 Degree Turn Time7.2 sec. |
| TorpedoMk11 |
| Maximum Damage11 733 |
| Torpedo Speed56 knot |
| Torpedo Range5.49 km. |
| 127 mm/38 Mk21 mod. 12 х 1 pcs. |
| . . . Average Damage per Second6.4 |
| . . . Firing Range5.01 km. |
| 127 mm/38 Mk21 mod. 02 х 1 pcs. |
| . . . Average Damage per Second6.4 |
| . . . Firing Range5.01 km. |
| 76.2 mm/23 Mk72 х 1 pcs. |
| . . . Average Damage per Second2 |
| . . . Firing Range3 km. |
| Maximum Speed37 knot |
| Turning Circle Radius600 m. |
| Rudder Shift Time4 sec. |
| Surface Detectability Range6.66 km. |
| Air Detectability Range3.06 km. |

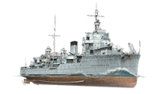
Nicholas — American Tier V destroyer.
La construcción de una gran cantidad de destructores cuando escaseaban los cruceros generó un debate en la Armada de EE. UU. sobre la necesidad de producir destructores de escuadra. Algunos oficiales sugirieron crear un tipo de barco intermedio que combinara los rasgos de un crucero y un destructor. Tras una serie de bocetos, se propuso un proyecto de destructor de escuadra con un desplazamiento de 2200 toneladas equipado con cinco cañones de 127 mm. Finalmente, con el inicio de la construcción de los cruceros de clase Omaha, desapareció la necesidad de un destructor de escuadra y se decidió abandonar la construcción de esta clase.
Modules
 |
Rate of Fire (shots/min) | 180 Degree Turn Time (sec) | Maximum Dispersion (m) | Maximum HE Shell Damage (HP) | Chance of Fire on Target Caused by HE Shell (%) | Maximum AP Shell Damage (HP) |
Research price (exp) |
Purchase price ( | |
|---|---|---|---|---|---|---|---|---|---|
| 127 mm/51 Mk.7 en una montura Mk.15 127 mm/38 Mk.12 en una montura Mk.21 | 15 | 12 | 96 | 1800 | 5 | 2100 | 0 | 95 000 |
 |
Hit Points (HP) | Armor (mm) | Armor (mm) | Main Turrets (pcs.) | Secondary Gun Turrets (pcs.) | AA Mounts (pcs.) | Torpedo Tubes (pcs.) | Hangar Capacity (pcs.) |
Research price (exp) |
Purchase price ( | |
|---|---|---|---|---|---|---|---|---|---|---|---|
| Nicholas (A) | 12 000 | 6 | 15 | 4 | 6/2 | 4 | 0 | 140 000 | |||
| Nicholas (B) | 13 100 | 6 | 15 | 4 | 4 | 4 | 4300 | 380 000 |
 |
Rate of Fire (shots/min) | Torpedo Tubes Reload Time (sec) | 180 Degree Turn Time (sec) | Maximum Damage (HP) | Torpedo Speed (knot) | Torpedo Range (km) |
Research price (exp) |
Purchase price ( | |
|---|---|---|---|---|---|---|---|---|---|
| Mark 11 | 0,9 | 66 | 7,2 | 11 733 | 56 | 5,5 | 0 | 152 000 |
 |
Firing Range Increase (%) | Maximum Firing Range (km) |
Research price (exp) |
Purchase price ( | |
|---|---|---|---|---|---|
| Mk5 mod. 1 | 0 | 0 | 90 000 |
 |
Maximum Speed (knot) |
Research price (exp) |
Purchase price ( | |
|---|---|---|---|---|
| Propulsión: 55 000 CV | 37 | 0 | 120 000 |
Compatible Upgrades
| Slot 1 |
|||||
|---|---|---|---|---|---|
| Slot 2 |
|||||
| Slot 3 |
Player Opinion
Performance
Pros:
- Monstrous rate of fire at 15 RPM, pairing with 127mm guns, HE spamming from distance is a piece of cake
- Torpedoes have the same sped to that of Clemson's, have 500m more range and deal more damage
- AA suite that can rip up some planes at the same tier and most carries at tier 4 and 5 will avoid attacking Nicholas
- Very wide torpedo launch arc and with 2 triple tubes on each side, 12 torpedoes can be launched at once
- Good pool of hit points at 13100 when upgraded
- AP penetration is surprisingly good for a destroyer, can give poorly-armored cruisers it face a nightmare when aimed correctly
- Fast at 37 knots and reaches up to 40 knots with engine boost consumable used
- Stealthier than Clemson
- Just one researchable module, avoids players from getting confused for wondering what to upgrade first
- Can use Defensive Fire Consumable instead of Engine Boost Consumable, excellent for shooting down aircraft at the loss of more speed.
Cons:
- Bad armor like any destroyer
- Suffers from frequent module incapacitation
- AA suite, despite being useful at the same tier, will have a very hard time against higher tier planes
- Terrible main battery firing arc from its bow
- Stock configuration still reflects low tier US destroyers when main batteries take a time to reload
- Shell flight time is high making aiming a difficult thing, especially when shooting destroyers at distance
- Torpedoes still retain the "traditional" 5.5 km range, making them almost useless except for the case of trying to go bow-on to an enemy battleship and launch them
- HE chance of fire is low at just 5% and even with the Demolition Expert skill trained total fires set per battle don't increase much
Research
Optimal Configuration
Commander Skills
| Recommended Commander Skills | ||||||||
|---|---|---|---|---|---|---|---|---|
| Cost (points) |
Endurance | Attack | Support | Versatility | ||||
| 1 |
★ |
★★★ |
★ |
|
|
|
|
|
| 2 |
★★ |
★ |
★★ |
|
★ |
|
★★ |
★★★ |
| 3 |
|
★★★ |
★ |
|
★★★ |
★★ |
★★ |
★ |
| 4 |
|
|
★ |
|
★ |
|
|
★★★ |
| Key: ★★★ - Extremely Useful ★★ - Frequently Useful ★ - Occasionally Useful No stars - Not Useful | ||||||||
Signals
Recommended Signal Flags 
| |||||
|---|---|---|---|---|---|
| Combat | |||||

|

|
 ★★ |
 ★★ |
 ★★ |
 ★ |
 ★★ |
 ★★★ |

|

|

|
 ★★★ |
| Economic | |||||

|

|
 ★★★ |
 ★★ |
 ★ | |
| Special | |||||

|

|
 ★ |

|

| |
| Key: ★★★ - Extremely Useful ★★ - Frequently Useful ★ - Occasionally Useful No stars - Not Useful | |||||
Gallery
Historical Info
Historical Gallery

| Destroyers | II Sampson • II Smith |
| Cruisers | I Erie • II Chester • II Albany |
| Battleships | III South Carolina • IV Wyoming • IV Arkansas Beta |
| Aircraft Carriers | IV [[Ship:Langley (< 23.01.2019)|Langley (< 23.01.2019)]] • IV Langley • V [[Ship:Bogue (< 23.01.2019)|Bogue (< 23.01.2019)]] • VI [[Ship:Independence (< 23.01.2019)|Independence (< 23.01.2019)]] • VI Independence • VI Ranger • VII [[Ship:Ranger (< 23.01.2019)|Ranger (< 23.01.2019)]] • VII [[Ship:Saipan (< 23.01.2019)|Saipan (< 23.01.2019)]] • VIII [[Ship:Lexington (< 23.01.2019)|Lexington (< 23.01.2019)]] • VIII Yorktown • VIII Lexington • VIII [[Ship:Enterprise (< 23.01.2019)|Enterprise (< 23.01.2019)]] • VIII Enterprise |
| N/A | IX Groningen |
| U.S.A. | II Sampson • II Smith |
| Commonwealth | III Vampire |
| N/A | II Tátra • III Romulus • IV Klas Horn • V Visby • V Muavenet • V Kalmar |
| Germany | II V-25 • III G-101 • IV V-170 • V T-22 • VI Ernst Gaede • VI T-61 |
| U.S.S.R. | II Storozhevoi • III Derzki • IV Izyaslav • V Gremyashchy |
| Italy | II Curtatone • III Nazario Sauro • IV Turbine • V Maestrale • VI Aviere • VI Leone |
| N/A | VI Juruá |
| Japan | II Tachibana |
| U.K. | II Medea • III Valkyrie • III Campbeltown |
| France | II Enseigne Gabolde • III Fusilier • IV Bourrasque • V L'Adroit • V Jaguar • V Siroco |
| Pan-Asia | II Longjiang • III Phra Ruang • IV Shenyang • V Jianwei • VI Fushun • VI Anshan |
| N/A | X Álvaro de Bazán |