| Version du 28 décembre 2012 à 18:55 | | Version actuelle en date du 20 février 2020 à 14:16 |
7 révisions intermédiaires par 4 utilisateurs non affichées |
| Ligne 1 : | | Ligne 1 : |
| ? | {{MapData|map=Malinovka|template=Map Detail}} | | + | {{MapDetails |
| | | + | |Size = 1000x1000 |
| | | + | |Map type = Été |
| | | + | |Battle Tier limit = IV-X |
| | | + | }} |
| | | | | |
| | {{To Do}} | | | {{To Do}} |
| | | | | |
| ? | There are plenty of different theories on how to win this map. The trick to doing well here is team work, regardless of the tactics used. While communication is often difficult in Random Battles, having just a few people talking to each other can turn the tide. Artillery has little to stand in its way if appropriately placed, less the depression on the west spawn and the buildings in the east spawn. | | + | {{clear}} |
| | | + | == Galerie d'images == |
| | | + | <gallery> |
| | | + | File:Malinovka_101.jpg |
| | | + | File:Malinovka_102.jpg |
| | | + | File:Malinovka_103.jpg |
| | | + | File:Malinovka_104.jpg |
| | | + | </gallery> |
| | | + | == Historique des changements == |
| | | + | {{main|{{FULLPAGENAME}}/Historique des changements|l1=Historique des changements de {{FULLPAGENAME}}}}<!-- |
| | | + | -->{{:{{FULLPAGENAME}}/Historique des changements}} |
| | | + | {{maps}} |
| | | | | |
| ? | One strategy is to send Light tanks to take an obscure route while Medium and Heavy tanks cause a distraction and hold the line. Meanwhile any and all available Artillery should be on standby for when the Light tanks flank the enemy and start marking targets. As for Tank Destroyers, well, they get a whole range of roles. They can snipe, join the medium and heavy tanks in the assault, protect the SPG's... the list is endless. | | + | [[Category:Cartes estivales]] |
| ? | | | + | {{#gw_breadcrumbs:Tank}} |
| ? | Another common tactic is to leave a few TD's or heavies on defense at each spawn and have the rest of the team go up the hill to the north. Artillery can harass the enemy defenders should they stick out too far, but their primary job should be to cover the assault up the hill. Should a light tank break into the enemy camp, artillery should take out the opposing artillery so their teammates can operate without fear of HE raining on their tanks. Generally, the team that controls the hill will win the match, as from this vantage point TD's can hammer the enemy defenders and the team Mediums and/or Heavies get decent speed heading downhill allowing for "faster" than average maneuvers. | | + | |
| ? | | | + | |
| ? | Of course this level of organization is almost impossible to obtain, but if people are familiar with these tactics then hopefully they will move to fill an appropriate role. As for you, be aware that it is possible to break through the base defenses if it left too lightly defended and that the team who controls the hill has a better chance of winning the match. | | + | |
| ? | | | + | |
| ? | | | + | |
| ? | Other observations: | | + | |
| ? | | | + | |
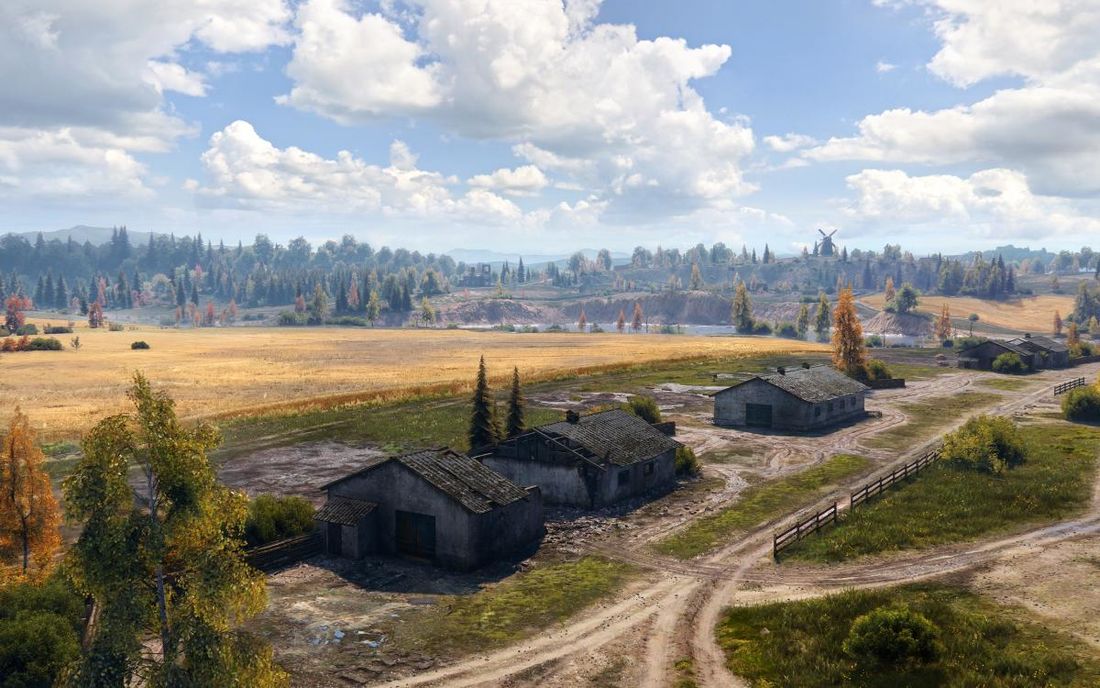
| ? | There are primarily two areas of the map: the killing fields and the hill, both bordered by deep water and some cliffs. The field heavily favors camouflaged snipers along either the line of buildings to the south or behind the wooded fence lines in the north. Rushing the field is a fool's errand, although some extremely fast Tier II light tanks have had success running out, exposing enemies to supporting fire, and then retreating. Almost all die in the attempt, however. Because it is easy to mass fire from along either set of positions, 6-8 tanks (especially tank destroyers, etc.) is usually sufficient to destroy any enemy foolish enough to venture into the open field. | | + | |
| ? | | | + | |
| ? | For the more maneuverable tanks, there is the challenge of going around and either taking the hill to the extreme East or making a fast run along the river's edge. This side of the map offers plenty of trees for cover while moving until one heads up toward the windmill. Gaining the far edge of the map allows direct access to the flag and the rear of the enemy base, and is the primary means of victory in this scenario. To successfully charge the hill, one needs several fast tanks - a platoon(3 tanks) at minimum, two platoons for better odds. If two platoons are sent, the first should be fast, light tanks to gain the position and skirmish as the second platoon can move up and provide fire support. | | + | |
| ? | | | + | |
| ? | Note: Artillery is deadly on such a wide open map. If playing against artillery, every effort should be made to flank and destroy them ASAP, as they can control this map very effectively. Sacrificing a couple of light tanks to take out the enemy artillery may be a winning strategy. | | + | |
| ? | | | + | |
| ? | | | + | |
| ? | [[category:maps]] | | + | |