| Version du 24 octobre 2015 à 18:15 | | Version du 19 avril 2016 à 17:03 Grosse réécriture de la section |
| Ligne 1 : | | Ligne 1 : |
| ? | {{panel title|icon=|content=<font face= "Arial">Maps vary in size, design, terrain, location, weather and land leveling. Each map offers different tactics to different tanks. Use these tactics to your advantage and you will master the battlefields.</font face> | | |
| ? | }} | | |
| | __NOTOC__ | | | __NOTOC__ |
| ? | ==<font size= 5><font face= "Arial"><center>'''Open Maps'''</center></font face></font size>== | | + | {{Terminer|Complète restructuration et traduction de la section}} |
| | | | | |
| ? | <font size= 4.5><font face= "Arial"><center>These maps consist mostly of open sight lines out to, or past, detection ranges and have limited amounts of rolling terrain and/or buildings, for close combat and cover.</center></font face></font size> | | + | == Cartes d'été == |
| | | + | {{Liste des cartes|Westfield|}} |
| | | | | |
| | | + | {{Liste des cartes|Carélie|}} |
| | | | | |
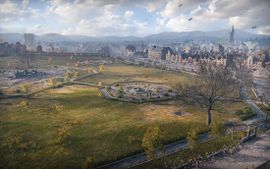
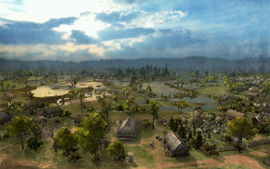
| ? | {{MapData|map=Airfield|template=Map}} | | + | {{Liste des cartes|Live Oaks|}} |
| | | | | |
| ? | ===== Tactics ===== | | + | {{Liste des cartes|Lakeville|}} |
| ? | The only game mode on Airfield is Standard Battles. | | + | |
| | | | | |
| ? | Light tanks tend to scout the hill in the lower center of the map, counting on the combined support of the tank destroyers that camp back at the bases. Alternatively, an effective spotting area in the North can be found at B5-B6, where tanks advancing through the upper center of the map can be spotted. | | + | {{Liste des cartes|Ligne Siegfried|}} |
| | | | | |
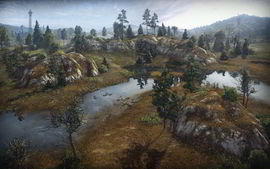
| ? | There are many different options for medium tanks on this map. Medium tanks can choose to go to the southern hill, get to the small pocket at E7 (east base only), go to the B line, skulk at the low path next to the hill at F5-F6, or support the heavies at the chokepoint at E6. | | + | {{Liste des cartes|Malinovka|}} |
| | | | | |
| ? | Heavy tanks tend to attack the valley at E6 and flank around at D6 Those at E6 benefit from supporting fire from the tank on the South hill, as well as artillery support. Heavies advancing past these chokepoints must be wary of tank destroyers hiding at B9 and D9, as well as enemy artillery, but their success at these chokepoints is crucial to winning the map. | | + | {{Liste des cartes|Mittengard|}} |
| | | | | |
| ? | Tank destroyers tend to camp at various locations at the front of the base, D2 and D9 to provide support for the tanks in the center or northern part of the map, or support the south coast at D2-D3 or D8-D9. | | + | {{Liste des cartes|Abbaye|}} |
| | | | | |
| ? | SPGs traditionally go in/behind the base or head to the TD sniping spots in the north or south. | | + | {{Liste des cartes|Murovanka|}} |
| | | | | |
| | | + | {{Liste des cartes|Percée fulgurante|}} |
| | | | | |
| | | + | {{Liste des cartes|Col de montagne|}} |
| | | | | |
| | | + | {{Liste des cartes|Prokhorovka|}} |
| | | | | |
| | | + | {{Liste des cartes|Redshire|}} |
| | | | | |
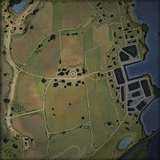
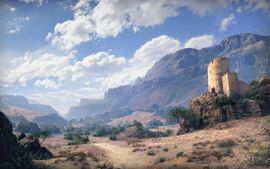
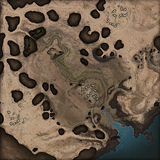
| ? | {{MapData|map=El Hallouf|template=Map}} | | + | {{Liste des cartes|Mines|}} |
| | | | | |
| ? | ===== Tactics ===== | | + | {{Liste des cartes|Ruinberg|}} |
| ? | Typically both sides will spread out a few snipers along the ridgelines to defend against any rushes through the middle and counter-snipe, which ideally are TDs but other tank types will also work to a lesser effectiveness. It's important for snipers to have cover nearby, as although the ridges are at the edge of spotting and render distance from each other, tanks in the center valley can spot those on the ridges. | | + | |
| | | | | |
| ? | Heavily armored tanks should head north or west (depending on the spawn) towards the A1 corner. Traditionally, the northern flank takes a more defensive approach and allows the southern flank to cross the valley and advance partially up into A2. From the south, some snipers can be left in C3 or E2 to defend against any tanks popping out from the north. A flank around from A2 to B3 and then B2 is unlikely to succeed due to snipers at B6 spotting and destroying the flanking tanks, but if successful it can be very effective. For the northern team, in addition to occupying the south road at A2-A3, the northern hills can be used, though it tends to be less effective cover when popping out to take shots. Tanks with good gun depression and turret armor are at an advantage in the north, and both teams must be mindful of artillery focusing on their positions and take appropriate cover. | | + | {{Liste des cartes|Baie du pêcheur|}} |
| | | | | |
| ? | For light tanks and faster mediums, a dash to the south-eastern corner can also be used. The winner of this corner can spot the tanks on the ridges for their own snipers, as well as advance up into the enemies base to wreck havok on TDs and SPGs. Less contested but also less effective positions can also be found elsewhere in the valley. Typically, the map is decided by whichever team can more quickly win the north-east corner or advance into the enemy base from the south-west. | | + | {{Liste des cartes|Steppes|}} |
| | | | | |
| ? | SPGs should primarily focus at the A2 corner, though this may be difficult for SPGs with poor gun arcs, especially the French, to hit targets behind cliffs. However, SPGs should also take advantage of any spotted snipers on the ridges. | | + | {{Liste des cartes|Plage sereine|}} |
| | | | | |
| | | + | {{Liste des cartes|Marécage|}} |
| | | | | |
| | | + | {{Liste des cartes|Toundra|}} |
| | | | | |
| | | + | {{Liste des cartes|Grand Parc|}} |
| | | | | |
| | | + | {{Liste des cartes|Falaise|}} |
| | | | | |
| ? | {{MapData|map=Erlenberg|template=Map}} | | + | {{Liste des cartes|Fjords|}} |
| | | | | |
| ? | ===== Tactics ===== | | + | {{Liste des cartes|Autoroute|}} |
| ? | All three game modes of Standard Battles, Assault, and Encounter are found on Erlenberg. | | + | |
| | | | | |
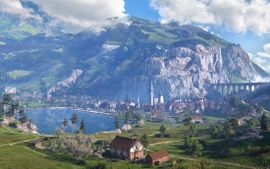
| ? | There are two main areas of contention regardless of the game mode. The west side of the map features a castle on the south, connected by a ridge to a hill on the south with a house and a ridge that serves as a defensive trench. There is also path that runs even further to the west right along the water's edge and around the hill to the north. The south side of the map also features a hill to the south-west of the castle in G1 that can be an effective location for snipers. The east features another ridge with a pair of houses on the north, and lots of undulations on the south side. There is a hill at the east edge of the map located in F0 that is a critical point for spotting the opposition, with some destructible houses on the foot of the hill in the north. Finally, a forested hill at the north east in C0 provides a location for snipers. Generally the east side emphasizes gun depression, viewrange/camo, and mobility, while the west requires armor and gun performance more. From the north, the west side is fairly easily won with an early, aggressive push if the team works together, while the same can be said for the south for the east, due to the fact that these pushes will deny sniping positions to the opposing team. However, more passive play favors the south in the west and north in the east due to the better sniping positions, though this doesn't mean that such an advantage can be defeated by a careful slow push later on. | | + | {{Liste des cartes|Himmelsdorf|}} |
| | | | | |
| ? | Typically the heavies split 50:50 or slightly more to the west. Northern TDs tend to favor east more, while the south is usually more evenly split. Mediums and lights also split more evenly. Lights and fast mediums can play more to the center of the map, and occasionally at the center buildings next to the river, but this is usually less effective. SPGs can position either at the center or in one of the corner to better support an individual flank. | | + | {{Liste des cartes|Ensk|}} |
| | | | | |
| ? | The role of the center is somewhat dependent on the game mode. For both Standard and Assault, tanks in the center can take advantage of unaware tanks on either flank, but tend to be easily focused down when spotted. A light tank might be able to streak down the center while the flanks are occupied to destroy enemy artillery, but otherwise the center is mostly a supporting role. However, for Encounter, the capture circle is in the center of the map. Fast captures are not uncommon, especially at low and mid-tiers, so it is wise to send a tank or two to the middle early to stall and spot the cappers, or risk having to have tanks from the flank cross open-fields to stop the cap in a rush. | | + | {{Séparateur|Grand}} |
| | | | | |
| | | + | == Cartes d'hiver == |
| | | | | |
| | | + | {{Liste des cartes|Tempête|}} |
| | | | | |
| | | + | {{Liste des cartes|Winterberg|}} |
| | | | | |
| | | + | {{Liste des cartes|Arctique|}} |
| | | | | |
| ? | {{MapData|map=Fisherman's Bay|template=Map}} | | + | {{Liste des cartes|Himmelsdorf en hiver|}} |
| | | | | |
| ? | ===== Tactics ===== | | + | {{Liste des cartes|Vallée sacrée|}} |
| ? | The only game mode on Fisherman's Bay is Standard Battles. | | + | |
| | | | | |
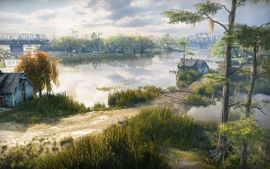
| ? | On Fisherman's Bay, typically heavy tanks and a few mediums and TDs head to the village at the east, fighting along the 8 column with oppurtunities for supporting fire from further out east in D9 or F9-F10. The buildings here are mostly indestuctive, and allow for tanks who excel at urban combat to shine, though the long sniping ranges down the alley can counter reckless pushes. Flanks though the 7 column can be devasting, if somewhat risky. A few mediums or lights may patrol the center ridge and pop up for spotting or supporting fire to either flank. In particular, flanking fire towards D7-D8 or F7-F8 to counter flanks or a synchronized push from the center towards the sea down the E line are options. | | + | {{Liste des cartes|Kharkov|}} |
| | | | | |
| ? | Meanwhile the rest of the mediums, TDs, and lights should go to the west. Support from the center in E4-F4 can also be useful, particularly from the north, but cannot convincingly win the flank. Fighting tends to be concentrated in the 1 column to the west of the raised road due to the cover it gives from flanking fire and the prevalance of rock cover in the depression. Many rocks are located here, large enough to totally conceal a tank, but spaced far enough away from each other that it is likely that enemy tanks will be able to get off a shot while you are moving from cover to cover. Very fast tanks may be able to get very close to the enemy lines by quickly heading down the west while the enemy is still moving into position, then hiding behind the rock and providing spotting for your own allies. Typical snipers reside in B1-B2 and A3 in the north and H1-H2 or J2-K2 in the south. | | + | {{Liste des cartes|Erlenberg|}} |
| | | | | |
| ? | For both flanks, after defeating the first and second line enemies, continue to carefully progress north-south to eliminate any hiding snipers or SPGs, then sweep across laterally to or across the flag cap, but beware of enemy snipers in the other corner. Alternatively, heading to the middle allows you to support your allies pushing forward as well as supporting the other flank. Tight games on this map can be extremely entertaining to watch as teams react to spots, as long as the opponents do not insist in camping a corner. | | + | {{Séparateur|grand}} |
| | | | | |
| | | + | == Cartes désertiques == |
| | | | | |
| | | + | {{Liste des cartes|Aérodrome|}} |
| | | | | |
| | | + | {{Liste des cartes|Rivière de sable|}} |
| | | | | |
| | | + | {{Liste des cartes|El Halluf|}} |
| | | | | |
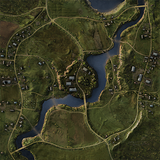
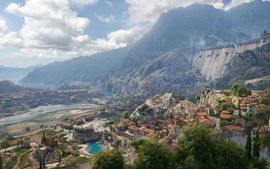
| ? | {{MapData|map=Karelia|template=Map}} | | + | {{Séparateur|grand}} |
| | | | | |
| ? | ===== Tactics ===== | | + | == Cartes spéciales == |
| ? | Karelia offers both Standard Battles and an Assault mode, which play very differently. | | + | {{Liste des cartes|Terrain d'entrainement|}} |
| | | | | |
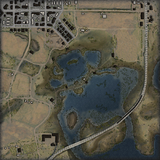
| ? | For Standard Battles, the bases are as indicated in A0 and K1. For very low tier battles the middle is used, but otherwise the teams mainly split to the raised area in the north-west and around the mountain in the south-east, as the center tanks are too vulnerable to accurate fire from north-west. Generally light tanks will go to the north-west and heavy tanks will go to the south-east, but any tank type can be useful anywhere. | | + | {{Liste des cartes|Karl|}} |
| | | | | |
| ? | The hill in H6-G7 is extremely useful for winning the south-east, which generally requires fast tanks to be able to get around the corner and start going up their respective path up the hill before heavier firepower can arrive. Tanks going up the hill are shielded by a rock formation separating the paths up from each side. This hill is an important strategic location as not only does it allow flanking fire downwards into the tanks in H9 and J7, which prevents the enemy from holding these areas, it is also a location for shots across the map into the north-west flank. For the tanks that stay at the base of the mountain, there are lots of rock cover, small depressions to go hull-down in, corners to peek, and a few sniping positions in the far back. Having heavy here is critical to being able to push into the enemy. | | + | {{Liste des cartes|Himmelsdorf Coupe du monde|}} |
| | | | | |
| ? | The north-west has lots of open ground, broken by a few rock formations. Some TDs will typically hang in the back, while aggressive lights may take up positions in the mountain behind trees in B2-C2. Winning this flank usually requires superior spotting and better shot trading when popping out of cover behind the rock formations, if there isn't any extremely early spots while the enemies are still making their way to cover. | | + | {{Liste des cartes|Tank Racing|}} |
| | | | | |
| | | + | {{Liste des cartes|Nouvelle Année 2015|}} |
| | | | | |
| ? | For the Assault Mode, the avenues and locations of clashes are much different. The attackers spawn in J7 and G9, while the defenders spawn around C3. The attackers generally split into two, with the SPGs and occasionally a few snipers climbing the hills. However, for the snipers to be effective, generally spots need to be made by a light tank or fast medium in the center, otherwise the snipers don't have any targets to shoot at, so usually such snipers are not very helpful to the team in random, uncoordinated battles. However, if the attacking team is able to get one or two tanks into the center under the hill, they can be very effective at spotting and/or destroying the soft TDs and SPGs in the base. To counter this, occasionally the defensive team will send a few lights and mediums into the center as well, underneath the attacking team's mountain. The attacking tanks on top of the mountain are very vulnerable to countersniping from all angles if they are spotted. | | + | {{Liste des cartes|LunaPark|}} |
| | | | | |
| ? | Otherwise, if there isn't significant action in the center, the attacking team will usually progress to J1 and A9 depending on their spawns, while the defensive team will set some snipers in D1 and anywhere in A3-A5 and B3, while pushing heavy tanks up to spot the attackers, which include positions in F1, H1, A7, and A8. Generally speaking, D1 depend slightly more on accuracy than the other positions. Afterwards, the teams will trade some shots and generally look to outflank each other. In the south, the attackers can flank around G1 through H2 and G2 to get shots into the rear of the tanks while being partially protected from snipers by a rock formation in F2. If they then manage to get rid of most of the tanks in F1, they can then blitz into the gorge in F2 while killing the remaining tanks, then be able to hull-down and spot the defending snipers in D1 from E2. E2 can also be reached simply by going around through the center. The defenders are forced to play passively and don't have many flanking opportunities in the south unless they manage to hold H1 convincingly, then the defenders can flank around carefully to H2 and crush the remaining tanks. The north also holds the potential for a lot of flanking maneuvers. Both attackers and defenders can flank around through A7-B9, though attackers risk being shot from the center. If the attackers are able to destroy the tanks in A8, they must advance to A7 to be safe from snipers. It may then be worth pushing a few tanks through B6 to provide another angle of attack to defeat the snipers. | | + | {{Liste des cartes|Monte Rosa|}} |
| | | | | |
| ? | There are a number of scenarios after a flank is won: | | + | {{Liste des cartes|Ville fantôme|}} |
| ? | If the attackers win the south side, the defenders must try to reinforce the defense by redirecting some of their tanks to defend the cap. Generally speaking, just defending the cap in this situation is somewhat favorable to the defense, all other variables equal and without attackers from the north, due to the superior hard cover in the north side of the base compared to the west. However, having to deal with attackers from both flanks may make the defense vulnerable to cross-fire, but as long as some tanks recognize that the west has fallen then they will be able to put up a fighting chance by advancing closer to the base to protect the flanks of their allies. | | + | |
| ? | If the attackers win the north side, the defenders have a much harder battle. Usually the attackers will not completely wipe the north flank, but they gain the advantage of good cover. If the defenders are able to rush to and past the cap before the flank falls, then the defense has a good chance; otherwise, the defenders will be mostly stuck in D1 and maybe E3. If the defenders have to try to fend off both flanks there is almost no hope, and if they only have to hold off the north it will still be a tough battle. | | + | |
| ? | If the defenders win either "chokepoint", they face a choice between returning to base and reinforcing the other flank or continuing to advance. Especially if the defenders are able to win early, sending a few faster tanks to deal with the enemy SPGs and TDs on the hill, then advance to harass the back of the opposing flank, may be worth it. However, destroying the enemy SPGs is no consolation if the base is overrun, so the rest of the flank, if not all of the tanks, should attempt to reinforce the other flank if necessary. Be careful not to be overzealous in rushing over to aid the defense however. | | + | |
| | | | | |
| | | + | {{Séparateur|Grand}} |
| | | | | |
| | | + | == Cartes supprimées du jeu == |
| | | + | {{Liste des cartes|Pearl River|}} |
| | | | | |
| | | + | {{Liste des cartes|Komarin|}} |
| | | | | |
| | | + | {{Liste des cartes|Overlord|}} |
| | | | | |
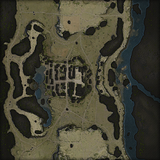
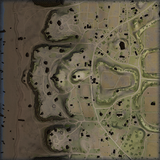
| ? | {{MapData|map=Komarin|template=Map}} | | + | {{Liste des cartes|Port|}} |
| | | | | |
| ? | ===== Tactics ===== | | + | {{Liste des cartes|Province|}} |
| ? | The only game mode on Komarin is Standard Battles. | | + | |
| | | | | |
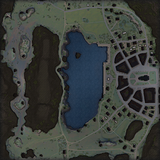
| ? | Komarin used to be a very campy, sniper-friendly map, but in its latest iteration the bushes on the map have been reduced, and now terrain features play a bigger role in providing cover. | | + | {{Liste des cartes|Ruinberg en feu|}} |
| ? | The hill is usually where the big tanks clash, and if won, tanks can snipe almost any place on the map from it, and it's a very good avenue for storming the enemy base. However, while the two sides are battling on the hill, unwary tanks can be shot at from the sides of the map. The sides of the map are usually areas where faster tanks and TDs go, with faster tanks lighting up enemies and drawing fire, while TDs snipe at stray tanks down their rather long lane of fire. | | + | |
| | | | | |
| ? | {{MapData|map=Malinovka|template=Map}} | | + | {{Liste des cartes|Nord-Ouest|}} |
| | | | | |
| ? | {{MapData|map=Murovanka|template=Map}} | | + | {{Liste des cartes|Severogorsk|}} |
| | | | | |
| ? | {{MapData|map=Prohorovka|template=Map}} | | + | {{Liste des cartes|Village caché|}} |
| | | | | |
| ? | {{MapData|map=Redshire|template=Map}} | | + | {{Liste des cartes|Stalingrad|}} |
| | | | | |
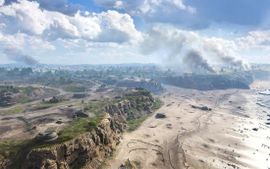
| ? | {{MapData|map=Desert|template=Map}} | | + | {{Liste des cartes|Dragon Ridge|}} |
| | | | | |
| ? | {{MapData|map=Serene Coast|template=Map}} | | + | {{Liste des cartes|Côte Sud|}} |
| | | | | |
| ? | {{MapData|map=South Coast|template=Map}} | | + | {{Cartes}} |
| | | | | |
| ? | {{MapData|map=Steppes|template=Map}} | | + | [[Catégorie:Maps]] |
| ? | | | + | [[en:Maps]] |
| ? | {{MapData|map=Swamp|template=Map}} | | + | |
| ? | | | + | |
| ? | {{MapData|map=Tundra|template=Map}} | | + | |
| ? | | | + | |
| ? | {{MapData|map=Westfeld|template=Map}} | | + | |
| ? | | | + | |
| ? | ==<font size= 5><font face= "Arial"><center>'''Closed Maps'''</center></font face></font size>== | | + | |
| ? | | | + | |
| ? | <font size= 4.5><font face= "Arial"><center>These maps have very few open sight lines out to, or past, detection ranges and mostly consist of rolling terrain and/or buildings for close combat and cover.</center></font face></font size> | | + | |
| ? | | | + | |
| ? | | | + | |
| ? | {{MapData|map=Himmelsdorf|template=Map}} | | + | |
| ? | | | + | |
| ? | {{MapData|map=Winter Himmelsdorf|template=Map}} | | + | |
| ? | | | + | |
| ? | ==<font size= 5><font face= "Arial"><center>'''Mixed Maps'''</center></font face></font size>== | | + | |
| ? | | | + | |
| ? | <font size= 4.5><font face= "Arial"><center>These maps have a mix of open sight lines out to, or past, detection ranges combined with rolling terrain and/or buildings for close combat and cover.</center></font face></font size> | | + | |
| ? | | | + | |
| ? | | | + | |
| ? | {{MapData|map=Monastery|template=Map}} | | + | |
| ? | | | + | |
| ? | {{MapData|map=Arctic Region|template=Map}} | | + | |
| ? | | | + | |
| ? | {{MapData|map=Cliff|template=Map}} | | + | |
| ? | | | + | |
| ? | {{MapData|map=Dragon Ridge|template=Map}} | | + | |
| ? | | | + | |
| ? | {{MapData|map=Ensk|template=Map}} | | + | |
| ? | | | + | |
| ? | {{MapData|map=Fjords|template=Map}} | | + | |
| ? | | | + | |
| ? | {{MapData|map=Lakeville|template=Map}} | | + | |
| ? | | | + | |
| ? | {{MapData|map=Live Oaks|template=Map}} | | + | |
| ? | | | + | |
| ? | {{MapData|map=Highway|template=Map}} | | + | |
| ? | | | + | |
| ? | {{MapData|map=Hills|template=Map}} | | + | |
| ? | | | + | |
| ? | {{MapData|map=Mountain Pass|template=Map}} | | + | |
| ? | | | + | |
| ? | {{MapData|map=Asia Miao|template=Map}} | | + | |
| ? | | | + | |
| ? | {{MapData|map=Port|template=Map}} | | + | |
| ? | | | + | |
| ? | {{MapData|map=Province|template=Map}} | | + | |
| ? | | | + | |
| ? | {{MapData|map=Ruinberg|template=Map}} | | + | |
| ? | | | + | |
| ? | {{MapData|map=Asia Korea|template=Map}} | | + | |
| ? | | | + | |
| ? | {{MapData|map=Severogorsk|template=Map}} | | + | |
| ? | | | + | |
| ? | {{MapData|map=Siegfried Line|template=Map}} | | + | |
| ? | | | + | |
| ? | {{MapData|map=Munchen|template=Map}} | | + | |
| ? | | | + | |
| ? | ==<font size= 5><font face= "Arial"><center>'''Upcoming Maps'''</center></font face></font size>== | | + | |
| ? | <font size= 4.5><font face= "Arial"><center>These maps are currently either in development or live on the test server. Details can often change.</center></font face></font size> | | + | |
| ? | | | + | |
| ? | [[Category:Maps]] | | + | |
| ? | [[ru:Игровые_локации]] | | + | |
| ? | | | + | |
| ? | | | + | |
| ? | Stalingrad: https://www.youtube.com/watch?v=D7mcG3SW9zY<br /> | | + | |
| ? | Minimap: https://image.noelshack.com/fichiers/2014/42/1413555672-desktop-17-10-2014-16-20-22-291.jpg | | + | |
| ? | | | + | |
| ? | Unconfirmed, but part of the game files<br> | | + | |
| ? | Asia great wall<br> | | + | |
| ? | [[File:Asia_great_wall.png]] | | + | |
| | {{#gw_breadcrumbs:Tank}} | | | {{#gw_breadcrumbs:Tank}} |


