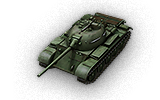
T-34-2

|
Article requires additional modification The design and/or content of this article do not conform to wiki standards. Missing Content
|
T-34-2

Mouse over "
| 2,480,000 |
| 1300280 HP Hit Points |
| 31.8/33.522.1/36.5 t Weight Limit |
- 전차장
- 포수
- 조종수
- 장전수 (무전수)
| 500580 hp Engine Power |
| 56/20 km/h Speed Limit |
| 4446 deg/s Traverse |
| 15.7226.24 hp/t Power/Wt Ratio |
| NoNo Pivot |
| // mm Hull Armor |
| 170/120/60180/120/60 mm Turret Armor |
AP/APCR/HE
AP/HEAT/HE Shells |
| 160/160/280360/360/530 HP Damage |
| 126/167/43212/280/61 mm Penetration |
|
13.33 r/m ▲
5 r/m Standard Gun ▲ Rate of Fire Standard Gun |
|
2132.8 ▲
Standard Gun
▼
Standard Gun
▲
1800 Standard Gun ▲
Standard Gun
▼
Standard Gun
▲ Damage Per Minute Standard Gun |
|
0.42 m ▲
0.43 m With 50% Crew: 0.52 m ▲ Accuracy With 50% Crew: 0.533 m |
| 2.3 s 2.9 s Aim time |
| 4446 deg/s Turret Traverse |
| 360° Gun Arc |
| -5°/+20°-5°/+15° Elevation Arc |
| 5040 rounds Ammo Capacity |
| 1212 % Chance of Fire |
| 370 m 380 m View Range |
| 600 m 750 m Signal Range |
Additional Statistics
(Top Configuration)
VIII
2480000
The T-34-2 is a Chinese tier 8 medium tank.
T-34-2는 소련의 T-34 전차의 개량형이 아닌 전혀 다른 전차로, 오히려 T-54와 유사한 형태였다. 후에 소련에서 중국으로 T-54의 기술을 넘겼으며 T-34-2 기획안은 계속되지 않았다.
The T-34-2 is often compared to the Type 59 as it has a similar design, speed, turret, and can even equip the same gun. However, if equipped with the 122 mm, the playstyle of the T-34-2 is radically different than that of the Type 59. Unlike the Type, the T-34-2 has very little hull armor. It's prone to ammo rack damage and fires. With the 122 mm, being killed due to a lack of gun depression and missing shots is not uncommon, and can therefore be very unpleasant for players that aren't familiar with it. However in the right hands, the T-34-2 can be an unexpected and extremely dangerous threat. The 122 mm can hit a tank for as much as 488 damage; the T-34-2 is literally an IS crossed with a medium, as it has the same gun as the IS. Most players never expect the T-34-2 to possess such firepower and frequently underestimate it at a fatal cost.
The T-34-2 leads to the WZ-120.
Modules / Available Equipment and Consumables
Modules

주포
| 단계 | 주포 | 평균 관통력 (mm) | 연사력 | 100m에서의 분산도 | 조준 시간 | 일반 경험치 | 중량 (톤) | 가격, | |
|---|---|---|---|---|---|---|---|---|---|
| VI | 85 mm S-53 | 126/167/43 | 160/160/280 | 13.33 | 0.42 | 2.3 | 0 | 1550 | 61530 |
| VI | 85 mm 56-85JT | 144/172/43 | 160/160/280 | 13.33 | 0.36 | 2 | 6100 | 1750 | 72000 |
| VII | 100 mm 44-100JT | 175/235/50 | 250/250/330 | 6.59 | 0.4 | 2.7 | 17500 | 2257 | 79000 |
| VIII | 100 mm 59-100T | 181/241/50 | 250/250/330 | 7.06 | 0.39 | 2.8 | 18000 | 2257 | 102000 |
| VIII | 122 mm 371-122JTX | 212/280/61 | 360/360/530 | 5 | 0.43 | 2.9 | 19000 | 2440 | 120000 |

엔진
| 단계 | 엔진 | 엔진 출력 (마력) | 충돌 시 화재 발생 확률 | 일반 경험치 | 중량 (톤) | 가격, |
|---|---|---|---|---|---|---|
| VII | Type 102S1 | 500 | 12 | 0 | 750 | 38000 |
| VIII | 12150L | 520 | 12 | 16000 | 750 | 48000 |
| IX | 12150LS | 580 | 12 | 33000 | 750 | 99500 |

현가장치
| 단계 | 현가장치 | 한계 중량 | 회전 속도 (도/초) | 일반 경험치 | 중량 (톤) | 가격, |
|---|---|---|---|---|---|---|
| VII | T-34-2 | 33.5 | 44 | 0 | 7800 | 11690 |
| VIII | T-34-2 model 2 | 36.5 | 46 | 16100 | 7800 | 34000 |

무전기
| 단계 | 무전기 | 통신 범위 (m) | 일반 경험치 | 중량 (톤) | 가격, |
|---|---|---|---|---|---|
| X | A-220A | 750 | 9500 | 40 | 54000 |
| IX | A-220 | 600 | 0 | 40 | 38000 |
Compatible Equipment
Compatible Consumables
Player Opinion
Pros and Cons
Pros:
- Extraordinarily low profile and compact size
- Very high camouflage values
- Great mobility
- 390 average damage with the 122mm gun
- Very strong and well-sloped turret
Cons:
- Paper-thin hull armor
- Prone to module damage and fires
- Low AP shell penetration
- Very poor gun depression
- Very poor gun handling
Performance
- The T-34-2 can be considered a very unique tank. It has many many weaknesses and can be extremely difficult to adapt to but boasts alpha damage greater than that of many same-tier heavies, premium HEAT rounds with tremendously improved penetration, a compact size, and a very tough turret. The T-34-2 has very low DPM and thus cannot fight enemies head on effectively. Even while flanking, the poor on-the-move accuracy and very low rate of fire make engagements difficult. The biggest strengths of the T-34-2 are its shell damage and good camo value. The T-34-2's play-style is actually similar to that of an autoloader, its true potential lies in flanking a vulnerable enemy, dishing out heavy alpha damage, and then retreating to cover, or ambushing an enemy using camouflage to whack them and get away. As the T-34-2 is a relatively rare sight on the battlefield, most players never expect the small and paper-armored medium to have the firepower of an IS-3, and fatally underestimate it at the cost of one-third of their tank. The T-34-2 well-utilizes bushes and can often remain hidden while firing. As difficult as it is with the 122 mm, sniping is a very viable tactic, but the gun can only be used at a moderate distance. On top of that, the reasonable view range makes it an excellent passive scout.
- It can be a very situational tank. One of the key points of the T-34-2 are its premium HEAT rounds, the penetration value of the 122 mm is practically doubled, even though it does become very finicky due to a lack of precision to put shells where they need to go, and fickle HEAT mechanics. Although shooting HEAT is very expensive, the low fire rate, long aim time, and low AP penetration ensure that you want to make every shot count. Unless you are presented with the side or rear of a tank, HEAT rounds may be a necessity. The key to playing a T-34-2 is to take an opportunistic supportive role and survive to continue providing powerful alpha support. Always avoid engaging tanks head on, peek-a-booms are occasionally viable but dangerous. A well-driven T-34-2 easily ends up with at least 2000 damage, even on a loss, and with unmatched versatility in being able to both scout very effectively and deliver a solid punch, it's capable of making wins come out.
Early Research
- First mount the third engine to make sure you've got the speed to flank your enemies, the penetration of the 85mm guns is far from enough to attack enemy tanks from the front. Then research the improved suspension and turret, the order doesn't matter, you'll need both to mount the 100mm gun from the T-34-1. Once you've got the 100mm gun, you should keep going to the last 100m gun.
- If you have another vehicle that needs the 122mm gun, or just like the high Alpha, then you should research that too. Just remember that to mount the 100mm instead makes you a severely gimped T-44, with less gun depression and far inferior gun handling.
Suggested Equipment
![]()
![]()
![]()
![]()
Gallery


History for this tank not found
| Light Tanks |
Vickers Mk. E Type B • Type 2597 Chi-Ha • M5A1 Stuart • 59-16 • Type 64 • Type 62 • WZ-131 • WZ-132 • M41D • WZ-132A • WZ-132-1 |
| Medium Tanks |
Type T-34 • Type 58 • T-34-1 • Type 59 • T-34-2 • T-34-3 • 59-Patton • 122 TM • Type 59 G • WZ-120 • 121 • 121B |
| Heavy Tanks |
IS-2 • WZ-111 • WZ-111 Alpine Tiger • 110 • 112 • WZ-111 model 1-4 • WZ-114 • 113 • 113 Beijing Opera • WZ-111 model 5A • WZ-111 Qilin |
| Tank Destroyers |
T-26G FT • M3G FT • SU-76G FT • 60G FT • WZ-131G FT • T-34-2G FT • WZ-111-1G FT • WZ-120-1G FT • WZ-111G FT • WZ-120G FT • WZ-113G FT • 114 SP2 |
| Self-Propelled Guns |