Crusader 5.5-in. SP

|
Article requires additional modification The design and/or content of this article do not conform to wiki standards. Missing Content
|
Crusader 5.5-in. SP

Mouse over "
| 1,440,000 |
| 35070 HP Hit Points |
| 17.59/1911.64/21 t Weight Limit |
- 전차장 (무전수)
- 포수
- 조종수
- 장전수
- 장전수
| 395410 hp Engine Power |
| 14/43.5 km/h Speed Limit |
| 3032 deg/s Traverse |
| 22.4635.22 hp/t Power/Wt Ratio |
| YesYes Pivot |
| // mm Hull Armor |
HE
HE/HE Shells |
| 450//550/650/400 HP Damage |
| 28//35/44/212 mm Penetration |
|
5 r/m ▲
2.07 r/m Standard Gun ▲ Rate of Fire Standard Gun |
|
2250 ▲
1138.5 Standard Gun ▲
Standard Gun ▼
Standard Gun ▲ Damage Per Minute Standard Gun
|
|
0.66 m ▲
0.66 m With 50% Crew: 0.818 m ▲ Accuracy With 50% Crew: 0.818 m |
| 4 s 4.8 s Aim time |
| 3032 deg/s Gun Traverse Speed |
| 40° Gun Arc |
| -5°/+45°-5°/+45° Elevation Arc |
| 7532 rounds Ammo Capacity |
| 2020 % Chance of Fire |
| 275 m 275 m View Range |
| 375 m 550 m Signal Range |
VII
1440000
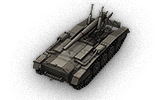
The Crusader 5.5-in. SP is a British tier 7 self-propelled gun.
Crusader 차체에 140mm 곡사포를 장착한 자주포이다. 제2차 세계대전 종전 후 개발이 시작되었지만, 시제 전차 제작 단계에서 개발이 중단되었으며 양산되거나 제식 채용되지 않았다.
The Crusader mounted with a 5.5-inch gun is quite the interesting SPG to play. It is horrifically slow driving forward, but this is because its gun is mounted on the chassis backwards. Therefore, driving in reverse actually achieves a higher top speed than driving normally. It can take some time to get used to these controls, but they end up being an effective tactic to throw off enemies who are unfamiliar with it. Its top gun has great range, a good aiming time, and a respectable rate of fire, although it has poor alpha damage for its tier and somewhat low accuracy.
The Crusader 5.5-in. SP leads to the FV207.
Modules / Available Equipment and Consumables
Modules

주포
| 단계 | 주포 | 평균 관통력 (mm) | 연사력 | 100m에서의 분산도 | 조준 시간 | 일반 경험치 | 중량 (톤) | 가격, | |
|---|---|---|---|---|---|---|---|---|---|
| V | Q.F. 4.5-in. Howitzer | 28 | 450 | 5 | 0.66 | 4 | 0 | 463 | 43000 |
| VII | B.L. 5.5-in. Gun | 35/44/212 | 550/650/400 | 2.07 | 0.66 | 4.8 | 14000 | 1869 | 88000 |

엔진
| 단계 | 엔진 | 엔진 출력 (마력) | 충돌 시 화재 발생 확률 | 일반 경험치 | 중량 (톤) | 가격, |
|---|---|---|---|---|---|---|
| IV | Nuffield Liberty Mk. III | 395 | 20 | 0 | 383 | 11500 |
| V | Nuffield Liberty Mk. V | 410 | 20 | 1000 | 383 | 12500 |

현가장치
| 단계 | 현가장치 | 한계 중량 | 회전 속도 (도/초) | 일반 경험치 | 중량 (톤) | 가격, |
|---|---|---|---|---|---|---|
| VI | Crusader Mk. II | 19 | 30 | 0 | 9000 | 15000 |
| VII | Crusader 5.5-in. SP | 21 | 32 | 9000 | 9000 | 20000 |

무전기
| 단계 | 무전기 | 통신 범위 (m) | 일반 경험치 | 중량 (톤) | 가격, |
|---|---|---|---|---|---|
| V | WS No. 9 | 375 | 0 | 40 | 3600 |
| VI | WS No. 19 Mk. I | 400 | 1480 | 40 | 15000 |
| VII | WS No. 19 Mk. II | 450 | 3600 | 40 | 21000 |
| VIII | WS No. 19 Mk. III | 550 | 4000 | 40 | 22000 |
Compatible Equipment
Compatible Consumables
Player Opinion
Pros and Cons
Pros:
- Gun range: stock: 500 m, top: 1300 m
- Good aim time
- Decent reload
- Good for escape and shoot tactics
- High reverse speed, this can throw off opposing players who have never seen this SPG before. Excellent for escaping tight situations
Cons:
- Poor alpha
- Unusual controls (You have to drive it backwards to reach top speed)
- Top gun has a low shell arc
Performance
Unlike most tanks, the Crusader SP has a faster reverse speed than forward speed: 44 km/h compared to 14. This is because its gun was mounted pointing toward the rear of the Crusader chassis. Although the Crusader SP gets a gun with twice as much damage and range than the FV, it's not as effective at distances higher than 600m due to low accuracy and high shell travel time. That said, use your high mobility, low profile and gun depression to hide behind small hills at a fair distance from the enemy and shoot them, that is play more as a TD with very low health and armor. In addition, this arty is one of the best at defending itself due to high reverse speed, fast reload time (for SPG) and the fact that it has gun depression, which is very usable at close quarters fight, especially versus TDs and other SPGs.
Early Research
- The WS No. 19 Mk. III Radio carries over from the FV304. Mount it immediately.
- First, research the B.L. 5.5-in. Gun.
- Next, research the Nuffield Liberty Mk. V Engine.
- Finally, research the Crusader 5.5-in. SP Suspension.
Suggested Equipment
![]()
![]()
Gallery


Historical Info
The 5.5-inch Gun was one of the two British medium guns of World War 2, which both used the same carriage (the other was the 4.5-inch Gun). It first entered service in 1942 replacing 6-inch Howitzers in medium regiments. It had limited service in Indian regiments and equipped a South African and three Canadian regiments in Europe. It was popular and recognized as an effective gun, however, there was a problem with bore premature, particularly in Burma and in late 1944 some 5.5-inch were temporarily replaced by old 6-inch howitzers in that theatre. Initially it had a 100 lb shell but later in the war an 80 lb shell was introduced and this eventually replaced the 100 lb. It left British service in the mid-1970s, UK last used them operationally in Borneo and Radfan in the mid-1960s and the last round was fired in UK was in 1995. Its last operational use seems to have been with the South African Defence Force in Angola in the 1980s. In European countries it was referred to as the 140-mm (or 14-cm) gun.
Self propelled varians
No SP versions ever entered service although an SP was the highest priority equipment at the end on WW2. After WW2 there was an open SP built on the Crusader gun tractor, some design work on FV 305, a 5.5-inch SP using the proposed FV 300 series carriage, it was cancelled in 1948. However, in 1950 a new SP design started, FV 3805, based on a Centurion tank chassis. A prototype was built, it had a fully enclosed fighting compartment and a barbette mounted gun. It was cancelled in about 1958.
Historical Gallery

| USA |
T1 HMC • T18 HMC • M7 Priest • T82 HMC • M37 • M41 HMC • M44 • M12 • M40/M43 • M53/M55 • T92 HMC |
| UK |
Loyd Gun Carriage • Sexton II • Sexton I • Birch Gun • Bishop • FV304 • Crusader 5.5-in. SP • FV207 • FV3805 • Conqueror Gun Carriage |
| Germany |
G.Pz. Mk. VI (e) • Sturmpanzer I Bison • Wespe • Pz.Sfl. IVb • Sturmpanzer II • Grille • Hummel • G.W. Panther • G.W. Tiger (P) • G.W. Tiger • G.W. E 100 |
| France |
Renault FT 75 BS • Lorraine 39L AM • AMX 105 AM mle. 47 • AMX 13 105 AM mle. 50 • 105 leFH18B2 • AMX 13 F3 AM • Lorraine 155 mle. 50 • Lorraine 155 mle. 51 • Bat.-Châtillon 155 55 • Bat.-Châtillon 155 58 |
| USSR |
SU-18 • SU-26 • SU-5 • SU-122A • SU-8 • S-51 • SU-14-1 • SU-14-2 • 212A • Object 261 |
| China | |
| Japan |