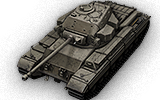
Witamy w Wiki Wargaming.net!
Warianty

Caernarvon

Skocz do: nawigacji, wyszukiwania


newfile.png Article requires additional modification
The design and/or content of this article do not conform to wiki standards.
Missing Content
  • Player Opinion: Pros
  • Player Opinion: Cons
  • Player Opinion: Performance
  • Player Opinion: Equipment
  • History
  • Historical Gallery
  • Sources and External Links


,,


Caernarvon

Icon
UK | Heavy Tank | Tier VIII
Battle Tier
1234567891011
Overview
Mouse over "
Well, the ones further down, of course.
" for more information
2 520 000  Credits Cost
1500400 HP Hit Points
59.18/6026.46/64 t Weight Limit
Crew
  1. Dowódca
  2. Kierowca-mechanik
  3. Celowniczy
  4. Ładowniczy (Radiooperator)
Mobility
650810 hp Engine Power
34.3/12 km/h Speed Limit
2224 deg/s Traverse
10.9830.61 hp/t Power/Wt Ratio
YesYes Pivot
Armor
// mm Hull Armor
152.4/88.9/88.9254/88.9/88.9 mm Turret Armor
Armament


{{#ifeq:ARMOR_PIERCING_CR|ARMOR_PIERCING||


{{#ifeq:HIGH_EXPLOSIVE|ARMOR_PIERCING||


AP/APCR/HE


{{#ifeq:ARMOR_PIERCING_CR|ARMOR_PIERCING||


{{#ifeq:HIGH_EXPLOSIVE|ARMOR_PIERCING||


AP/APCR/HE
Shells
150/150/190280/280/370 HP Damage
171/239/38220/252/47 mm Penetration


|


|}}

|


|}}


13.33 r/m 

Standard Gun

Reload Times
Nominal: 4.5 s
50% Crew: 5.57 s
75% Crew: 4.87 s
100% Crew: 4.31 s
Rammer: 3.88 s
Vents: 4.22 s
Both: 3.79 s
Both and BiA: 3.71 s
Both and Max Crew %: 3.56 s

See Crew, Consumables, or Equipment for more information.


|


|}}

|


|}}


9.23 r/m 

Standard Gun

Reload Times
Nominal: 6.5 s
50% Crew: 8.05 s
75% Crew: 7.03 s
100% Crew: 6.23 s
Rammer: 5.61 s
Vents: 6.09 s
Both: 5.48 s
Both and BiA: 5.36 s
Both and Max Crew %: 5.14 s

See Crew, Consumables, or Equipment for more information.
Rate of Fire


|


|}}

|


|}}


1999.5

Standard Gun

Using Shell Type 1 (150 Damage):


Theoretical Damage Per Minute
Nominal DPM: 1999.5
50% Crew: 1614
75% Crew: 1848
100% Crew: 2085
100% Crew
Vents: 2131.5
Rammer: 2316
Both: 2368.5
Both and BiA: 2421
Both and Max Crew %: 2526

Advantageous Damage Per Minute
First-shot DPM: 2149.5
50% Crew: 1764
75% Crew: 1998
100% Crew: 2235
100% Crew
Rammer: 2466
Vents: 2281.5
Both: 2518.5
Both and BiA: 2571
Both and Max Crew %: 2676

See here, here, or here for more information.

Standard Gun

Using Shell Type 2 (150 Damage):


Theoretical Damage Per Minute
Nominal DPM: 1999.5
50% Crew: 1614
75% Crew: 1848
100% Crew: 2085
100% Crew
Vents: 2131.5
Rammer: 2316
Both: 2368.5
Both and BiA: 2421
Both and Max Crew %: 2526

Advantageous Damage Per Minute
First-shot DPM: 2149.5
50% Crew: 1764
75% Crew: 1998
100% Crew: 2235
100% Crew
Rammer: 2466
Vents: 2281.5
Both: 2518.5
Both and BiA: 2571
Both and Max Crew %: 2676

See here, here, or here for more information.

Standard Gun

Using Shell Type 3 (190 Damage):
With wholly penetrating hits

Theoretical Damage Per Minute
Nominal DPM: 2532.7
50% Crew: 2044.4
75% Crew: 2340.8
100% Crew: 2641
100% Crew
Vents: 2699.9
Rammer: 2933.6
Both: 3000.1
Both and BiA: 3066.6
Both and Max Crew %: 3199.6

Advantageous Damage Per Minute
First-shot DPM: 2722.7
50% Crew: 2234.4
75% Crew: 2530.8
100% Crew: 2831
100% Crew
Rammer: 3123.6
Vents: 2889.9
Both: 3190.1
Both and BiA: 3256.6
Both and Max Crew %: 3389.6

See here, here, or here for more information.


|


|}}

|


|}}


2584.4

Standard Gun

Using Shell Type 1 (280 Damage):


Theoretical Damage Per Minute
Nominal DPM: 2584.4
50% Crew: 2086
75% Crew: 2388.4
100% Crew: 2696.4
100% Crew
Vents: 2758
Rammer: 2996
Both: 3063.2
Both and BiA: 3130.4
Both and Max Crew %: 3267.6

Advantageous Damage Per Minute
First-shot DPM: 2864.4
50% Crew: 2366
75% Crew: 2668.4
100% Crew: 2976.4
100% Crew
Rammer: 3276
Vents: 3038
Both: 3343.2
Both and BiA: 3410.4
Both and Max Crew %: 3547.6

See here, here, or here for more information.

Standard Gun

Using Shell Type 2 (280 Damage):


Theoretical Damage Per Minute
Nominal DPM: 2584.4
50% Crew: 2086
75% Crew: 2388.4
100% Crew: 2696.4
100% Crew
Vents: 2758
Rammer: 2996
Both: 3063.2
Both and BiA: 3130.4
Both and Max Crew %: 3267.6

Advantageous Damage Per Minute
First-shot DPM: 2864.4
50% Crew: 2366
75% Crew: 2668.4
100% Crew: 2976.4
100% Crew
Rammer: 3276
Vents: 3038
Both: 3343.2
Both and BiA: 3410.4
Both and Max Crew %: 3547.6

See here, here, or here for more information.

Standard Gun

Using Shell Type 3 (370 Damage):
With wholly penetrating hits

Theoretical Damage Per Minute
Nominal DPM: 3415.1
50% Crew: 2756.5
75% Crew: 3156.1
100% Crew: 3563.1
100% Crew
Vents: 3644.5
Rammer: 3959
Both: 4047.8
Both and BiA: 4136.6
Both and Max Crew %: 4317.9

Advantageous Damage Per Minute
First-shot DPM: 3785.1
50% Crew: 3126.5
75% Crew: 3526.1
100% Crew: 3933.1
100% Crew
Rammer: 4329
Vents: 4014.5
Both: 4417.8
Both and BiA: 4506.6
Both and Max Crew %: 4687.9

See here, here, or here for more information.
Damage Per Minute


|


|}}


0.34 m 

With 50% Crew: 0.421 m
With 75% Crew: 0.368 m
With 100% Crew: 0.326 m
With BiA: 0.319 m
With BiA and Vents: 0.312 m
Maximum possible: 0.299 m

For more details, see Crew


|


|}}


0.34 m 

With 50% Crew: 0.421 m
With 75% Crew: 0.368 m
With 100% Crew: 0.326 m
With BiA: 0.319 m
With BiA and Vents: 0.312 m
Maximum possible: 0.299 m

For more details, see Crew
Accuracy


|


|}}


2.3 s 

With 50% Crew: 2.849 s
With 75% Crew: 2.488 s
With 100% Crew: 2.205 s
With GLD: 2.005 s
With BiA: 2.157 s
With BiA and Vents: 2.11 s
With both and GLD: 1.918 s
Maximum possible: 1.839 s

For more details, see Crew or Equipment


|


|}}


2.3 s 

With 50% Crew: 2.849 s
With 75% Crew: 2.488 s
With 100% Crew: 2.205 s
With GLD: 2.005 s
With BiA: 2.157 s
With BiA and Vents: 2.11 s
With both and GLD: 1.918 s
Maximum possible: 1.839 s

For more details, see Crew or Equipment
Aim time
2630 deg/s Turret Traverse
360° Gun Arc
-10°/+18°-10°/+18° Elevation Arc
7050 rounds Ammo Capacity
General
2020 % Chance of Fire


370 m 

With 50% Crew: 290.7 m
With 75% Crew: 330.4 m
With 100% Crew: 370 m
With Recon and Situational Awareness: 388.7 m
With Coated Optics: 407 m
With Binocular Telescope: 462.5 m
Maximum possible: 529.7 m

For more details, see Skills or Equipment


400 m 

With 50% Crew: 314.3 m
With 75% Crew: 357.2 m
With 100% Crew: 400 m
With Recon and Situational Awareness: 420.2 m
With Coated Optics: 440 m
With Binocular Telescope: 500 m
Maximum possible: 572.6 m

For more details, see Skills or Equipment
View Range


|


|}}


550 m 

With 50% Crew: 444 m
With 75% Crew: 508.5 m
With 100% Crew: 573.6 m
With 100% Signal Boost: 660 m
When affected by 100% Relaying: 605 m
Maximum possible: 825.7 m

For more details, see Skills or Equipment


|


|}}


750 m 

With 50% Crew: 605.4 m
With 75% Crew: 693.4 m
With 100% Crew: 782.2 m
With 100% Signal Boost: 900 m
When affected by 100% Relaying: 825 m
Maximum possible: 1125.9 m

For more details, see Skills or Equipment
Signal Range
Values are Stock - click for Top


VIII

annoGB11_Caernarvon.png

2520000

The Caernarvon is a British tier 8 heavy tank.

Prace nad tym czołgiem wsparcia piechoty rozpoczęły się w roku 1944. Pierwszy prototyp był gotowy do prób w 1952 r. W sumie wyprodukowano 21 czołgów, ale żaden z nich nie wszedł do służby. Część z tych pojazdów przebudowano później na czołgi ciężkie Conqueror.

The Caernarvon leads to the Conqueror.

Modules / Available Equipment and Consumables

Modules

Działo

Działo

Poziom Działo Średnia penetracja (mm) Szybkostrzelność Celność na 100 m Czas celowania Doświadczenie Masa (t) Koszt,
VII OQF 17-pdr Gun Mk. VII 171/239/38 150/150/190 13.33 0.34 2.3 0 826 70000
VIII OQF 32-pdr Gun Mk. II 220/252/47 280/280/370 9.23 0.34 2.3 16400 2972 125000
Silnik

Silnik

Poziom Silnik Moc silnika (KM) Prawdopodobieństwo pożaru przy trafieniu Doświadczenie Masa (t) Koszt,
V Rolls-Royce Meteor Mk. IVB 650 20 0 744 16000
IX Rolls-Royce Meteor Mk. IVC 750 20 31000 744 84000
IX Rolls-Royce Meteor M120 810 20 27000 744 92000
Zawieszenie

Zawieszenie

Poziom Zawieszenie Maks. obciążenie Prędkość obrotu (stopni/s) Doświadczenie Masa (t) Koszt,
VII FV221 60 22 0 12000 20200
VIII FV221A 64 24 14800 12000 30500
Radio

Radio

Poziom Radio Zasięg sygnału (m) Doświadczenie Masa (t) Koszt,
X SR C42 750 9000 40 54000
VIII WS No. 19 Mk. III 550 0 40 22000
VIII WS No. 22 700 4500 40 25000

Compatible Equipment

Compatible Consumables


Gallery

History for this tank not found


UK
Light Tanks


Cruiser Mk. I • M2 • Cruiser Mk. II • Light Mk. VIC • Valentine • Stuart I-IV • Cruiser Mk. III • Cruiser Mk. IV • Covenanter • A46 • Crusader • GSR 3301 Setter • FV1066 Senlac • LHMTV • GSOR3301 AVR FS • Manticore

Medium Tanks


Vickers Medium Mk. I • Vickers Medium Mk. II • Vickers Medium Mk. III • Matilda • Matilda LVT • Grant • AC 1 Sentinel • Cavalier • Valiant • Sherman III • Matilda Black Prince • Sherman Firefly • Cromwell • AC 4 Experimental • Cromwell B • Sherman VC Firefly • Comet • Centurion Mk. I • FV4202 • Chieftain/T95 • Centurion Mk. 5/1 RAAC • Chimera • Cobra • Centurion Mk. 7/1 • Centurion Action X

Heavy Tanks


Churchill I • Excelsior • Churchill VII • TOG II* • Black Prince • FV201 (A45) • Charlemagne • Caliban • Gonsalo • Caernarvon • Caernarvon Action X • FV4201 Chieftain Proto • Conqueror • FV215b • Super Conqueror • T95/FV4201 Chieftain

Tank Destroyers


Universal Carrier 2-pdr • Valentine AT • Alecto • Archer • AT 2 • Churchill Gun Carrier • Achilles • AT 8 • Excalibur • Challenger • AT 15A • AT 7 • GSOR 1008 • AT 15 • Charioteer • Turtle Mk. I • Tortoise • FV4004 Conway • FV215b (183) • FV4005 Stage II • FV217 Badger

Self-Propelled Guns


Loyd Gun Carriage • Sexton II • Sexton I • Birch Gun • Bishop • FV304 • Crusader 5.5-in. SP • FV207 • FV3805 • Conqueror Gun Carriage

Heavy Tanks
USA


T14 • T1 Heavy Tank • Pawlack Tank • M6 • King Tiger (Captured) • M-II-Y • T29 • Chrysler K • Chrysler K GF • T26E5 • T26E5 Patriot • M54 Renegade • T77 • M-III-Y • M-IV-Y • M6A2E1 • T32 • T34 • T34 B • AE Phase I • Concept 1B • M-VI-Y • M103 • T54E1 • M-V-Y • T110E5 • T57 Heavy Tank

UK


Churchill I • Excelsior • Churchill VII • TOG II* • Black Prince • FV201 (A45) • Charlemagne • Caliban • Gonsalo • Caernarvon • Caernarvon Action X • FV4201 Chieftain Proto • Conqueror • FV215b • Super Conqueror • T95/FV4201 Chieftain

Germany


Pz.Kpfw. B2 740 (f) • Durchbruchswagen 2 • Tiger 131 • VK 30.01 (P) • VK 36.01 (H) • VK 45.03 • Tiger I • Tiger (P) • VK 100.01 (P) • VK 168.01 (P) • VK 168.01 Mauerbrecher • VK 75.01 (K) • E 75 TS • Löwe • Tiger II • VK 45.02 (P) Ausf. A • E 75 • Mäuschen • VK 45.02 (P) Ausf. B • E 100 • Pz.Kpfw. VII • Maus • VK 72.01 (K)

France


B1 • BDR G1 B • ARL 44 • AMX M4 mle. 45 • AMX 50 100 • AMX M4 mle. 49 • AMX M4 mle. 49 Liberté • AMX 65 t • Somua SM • FCM 50 t • AMX 50 120 • Lorraine 50 t • AMX M4 mle. 51 • AMX 50 B • AMX M4 mle. 54

USSR


Churchill III • KV-220-2 • KV-220-2 Beta Test • KV-1 • KV-1 shielded • KV-1S • KV-2 • KV-2 (R) • KV-85 • Object 244 • T-150 • IS • KV-3 • KV-122 • IS-2M • IS-2 shielded • IS-2 • IS-3 • IS-6 • IS-6 B • KV-5 • KV-4 • IS-5 (Object 730) • IS-3A • IS-3A Peregrine • Kirovets-1 • KV-4 Kreslavskiy • Object 252U Defender • Object 252U • IS-M • Object 703 Version II • IS-2-II • T-10 • Object 777 Version II • Object 257 • Object 705 • IS-3-II • ST-I • IS-4 • IS-7 • Object 260 • Object 705A • Object 277 • Object 279 early • ST-II • Object 780

China


IS-2 • WZ-111 • WZ-111 Alpine Tiger • 110 • 112 • WZ-111 model 1-4 • WZ-114 • 113 • 113 Beijing Opera • WZ-111 model 5A • WZ-111 Qilin

Japan


Type 91 Heavy • Type 95 Heavy • O-I Experimental • Heavy Tank No. VI • O-I • O-Ni • O-Ho • Type 4 Heavy • Type 5 Heavy