| 2014年11月1日 (六) 02:42的修訂版本 | | 2017年1月31日 (二) 14:40的修訂版本 |
| 第 1 行: | | 第 1 行: |
| | [[image:Spg S.png|left|link=|]] | | | [[image:Spg S.png|left|link=|]] |
| ? | Self-propelled guns (SPGs), more often known as artillery, provide powerful indirect fire support with a very large range that can potentially cover the entire map. They stay safe by remaining well within friendly lines and provide support against tough stationary or slow targets. Artillery is just as good as the team. So if you (as arty) find yourself in a "bad team" or a team that only camps, you will not get the full potential to the powerful gun you have and support as much that you wanted to. | | + | 自走砲是一種可以從遠距離發射強力火炮來支援隊伍的一種裝甲戰鬥車輛,它們的射程有時可以還蓋整張地圖,而它們最愛的目標就是那些靜止不動或是移動緩慢的車輛。自走砲非常仰賴隊伍,當它們所在的隊伍中沒有人願意偵查或是牽制敵人使敵人無法隨意移動時,它們的真正能力就難以發揮。自走砲在小地圖上以綠色或紅色的正方形圖案顯示。 |
| | | + | 幾乎所有的自走砲都使用高爆彈(HE)來攻擊遠處的目標,由於火炮的準確度低,因此比起直接命中,爆炸引起的擴散傷害才是主要的傷害來源,尤其越到高階越是如此。最重的自走砲有115公噸重,最高時速的差異也很大,速度最快的自走砲時速有72公里,而最慢的自走砲時速僅有20公里。它們幾乎沒有任何裝甲,最厚也不過152公釐,脆弱程度和輕型與中型戰車差不多。不過,這些犧牲換得的是遊戲中最有威力的武器,火力幾乎比同階的戰車還高上一倍,但還是要注意它們的準確度差、裝填時間長、瞄準時間長,因此往往只能對著靜止、移動緩慢或沿著直線前進的戰車造成傷害。 |
| | | | | |
| ? | Almost exclusively, SPGs use HE shells lobbed in a ballistic arc to hit distant targets. The inaccuracy of their weapons, particularly at higher tiers, makes the splash damage caused by the explosion often the primary source of damage, with direct hits being crippling to the target tank. The heaviest SPG can weigh up to 115 tons. Speeds vary greatly and range from maximum speeds of below 20 kph to above 72 kph. Armor is usually negligible, and with a maximum armor thickness of 152 mm, SPGs are vulnerable to [[Light Tanks|light]] and [[Medium Tanks|medium]] tanks. SPGs possess the most powerful weapons in the game, being able to deliver over twice the damage of the most powerful cannons available on similarly-tiered tanks. However, extremely poor accuracy, slow aiming speed, and a long reload time make their weapons only effective against slow and stationary tanks, or tanks moving in a straight line at a constant speed. | | + | 自走砲是唯一可以使用俯視圖瞄準(左Shift)的車輛,讓它們可以全覽整張地圖。請注意,如果瞄準的地方超出原本的射界,將會使自走砲車體轉向,使得準確度下降並需要重新瞄準目標。標線會指示是否能夠擊中目標,而且會隨著地形的不同而有變化。 |
| | | | | |
| ? | SPGs are capable of using [[Battle_Mechanics#Strategic View (SPG)|Strategic View Mode]] (left shift), which gives them a bird's-eye view of the whole [[Maps|map]], though due to screen size limitations you see only a small portion. Map navigation in this mode is very easy. Be aware that moving reticle sideways on the map will cause the vehicle to physically reposition itself, which will significantly reduce your firing accuracy. The reticle will still display as expected, but will vary in shape with the terrain. This eliminates the need to get reasonably close to the target to hit it. | | + | 偵查的配合是自走砲迫切需要的,它們必須藉由其他戰車的偵查來看見目標。自走砲的支援可以摧毀強力的對手,並在一瞬間扭轉整個戰局。此外,若看到樹木或建築物被壓倒或摧毀,自走砲可以猜測目標的所在進行攻擊,有時會取得意外的成效。 |
| | | | | |
| ? | SPGs work closely with scouts, using them to spot targets. SPG support is essential in a scenario in which smaller tanks are up against more powerful tanks, and can quickly turn the tide of a battle. SPGs are also one of the best weapons against opposing SPGs, able to fire blindly at potential enemy positions by spotting tracer fire or recently destroyed map-objects like trees or buildings. | | + | 為了避免對方自走砲藉由彈道進行的反攻擊,在每次開火後,自走砲必須盡量的改變自身的位置。選擇一個適當躲藏的地方也是自走砲自保的方式,同時更必須要隨時注意友方的防線是否遭到突破,並躲到隊友的掩護之下。最後,玩家必須要知道的是自走砲的彈藥費非常昂貴,以一台Hummel或同級的自走砲來說,一發砲彈就要1000銀幣,因此在發砲前必須好好的考慮是否會命中目標。 |
| ? | | | + | |
| ? | SPGs should relocate after firing, and avoid predictable locations to prevent from being destroyed by counter-artillery fire. Good situational awareness is also essential to survive in an SPG. Noticing breaks in a defensive line early can allow an SPG to relocate before an enemy scout can arrive. | | + | |
| ? | | | + | |
| ? | Another thing to remember with SPGs is that they have very high ammo-costs, for example a single round for an upgraded [[Hummel]] (and similar tiered SPGs) will cost about 1000 credits, which makes constant blind-firing and misses a costly endeavor. | | + | |
| ? | | | + | |
| ? | SPGs appear as red or green squares on the mini-map and over target marker. | | + | |
| | | | | |
| | {{:Self-Propelled Guns/Data}} | | | {{:Self-Propelled Guns/Data}} |
2017年1月31日 (二) 14:40的修訂版本
自走砲是一種可以從遠距離發射強力火炮來支援隊伍的一種裝甲戰鬥車輛,它們的射程有時可以還蓋整張地圖,而它們最愛的目標就是那些靜止不動或是移動緩慢的車輛。自走砲非常仰賴隊伍,當它們所在的隊伍中沒有人願意偵查或是牽制敵人使敵人無法隨意移動時,它們的真正能力就難以發揮。自走砲在小地圖上以綠色或紅色的正方形圖案顯示。
幾乎所有的自走砲都使用高爆彈(HE)來攻擊遠處的目標,由於火炮的準確度低,因此比起直接命中,爆炸引起的擴散傷害才是主要的傷害來源,尤其越到高階越是如此。最重的自走砲有115公噸重,最高時速的差異也很大,速度最快的自走砲時速有72公里,而最慢的自走砲時速僅有20公里。它們幾乎沒有任何裝甲,最厚也不過152公釐,脆弱程度和輕型與中型戰車差不多。不過,這些犧牲換得的是遊戲中最有威力的武器,火力幾乎比同階的戰車還高上一倍,但還是要注意它們的準確度差、裝填時間長、瞄準時間長,因此往往只能對著靜止、移動緩慢或沿著直線前進的戰車造成傷害。
自走砲是唯一可以使用俯視圖瞄準(左Shift)的車輛,讓它們可以全覽整張地圖。請注意,如果瞄準的地方超出原本的射界,將會使自走砲車體轉向,使得準確度下降並需要重新瞄準目標。標線會指示是否能夠擊中目標,而且會隨著地形的不同而有變化。
偵查的配合是自走砲迫切需要的,它們必須藉由其他戰車的偵查來看見目標。自走砲的支援可以摧毀強力的對手,並在一瞬間扭轉整個戰局。此外,若看到樹木或建築物被壓倒或摧毀,自走砲可以猜測目標的所在進行攻擊,有時會取得意外的成效。
為了避免對方自走砲藉由彈道進行的反攻擊,在每次開火後,自走砲必須盡量的改變自身的位置。選擇一個適當躲藏的地方也是自走砲自保的方式,同時更必須要隨時注意友方的防線是否遭到突破,並躲到隊友的掩護之下。最後,玩家必須要知道的是自走砲的彈藥費非常昂貴,以一台Hummel或同級的自走砲來說,一發砲彈就要1000銀幣,因此在發砲前必須好好的考慮是否會命中目標。
American
 T1 HMC
 T18 HMC
M7 Priest
 T82 HMC
M37
 M41 HMC
 M44
M44
 M12
M12
 M40/M43
 M53/M55
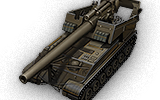
 T92 HMC
British
Loyd Gun Carriage
Sexton II
Sexton I 
Birch Gun
Bishop
FV304
Crusader 5.5-in. SP
FV207
FV3805
Conqueror Gun Carriage
German
G.Pz. Mk. VI (e)
Sturmpanzer I Bison
Wespe
Pz.Sfl. IVb
Sturmpanzer II
Grille
Hummel
G.W. Panther
G.W. Tiger (P)
G.W. Tiger
G.W. E 100
French
Renault FT 75 BS
Lorraine 39L AM
AMX 105 AM mle. 47
AMX 13 105 AM mle. 50
105 leFH18B2 
AMX 13 F3 AM
Lorraine 155 mle. 50
Lorraine 155 mle. 51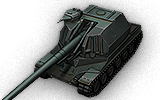
Bat.-Châtillon 155 55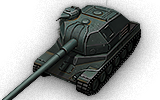
Bat.-Châtillon 155 58
Soviet
SU-18
SU-26
SU-5
SU-122A
SU-8
S-51
SU-14-1
SU-14-2
212A
Object 261
