歡迎來到 Wargaming.net Wiki!
變換

T37

在2015年1月19日 (一) 18:13由所做的修訂版本
(差異) ←上個修訂 | 最新修訂 (差異) | 下一修訂→ (差異)
跳轉到: 導覽搜尋


newfile.png Article requires additional modification
The design and/or content of this article do not conform to wiki standards.
Missing Content
  • Gallery
  • History
  • Historical Gallery
  • Sources and External Links


,,


T37

Icon
nation | Light Tank | Tier VI
Battle Tier
1234567891011
Overview
Mouse over "
Well, the ones further down, of course.
" for more information
910,000  Credits Cost
650136 HP Hit Points
21.9/2212.53/26 t Weight Limit
Crew
  1. 車長 (通訊員)
  2. 炮手
  3. 駕駛
  4. 裝填手
Mobility
470600 hp Engine Power
65/22 km/h Speed Limit
4448 deg/s Traverse
21.4647.89 hp/t Power/Wt Ratio
YesYes Pivot
Armor
// mm Hull Armor
31.8/25.4/25.431.8/25.4/25.4 mm Turret Armor
Armament


{{#ifeq:ARMOR_PIERCING_CR|ARMOR_PIERCING||


{{#ifeq:HIGH_EXPLOSIVE|ARMOR_PIERCING||


AP/APCR/HE


{{#ifeq:ARMOR_PIERCING_CR|ARMOR_PIERCING||


{{#ifeq:HIGH_EXPLOSIVE|ARMOR_PIERCING||


AP/APCR/HE
Shells
115/115/185115/115/185 HP Damage
120/160/38126/160/38 mm Penetration


|


|}}

|


|}}


13.64 r/m 

Standard Gun

Reload Times
Nominal: 4.4 s
50% Crew: 5.45 s
75% Crew: 4.76 s
100% Crew: 4.22 s
Rammer: 3.8 s
Vents: 4.13 s
Both: 3.71 s
Both and BiA: 3.63 s
Both and Max Crew %: 3.48 s

See Crew, Consumables, or Equipment for more information.


|


|}}

|


|}}


16.22 r/m 

Standard Gun

Reload Times
Nominal: 3.7 s
50% Crew: 4.58 s
75% Crew: 4 s
100% Crew: 3.55 s
Rammer: 3.2 s
Vents: 3.47 s
Both: 3.12 s
Both and BiA: 3.06 s
Both and Max Crew %: 2.93 s

See Crew, Consumables, or Equipment for more information.
Rate of Fire


|


|}}

|


|}}


1568.6

Standard Gun

Using Shell Type 1 (115 Damage):


Theoretical Damage Per Minute
Nominal DPM: 1568.6
50% Crew: 1266.15
75% Crew: 1450.15
100% Crew: 1636.45
100% Crew
Vents: 1673.25
Rammer: 1818.15
Both: 1859.55
Both and BiA: 1900.95
Both and Max Crew %: 1982.6

Advantageous Damage Per Minute
First-shot DPM: 1683.6
50% Crew: 1381.15
75% Crew: 1565.15
100% Crew: 1751.45
100% Crew
Rammer: 1933.15
Vents: 1788.25
Both: 1974.55
Both and BiA: 2015.95
Both and Max Crew %: 2097.6

See here, here, or here for more information.

Standard Gun

Using Shell Type 2 (115 Damage):


Theoretical Damage Per Minute
Nominal DPM: 1568.6
50% Crew: 1266.15
75% Crew: 1450.15
100% Crew: 1636.45
100% Crew
Vents: 1673.25
Rammer: 1818.15
Both: 1859.55
Both and BiA: 1900.95
Both and Max Crew %: 1982.6

Advantageous Damage Per Minute
First-shot DPM: 1683.6
50% Crew: 1381.15
75% Crew: 1565.15
100% Crew: 1751.45
100% Crew
Rammer: 1933.15
Vents: 1788.25
Both: 1974.55
Both and BiA: 2015.95
Both and Max Crew %: 2097.6

See here, here, or here for more information.

Standard Gun

Using Shell Type 3 (185 Damage):
With wholly penetrating hits

Theoretical Damage Per Minute
Nominal DPM: 2523.4
50% Crew: 2036.85
75% Crew: 2332.85
100% Crew: 2632.55
100% Crew
Vents: 2691.75
Rammer: 2924.85
Both: 2991.45
Both and BiA: 3058.05
Both and Max Crew %: 3189.4

Advantageous Damage Per Minute
First-shot DPM: 2708.4
50% Crew: 2221.85
75% Crew: 2517.85
100% Crew: 2817.55
100% Crew
Rammer: 3109.85
Vents: 2876.75
Both: 3176.45
Both and BiA: 3243.05
Both and Max Crew %: 3374.4

See here, here, or here for more information.


|


|}}

|


|}}


1865.3

Standard Gun

Using Shell Type 1 (115 Damage):


Theoretical Damage Per Minute
Nominal DPM: 1865.3
50% Crew: 1505.35
75% Crew: 1725
100% Crew: 1945.8
100% Crew
Vents: 1989.5
Rammer: 2162
Both: 2210.3
Both and BiA: 2259.75
Both and Max Crew %: 2357.5

Advantageous Damage Per Minute
First-shot DPM: 1980.3
50% Crew: 1620.35
75% Crew: 1840
100% Crew: 2060.8
100% Crew
Rammer: 2277
Vents: 2104.5
Both: 2325.3
Both and BiA: 2374.75
Both and Max Crew %: 2472.5

See here, here, or here for more information.

Standard Gun

Using Shell Type 2 (115 Damage):


Theoretical Damage Per Minute
Nominal DPM: 1865.3
50% Crew: 1505.35
75% Crew: 1725
100% Crew: 1945.8
100% Crew
Vents: 1989.5
Rammer: 2162
Both: 2210.3
Both and BiA: 2259.75
Both and Max Crew %: 2357.5

Advantageous Damage Per Minute
First-shot DPM: 1980.3
50% Crew: 1620.35
75% Crew: 1840
100% Crew: 2060.8
100% Crew
Rammer: 2277
Vents: 2104.5
Both: 2325.3
Both and BiA: 2374.75
Both and Max Crew %: 2472.5

See here, here, or here for more information.

Standard Gun

Using Shell Type 3 (185 Damage):
With wholly penetrating hits

Theoretical Damage Per Minute
Nominal DPM: 3000.7
50% Crew: 2421.65
75% Crew: 2775
100% Crew: 3130.2
100% Crew
Vents: 3200.5
Rammer: 3478
Both: 3555.7
Both and BiA: 3635.25
Both and Max Crew %: 3792.5

Advantageous Damage Per Minute
First-shot DPM: 3185.7
50% Crew: 2606.65
75% Crew: 2960
100% Crew: 3315.2
100% Crew
Rammer: 3663
Vents: 3385.5
Both: 3740.7
Both and BiA: 3820.25
Both and Max Crew %: 3977.5

See here, here, or here for more information.
Damage Per Minute


|


|}}


0.42 m 

With 50% Crew: 0.52 m
With 75% Crew: 0.454 m
With 100% Crew: 0.403 m
With BiA: 0.394 m
With BiA and Vents: 0.385 m
Maximum possible: 0.369 m

For more details, see Crew


|


|}}


0.45 m 

With 50% Crew: 0.557 m
With 75% Crew: 0.487 m
With 100% Crew: 0.431 m
With BiA: 0.422 m
With BiA and Vents: 0.413 m
Maximum possible: 0.396 m

For more details, see Crew
Accuracy


|


|}}


1.9 s 

With 50% Crew: 2.354 s
With 75% Crew: 2.055 s
With 100% Crew: 1.822 s
With GLD: 1.656 s
With BiA: 1.782 s
With BiA and Vents: 1.743 s
With both and GLD: 1.584 s
Maximum possible: 1.519 s

For more details, see Crew or Equipment


|


|}}


1.7 s 

With 50% Crew: 2.106 s
With 75% Crew: 1.839 s
With 100% Crew: 1.63 s
With GLD: 1.482 s
With BiA: 1.594 s
With BiA and Vents: 1.559 s
With both and GLD: 1.418 s
Maximum possible: 1.359 s

For more details, see Crew or Equipment
Aim time
4444 deg/s Turret Traverse
360° Gun Arc
-9°/+20°-9°/+20° Elevation Arc
6050 rounds Ammo Capacity
General
2020 % Chance of Fire


360 m 

With 50% Crew: 282.8 m
With 75% Crew: 321.5 m
With 100% Crew: 360 m
With Recon and Situational Awareness: 378.2 m
With Coated Optics: 396 m
With Binocular Telescope: 450 m
Maximum possible: 515.4 m

For more details, see Skills or Equipment


370 m 

With 50% Crew: 290.7 m
With 75% Crew: 330.4 m
With 100% Crew: 370 m
With Recon and Situational Awareness: 388.7 m
With Coated Optics: 407 m
With Binocular Telescope: 462.5 m
Maximum possible: 529.7 m

For more details, see Skills or Equipment
View Range


|


|}}


410 m 

With 50% Crew: 331 m
With 75% Crew: 379 m
With 100% Crew: 427.6 m
With 100% Signal Boost: 492 m
When affected by 100% Relaying: 451 m
Maximum possible: 615.5 m

For more details, see Skills or Equipment


|


|}}


745 m 

With 50% Crew: 601.4 m
With 75% Crew: 688.8 m
With 100% Crew: 777 m
With 100% Signal Boost: 894 m
When affected by 100% Relaying: 819.5 m
Maximum possible: 1118.4 m

For more details, see Skills or Equipment
Signal Range
Values are Stock - click for Top


VI

annoT37.png

910000

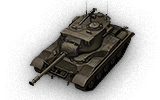
The T37 is a [[美國|]] tier 6 輕型戰車.

輕型戰車 T37 是由底特律兵工廠於四零年代後期為了取代 M24 Chaffee 而研發。下令要開發出三輛原型車。後來,一些創新的技術被應用在 T41 與 M41 戰車的研發上。

The T37 leads to the T71 CMCD.

Modules / Available Equipment and Consumables

Modules

炮管

炮管

等級 炮管 平均穿透力(毫米) 射擊速率 100 公尺處擴散度 瞄準時間 經驗 重量 (噸) 價格,
VI 76 mm Gun T94 120/160/38 115/115/185 13.64 0.42 1.9 0 726 64000
VI 76 mm Gun T91 126/160/38 115/115/185 16.22 0.45 1.7 6350 775 67100
引擎

引擎

等級 引擎 引擎功率(匹馬力) 碰撞時火災發生機率 經驗 重量 (噸) 價格,
VI Continental AOS-895-1 470 20 0 756 30000
VII Continental AOS-895-3A 600 20 9500 771 38400
懸吊

懸吊

等級 懸吊 負載限制 迴轉速度(度/秒) 經驗 重量 (噸) 價格,
V T37 22 44 0 6000 9800
VI T41 pilot number 1 26 48 5300 6000 15200
通訊設備

通訊設備

等級 通訊設備 通訊範圍(公尺) 經驗 重量 (噸) 價格,
X SCR 528 745 9000 80 54000
VI AN/GRC-3 410 0 120 21600

Compatible Equipment

Compatible Consumables

Player Opinion

Pros and Cons

Pros:


  • Guns are fairly accurate and are, except for the stock gun, superior to the M1A1 and M1A2 guns.
  • High penetration (With the 76mm Gun T91) allows you to go through the front of most Tier 7 tanks and hit weak spots in the front on higher tanks
  • High hp for a tier 6 light
  • XP costs for modules is relatively cheap


Cons:


  • Slightly sluggish with below average power-to-weight ratio, second turret makes mobility worse with the increased weight
  • Second turret is required for top gun, slowing the tank down if you want to use that gun
  • Ammo rack is directly behind weak frontal armor
  • Somewhat large hull for a light tank
  • Tracks take very long to repair


Performance

This tank can be played in two ways. The first is that of a traditional light tank, with a fully upgraded engine and the first turret performance is acceptable, use your speed to flank and destroy tanks, and kill other lights. The other way to play this tank is using its upgraded gun to be a mobile sniper, hitting the enemy from afar and using your camo & decent view range to hit them and scout before they hit you. The camouflage net works well when the tank is used as a sniper, just let it activate before shooting. With its excellent view range, you can move into position and monitor vast swathes of the battlefield, spotting would-be surprise attacks. However, it can also use this in conjunction with its excellent cannon to snipe. Care must be taken, for there will be many opponents more than willing to shoot at your thin, large profile. Close up, the T37 can troll big, dumb, heavy tanks by circling them, however you may not have the penetration to go through the front without mountains of silver or gold, but standard rounds are more than capable of punching holes in side and rear armor for all but the heaviest tanks. However it is important to note that if the second turret is mounted the tank does not have a maneuverability to do this with many heavies as they will out turn the tank with their hulls/turrets and make easy work of your tank.

Autoloaded gun has lower penetration than 76mm T91, but faster burst damage. Use it to peek out and shoot few shots before taking cover.


Early Research

Tracks, 2nd Turret, 2nd Gun, Engine, Go from there


Suggested Equipment


Vertical Stabilizer Coated Optics Camouflage Net Binocular Telescope Improved Ventilation


Gallery

History for this tank not found

美國
輕型戰車


T1 Cunningham • M2 Light Tank • T1E6 • T2 Light Tank • T7 Combat Car • M22 Locust • M3 Stuart • MTLS-1G14 • M5 Stuart • M24 Chaffee • M7 • M24E2 Super Chaffee • T21 • T37 • T71 CMCD • T71 DA • T92 • M41 Walker Bulldog • T49 • XM551 Sheridan

中型戰車


T2 Medium Tank • Convert. Medium Tank T3 • M2 Medium Tank • T6 Medium • M3 Lee • M4 Improved • M4A2E4 Sherman • M4A1 Sherman • Ram II • M4A3E8 Fury • M4A3E8 Thunderbolt VII • M4A3E8 Sherman • M4A3E2 Sherman Jumbo • T26E3 Eagle 7 • T20 • T23E3 • T25 Pilot Number 1 • TL-1 LPC • T42 • ASTRON Rex 105 mm • AMBT • M46 Patton KR • M26 Pershing • T26E4 SuperPershing • T69 • T95E2 • M46 Patton • M48A5 Patton • M60 • T95E6

重型戰車


T14 • T1 Heavy Tank • Pawlack Tank • M6 • King Tiger (Captured) • M-II-Y • T29 • Chrysler K • Chrysler K GF • T26E5 • T26E5 Patriot • M54 Renegade • T77 • M-III-Y • M-IV-Y • M6A2E1 • T32 • T34 • T34 B • AE Phase I • Concept 1B • M-VI-Y • M103 • T54E1 • M-V-Y • T110E5 • T57 Heavy Tank

驅逐戰車


T3 HMC • T56 GMC • M8A1 • T40 • M10 Wolverine • T67 • T78 • M18 Hellcat • M36 Jackson • M56 Scorpion • T28 Concept • Super Hellcat • T25/2 • T25 AT • TS-5 • T28 • T28 Prototype • T30 • T95 • T110E3 • T110E4

Self-Propelled Guns


T1 HMC • T18 HMC • M7 Priest • T82 HMC • M37 • M41 HMC • M44 • M12 • M40/M43 • M53/M55 • T92 HMC

輕型戰車
美國


T1 Cunningham • M2 Light Tank • T1E6 • T2 Light Tank • T7 Combat Car • M22 Locust • M3 Stuart • MTLS-1G14 • M5 Stuart • M24 Chaffee • M7 • M24E2 Super Chaffee • T21 • T37 • T71 CMCD • T71 DA • T92 • M41 Walker Bulldog • T49 • XM551 Sheridan

英國


Cruiser Mk. I • M2 • Cruiser Mk. II • Light Mk. VIC • Valentine • Stuart I-IV • Cruiser Mk. III • Cruiser Mk. IV • Covenanter • A46 • Crusader • GSR 3301 Setter • FV1066 Senlac • LHMTV • GSOR3301 AVR FS • Manticore

德國


Leichttraktor • Pz.Kpfw. II Ausf. D • MKA • Pz.Kpfw. 35 R • Pz.Kpfw. 38H 735 (f) • Pz.Kpfw. 35 (t) • Pz.Kpfw. I • Pz.Kpfw. II • 43 M. Toldi III • Pz.Kpfw. M 15 • Pz.Kpfw. 38 (t) • Pz.Kpfw. III Ausf. E • Pz.Kpfw. II Ausf. J • Pz.Kpfw. I Ausf. C • Pz.Kpfw. II Ausf. G • Pz.Kpfw. T 15 • Pz.Kpfw. 38 (t) n.A. • Pz.Kpfw. II Luchs • VK 16.02 Leopard • VK 28.01 mit 10,5 cm L/28 • VK 28.01 • Aufklärungspanzer Panther • Spähpanzer SP I C • leKpz M 41 90 mm • leKpz M 41 90 mm GF • HWK 12 • HWK 30 • Spähpanzer Ru 251 • Rheinmetall Panzerwagen

法國


Renault FT • D1 • AM 39 Gendron-Somua • AMR 35 • FCM 36 • Renault R35 • Hotchkiss H35 • AMX 38 • AMX 40 • AMX ELC bis • AMX 12 t • Panhard AMD 178B • AMX 13 75 • Hotchkiss EBR • AMX 13 57 • AMX 13 57 GF • Panhard EBR 75 (FL 10) • Panhard AML Lynx 6x6 • Bat.-Châtillon 12 t • ELC EVEN 90 • AMX 13 90 • Panhard EBR 90 • Panhard EBR 105 • AMX 13 105

蘇聯


MS-1 • BT-2 • T-45 • T-26 • T-60 • Tetrarch • BT-SV • LTP • M3 Light • BT-7 artillery • T-116 • BT-5 • T-127 • T-46 • T-70 • BT-7 • T-80 • Valentine II • A-20 • T-50 • MT-25 • T-50-2 • LTG • LTTB • LT-432 • T-54 ltwt. • T-100 LT

中國


Vickers Mk. E Type B • Type 2597 Chi-Ha • M5A1 Stuart • 59-16 • Type 64 • Type 62 • WZ-131 • WZ-132 • M41D • WZ-132A • WZ-132-1

日本


Renault Otsu • Type 95 Ha-Go • Type 97 Te-Ke • Type 97 Chi-Ha • Type 98 Ke-Ni • Type 5 Ke-Ho