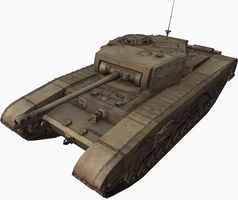
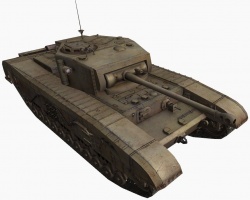
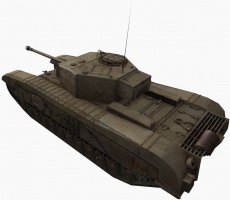
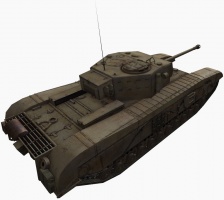
Black Prince

|
Article requires additional modification The design and/or content of this article do not conform to wiki standards. Missing Content
|
Black Prince
Mouse over "
| 1,400,000 |
| 1450290 HP Hit Points |
| 50.65/5121.91/53 t Weight Limit |
- 車長
- 駕駛
- 通訊員
- 炮手
- 裝填手
| 350600 hp Engine Power |
| 20/12 km/h Speed Limit |
| 1820 deg/s Traverse |
| 6.9127.38 hp/t Power/Wt Ratio |
| NoNo Pivot |
| // mm Hull Armor |
| 240/95.2/101.6240/95.2/101.6 mm Turret Armor |
AP/APCR/HE
AP/APCR/HE Shells |
| 140/140/190150/150/190 HP Damage |
| 148/208/38171/239/38 mm Penetration |
|
14.29 r/m ▲
12 r/m Standard Gun ▲ Rate of Fire Standard Gun |
|
2000.6 ▲
Standard Gun
▼
Standard Gun
▲
1800 Standard Gun ▲
Standard Gun
▼
Standard Gun
▲ Damage Per Minute Standard Gun |
|
0.34 m ▲
0.34 m With 50% Crew: 0.421 m ▲ Accuracy With 50% Crew: 0.421 m |
| 2.3 s 2.3 s Aim time |
| 3030 deg/s Turret Traverse |
| 360° Gun Arc |
| -8°/+20°-8°/+20° Elevation Arc |
| 14084 rounds Ammo Capacity |
| 2020 % Chance of Fire |
| 370 m 370 m View Range |
| 450 m 700 m Signal Range |
VII
1400000
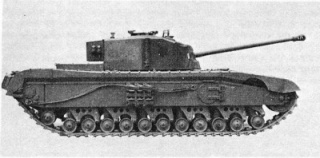
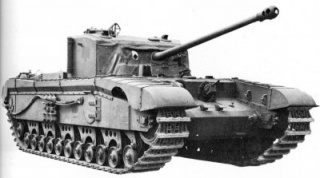
The Black Prince is a [[英國|]] tier 7 重型戰車.
於 1943 年到 1945 年間,以 Churchill 戰車為基礎研發而成。車輛具備了較寬且狹長的車身來搭載帶有 17 磅炮的升級型炮塔。從 1944 年到 1945 年間共生產了六輛 Black Prince 原型車。有些車輛投入了測試、但從未參與作戰。
The last of the "Infantry tanks", the Black Prince is an overhauled Churchill equipped with a much better gun. Unfortunately, while the powerful engine makes it respectably agile during maneuvering, the tank retains the terrible cruising speed of its predecessors. Still, even being the slowest of all tier 7 tanks, its a worthy opponent thanks to its quick rate of fire, excellent accuracy, and great armor that can surprisingly bounce even a T34 shot sometimes.
When first acquired, the lumbering mobility will be absolutely inadequate for its tier, and only after researching the superb Meteor engine does it gain its ability to perform a stalwart role in battle. Like the Mark VII, it boasts an excellent front and side armor, but under no circumstance should it be driven into the open as it is an easy artillery target.
The Black Prince leads to the Caernarvon.
Modules / Available Equipment and Consumables
Modules

炮管
| 等級 | 炮管 | 平均穿透力(毫米) | 射擊速率 | 100 公尺處擴散度 | 瞄準時間 | 經驗 | 重量 (噸) | 價格, | |
|---|---|---|---|---|---|---|---|---|---|
| VII | OQF 77 mm Gun Mk. II | 148/208/38 | 140/140/190 | 14.29 | 0.34 | 2.3 | 0 | 681 | 63000 |
| VII | OQF 17-pdr Gun Mk. VII | 171/239/38 | 150/150/190 | 12 | 0.34 | 2.3 | 15000 | 826 | 70000 |

引擎
| 等級 | 引擎 | 引擎功率(匹馬力) | 碰撞時火災發生機率 | 經驗 | 重量 (噸) | 價格, |
|---|---|---|---|---|---|---|
| IV | Bedford Twin-Six | 350 | 20 | 0 | 1531 | 11000 |
| V | Rolls-Royce Meteor | 600 | 20 | 1500 | 744 | 14000 |

懸吊
| 等級 | 懸吊 | 負載限制 | 迴轉速度(度/秒) | 經驗 | 重量 (噸) | 價格, |
|---|---|---|---|---|---|---|
| VI | Black Prince | 51 | 18 | 0 | 10000 | 13000 |
| VII | Black Prince Mk. II | 53 | 20 | 8600 | 10000 | 18000 |

通訊設備
| 等級 | 通訊設備 | 通訊範圍(公尺) | 經驗 | 重量 (噸) | 價格, |
|---|---|---|---|---|---|
| VII | WS No. 19 Mk. II | 450 | 0 | 40 | 21000 |
| VIII | WS No. 19 Mk. III | 550 | 4000 | 40 | 22000 |
| VIII | WS No. 22 | 700 | 4500 | 40 | 25000 |
Compatible Equipment
Compatible Consumables
Player Opinion
Pros and Cons
Pros:
- Extremely strong frontal turret armor with no weak spots - bounces some tier 10 guns
- Tracks absorb a lot of damage; sidescraping is very effective
- Thick hull armour made thicker when effectively angled
- High Rate of Fire
- Good accuracy
Cons:
- Easy target not only for artillery
- Very low alpha damage
- Low top speed
- Doesn't improve much from stock config
- Combination of low speed, low penetration, low alpha, and armour that is easily penned by higher tier 8-9 guns makes it frustrating to play in those matches.
Performance
The Black Prince has a similar playstyle to the preceding Churchill series of tanks. However, being the most advanced Churchill infantry support tank ever developed, it is a far more enjoyable tank to play than the Churchill VII. Oddly enough on paper, the Black Prince's armor is in fact worse than the Churchill VII, having less rear armor than its predecessor (it does have the same front and side armour). Despite this, the Black Prince's armor is actually more reliable with very small weakspots that can be covered through angling, which isn't difficult due to its decent traverse speed. Add the fact that the Black Prince has one of the largest health pools of the tier VII heavies and you've got a tank that can really tank shots.
If you are top tier, you can have a lot of fun. Unlike the first two UK heavies, the Black Prince has better agility than it seems on paper (most likely due to its good terrain passability), and when used tactically it can make a brawler in a pinch, though it is generally a better idea to avoid close combat in order to fully utilize the advantages of your gun. It is vital especially in close quarters to angle your armor, preferably slightly to the right at around thirty degrees. Aside from the hatch and machine gun on the unsloped face of your driver's compartment and your very shallow commander's cupola, you are extremely difficult to penetrate from the front, even at point blank range. Use your decent turning speed to your advantage and make those weak points harder to hit, and you will survive for a long time. If you can jam your front end against a rock or other cover with just your sharply angled side and your turret exposed to enemy fire, you can also become a frustrating blockade for any tank at your tier (this tactic is also known as sidescraping). While Black Prince's armor can bounce shots from KV-1S' and IS's 122 mm gun, driver should fear the Tiger and T-29, which with a suitable drivers can reliably penetrate you armor and empty your health pool.
Note that once you're set in a direction, it will be rather difficult to backtrack as the Black Prince's mediocre top speed won't get you there in time; instead, you should consider where your allies are going and where you can be of most use. If you are close to the middle or bottom tier, stick to the second line and provide support with the excellent 17 pounder, which can penetrate weak spots on most high tier tanks easily thanks to its great accuracy and aim time and good penetration. The damage will seem lacking but the rate of fire is impressive and the gun will drain all but the largest health pools in a short time. Do be ready to take the initiative though and to lead an assault through where the enemy lines are weak. Given the fast reload of your gun and your heavy armor, you can charge through enemy fire and get into their faces as your allies follow you up.
No matter what the fight, don't stray too far from your support. The Black Prince can fight a lot of things and win head to head, but if you enter combat with more than one agile, well-armed tank in close quarters your chances of victory plummet. Shots to your exposed sides and rear carry a high chance of injuring a crew member, track your tank, or worse destroy your ammo rack. This will more than double your reload time and make your cannon far less potent due to its low alpha damage.
Take note that when cornering or making tight turns your sides will be exposed long before your turret and gun, allowing enemies to potentially cause extensive damage to your exposed hull. Instead of making tight turns, you should take corners from far off the edge and angle yourself diagonally. This makes it harder for enemies hiding around the corner to penetrate you due to the shallow angle of your sides, and will leave your gun clear to fire at the enemy. This tactic is valid on all Churchill Tank Models.
Despite it's flaws though, Black Prince is basically a TOG that has excellent armor, more health, a tier higher, more mobility, and the same gun. So if you like the TOG, this is for you. When put into tier 7 battles, it is unstoppable. With a combination of insane armor and health, it can 'TOG' it out and even beat the heaviest tanks.
Early Research
The tank doesn't have many research options, and those don't make any big differences, including the unrequired suspension. The choices will depend if you favour fire-power over mobility, but once again, no change will have outlandish results. The 2nd engine is MUCH lower weight than the first, so you can easily mount a full set of equipment without ever upgrading the weight limit. The upgrade to your gun seems small on paper but the performance in battle is noticeably improved, especially against thick armor.
Suggested Equipment
Gallery
Historical Info
Development
As a development from the Churchill, the Black Prince was a continuation of the line of Infantry tanks, that is slower, heavier tanks intended to operate in close support of infantry. The parallel development in British tank design were the Cruiser tanks, which were intended for more mobile operations. A43 was the General Staff Specification number issued in 1943, for an interim tank that would eventually be superseded by a "Universal tank" that would replace both Infantry and Cruiser tanks.
The cruiser line led to the Cromwell tank (and the 17 pounder armed Challenger variant) and then the Comet tank, (which had a variant of the 17 pounder gun) entering service during the war. While not as heavily protected as the Churchill, the Comet showed the way tank development was going. This led to the last of the cruiser line and the first of the Universal tanks, the very successful Centurion tank.
A larger gun than a conventional Churchill required a larger turret on a wider turret ring and consequently a widening of the tank hull to carry this. The Black Prince weighed around ten tons more than the Churchill so the suspension was modified and the tracks widened by 10 inches to carry the extra load. However, the Churchill's 350-horsepower (260 kW) engine was retained, leading to the tank being underpowered and slow, with maximum speeds of 10.5 mph (16.9 km/h) on roads and 7.5 mph (12.1 km/h) cross country. This was so slow that the tank's tactical usefulness would have been limited. Consideration was given to the use of the Rolls-Royce Meteor engine; this would have increased the available power to 600 hp (450 kW), but the idea never left the drawing–board. Likewise, plans to fit the Black Prince with the turret from the Centurion were never carried out.
By the time the Black Prince prototypes had appeared in May 1945, the Sherman Firefly had acquired a proven combat record, the Comet tank was in service and the introduction of Centurion was imminent. All these tanks carried the QF 17-pounder or a derivative; all had better mobility than the Black Prince and the Centurion had frontal armour of comparable effectiveness. The Black Prince had become redundant and the project was abandoned.
The Black Prince marked the end of the development of the Churchill tank, and the end of the Infantry tank concept in British tank design.
Survivors
The only surviving Black Prince tank is held by the Bovington Tank Museum in Bovington, UK; it is the fourth of the six prototypes that were built. It has recently been restored to running condition.
Historical Gallery
