歡迎來到 Wargaming.net Wiki!
變換

AT 7

在2014年12月29日 (一) 23:04由所做的修訂版本
(差異) ←上個修訂 | 最新修訂 (差異) | 下一修訂→ (差異)
跳轉到: 導覽搜尋


newfile.png Article requires additional modification
The design and/or content of this article do not conform to wiki standards.
Missing Content
  • Sources and External Links


,,


AT 7

Icon
nation | TD | Tier VII
Battle Tier
1234567891011
Overview
Mouse over "
Well, the ones further down, of course.
" for more information
1,400,000  Credits Cost
1250250 HP Hit Points
43.5/4413.44/48 t Weight Limit
Crew
  1. 車長
  2. 炮手
  3. 駕駛
  4. 通訊員
  5. 裝填手
  6. 裝填手
Mobility
395500 hp Engine Power
20/10 km/h Speed Limit
2022 deg/s Traverse
9.0837.2 hp/t Power/Wt Ratio
YesYes Pivot
Armor
// mm Hull Armor
Armament


{{#ifeq:ARMOR_PIERCING_CR|ARMOR_PIERCING||


{{#ifeq:HIGH_EXPLOSIVE|ARMOR_PIERCING||


AP/APCR/HE


{{#ifeq:ARMOR_PIERCING_CR|ARMOR_PIERCING||


{{#ifeq:HIGH_EXPLOSIVE|ARMOR_PIERCING||


AP/APCR/HE
Shells
75/75/100230/230/280 HP Damage
110/180/30226/258/42 mm Penetration


|


|}}

|


|}}


27.51 r/m 

Magazine-fed Gun

Burst Length: 1 rounds
Magazine Size: 10 rounds
Cycle Time: 1.09 s
Magazine Reload Times
Nominal: 12 s
50% Crew: 14.87 s
75% Crew: 12.98 s
100% Crew: 11.51 s
With Vents: 11.26 s
With Vents and BiA: 11.01 s

Click here for more information.


|


|}}

|


|}}


9.68 r/m 

Standard Gun

Reload Times
Nominal: 6.2 s
50% Crew: 7.68 s
75% Crew: 6.71 s
100% Crew: 5.94 s
Rammer: 5.35 s
Vents: 5.81 s
Both: 5.23 s
Both and BiA: 5.11 s
Both and Max Crew %: 4.9 s

See Crew, Consumables, or Equipment for more information.
Rate of Fire


|


|}}

|


|}}


2063.25

Magazine-fed Gun

Using Shell Type 1 (75 Damage):


Theoretical Damage Per Minute
Nominal: 2063.25
50% Crew: 1824
75% Crew: 1974.75
100% Crew: 2111.25
With Vents: 2088.75
With Vents and BiA: 2113.5

Advantageous Damage Per Minute
Loaded-mag DPM: 2475.75
50% Crew: 2275.5
75% Crew: 2401.5
100% Crew: 2516.25
With Vents: 2496.75
With Vents and BiA: 2517.75

Click here for more information.

Clip-fed Gun

Using Shell Type 2 (75 Damage):


Theoretical Damage Per Minute
Nominal: 2063.25
50% Crew: 1824
75% Crew: 1974.75
100% Crew: 2111.25
With Vents: 2088.75
With Vents and BiA: 2113.5

Advantageous Damage Per Minute
Loaded-mag DPM: 2475.75
50% Crew: 2275.5
75% Crew: 2401.5
100% Crew: 2516.25
With Vents: 2496.75
With Vents and BiA: 2517.75

Click here for more information.

Clip-fed Gun

Using Shell Type 3 (100 Damage):
With wholly penetrating hits

Theoretical Damage Per Minute
Nominal: 2751
50% Crew: 2432
75% Crew: 2633
100% Crew: 2815
With Vents: 2785
With Vents and BiA: 2818

Advantageous Damage Per Minute
Loaded-mag DPM: 3301
50% Crew: 3034
75% Crew: 3202
100% Crew: 3355
With Vents: 3329
With Vents and BiA: 3357

Click here for more information.


|


|}}

|


|}}


2226.4

Standard Gun

Using Shell Type 1 (230 Damage):


Theoretical Damage Per Minute
Nominal DPM: 2226.4
50% Crew: 1796.3
75% Crew: 2058.5
100% Crew: 2323
100% Crew
Vents: 2375.9
Rammer: 2580.6
Both: 2640.4
Both and BiA: 2697.9
Both and Max Crew %: 2815.2

Advantageous Damage Per Minute
First-shot DPM: 2456.4
50% Crew: 2026.3
75% Crew: 2288.5
100% Crew: 2553
100% Crew
Rammer: 2810.6
Vents: 2605.9
Both: 2870.4
Both and BiA: 2927.9
Both and Max Crew %: 3045.2

See here, here, or here for more information.

Standard Gun

Using Shell Type 2 (230 Damage):


Theoretical Damage Per Minute
Nominal DPM: 2226.4
50% Crew: 1796.3
75% Crew: 2058.5
100% Crew: 2323
100% Crew
Vents: 2375.9
Rammer: 2580.6
Both: 2640.4
Both and BiA: 2697.9
Both and Max Crew %: 2815.2

Advantageous Damage Per Minute
First-shot DPM: 2456.4
50% Crew: 2026.3
75% Crew: 2288.5
100% Crew: 2553
100% Crew
Rammer: 2810.6
Vents: 2605.9
Both: 2870.4
Both and BiA: 2927.9
Both and Max Crew %: 3045.2

See here, here, or here for more information.

Standard Gun

Using Shell Type 3 (280 Damage):
With wholly penetrating hits

Theoretical Damage Per Minute
Nominal DPM: 2710.4
50% Crew: 2186.8
75% Crew: 2506
100% Crew: 2828
100% Crew
Vents: 2892.4
Rammer: 3141.6
Both: 3214.4
Both and BiA: 3284.4
Both and Max Crew %: 3427.2

Advantageous Damage Per Minute
First-shot DPM: 2990.4
50% Crew: 2466.8
75% Crew: 2786
100% Crew: 3108
100% Crew
Rammer: 3421.6
Vents: 3172.4
Both: 3494.4
Both and BiA: 3564.4
Both and Max Crew %: 3707.2

See here, here, or here for more information.
Damage Per Minute


|


|}}


0.37 m 

With 50% Crew: 0.458 m
With 75% Crew: 0.4 m
With 100% Crew: 0.355 m
With BiA: 0.347 m
With BiA and Vents: 0.339 m
Maximum possible: 0.325 m

For more details, see Crew


|


|}}


0.31 m 

With 50% Crew: 0.384 m
With 75% Crew: 0.335 m
With 100% Crew: 0.297 m
With BiA: 0.291 m
With BiA and Vents: 0.284 m
Maximum possible: 0.273 m

For more details, see Crew
Accuracy


|


|}}


1.7 s 

With 50% Crew: 2.106 s
With 75% Crew: 1.839 s
With 100% Crew: 1.63 s
With GLD: 1.482 s
With BiA: 1.594 s
With BiA and Vents: 1.559 s
With both and GLD: 1.418 s
Maximum possible: 1.359 s

For more details, see Crew or Equipment


|


|}}


2.3 s 

With 50% Crew: 2.849 s
With 75% Crew: 2.488 s
With 100% Crew: 2.205 s
With GLD: 2.005 s
With BiA: 2.157 s
With BiA and Vents: 2.11 s
With both and GLD: 1.918 s
Maximum possible: 1.839 s

For more details, see Crew or Equipment
Aim time
2022 deg/s Gun Traverse Speed
14° Gun Arc
-5°/+7°-5°/+7° Elevation Arc
15050 rounds Ammo Capacity
General
2020 % Chance of Fire


350 m 

With 50% Crew: 275 m
With 75% Crew: 312.5 m
With 100% Crew: 350 m
With Recon and Situational Awareness: 367.7 m
With Coated Optics: 385 m
With Binocular Telescope: 437.5 m
Maximum possible: 501.1 m

For more details, see Skills or Equipment


350 m 

With 50% Crew: 275 m
With 75% Crew: 312.5 m
With 100% Crew: 350 m
With Recon and Situational Awareness: 367.7 m
With Coated Optics: 385 m
With Binocular Telescope: 437.5 m
Maximum possible: 501.1 m

For more details, see Skills or Equipment
View Range


|


|}}


450 m 

With 50% Crew: 363.3 m
With 75% Crew: 416 m
With 100% Crew: 469.3 m
With 100% Signal Boost: 540 m
When affected by 100% Relaying: 495 m
Maximum possible: 675.5 m

For more details, see Skills or Equipment


|


|}}


700 m 

With 50% Crew: 565.1 m
With 75% Crew: 647.2 m
With 100% Crew: 730.1 m
With 100% Signal Boost: 840 m
When affected by 100% Relaying: 770 m
Maximum possible: 1050.8 m

For more details, see Skills or Equipment
Signal Range
Values are Stock - click for Top


VII

annoGB75_AT7.png

1400000

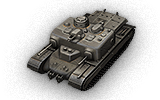
The AT 7 is a [[英國|]] tier 7 驅逐戰車.

被設計成一輛突圍用突擊戰車。此設計案於 1943 年 6 月 10 日完成。雖然沒有建造過完整原型車,AT7 計畫中的一些零件與組件卻也用於 A39 Tortoise 之上。

The AT 7 is a vast improvement over its predecessor, the AT 8. Although it still keeps the 203mm thickness of armor from the Tier 5, only the upper half is at a poor angle. The most notable feature of the AT 7 is the far right side-mounted gun. If the AT 7 manages to peek only the side-mounted gun around a corner, anything down that street will have a very hard time penetrating it while receiving generous amounts of damage. The AT 7 boasts very high penetration, great damage per minute, extreme accuracy, and a great aiming speed.

The AT 7 leads to the AT 15.

Modules / Available Equipment and Consumables

Modules

炮管

炮管

等級 炮管 平均穿透力(毫米) 射擊速率 100 公尺處擴散度 瞄準時間 經驗 重量 (噸) 價格,
V QF 6-pdr AT Gun Mk. V 110/180/30 75/75/100 27.5 0.37 1.7 0 450 35000
VII OQF 77 mm AT Gun Mk. II 148/208/38 140/140/190 18.18 0.32 1.7 14500 681 62000
VII OQF 17-pdr AT Gun Mk. VII 171/239/38 150/150/190 15.79 0.32 1.7 15000 826 65000
VIII OQF 20-pdr AT Gun Type A Barrel 226/258/42 230/230/280 9.68 0.31 2.3 16400 1242 120000
引擎

引擎

等級 引擎 引擎功率(匹馬力) 碰撞時火災發生機率 經驗 重量 (噸) 價格,
IV Nuffield Liberty Mk. III 395 20 0 383 11500
V Nuffield Liberty Mk. V 410 20 1000 383 12500
V Ford GAA 500 20 1400 708 13910
懸吊

懸吊

等級 懸吊 負載限制 迴轉速度(度/秒) 經驗 重量 (噸) 價格,
VI AT 7 44 20 0 11000 8600
VII AT 7 Mk. II 48 22 8800 11000 19000
通訊設備

通訊設備

等級 通訊設備 通訊範圍(公尺) 經驗 重量 (噸) 價格,
VII WS No. 19 Mk. II 450 0 40 21000
VIII WS No. 19 Mk. III 550 4000 40 22000
VIII WS No. 22 700 4500 40 25000

Compatible Equipment

Compatible Consumables

Player Opinion

Pros and Cons

Pros:


  • Very large hitpoints pool
  • Extremely accurate and quick-aiming top gun
  • Very high AP penetration for its tier
  • High rate of fire provides exceptional DPM
  • Decent armor for tier 7


Cons:


  • Poorly angled upper armor.
  • Very large commanders cupola, like that of it's predecessors
  • Gun mantlet is vulnerable to 175mm+ penetration guns
  • Very low top speed and poor turning speed, also like that of it's predecessors
  • Poor gun depression and gun arc, terrible gun elevation, yet again like it's predecessors


Performance

The AT 7 is a great tank for its tier. It has an excellent gun mounted to the far right of the tank, just above the track. This side-mounted gun opens up many advantages and disadvantages. If the AT 7 manages to peek out its gun from a corner, anything down that street will have a very hard time penetrating it. However, the AT 7 has a very poor gun arc and thus, cannot angle its armor. One should never face hug in an AT 7. Firstly, the large commander's cupola will ensure a quick death. Secondly, the side-mounted gun will be unable to aim at the front of the enemy, just the steeply-angled side. The 20-pdr gun is exceptional for its tier. It's very accurate, aims quickly, boasts good damage per minute, and has very high penetration. A gun laying drive is not necessary with this gun.

The stock gun if coming from the Churchill GC is the 6-pounder. Yes, that gun you can get on the tier 3 Valentine TD. While it's now a 10-round autoloader, it has little value other than comedy as it more or less requires APCR spam to pen anything in tier 7-9. Free XP or simply coming from the AT 8 instead is very strongly recommended.

As with most British tank destroyers, the AT 7 has a very low top speed, poor engine power, and a slow traverse speed. It is a prime target for artillery due to its low speed and large size. An AT 7 should always keep moving forward to compensate for its low speed. The At 7 has potential sniping due to its accurate gun and good armor, but its poor view range hinders this. The AT 7 needs to be played with support from its teammates. Take the front-lines but don't get overconfident in its armor. Shots on the less-angled parts of the armor will most likely penetrate. Getting too close to the enemy will allow them to quickly destroy you through the big commander's cupola, although there are two machine gun blocks that protect some of it. You have a reasonable camo value despite being a heavily armoured brick, so don't be afraid to play as a long range sniper when in higher tier matches where your armour cannot be counted on.

The AT 7 is a great improvement over its predecessor and can dominate in urban maps with the usage of its side-mounted gun. This gun is also exceptional in all aspects. An AT 7 played with support from its team can lead and protect its team while it slowly turtles towards the enemy forces. Taller friendly heavies can even fire over it while pushing it along as portable cover, although the low top speed limits the effectiveness of pushing.


Early Research

  • If you came from the AT 8, the OQF 17-pdr AT Gun Mk. VII, Nuffield Liberty Mk. V Engine, and WS No. 19 Mk. III Radio carry over. Mount them immediately, unless you want to play with the gimmicky, yet somewhat effective 6-pdr Gun Mk. V.
  • If you came instead from the Churchill Gun Carrier, only the WS No. 19 Mk. III Radio carries over. Mount it immediately. You should first research the OQF 77 mm AT Gun Mk. II, OQF 17-pdr AT Gun Mk. VII and Nuffield Liberty Mk. V Engine.
  • Next, research the AT 7 Mk. II Suspension, to allow for the weight of the Ford GAA engine and the OQF 20-pdr AT Gun Type A Barrel.
  • Research the Ford GAA Engine.
  • Now, research the OQF 20-pdr AT Gun Type A Barrel.
  • Finally, research the WS No. 22 Radio.


Suggested Equipment


Tank Gun Rammer Improved VentilationBinocular Telescope Spall Liner Toolbox 


Gallery

Historical Info

AT-7 was one of the proposed designs in the process that emerged A39 Tortoise. It had a 6 pounder as a main weapon which was at the time considered sufficient. Basically, it was a re-worked version of the AT-6 design from May 1943, in which the developers decided to put a 6pdr gun in a sponson mount, with the addition of several machine guns in separate mini-turrets. Several variations of the designs was considered, one of which included additional 20 mm auto cannon in the left sponson. Final design draft emerged a vehicle that had a maximum armor thickness of 203 mm on the front, with and 100 mm on the sides and rear. Total mass of the vehicle was calculated to be around 43,5 metric tons. There was also project designated as AT-7A, slightly lighter vehicle with a proposed mass of 41,5 tons.


Historical Gallery


英國
輕型戰車


Cruiser Mk. I • M2 • Cruiser Mk. II • Light Mk. VIC • Valentine • Stuart I-IV • Cruiser Mk. III • Cruiser Mk. IV • Covenanter • A46 • Crusader • GSR 3301 Setter • FV1066 Senlac • LHMTV • GSOR3301 AVR FS • Manticore

中型戰車


Vickers Medium Mk. I • Vickers Medium Mk. II • Vickers Medium Mk. III • Matilda • Matilda LVT • Grant • AC 1 Sentinel • Cavalier • Valiant • Sherman III • Matilda Black Prince • Sherman Firefly • Cromwell • AC 4 Experimental • Cromwell B • Sherman VC Firefly • Comet • Centurion Mk. I • FV4202 • Chieftain/T95 • Centurion Mk. 5/1 RAAC • Chimera • Cobra • Centurion Mk. 7/1 • Centurion Action X

重型戰車


Churchill I • Excelsior • Churchill VII • TOG II* • Black Prince • FV201 (A45) • Charlemagne • Caliban • Gonsalo • Caernarvon • Caernarvon Action X • FV4201 Chieftain Proto • Conqueror • FV215b • Super Conqueror • T95/FV4201 Chieftain

驅逐戰車


Universal Carrier 2-pdr • Valentine AT • Alecto • Archer • AT 2 • Churchill Gun Carrier • Achilles • AT 8 • Excalibur • Challenger • AT 15A • AT 7 • GSOR 1008 • AT 15 • Charioteer • Turtle Mk. I • Tortoise • FV4004 Conway • FV215b (183) • FV4005 Stage II • FV217 Badger

Self-Propelled Guns


Loyd Gun Carriage • Sexton II • Sexton I • Birch Gun • Bishop • FV304 • Crusader 5.5-in. SP • FV207 • FV3805 • Conqueror Gun Carriage

驅逐戰車
美國


T3 HMC • T56 GMC • M8A1 • T40 • M10 Wolverine • T67 • T78 • M18 Hellcat • M36 Jackson • M56 Scorpion • T28 Concept • Super Hellcat • T25/2 • T25 AT • TS-5 • T28 • T28 Prototype • T30 • T95 • T110E3 • T110E4

英國


Universal Carrier 2-pdr • Valentine AT • Alecto • Archer • AT 2 • Churchill Gun Carrier • Achilles • AT 8 • Excalibur • Challenger • AT 15A • AT 7 • GSOR 1008 • AT 15 • Charioteer • Turtle Mk. I • Tortoise • FV4004 Conway • FV215b (183) • FV4005 Stage II • FV217 Badger

德國


Panzerjäger I • Marder II • StuG III Ausf. B • Pz.Sfl. IC • Jagdpanzer 38(t) Hetzer • Marder 38T • StuG IV • Pz.Sfl. IVc • StuG III Ausf. G • Dicker Max • Jagdpanzer IV • Nashorn • E 25 • Krupp-Steyr Waffenträger • Jagdpanther • Sturer Emil • Ferdinand • Kanonenjagdpanzer 105 • Rheinmetall Skorpion G • Rheinmetall Skorpion • Jagdpanther II • 8,8 cm Pak 43 Jagdtiger • Rhm.-Borsig Waffenträger • Jagdtiger • Waffenträger auf Pz. IV • Grille 15 • Jagdpanzer E 100 • Waffenträger auf E 100

法國


Renault FT AC • FCM 36 Pak 40 • Renault UE 57 • Somua SAu 40 • M10 RBFM • S35 CA • ARL V39 • AMX AC mle. 46 • AMX AC mle. 48 • AMX Canon d'assaut 105 • AMX 50 Foch • AMX 50 Foch (155) • AMX 50 Foch B

蘇聯


AT-1 • SU-76I • SU-85B • SU-76M • SU-85 • SU-85I • SU-100 • SU-100Y • ISU-122S • SU-152 • SU-100M1 • SU-122-44 • ISU-152 • ISU-130 • KV-4 KTTS • T-103 • SU-130PM • ISU-152K • SU-101 • K-91-PT • Object 704 • Object 263 • Object 268 • Object 268 Version V • Object 268 Version 4

中國


T-26G FT • M3G FT • SU-76G FT • 60G FT • WZ-131G FT • T-34-2G FT • WZ-111-1G FT • WZ-120-1G FT • WZ-111G FT • WZ-120G FT • WZ-113G FT • 114 SP2

日本