Birch Gun

|
Article requires additional modification The design and/or content of this article do not conform to wiki standards. Missing Content
|
Birch Gun
Mouse over "
| 152,000 |
| 29058 HP Hit Points |
| 12.1/12.27.05/14.2 t Weight Limit |
- 車長 (通訊員)
- 炮手
- 炮手
- 駕駛
- 裝填手
- 裝填手
| 90110 hp Engine Power |
| 45/10 km/h Speed Limit |
| 1618 deg/s Traverse |
| 7.4415.6 hp/t Power/Wt Ratio |
| YesYes Pivot |
| // mm Hull Armor |
HE
HE Shells |
| 260//280// HP Damage |
| 21//22// mm Penetration |
|
6.82 r/m ▲
6.25 r/m Standard Gun ▲ Rate of Fire Standard Gun |
|
1773.2 ▲
1750 Standard Gun ▲ Damage Per Minute Standard Gun |
|
0.74 m ▲
0.72 m With 50% Crew: 0.917 m ▲ Accuracy With 50% Crew: 0.892 m |
| 5 s 5 s Aim time |
| 1618 deg/s Gun Traverse Speed |
| 360° Gun Arc |
| -5°/+38°-5°/+70° Elevation Arc |
| 265265 rounds Ammo Capacity |
| 2020 % Chance of Fire |
| 265 m 265 m View Range |
| 400 m 550 m Signal Range |
IV
152000
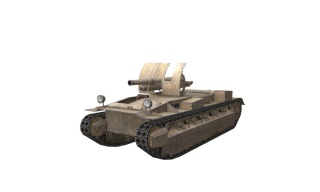
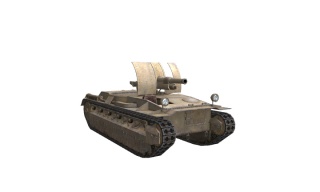
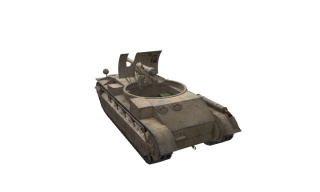
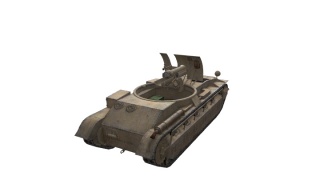
The Birch Gun is a [[英國|]] tier 4 自走炮.
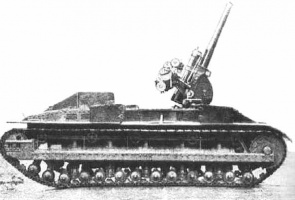
二零年代時期,英國工程師試驗了以戰車底盤製造自走炮的構想。該車輛於 1923 年,由伍利奇的皇家兵工廠開發。採用 Vickers Medium Mark II 作為基礎,它的車身可以裝載所需的配件。自 1926 年到 1927 年間共製造了七輛原型車,並加入了 1927 年 5 月 1 日成立的機械化實驗部隊。此自走炮計畫後來連同該單位一同被解散。
For all intents and purposes, the Birch Gun functions identically to the SU-26. Equipping a Camo Net would be very useful, since it will not have to turn its chassis when acquiring new targets (unless you want to snap to a target quickly, as the gun traverse is slow). Having a low profile not only helps in camouflaging, it also comes in handy when going into TD mode to fight off tanks that come too close.
While the 25-pounder gun is marginally more powerful than the stock 18-pounder, it can load AP rounds, which comes in useful for staying hidden. Its anemic damage and low splash means that, for the most part, you will be doing double digit damage to anything with a reasonable amount of armour. However, it makes up for it with a good rate of fire like its predecessor the Sexton II, along with decent accuracy and a high gun arc to fire over obstacles.
The Birch Gun marks the end of its self-propelled gun line.
Modules / Available Equipment and Consumables
Modules

炮管
| 等級 | 炮管 | 平均穿透力(毫米) | 射擊速率 | 100 公尺處擴散度 | 瞄準時間 | 經驗 | 重量 (噸) | 價格, | |
|---|---|---|---|---|---|---|---|---|---|
| III | Q.F. 18-Pr. | 21 | 260 | 6.82 | 0.74 | 5 | 0 | 457 | 10500 |
| IV | Q.F. 25-Pr. Gun/How. | 22 | 280 | 6.25 | 0.72 | 5 | 2250 | 510 | 28500 |

引擎
| 等級 | 引擎 | 引擎功率(匹馬力) | 碰撞時火災發生機率 | 經驗 | 重量 (噸) | 價格, |
|---|---|---|---|---|---|---|
| I | Armstrong Siddeley V8 | 90 | 20 | 0 | 200 | 0 |
| I | Armstrong Siddeley V8 SC | 110 | 20 | 35 | 200 | 350 |

懸吊
| 等級 | 懸吊 | 負載限制 | 迴轉速度(度/秒) | 經驗 | 重量 (噸) | 價格, |
|---|---|---|---|---|---|---|
| III | Birch Gun Mk. I | 12.2 | 16 | 0 | 6000 | 2000 |
| IV | Birch Gun Mk. II | 14.2 | 18 | 1100 | 6000 | 4650 |

通訊設備
| 等級 | 通訊設備 | 通訊範圍(公尺) | 經驗 | 重量 (噸) | 價格, |
|---|---|---|---|---|---|
| VI | WS No. 19 Mk. I | 400 | 0 | 40 | 15000 |
| VII | WS No. 19 Mk. II | 450 | 3600 | 40 | 21000 |
| VIII | WS No. 19 Mk. III | 550 | 4000 | 40 | 22000 |
Compatible Equipment
Compatible Consumables
Player Opinion
Pros and Cons
Pros:
- Gun range: stock: 850 m, top: 1050 m
- Can rotate its gun 360 degrees, like the SU-26
- High gun arc, comparable to Soviet artillery
- Massive ammo capacity
- Good reload speed
Cons:
- Poor accuracy
- Low alpha damage
- Poor splash radius
- Open top, which means it's vulnerable to crew and module damage
- Weak engine
Performance
Compared to the large caliber guns of most other SPGs, the Birch Gun takes on a more autocannonesque approach to indirect fire support by utilizing a fast-firing gun with mediocre damage and anemic penetration. Apart from lucky shots hitting vulnerable parts on poorly armored targets, the one-shot-one-kill-scenario remains a dream at best; what you get is an endless stream of double-digit hits. Concentrating on lighter targets and the side armour of heavier ones yields the best damage. However, while some might look down on the Birch Gun because of this, the damage tends to stack up, even against heavier opponents.
While most SPGs require careful aiming to ensure damage, the fast rate of fire, surprisingly accurate gun, low ammo cost and practically endless ammo supply means that the Birch Gun employs a more leisurely mindset. Snap shots become a somewhat practical option: Acquire a new target, shoot without aiming as soon as the gun has turned and wait for the aiming circle to close while a new shell is loaded. The unaimed shell hits surprisingly often, while the second, aimed shot can be delivered with precision. The drawbacks to this sort of approach are potentially giving your position away to counter-arty and alerting an unsuspecting target about being under fire if the first shot doesn't hit. Even shots against fast-moving targets are viable, because a miss is not an issue and a lucky hit can result in some damage or in best cases a dead or detracked enemy.
Even though the gun depression and fully rotating turret mean that the Birch Gun is much more adept at direct-fire self-defence than most SPGs, the poor penetration means that hitting a light tank doesn't ensure its demise, so relying on 'TD mode' for survivability will often result in a slightly damaged scout and a burning wreck of a Birch Gun. Using the AP shells for self-defence yields an improved chance of destroying the attacking light tank provided that the shells hit and penetrate.
Due to the poor engine power and traverse speed, repositioning is a somewhat arduous process and fleeing impractical, so picking a safe spot and sitting in it for the rest of the battle while raining shells in every direction is the most practical approach mobility-wise.
The Birch Gun has earned an unimaginative but fitting nickname both from owners that dislike the slightly unconventional characteristics and from enemies annoyed by a constant hail of low-damage HE shells picking away at their health.
Early Research
- If you haven't already on the Sexton II, get the 25-pounder gun, you'll need it to progress to the next tier anyway, and the suspension can take it.
- Upgrading the radio is useful. The suspension needs to be upgraded before fitting more modules/equipment. Engine is purely optional; there is barely any visible difference in performance.
- Go from there.
Suggested Equipment
Gallery
Historical Info
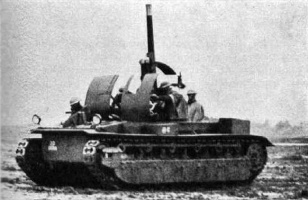
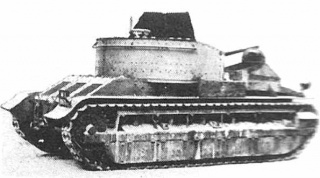
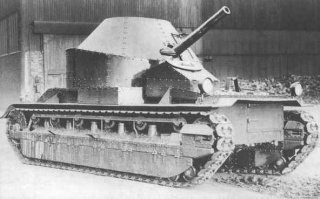
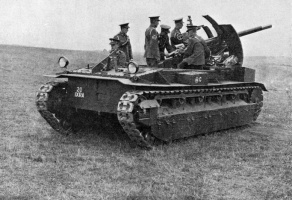
The Birch Gun was the world's first practical self-propelled artillery gun, built at the Royal Arsenal, Woolwich in 1925. The gun was never highly regarded by the British High Command, purely for prejudicial beliefs and political pressure rather than any real lack of ability.[1] Named after General Sir Noel Birch, who was Master General of Ordnance at the time, the Birch gun had real potential. It was built upon a Vickers Medium Mark II tank chassis and mated originally with the QF 18 pdr (83.8 mm) gun then with a 75 mm field gun. The project was abandoned in 1928 after political pressure killed off any plans to complete the third version of this weapon.
Development history
The initial prototype, the Mark I, made its first appearance in January 1925 and spent the next year undergoing trials and taking part in manoeuvres, mainly with 28 Battery, 9th Field Brigade, Royal Artillery. The lone Mark I was transferred to 20 Battery, 9th Field Brigade RA, who then took delivery of three Mark II Birch Guns in July 1926, followed by a fourth gun in September. This brought the battery strength to five guns, which participated in various field exercises as part of the Experimental Mechanised Force and it successor, the Experimental Armoured Force which was dispersed in February 1929. All five guns were finally withdrawn in June/July 1931, effectively ending the British Army's experiments with tracked self-propelled guns until the advent of various hurriedly improvised vehicles during the Second World War, such as the Bishop, and the Deacon. Two Mark III Birch Guns were produced, but never issued to serving units. These had the guns mounted in revolving barbette-style turrets that increased crew protection but reduced the guns' elevation, so capping their effective range. The armament for the original Birch Gun consisted of an Ordnance QF 18 pounder field gun (3.3 inch, 84 mm). This was changed to the 75 mm gun on the Birch gun Mk II and from then on was able to be fired either at ground targets or in the air-defence role, being given a much higher rate of elevation to be fired at enemy aircraft. The Armstrong Siddeley engine was modestly powerful. Being only 8 cylinders it could manage 90 hp for a mild 45 km/h top-speed. However, for its time (late 1920s) it was quite fast.
The Birch gun was tested as part of the Experimental Mechanised Force in the 1920s. The Force undertook various experiments in mechanized warfare combining tanks and infantry with their own transport. The project was finally abandoned in 1928 after major political pressure cancelled all plans to complete the third version of this weapon.
Historical Gallery
| 美國 |
T1 HMC • T18 HMC • M7 Priest • T82 HMC • M37 • M41 HMC • M44 • M12 • M40/M43 • M53/M55 • T92 HMC |
| 英國 |
Loyd Gun Carriage • Sexton II • Sexton I • Birch Gun • Bishop • FV304 • Crusader 5.5-in. SP • FV207 • FV3805 • Conqueror Gun Carriage |
| 德國 |
G.Pz. Mk. VI (e) • Sturmpanzer I Bison • Wespe • Pz.Sfl. IVb • Sturmpanzer II • Grille • Hummel • G.W. Panther • G.W. Tiger (P) • G.W. Tiger • G.W. E 100 |
| 法國 |
Renault FT 75 BS • Lorraine 39L AM • AMX 105 AM mle. 47 • AMX 13 105 AM mle. 50 • 105 leFH18B2 • AMX 13 F3 AM • Lorraine 155 mle. 50 • Lorraine 155 mle. 51 • Bat.-Châtillon 155 55 • Bat.-Châtillon 155 58 |
| 蘇聯 |
SU-18 • SU-26 • SU-5 • SU-122A • SU-8 • S-51 • SU-14-1 • SU-14-2 • 212A • Object 261 |
| 中國 | |
| 日本 |
