Harugumo

| Preço de Pesquisa223000 xp |
| Preço de Compra19 500 000 |
| Pontos de Energia25 600 |
| 100 mm/65 Type98 em uma torreta Model A5 х 2 pçs. |
| Taxa de Fogo20 tiros/min. |
| Tempo de Recarga3 seg. |
| Velocidade de Rotação16 graus/seg. |
| Tempo para Virar 180 Graus11.25 sec. |
| Distância Máxima12.55 km. |
| Dispersão Máxima109 m. |
| Projétil HE100 mm HE Type98 |
| Dano Máximo do Projétil HE1 200 |
| Chance de Incendiar com HE5 % |
| Velocidade Inicial do Projétil HE1000 m/s |
| Peso do Projétil HE13 kg. |
| Projétil AP100 mm AP Type98 |
| Dano Máximo do Projétil AP1 700 |
| Velocidade Inicial do Projétil AP1000 m/s |
| Peso do Projétil AP13 kg. |
| 610 mm Sextuple1 х 6 pçs. |
| Taxa de Fogo0.35 tiros/min. |
| Tempo de Recarga171 seg. |
| Velocidade de Rotação25 graus/seg. |
| Tempo Para Virar 180 Graus7.2 seg. |
| TorpedoType93 mod. 3 |
| Dano Máximo23 767 |
| Velocidade do Torpedo67 nós |
| Distância Máxima dos Torpedos12 km. |
| 100 mm/65 Type98 em uma torreta Model A5 х 2 pcs. |
| . . . Dano Médio por Segundo104 |
| . . . Distância Máxima5.01 km. |
| 25 mm/60 Type 96 em uma torreta simples16 х 1 pcs. |
| . . . Dano Médio por Segundo28.8 |
| . . . Distância Máxima2.49 km. |
| 40 mm/60 Type 5 em uma torreta dupla6 х 2 pcs. |
| . . . Dano Médio por Segundo66 |
| . . . Distância Máxima3.51 km. |
| Velocidade Máxima35.7 nós |
| Raio da curva830 m. |
| Tempo de virada do leme5.5 seg. |
| Distância de detecção em Superfície7.68 km. |
| Distância de detecção no Ar4.18 km. |

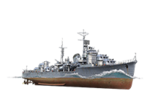
Harugumo — Contratorpedeiro Japonês Tier X.
A further development of the Akizuki-class destroyers. This ship features larger dimensions and ten dual-purpose 100 mm guns arranged in five turrets to serve as the ship's primary armament.
Módulos
 |
Taxa de Disparo (tiros/min) | Tempo de Virada de 180º (seg) | Dispersão Máxima (m) | Maximum HE Shell Damage (HP) | Chance of Fire on Target Caused by HE Shell (%) | Maximum AP Shell Damage (HP) |
Preço de Pesquisa (XP) |
Preço de Compra ( | |
|---|---|---|---|---|---|---|---|---|---|
| 100 mm/65 Type98 em uma torreta Model A | 20 | 11,25 | 109 | 1 200 | 5 | 1 700 | 0 | 1 700 000 |
 |
Pontos de Energia (HP) | Armor (mm) | Armor (mm) | Torres Principais (pcs.) | Torres Secundárias de Canhões (pcs.) | AA Montadas (pcs.) | Tubos de Torpedos (pcs.) | Hangar Capacity (pcs.) |
Preço de Pesquisa (XP) |
Preço de Compra ( | |
|---|---|---|---|---|---|---|---|---|---|---|---|
| Harugumo (A) | 25 600 | 13 | 20 | 5 | 6/16/5 | 1 | 0 | 2 000 000 |
 |
Taxa de Disparo (tiros/min) | Torpedo Tubes Reload Time (seg) | Tempo de Virada de 180º (seg) | Dano Máximo (HP) | Velocidade do Torpedo (nós) | Alcance do Torpedo (km) |
Preço de Pesquisa (XP) |
Preço de Compra ( | |
|---|---|---|---|---|---|---|---|---|---|
| Type F3 | 0,4 | 157 | 7,2 | 21 366 | 76 | 8 | 30 000 | 2 500 000 | |
| Type93 mod. 3 | 0,4 | 171 | 7,2 | 23 766 | 67 | 12 | 0 | 2 500 000 |
 |
Aumento no Alcance de Disparo (%) | Maximum Firing Range (km) |
Preço de Pesquisa (XP) |
Preço de Compra ( | |
|---|---|---|---|---|---|
| Type10 mod. 1 | 0 | 12,6 | 0 | 1 100 000 |
 |
Velocidade Máxima (nós) |
Preço de Pesquisa (XP) |
Preço de Compra ( | |
|---|---|---|---|---|
| Propulsão: 79.240 hp | 35,7 | 0 | 1 650 000 |
Atualizações Compatíveis
| Slot 1 | |||||
|---|---|---|---|---|---|
| Slot 2 | |||||
| Slot 3 | |||||
| Slot 4 | |||||
| Slot 5 | |||||
| Slot 6 |
Opinião dos Jogadores
Performance
Harugumo sits atop the IJN "gunboat" branch of destroyers, encapsulating and building upon the design elements and game play of the ships preceding her; namely the Tier VIII and IX ships, Akizuki and Kitakaze. Armed with ten 100 mm rifles and a single sextuplet torpedo launcher, she is a ship of absolutes; she has third place of the highest base hit points of all Tier X destroyers, has an incredible rate of fire, and has the worst maneuverability (turning radius) plus base detection range (tied with Khabarovsk).
The most notable differences when moving up to Harugumo are the addition of a fifth main battery turret and major performance losses in the areas of handling and concealment. She also gains a significant amount of health in comparison to that of her immediate predecessors: a whopping 25,600 base health. Captains will also notice the significant loss in mobility — especially in regards to turning radius — as well as the far-worse concealment. Despite the major drawbacks found when upgrading to Harugumo, most captains will find that play styles that worked well on the previous destroyers are still applicable, albeit with some modifications.
First and foremost, Harugumo is not a capture-point contesting destroyer. Her poor concealment, awful turning radius, and huge size make her incredibly easy to hit with torpedoes, and enemy ships far behind a capture point will have no difficulty landing shots on her. Enemy destroyers will see her coming long before she spots them, and a competent enemy destroyer captain can easily avoid being spotted by Harugumo.
Captains should play Harugumo in a similar fashion to that of a light cruiser; stay outside of capture points early on, but stay within effective gun range to support the destroyers on the team who can capture. Engagements of all enemies should be done from within the relative safety of smoke or from behind islands. Open water engagements should be planned and executed a manner that minimizes the number of enemy ships that can engage her in return.
Harugumo's biggest strength is her insane rate of fire. When Predefinição:Main Battery Modification 3 is mounted and the 'Main Battery Specialist' reload skill is active, she is able to toss out 10 shells in 2.5 seconds, giving her a rate of fire of an insane 250 shells per minute! (With the contingent skills 'Adrenaline Rush' and 'Fearless Brawler' active, that can approach 300 shells per minute.) Her reload time means that Harugumo is able to "machine-gun" enemy ships and continuously spit out an endless stream of shells at enemies, making her an extremely fun ship to play.
Due to the 30mm penetration of the Japanese 100mm HE shell, Harugumo does not require the 'Inertia Fuse for HE Shells' skill to do damage to enemy destroyers. However, captains who do use it gain the ability to penetrate 37mm of armor, thicknesses found on high-tier battleships in many places. This allows Harugumo to engage all ship classes with great effectiveness.
Fans of Akizuki and Kitakaze will have no issues adapting their play styles to Harugumo. In the right hands, Harugumo poses a massive threat to all enemy ship types and can have a significant impact on the outcome of a match.Prós:
- Large health pool (25,600) can go up to 29,100 with survivability expert.
- Highest damage output potential of all Tier X destroyers.
- Powerful torpedo armament.
- Excellent HE shell armor penetration.
- Low-caliber AP shells allows for high effectiveness against broadsiding destroyers.
- Torpedo Reload Booster consumable allows her to put 12 fish in the water every few minutes.
Contras:
- Poor concealment
- Worst turning radius among all destroyers; turning circle is larger than that of many cruisers.
- Large profile makes her an easy target.
- Very long torpedo launcher reload time.
- No Repair Party
 consumable results in her having less "effective" HP than other same-tier destroyers with the consumable.
- No Defensive AA Fire
 consumable.
- Relatively miserable agility.
Pesquisar
Unlike most Tier X ships, does have a module that can be researched:
- Type F3 Torpedoes are very fast and reload more quickly, but are short-ranged (8km) and don't hit as hard.
Melhor Configuração
The philosophy of Harugumo's build is identical to that of Kitakaze: while her torpedoes are dangerous indeed, it is difficult to justify a full Torpedo build. Best to stay with a Gun build.
Atualizações
The recommended upgrades for Harugumo are as follows:
- Slot 1: Predefinição:Main Armaments Modification 1 to increase turret and torpedo tube survivability.
- Slot 2: Predefinição:Engine Room Protection to lessen the chances of the engines blowing up and to get them running again more quickly when they do.
- Slot 3: Predefinição:Aiming Systems Modification 1 because rate of fire is only one way to get shells on target.
- Slot 4: Predefinição:Propulsion Modification 1 to help scoot out of dangerous waters.
- Slot 5: Predefinição:Concealment System Modification 1 to lower the detectability range.
- Slot 6: Predefinição:Main Battery Modification 3 because watching the world burn is wonderful.
Habilidades de Comandante
Harugumo's priorities are survival and guns.
Predefinição:Commander Skills 3 DD
Consumíveis
Harugumo equips the following consumables:
- Slot 1: Damage Control Party

- Slot 2: Smoke Generator

- Slot 3: Engine Boost

- Slot 4: Torpedo Reload Booster

Sinais
As Harugumo relies mainly on her main batteries for firepower, India X-Ray and Juliet Yankee are highly recommended for increased fire chance, especially when the captain has learned the Inertia Fuse for HE Shells skill. Juliet Charlie is also recommended as Harugumo has a relatively high detonation chance like with most other destroyers. Additionally, because Harugumo is very slow compared to other same tier destroyers, Sierra Mike is highly recommended for fast repositioning.
Sinais de Combate Recomendados 
| |||||
|---|---|---|---|---|---|
 ★★★ |
 ★★ |

|

|
 ★★★ |
 ★★★ |
 ★★ |

|
 ★ |
 ★★ |
 ★★★ |

|

|

| ||||
Notas:
| |||||
| Legenda: ★★★ - Extremamente Útil ★★ - Frequentemente Útil ★ - Ocasionalmente Útil Sem estrelas - Não é Útil | |||||
Galeria


Informações Históricas
Referências
Predefinição:WoWS Ship Changelog Insert