Giulio Cesare
| Revision as of 06:19, 17 October 2017 Added Historical Specs. | Revision as of 09:06, 17 October 2017 Added Service History. | |||
| Line 186: | Line 186: | |||
| ====Design==== | ====Design==== | |||
| ? | + | ===Service=== | ||
| + | Giulio ''Cesare'' was commissioned for the first time on the 7th of June 1914, completed ahead of her sister-ships ''Conte di Cavour'' and ''Leonardo da Vinci'', joining ''Dante Alighieri'' as the second modern dreadnought battleship of the Regia Marina, a month before the outbreak of World War I. Serving as the flagship of the southern Adriatic Sea fleet, she saw absolutely no action throughout the war as the Italian naval chief of staff believed that Austro-Hungarian submarines and minelayers could operate too effectively in the narrow confines of the Adriatic, and as such ''Cesare'' served as a fleet-in-being throughout the war. She finally saw action after the war in 1923, where she alongside her sister ''Cavour'' bombarded the Greek island of Corfu following the Corfu Incident. She was decommissioned in May 1928 due to her age, serving as a gunnery training ship until the decision came in 1933 to modernize ''Cesare'' alongside her sister ''Cavour''. | |||
| + | ||||
| + | ''Giulio Cesare'' re-joined the Regia Marina in 1937 as the first modern battleship of the fleet. At that moment, ''Cesare'' and ''Cavour'' were the only combat-ready battleships Italy had, and they would remain as such until after Italy entered the war in 1940. When Italy did enter the war on the 10th of June 1940, ''Cesare'' was one of only two battleships readily available to fight the Royal Navy. Fortunately for Italy, France had capitulated a month before they joined, and now the Regia Marina had rough numerical superiority in the Mediterranean against the British; and the Italians had the home advantage. The war in the Mediterranean quickly became a convoy interdiction fight, with the Regia Marina working to keep supply lines to Italian Libya open, and the British to reinforce Malta and Egypt. ''Cesare''’s first scrape with the Royal Navy came at the Battle of Calabria on the 9th of July 1940. The battle itself was indecisive, but ''Cesare'' took a direct hit from ''[[Warspite]]'' at extreme range, causing a fire that effectively shut down half her boilers and cutting her speed to 18 knots, causing the Italians to break off. This battle early in the war immediately highlighted the sever inferiorities the Regia Marina suffered from compared to the well-armed, armored, organized and disciplined Royal Navy. ''Cesare'' was quickly repaired, and was joined in operations by the older ''Andrea Doria'' and ''Caio Duilio'', and the brand-new ''Littorio'' and ''Vittorio Veneto''. | |||
| + | ||||
| + | ''Giulio Cesare'' participated in several more unsuccessful attempts at intercepting British convoys across the Mediterranean in 1940. The Regia Marina took a catastrophic blow following the daring British air raid on Taranto, with ''Cesare'' caught in the attack. ''Cesare'', along with ''Veneto'' and ''Doria'' suffered the least damage, and moved to Naples while Taranto’s air defenses were upgraded. Despite suffering from Taranto, the Regia Marina still desired to force the British forces into combat. This came to be as the Battle of Cape Spartivento, where ''Cesare'' and ''Veneto'' accompanied by six heavy cruisers and fourteen destroyers engaged and then retreated from British Forces; Italian Admirals were under strict orders to not engage enemy forces unless under favorable conditions. Shots were exchanged between the cruisers present, but the British ceased to chase the retreating Italians when their cruisers came under fire from ''Veneto''’s 15” guns; ''Cesare'' did not open fire. With another inconsequential battle to ''Cesare''’s name and the Regia Marina, a change of command occurred. | |||
| + | ||||
| + | The repeated Italian failures forced the Germans to join the battle of the Mediterranean by air and by land. ''Cesare'' suffered damage in January 1941 following an air raid on Naples, rushing out to sea to attempt to intercept the British force that had struck Genoa in late early February that year, once again failing to intercept British forces. Despite the successful invasion of Greece and the occupation of Crete giving the Axis strategic control of the Eastern Mediterranean, Italian naval moral was low following the losses at Matapan and their dwindling resources, but nevertheless their battleships, including ''Cesare'', were largely intact. ''Cesare'' nevertheless remained in port for the majority of 1941. Towards the end, however, following the German invasion of the Soviet Union, the Italians were no longer so readily assisted by the Germans and, despite their limited resources, began to use their heavier units in convoy escorts again, helping to support the dire situation in North Africa. The last time ''Cesare'' fired her 320mm guns during the war was during the First Battle of Sirte, yet another inconclusive engagement to her name. She last sortied to support another convoy to North Africa in January 1942, returning to Taranto where she served as a gunnery training ship, later transferring to Pola in safer waters. | |||
| + | ||||
| + | Italy had decided to focus its resources on their trio of modern battleships ''Littorio'', ''Vittorio Veneto'' and the new ''Roma'', as well as constructing and fueling more badly-needed destroyers. While the situation favored the Axis during the first half of 1942, American entry to the war began to tilt the balance of power against the Axis. The Italians were only able to operate half their battleships, and while construction on carriers had begun, it was coming to be too little too late as the Royal Navy was reinforced by the United States Navy. In the last days of the Regia Marina, ''Doria'' and ''Duilio'' were brought out of reserve, but ''Cavour'' was still under repairs and ''Cesare'' was effectively permanently attached to a naval school in Pola. Following the successful allied invasion of Sicily, Mussolini’s fascist regime collapsed, and an Armistice was signed with the Allies. This prompted a violent German reaction that split Italy in two, and divided the battered Regia Marina further. ''Cesare'' quickly escaped Pola before she could be captured by the Germans, she returned to Taranto, then onto Malta, where she arrived and was interned there from the 12th of September 1943 to the 17th of June 1944, when she returned to Taranto for four years onwards. | |||
| + | ||||
| + | Following post-war negotiations, ''Giulio Cesare'' and many other Italian warships were to be transferred to the Soviet Red Fleet. Following an overhaul and decommissioning from the now defunct Regia Marina, ''Cesare'' was transferred to the Soviet Union at Valone, Albania, on the 6th of February 1949. Under the Soviet flag, she sailed to the Black Sea where she was renamed ''Novorossiysk''. She remained in Soviet service until 1955. She underwent many gradual refits while in Soviet service, but the plans to replace her guns with Russian-designed 305mm guns when ''Novorossiysk'' sunk on the 29th of October 1955. The explosion blew a hole clean through the ship, and the uncontrolled flooding made her eventually capsize with a loss of 608 men. While the reason for her loss was most likely the ship striking an unexploded German mine left over from WWII, other sources and theories put forth said that she was sunk by Italian Frogmen of a wartime special operations unit, either to avenge the transfer of their ship to the Soviet Union or doing so on behalf of NATO. She was stricken from the naval register on the 24th of February 1956, salvaged the next year, and subsequently scrapped. | |||
Revision as of 09:06, 17 October 2017
[[File:<value_unset_error>_icon_small.png|<value_unset_error>|link=Ship:<value_unset_error>]] [[File:<value_unset_error>_icon_small.png|<value_unset_error>|link=Ship:<value_unset_error>]] [[File:<value_unset_error>_icon_small.png|<value_unset_error>|link=Ship:<value_unset_error>]] |
| File:icon small.png |
[[File:<value_unset_error>_icon_small.png|<value_unset_error>|link=Ship:<value_unset_error>]] [[File:<value_unset_error>_icon_small.png|<value_unset_error>|link=Ship:<value_unset_error>]] [[File:<value_unset_error>_icon_small.png|<value_unset_error>|link=Ship:<value_unset_error>]] |
| Research pricelevel;mark_id;mark;shortmark_id;shortMark;description_id;description;price_credit;price_gold;nation;icon;name;aa_caliber_0;aa_caliber_1;aa_caliber_2;aa_caliber_3;aa_damage;aa_defense;aa_maxDist;aaMaxdist;aa_maxDist_0;aaMaxdist0;aa_maxDist_1;aaMaxdist1;aa_maxDist_2;aaMaxdist2;aa_maxDist_3;aaMaxdist3;aa_name_0;aaName0;aa_name_1;aaName1;aa_name_2;aaName2;aa_name_3;aaName3;aa_numBarrels_0;aaNumbarrels0;aa_numBarrels_1;aaNumbarrels1;aa_numBarrels_2;aaNumbarrels2;aa_numBarrels_3;aaNumbarrels3;aa_numGuns_0;aaNumguns0;aa_numGuns_1;aaNumguns1;aa_numGuns_2;aaNumguns2;aa_numGuns_3;aaNumguns3;air_support;air_support_bombDamage_depthcharge;air_support_bombName_depthcharge;air_support_maxDist_depthcharge;air_support_numBombsOnPlane_depthcharge;air_support_numPlanesInCharge_depthcharge;air_support_numSquadrons_depthcharge;air_support_planeMaxHealth_depthcharge;air_support_planeName_depthcharge;air_support_reloadTime_depthcharge;armour_casMax;armourCasmax;armour_casMin;armourCasmin;armour_citMax;armourCitmax;armour_citMin;armourCitmin;armour_deckMax;armourDeckmax;armour_deckMin;armourDeckmin;armour_extremitiesMax;armourExtremitiesmax;armour_extremitiesMin;armourExtremitiesmin;armour_rangeMax;armourRangemax;armour_rangeMin;armourRangemin;artillery_weaponry;atba_bulletMassHE_0;atba_bulletMassHE_1;atba_bulletSpeedHE_0;atba_bulletSpeedHE_1;atba_burnProbHE_0;atba_burnProbHE_1;atba_caliber_0;atba_caliber_1;atba_damageHE_0;atba_damageHE_1;atba_maxDist;atbaMaxdist;atba_nameHE_0;atba_nameHE_1;atba_name_0;atbaName0;atba_name_1;atbaName1;atba_numBarrels_0;atba_numBarrels_1;atba_numGuns_0;atba_numGuns_1;atba_piercingHE_0;atba_piercingHE_1;atba_shotDelay_0;atba_shotDelay_1;atba_shotSpeed;atba_shotSpeed_0;atba_shotSpeed_1;battleLevelRangeMax;battleLevelRangeMin;durability;floodDamage;health;mobility;mobility_maxSpeed;mobilityMaxspeed;mobility_rudderTime;mobilityRuddertime;mobility_turningRadius;mobilityTurningradius;planes_aviation;planes_bomber_forsageRestore;planes_bomber_forsageTime;planes_bomber_hangarVolume;planes_bomber_level;planes_bomber_maxSpeed;planes_bomber_name;planes_bomber_numAttackers;planes_bomber_numInSquadron;planes_bomber_numSquadrons;planesBomberNumsquadrons;planes_bomber_planesRestoreTime;planes_bomber_speed;planes_bomber_torpedo_maxDamage;planes_bomber_torpedo_maxDist;planes_bomber_torpedo_name;planes_bomber_torpedo_speed;planes_bomber_visibility;planes_bomber_vitality;planes_dive_bomb_bulletMassHE_alt;planes_dive_bomb_bulletMass_alt;planes_dive_bomb_bulletSpeedHE_alt;planes_dive_bomb_bulletSpeed_alt;planes_dive_bomb_burnProbHE_alt;planes_dive_bomb_burnProb_alt;planes_dive_bomb_damageHE_alt;planes_dive_bomb_nameHE_alt;planes_dive_bomb_numBombsHE_alt;planes_dive_forsageRestore_alt;planes_dive_forsageTime_alt;planes_dive_hangarVolume_alt;planes_dive_level_alt;planes_dive_maxSpeed_alt;planes_dive_name_alt;planes_dive_numAttackers_alt;planes_dive_numInSquadron_alt;planes_dive_numSquadrons_alt;planes_dive_planesRestoreTime_alt;planes_dive_speed_alt;planes_dive_visibility_alt;planes_dive_vitality_alt;planes_fighter_forsageRestore_alt;planes_fighter_forsageTime_alt;planes_fighter_hangarVolume_alt;planes_fighter_level_alt;planes_fighter_maxSpeed_alt;planes_fighter_name_alt;planes_fighter_numAttackers_alt;planes_fighter_numInSquadron_alt;planes_fighter_numSquadrons_alt;planes_fighter_planesRestoreTime_alt;planes_fighter_rocket_bulletMassHE_alt;planes_fighter_rocket_bulletSpeedHE_alt;planes_fighter_rocket_burnProbHE_alt;planes_fighter_rocket_damageHE_alt;planes_fighter_rocket_nameHE_alt;planes_fighter_rocket_numBombsHE_alt;planes_fighter_speed_alt;planes_fighter_visibility_alt;planes_fighter_vitality_alt;slotsNum;visibility_detection;visibility_distByPlane;visibilityDistbyplane;visibility_distByPlane_fire;visibility_distByPlane_mg;visibility_distByShip;visibilityDistbyship;visibility_distByShip_fire;visibility_distByShip_mg;visibility_distByShip_smoke;visibility_distBySubmarine exp |
| Purchase priceSpecial |
| Maximum SpeedExpression error: Unexpected * operator. knot |
[[Ship:|]] — N/A special premium Tier N/A.
IDS__descr
Modules
Compatible Upgrades
| Slot 1 |
||||||||||||||||||||||||||||
|---|---|---|---|---|---|---|---|---|---|---|---|---|---|---|---|---|---|---|---|---|---|---|---|---|---|---|---|---|
| Slot 2 |
Damage Control System Modification 3 | |||||||||||||||||||||||||||
| Slot 3 |
||||||||||||||||||||||||||||
| Slot 4 |
||||||||||||||||||||||||||||
| Slot 5 |
Torpedo Tubes Modification 3 |
Reinforced Bulkheads | ||||||||||||||||||||||||||
| Slot 6 |
Player Opinion
Performance
Expanding the Regia Marina’s presence in World of Warships is Tier V battleship Giulio Cesare. Fans of Japanese Tier V battleship Kongo will find a lot to like about this sleek Italian capital ship.
Cesare features ten 320mm guns with decent dispersion and an above average sigma value for her tier, leading to a main battery that produces tight shell groupings. She also boasts a relatively high speed — only slightly slower than Kongo — as well as decent AA and armor protection. Subsequently, Cesare straddles the line between battleship and cruiser: faster than most of the BB's at tier, but far more durable than the notoriously easy-to-kill Tier V cruisers. This allows her to utilize her speed to take on the cruiser role that the slower Tier V battleships are unable to. She has some notable deficiencies: her torpedo protection is weaker than most of her counterparts, her rudder shift time is on the slow side for the tier, and her health pool is relatively small (only Oktyabrskaya Revolutsiya is worse). Still, overall she is a well-rounded ship that will be comfortable to play for veterans of other mid-tier battleships.
Captains who enjoy a battlecruiser play style will enjoy the mix of speed and firepower that Giulio Cesare brings to the battle.Pros:
- Armor belt covers most of the hull and extends across the stern of the ship, offering extra protection.
- Her citadel is small and well armored, making it difficult to reliably hit.
- Second fastest Tier V battleship at 27 knots.
- Lowest detection range of the Tier V battleships at 13.3km.
- Quick turret traverse time for a battleship.
Cons:
- Lower amount of hit points than most Tier V battleships; only 2,000 hit points more than Oktyabrskaya Revolutsiya, and nearly 10,000 hit points less than Kongo
- Low torpedo damage reduction for her tier.
- Armor piercing shells may struggle to damage distant or angled targets.
- The rear turrets require the ship to expose a large portion of her side to fire.
Research
Optimal Configuration
Upgrades
The recommended upgrades for ' are as follows:
- Slot 1: Auxiliary Armaments Modification 1
- Slot 2: AA Guns Modification 2*
- Slot 4: Damage Control System Modification 1
Upgrade Slot 2 allows players to mount AA Guns Modification 2, which extends the firing range of anti-aircraft mounts to defend against attacking planes. Players may also choose to mount Secondary Battery Modification 2 to increase the firing range and accuracy of the secondary battery. Although this option is viable for players who enjoy brawling or wish to defend against a destroyer at close range, enemy aircraft will prove to be a more common threat.
Commander Skills
There is nothing unusual about the optimum commander skills for Giulio Cesare. Simply set her up as you would any other battleship, and things will work fine.
| Recommended Commander Skills | ||||||||
|---|---|---|---|---|---|---|---|---|
| Cost (points) |
Endurance | Attack | Support | Versatility | ||||
| 1 |
★★ |
★★ |
★ |
|
|
|
|
|
| 2 |
★ |
★ |
★★★ |
|
|
|
★★ |
|
| 3 |
★★ |
|
|
|
|
★★★ |
|
★ |
| 4 |
|
★★ |
|
|
★ |
|
|
★★★ |
| Key: ★★★ - Extremely Useful ★★ - Frequently Useful ★ - Occasionally Useful No stars - Meh Χ - Not recommended | ||||||||
Consumables
' can equip the following consumables:
Damage Control Party II or Repair Party II is recommended for players who find the ship easily set afire.
Camouflage
As a premium ship, ' comes included with Type 9 camouflage that lowers her detection radius, reduces the accuracy of incoming shells, and increases the amount of experience she earns.
Signals
Giulio Cesare captains should focus on survivability as the primary goal of its signal loadout. Credit and experience signals may also be taken, but as Giulio Cesare is a mid-tier ship she does not see as much experience and credit gains compared to her higher tiered counterparts. For boosting survivability, November Foxtrot (![]() ), India Delta (
), India Delta (![]() ), and India Yankee (
), and India Yankee (![]() ) are all important signals to take. November Echo Setteseven (
) are all important signals to take. November Echo Setteseven (![]() ) may also help survivability by increasing the damage per second of the anti-aircraft guns, while mounting Sierra Mike (
) may also help survivability by increasing the damage per second of the anti-aircraft guns, while mounting Sierra Mike (![]() ) will aid in maneuverability. The economic and special flags may also be used on the Giulio Cesare, however if low on these signal flags they are best saved for higher tiered premium ships as they provide more gains in experience and credits.
) will aid in maneuverability. The economic and special flags may also be used on the Giulio Cesare, however if low on these signal flags they are best saved for higher tiered premium ships as they provide more gains in experience and credits.
Recommended Signal Flags 
| |||||
|---|---|---|---|---|---|
| Combat | |||||
 ★ |
 ★ |
 ★★★ |
 ★ |

|

|

|

|
 ★★ |
 ★★ |
 ★★★ |
 ★★★ |

|

| ||||
Note: Use of the Juliet Charlie signal makes detonation impossible.
Gallery
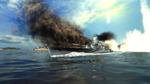
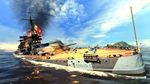
The aft batteries of Giulio Cesare erupt.
A high muzzle velocity yields a very flat trajectory.
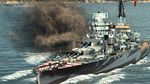
Woe to the helpless!
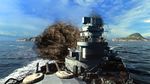
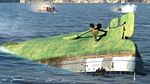
Giulio Cesare takes a torpedo in the bow.
Giulio Cesare falls victim to its' many stab wounds.
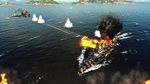
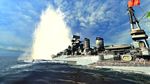
Giulio Cesare engages in a close range duel with an enemy New York.


Historical Info
Historical Gallery


| Destroyers | |
| Cruisers | |
| Battleships | |
| Aircraft Carriers |
| Japan | |
| U.K. | |
| France | |
| U.S.S.R. | |
| U.S.A. | |
| Germany | |
| Pan-Asia | |
| Spain | |
| Europe | |
| Netherlands | |
| Italy | |
| Commonwealth | |
| Pan-America |