Wargaming.net 위키에 오신 것을 환영합니다!
변수

TOG II*

이동: 둘러보기, 검색


newfile.png Article requires additional modification
The design and/or content of this article do not conform to wiki standards.
Missing Content
  • Sources and External Links


,,


Premium  TOG II*

Icon
UK | Heavy Tank | Tier VI
Battle Tier
1234567891011
Overview
Mouse over "
Well, the ones further down, of course.
" for more information
3,100  Gold Cost
1560312 HP Hit Points
81.28/8532.17/85 t Weight Limit
Crew
  1. 전차장
  2. 포수
  3. 조종수
  4. 무전수
  5. 장전수
  6. 장전수
Mobility
600600 hp Engine Power
14/7 km/h Speed Limit
2020 deg/s Traverse
7.3818.65 hp/t Power/Wt Ratio
YesYes Pivot
Armor
// mm Hull Armor
114.3/76.2/53.3114.3/76.2/53.3 mm Turret Armor
Armament


{{#ifeq:ARMOR_PIERCING_CR|ARMOR_PIERCING||


{{#ifeq:HIGH_EXPLOSIVE|ARMOR_PIERCING||


AP/APCR/HE


{{#ifeq:ARMOR_PIERCING_CR|ARMOR_PIERCING||


{{#ifeq:HIGH_EXPLOSIVE|ARMOR_PIERCING||


AP/APCR/HE
Shells
150/150/190150/150/190 HP Damage
171/239/38171/239/38 mm Penetration


|


|}}

|


|}}


12 r/m 

Standard Gun

Reload Times
Nominal: 5 s
50% Crew: 6.19 s
75% Crew: 5.41 s
100% Crew: 4.79 s
Rammer: 4.31 s
Vents: 4.68 s
Both: 4.22 s
Both and BiA: 4.12 s
Both and Max Crew %: 3.95 s

See Crew, Consumables, or Equipment for more information.


|


|}}

|


|}}


12 r/m 

Standard Gun

Reload Times
Nominal: 5 s
50% Crew: 6.19 s
75% Crew: 5.41 s
100% Crew: 4.79 s
Rammer: 4.31 s
Vents: 4.68 s
Both: 4.22 s
Both and BiA: 4.12 s
Both and Max Crew %: 3.95 s

See Crew, Consumables, or Equipment for more information.
Rate of Fire


|


|}}

|


|}}


1800

Standard Gun

Using Shell Type 1 (150 Damage):


Theoretical Damage Per Minute
Nominal DPM: 1800
50% Crew: 1453.5
75% Crew: 1663.5
100% Crew: 1878
100% Crew
Vents: 1920
Rammer: 2086.5
Both: 2133
Both and BiA: 2181
Both and Max Crew %: 2275.5

Advantageous Damage Per Minute
First-shot DPM: 1950
50% Crew: 1603.5
75% Crew: 1813.5
100% Crew: 2028
100% Crew
Rammer: 2236.5
Vents: 2070
Both: 2283
Both and BiA: 2331
Both and Max Crew %: 2425.5

See here, here, or here for more information.

Standard Gun

Using Shell Type 2 (150 Damage):


Theoretical Damage Per Minute
Nominal DPM: 1800
50% Crew: 1453.5
75% Crew: 1663.5
100% Crew: 1878
100% Crew
Vents: 1920
Rammer: 2086.5
Both: 2133
Both and BiA: 2181
Both and Max Crew %: 2275.5

Advantageous Damage Per Minute
First-shot DPM: 1950
50% Crew: 1603.5
75% Crew: 1813.5
100% Crew: 2028
100% Crew
Rammer: 2236.5
Vents: 2070
Both: 2283
Both and BiA: 2331
Both and Max Crew %: 2425.5

See here, here, or here for more information.

Standard Gun

Using Shell Type 3 (190 Damage):
With wholly penetrating hits

Theoretical Damage Per Minute
Nominal DPM: 2280
50% Crew: 1841.1
75% Crew: 2107.1
100% Crew: 2378.8
100% Crew
Vents: 2432
Rammer: 2642.9
Both: 2701.8
Both and BiA: 2762.6
Both and Max Crew %: 2882.3

Advantageous Damage Per Minute
First-shot DPM: 2470
50% Crew: 2031.1
75% Crew: 2297.1
100% Crew: 2568.8
100% Crew
Rammer: 2832.9
Vents: 2622
Both: 2891.8
Both and BiA: 2952.6
Both and Max Crew %: 3072.3

See here, here, or here for more information.


|


|}}

|


|}}


1800

Standard Gun

Using Shell Type 1 (150 Damage):


Theoretical Damage Per Minute
Nominal DPM: 1800
50% Crew: 1453.5
75% Crew: 1663.5
100% Crew: 1878
100% Crew
Vents: 1920
Rammer: 2086.5
Both: 2133
Both and BiA: 2181
Both and Max Crew %: 2275.5

Advantageous Damage Per Minute
First-shot DPM: 1950
50% Crew: 1603.5
75% Crew: 1813.5
100% Crew: 2028
100% Crew
Rammer: 2236.5
Vents: 2070
Both: 2283
Both and BiA: 2331
Both and Max Crew %: 2425.5

See here, here, or here for more information.

Standard Gun

Using Shell Type 2 (150 Damage):


Theoretical Damage Per Minute
Nominal DPM: 1800
50% Crew: 1453.5
75% Crew: 1663.5
100% Crew: 1878
100% Crew
Vents: 1920
Rammer: 2086.5
Both: 2133
Both and BiA: 2181
Both and Max Crew %: 2275.5

Advantageous Damage Per Minute
First-shot DPM: 1950
50% Crew: 1603.5
75% Crew: 1813.5
100% Crew: 2028
100% Crew
Rammer: 2236.5
Vents: 2070
Both: 2283
Both and BiA: 2331
Both and Max Crew %: 2425.5

See here, here, or here for more information.

Standard Gun

Using Shell Type 3 (190 Damage):
With wholly penetrating hits

Theoretical Damage Per Minute
Nominal DPM: 2280
50% Crew: 1841.1
75% Crew: 2107.1
100% Crew: 2378.8
100% Crew
Vents: 2432
Rammer: 2642.9
Both: 2701.8
Both and BiA: 2762.6
Both and Max Crew %: 2882.3

Advantageous Damage Per Minute
First-shot DPM: 2470
50% Crew: 2031.1
75% Crew: 2297.1
100% Crew: 2568.8
100% Crew
Rammer: 2832.9
Vents: 2622
Both: 2891.8
Both and BiA: 2952.6
Both and Max Crew %: 3072.3

See here, here, or here for more information.
Damage Per Minute


|


|}}


0.36 m 

With 50% Crew: 0.446 m
With 75% Crew: 0.389 m
With 100% Crew: 0.345 m
With BiA: 0.338 m
With BiA and Vents: 0.33 m
Maximum possible: 0.317 m

For more details, see Crew


|


|}}


0.36 m 

With 50% Crew: 0.446 m
With 75% Crew: 0.389 m
With 100% Crew: 0.345 m
With BiA: 0.338 m
With BiA and Vents: 0.33 m
Maximum possible: 0.317 m

For more details, see Crew
Accuracy


|


|}}


2.3 s 

With 50% Crew: 2.849 s
With 75% Crew: 2.488 s
With 100% Crew: 2.205 s
With GLD: 2.005 s
With BiA: 2.157 s
With BiA and Vents: 2.11 s
With both and GLD: 1.918 s
Maximum possible: 1.839 s

For more details, see Crew or Equipment


|


|}}


2.3 s 

With 50% Crew: 2.849 s
With 75% Crew: 2.488 s
With 100% Crew: 2.205 s
With GLD: 2.005 s
With BiA: 2.157 s
With BiA and Vents: 2.11 s
With both and GLD: 1.918 s
Maximum possible: 1.839 s

For more details, see Crew or Equipment
Aim time
3232 deg/s Turret Traverse
360° Gun Arc
-10°/+20°-10°/+20° Elevation Arc
144144 rounds Ammo Capacity
General
1515 % Chance of Fire


360 m 

With 50% Crew: 282.8 m
With 75% Crew: 321.5 m
With 100% Crew: 360 m
With Recon and Situational Awareness: 378.2 m
With Coated Optics: 396 m
With Binocular Telescope: 450 m
Maximum possible: 515.4 m

For more details, see Skills or Equipment


360 m 

With 50% Crew: 282.8 m
With 75% Crew: 321.5 m
With 100% Crew: 360 m
With Recon and Situational Awareness: 378.2 m
With Coated Optics: 396 m
With Binocular Telescope: 450 m
Maximum possible: 515.4 m

For more details, see Skills or Equipment
View Range


|


|}}


570 m 

With 50% Crew: 460.1 m
With 75% Crew: 527 m
With 100% Crew: 594.5 m
With 100% Signal Boost: 684 m
When affected by 100% Relaying: 627 m
Maximum possible: 855.7 m

For more details, see Skills or Equipment


|


|}}


570 m 

With 50% Crew: 460.1 m
With 75% Crew: 527 m
With 100% Crew: 594.5 m
With 100% Signal Boost: 684 m
When affected by 100% Relaying: 627 m
Maximum possible: 855.7 m

For more details, see Skills or Equipment
Signal Range
Values are Stock - click for Top
TOG II*


VI

annoGB63_TOG_II.png

3100

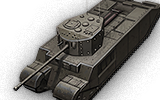
The TOG II* is a British tier 6 premium heavy tank.

참호전을 상정하고 설계된 전차로 차체 정면과 측면 포좌에 무장이 장착될 예정이었으나 이후 포좌 대신 포탑을 얹는 것으로 설계가 변경되었다. 1943년 시험 주행을 위한 시제 전차가 완성되었으나 이미 설계가 구식이 되어 제식 채용되지 않았다.

Comically massive and incredibly slow-moving, the TOG II* is one of the most popular and easily recognizable vehicles in World of Tanks. Despite its bulky appearance, the TOG is not an unstoppable behemoth and instead derives its strength from its hitpoint pool. The TOG's huge hitpoint pool and powerful, fast-firing 17 pounder gun make it ideal for fighting multiple smaller targets at once. With proper positioning and hitpoint rationing, even a single TOG can swing seemingly hopeless fights in its favor.

Modules / Available Equipment and Consumables

Modules

주포

주포

단계 주포 평균 관통력 (mm) 연사력 100m에서의 분산도 조준 시간 일반 경험치 중량 (톤) 가격,
VII OQF 17-pdr Gun Mk. VII 171/239/38 150/150/190 12 0.36 2.3 0 826 62000
엔진

엔진

단계 엔진 엔진 출력 (마력) 충돌 시 화재 발생 확률 일반 경험치 중량 (톤) 가격,
V Paxman 12TP 600 15 0 3000 18000
현가장치

현가장치

단계 현가장치 한계 중량 회전 속도 (도/초) 일반 경험치 중량 (톤) 가격,
VI TOG II* 85 20 0 20000 15420
무전기

무전기

단계 무전기 통신 범위 (m) 일반 경험치 중량 (톤) 가격,
IX WS No. 19 Special 570 0 40 29400

Compatible Equipment

Compatible Consumables

Player Opinion

Pros and Cons

Pros:


  • Huge hitpoint pool
  • Rapid-firing, powerful gun
  • Good gun depression
  • Preferential matchmaking; only sees tier VI and VII battles
  • Excellent aim dispersion while moving


Cons:


  • Massive size; easily hit by artillery when exposed
  • Flat, below-average armor
  • Very low top speed; one of the slowest tanks in the game


Performance

The huge, lumbering TOG is a heavy tank that plays like no other heavy at any tier. The TOG has a 14 km/h top speed and is incredibly slow even for a heavy. It's not particularly well armored for a heavy either. Its large, flat armor plates are more fitting for a tier V heavy, and will likely not protect the TOG from many of the tier VI enemies it has to face. Compounding this problem is the TOG's gigantic size. The TOG is one of the most (if not, the most) long tanks in the game - so long that it can even be used to block off roads in desperate situations. In place of strong armor, the TOG instead gets an incredible amount of hitpoints. With 1400 hitpoints, the TOG has more than any tier VI heavy and is more comparable to tier VII heavies in this regard. The TOG is also capable of hitting back with a powerful 17 pounder gun. This fast firing and accurate gun can quickly evaporate enemy tanks' health pools at any range and is more than capable of perma-tracking enemies.

Incapable of brawling in the same sense as other heavy tanks are, the TOG is not very effective as the lead tank in a push (incidentally, a TOG will rarely lead a push due to how slow it is). Instead, the a TOG typically engages targets by trading hitpoints with them. This is best done against targets who are already weakened, and thus a properly positioned TOG is a very formidable late-game tank after both teams have lost most of their hitpoints. Its huge hitpoint pool and fast firing gun enable it to take on multiple lower-health targets simultaneously and win, and in this way a TOG can completely turn a bad game around. It is also for this reason that the TOG is an incredibly good platooning tank. A platoon of TOGs possesses more than enough firepower and hitpoints to consistently carry games when played in a coordinated group.

The TOG is an incredibly popular tank among World of Tanks players. Its massive size is not only a source of humor in the community, but has also has given it a reputation as a huge, unstoppable juggernaut. This couldn't be further from the truth - the TOG is very dependent on proper positioning and is effectively reduced to a hitpoint pinata for the enemy team (especially for artillery) when not positioned correctly. Though the TOG's comical size and perceived strength make it very enticing to inexperienced players, in reality the TOG can be very difficult to play properly and is not incredibly user-friendly.


Suggested Equipment


Tank Gun Rammer Spall Liner Improved Ventilation


Gallery

Historical Info

The early version of the TOG II mounting a 77 mm cannon

This enormous tank was designed on the premise that World War II would evolve in the same way as the First World War. Some believed that existing tanks would not be able to deal with such conditions, and one of the most influential was Sir Albert Stern, who had been secretary to the Landships Committee in the First World War. In company with many others involved in tank design in 1916, including Sir William Tritton, Sir Eustace Tennyson D'Eyncourt, Sir Ernest Swinton and Walter Wilson, Stern was authorised by the War Office to design a heavy tank on First World War principles.

Development history

At the beginning of World War II (September 1939) some military officers and engineers thought that the new war would evolve in the same way as the First World War. The war would be static, with the opposing armies occupying two lines of trenches running from the North Sea coast to the Swiss border, separated by a ‘no mans land’ swept by artillery and machine gun fire. Sir Albert Stern, Secretary of the Landships Committee during the First World War, believed that the sort of tanks being produced in 1939 would not be able to cope with these conditions. In company with other engineers involved in tank design in 1916, including Sir Eustace Tennyson D’Eyncourt (Former Director of Naval Construction), Sir Ernest Swinton and Walter Wilson, Stern was asked by the War Office to design a heavy tank using World War One principles. The group was called officially called ‘The Special Vehicle Development Committee of the Ministry of Supply’; unofficially it was known as the TOG committee (TOG: The Old Gang). It began work in September 1939.

The first design resembled an enlarged World War I tank with a Matilda II turret on top and a French 75mm gun mounted in the front plate of the hull. Fosters of Lincoln built a single prototype and trials started in October 1940. It was powered by a Paxman-Ricardo diesel engine and had an electric final drive. The electric drive burnt out and was replaced by a hydraulic drive; this also failed and the vehicle was scrapped. In the meantime the committee was designing a larger vehicle of great size, the TOG II. Its most original feature was the diesel electric transmission where the V12 diesel engine drove two electric generators, which powered two electric motors, which drove the tracks. There was no gearbox or mechanical transmission. (Ferdinand Porsche installed a similar system in one of his unsuccessful prototypes built for the German Army.) The tracks, after passing around the front mounted idler dropped down below floor level to create more internal space, an idea thought to be unique to this tank.

Fosters completed the single TOG II prototype in March 1941. It was so heavy that it was only possible to weigh half the vehicle at a time. The design specified machine gun sponsons on each side where the side doors are, like a British World War I tank. These were quickly abandoned. The tank was fitted with four different gun turrets between 1941 and 1944, ending up with the type of turret designed by Stoddart and Pitt for the A30 Challenger Heavy Cruiser Tank. This mounted a 17pdr gun, making the tank a TOG II*. The TOG II’s great length made it very difficult to steer and combined with its weight and low power weight ratio (7.5hp/ton) made the tank cumbersome and unwieldy.In reality ‘The Old Gang’s’ ideas were wrong; tanks needed to be smaller, agile and more mobile. The TOG II was finally abandoned in 1944, although the A22 Churchill had been adopted as Britain’s standard heavy infantry tank long before.


Historical Gallery


UK
Light Tanks


Cruiser Mk. I • M2 • Cruiser Mk. II • Light Mk. VIC • Valentine • Stuart I-IV • Cruiser Mk. III • Cruiser Mk. IV • Covenanter • A46 • Crusader • GSR 3301 Setter • FV1066 Senlac • LHMTV • GSOR3301 AVR FS • Manticore

Medium Tanks


Vickers Medium Mk. I • Vickers Medium Mk. II • Vickers Medium Mk. III • Matilda • Matilda LVT • Grant • AC 1 Sentinel • Cavalier • Valiant • Sherman III • Matilda Black Prince • Sherman Firefly • Cromwell • AC 4 Experimental • Cromwell B • Sherman VC Firefly • Comet • Centurion Mk. I • FV4202 • Chieftain/T95 • Centurion Mk. 5/1 RAAC • Chimera • Cobra • Centurion Mk. 7/1 • Centurion Action X

Heavy Tanks


Churchill I • Excelsior • Churchill VII • TOG II* • Black Prince • FV201 (A45) • Charlemagne • Caliban • Gonsalo • Caernarvon • Caernarvon Action X • FV4201 Chieftain Proto • Conqueror • FV215b • Super Conqueror • T95/FV4201 Chieftain

Tank Destroyers


Universal Carrier 2-pdr • Valentine AT • Alecto • Archer • AT 2 • Churchill Gun Carrier • Achilles • AT 8 • Excalibur • Challenger • AT 15A • AT 7 • GSOR 1008 • AT 15 • Charioteer • Turtle Mk. I • Tortoise • FV4004 Conway • FV215b (183) • FV4005 Stage II • FV217 Badger

Self-Propelled Guns


Loyd Gun Carriage • Sexton II • Sexton I • Birch Gun • Bishop • FV304 • Crusader 5.5-in. SP • FV207 • FV3805 • Conqueror Gun Carriage

Heavy Tanks
USA


T14 • T1 Heavy Tank • Pawlack Tank • M6 • King Tiger (Captured) • M-II-Y • T29 • Chrysler K • Chrysler K GF • T26E5 • T26E5 Patriot • M54 Renegade • T77 • M-III-Y • M-IV-Y • M6A2E1 • T32 • T34 • T34 B • AE Phase I • Concept 1B • M-VI-Y • M103 • T54E1 • M-V-Y • T110E5 • T57 Heavy Tank

UK


Churchill I • Excelsior • Churchill VII • TOG II* • Black Prince • FV201 (A45) • Charlemagne • Caliban • Gonsalo • Caernarvon • Caernarvon Action X • FV4201 Chieftain Proto • Conqueror • FV215b • Super Conqueror • T95/FV4201 Chieftain

Germany


Pz.Kpfw. B2 740 (f) • Durchbruchswagen 2 • Tiger 131 • VK 30.01 (P) • VK 36.01 (H) • VK 45.03 • Tiger I • Tiger (P) • VK 100.01 (P) • VK 168.01 (P) • VK 168.01 Mauerbrecher • VK 75.01 (K) • E 75 TS • Löwe • Tiger II • VK 45.02 (P) Ausf. A • E 75 • Mäuschen • VK 45.02 (P) Ausf. B • E 100 • Pz.Kpfw. VII • Maus • VK 72.01 (K)

France


B1 • BDR G1 B • ARL 44 • AMX M4 mle. 45 • AMX 50 100 • AMX M4 mle. 49 • AMX M4 mle. 49 Liberté • AMX 65 t • Somua SM • FCM 50 t • AMX 50 120 • Lorraine 50 t • AMX M4 mle. 51 • AMX 50 B • AMX M4 mle. 54

USSR


Churchill III • KV-220-2 • KV-220-2 Beta Test • KV-1 • KV-1 shielded • KV-1S • KV-2 • KV-2 (R) • KV-85 • Object 244 • T-150 • IS • KV-3 • KV-122 • IS-2M • IS-2 shielded • IS-2 • IS-3 • IS-6 • IS-6 B • KV-5 • KV-4 • IS-5 (Object 730) • IS-3A • IS-3A Peregrine • Kirovets-1 • KV-4 by Kreslavskiy • Object 252U Defender • Object 252U • IS-M • Object 703 Version II • IS-2-II • T-10 • Object 777 Version II • Object 257 • Object 705 • IS-3-II • ST-I • IS-4 • IS-7 • Object 260 • Object 705A • Object 277 • Object 279 early • ST-II • Object 780

China


IS-2 • WZ-111 • WZ-111 Alpine Tiger • 110 • 112 • WZ-111 model 1-4 • WZ-114 • 113 • 113 Beijing Opera • WZ-111 model 5A • WZ-111 Qilin

Japan


Type 91 Heavy • Type 95 Heavy • O-I Experimental • Heavy Tank No. VI • O-I • O-Ni • O-Ho • Type 4 Heavy • Type 5 Heavy

Premium Tanks
USA


T1E6 • T2 Light Tank • T7 Combat Car • Convert. Medium Tank T3 • M22 Locust • MTLS-1G14 • M4 Improved • M4A2E4 Sherman • Ram II • T14 • M4A3E8 Fury • M4A3E8 Thunderbolt VII • T78 • M24E2 Super Chaffee • M56 Scorpion • T28 Concept • T26E3 Eagle 7 • King Tiger (Captured) • Super Hellcat • T23E3 • T25 Pilot Number 1 • Chrysler K • Chrysler K GF • T26E5 • T26E5 Patriot • TS-5 • M54 Renegade • TL-1 LPC • T77 • T42 • ASTRON Rex 105 mm • M-IV-Y • AMBT • M46 Patton KR • T92 • M6A2E1 • T26E4 SuperPershing • T34 • T34 B • T95E2 • AE Phase I • Concept 1B • M60 • T95E6

UK


Light Mk. VIC • Sexton I • Matilda LVT • AC 1 Sentinel • Valiant • Excelsior • Matilda Black Prince • A46 • AC 4 Experimental • TOG II* • Cromwell B • Sherman VC Firefly • Excalibur • FV201 (A45) • AT 15A • FV1066 Senlac • GSOR 1008 • Charlemagne • Caliban • Gonsalo • FV4202 • Chieftain/T95 • Caernarvon Action X • Centurion Mk. 5/1 RAAC • Chimera • Turtle Mk. I • Cobra • FV4201 Chieftain Proto • FV215b • FV215b (183) • T95/FV4201 Chieftain

Germany


Pz.Kpfw. II Ausf. D • MKA • Pz.Kpfw. 35 R • Pz.Kpfw. 38H 735 (f) • Großtraktor - Krupp • 43 M. Toldi III • Pz.Kpfw. M 15 • Pz.Kpfw. II Ausf. J • Pz.Kpfw. S35 739 (f) • Pz.Kpfw. T 15 • Pz.Kpfw. B2 740 (f) • Pz.Sfl. IC • StuG IV • Pz.Kpfw. III Ausf. K • Turán III prototípus • Pz.Kpfw. IV Ausf. H Ankou • Pz.Kpfw. IV hydrostat. • Pz.Kpfw. V/IV • Pz.Kpfw. V/IV Alpha • Pz.Kpfw. T 25 • Dicker Max • Tiger 131 • VK 28.01 mit 10,5 cm L/28 • Pz.Kpfw. IV Schmalturm • Aufklärungspanzer Panther • E 25 • Krupp-Steyr Waffenträger • VK 45.03 • Panther/M10 • Panther mit 8,8 cm L/71 • Kanonenjagdpanzer 105 • Rheinmetall Skorpion G • Rheinmetall Skorpion • Panzer 58 • Schwarzpanzer 58 • Panzer 58 Mutz • leKpz M 41 90 mm • leKpz M 41 90 mm GF • VK 168.01 (P) • VK 168.01 Mauerbrecher • HWK 30 • VK 75.01 (K) • M48A2 Räumpanzer • E 75 TS • Kampfpanzer 07 RH • 8,8 cm Pak 43 Jagdtiger • Löwe • T 55A • Kampfpanzer 50 t • Kunze Panzer • VK 72.01 (K)

France


AM 39 Gendron-Somua • AMR 35 • FCM 36 Pak 40 • M10 RBFM • 105 leFH18B2 • Bretagne Panther • M4A1 FL 10 • AMX 13 57 • AMX 13 57 GF • Panhard EBR 75 (FL 10) • Bat.-Châtillon Bourrasque • AltProto AMX 30 • Lorraine 40 t • AMX Chasseur de chars • M4A1 Revalorisé • AMX M4 mle. 49 • AMX M4 mle. 49 Liberté • Somua SM • AMX Canon d'assaut 105 • ELC EVEN 90 • FCM 50 t • Char Futur 4 • Lorraine 50 t • AMX 50 Foch (155)

USSR


T-45 • Tetrarch • BT-SV • LTP • M3 Light • BT-7 artillery • T-29 • T-116 • SU-76I • T-127 • A-32 • T-28E with F-30 • T-34 with L-11 • Valentine II • Churchill III • KV-220-2 • KV-220-2 Beta Test • Matilda IV • T-34 shielded • KV-1 shielded • M4-85 • SU-85I • KV-2 (R) • T-34-85M • Object 244 • T-34-85 Rudy • Loza's M4-A2 Sherman • T-50-2 • SU-100Y • ISU-122S • KV-122 • IS-2M • IS-2 shielded • IS-2 • SU-122-44 • T-44-122 • IS-6 • IS-6 B • KV-5 • ISU-130 • T-54 first prototype • IS-5 (Object 730) • IS-3A • IS-3A Peregrine • KV-4 KTTS • Kirovets-1 • T-44-100 Igrovoy • KV-4 by Kreslavskiy • Object 252U Defender • Object 252U • T-103 • STG • STG Guard • LT-432 • SU-130PM • Object 703 Version II • ISU-152K • Object 274a • Object 777 Version II • K-91-PT • Object 907 • Object 260 • T-22 medium • Object 268 Version V • Object 279 early • Object 780

China


Type 64 • Type 62 • Type 59 • WZ-111 • WZ-111 Alpine Tiger • T-34-3 • 112 • 59-Patton • WZ-120-1G FT • M41D • 122 TM • Type 59 G • WZ-120G FT • WZ-114 • 113 Beijing Opera • 121B • WZ-111 Qilin • 114 SP2

Japan


Type 97 Te-Ke • Type 3 Chi-Nu Kai • Heavy Tank No. VI • STA-2