Edinburgh

| Research price108000 exp |
| Purchase price8 800 000 |
| Hit Points31 800 |
| 152 mm/50 Mk XXIII4 х 3 pcs. |
| Rate of Fire8 shots/min. |
| Reload Time7.5 sec. |
| Rotation Speed7 deg./sec. |
| 180 Degree Turn Time25.71 sec. |
| Firing Range14.02 km. |
| Maximum Dispersion129 m. |
| Chance of Fire on Target Caused by HE Shell0 % |
| AP Shell152 mm AP 6crh Mk IV |
| Maximum AP Shell Damage3100 |
| Initial AP Shell Velocity841 m./s. |
| AP Shell Weight50.8 kg. |
| 102 mm/45 QF Mk XIX6 х 2 pcs. |
| Firing Range5 km. |
| Rate of Fire20 shots/min. |
| Reload Time3 sec. |
| HE Shell102 mm HE 35 lb |
| Maximum HE Shell Damage1500 |
| Initial HE Shell Velocity811 m./s. |
| Chance of Fire on Target Caused by HE Shel6 % |
| 533 mm TR Mk IV2 х 3 pcs. |
| Rate of Fire0.83 shots/min. |
| Reload Time72 sec. |
| Rotation Speed25 deg./sec. |
| 180 Degree Turn Time7.2 sec. |
| Torpedo533 mm Mk IX* |
| Maximum Damage15 867 |
| Torpedo Speed61 knot |
| Torpedo Range8.01 km. |
| 20 mm Oerlikon Mk IV8 х 1 pcs. |
| . . . Average Damage per Second28.8 |
| . . . Firing Range2.01 km. |
| 40 mm Vickers 2-pdr. Mk VIII3 х 8 pcs. |
| . . . Average Damage per Second59.4 |
| . . . Firing Range2.49 km. |
| 20 mm Oerlikon Mk V5 х 2 pcs. |
| . . . Average Damage per Second30.5 |
| . . . Firing Range2.01 km. |
| 102 mm/45 QF Mk XIX6 х 2 pcs. |
| . . . Average Damage per Second56.4 |
| . . . Firing Range5.01 km. |
| Maximum Speed32.5 knot |
| Turning Circle Radius680 m. |
| Rudder Shift Time13.4 sec. |
| Surface Detectability Range11.7 km. |
| Air Detectability Range8.13 km. |


Edinburgh — British Tier VIII cruiser.
The most powerful light cruiser in the Royal Navy during World War II. Outrivaled most other same-type ships in terms of armor protection. She inherited powerful main guns from her predecessors. Among other Royal Navy cruisers of the 1930s, Edinburgh carried more powerful AA weapons.
Modules
 |
Rate of Fire (shots/min) | 180 Degree Turn Time (sec) | Maximum Dispersion (m) | Maximum HE Shell Damage (HP) | Chance of Fire on Target Caused by HE Shell (%) | Maximum AP Shell Damage (HP) |
Research price (exp) |
Purchase price ( | |
|---|---|---|---|---|---|---|---|---|---|
| 152 mm/50 BL Mk.XXIII en una montura Mk.XXIII | 7,8 | 25,71 | 129 | 3100 | 0 | 600 000 |
 |
Hit Points (HP) | Armor (mm) | Armor (mm) | Main Turrets (pcs.) | Secondary Gun Turrets (pcs.) | AA Mounts (pcs.) | Torpedo Tubes (pcs.) | Hangar Capacity (pcs.) |
Research price (exp) |
Purchase price ( | |
|---|---|---|---|---|---|---|---|---|---|---|---|
| Edinburgh (A) | 31 800 | 6 | 114 | 4 | 6 | 3/6/8/5 | 2 | 0 | 900 000 | ||
| Edinburgh (B) | 36 400 | 6 | 114 | 4 | 6 | 6/3/14 | 2 | 28 000 | 2 200 000 |
 |
Rate of Fire (shots/min) | Torpedo Tubes Reload Time (sec) | 180 Degree Turn Time (sec) | Maximum Damage (HP) | Torpedo Speed (knot) | Torpedo Range (km) |
Research price (exp) |
Purchase price ( | |
|---|---|---|---|---|---|---|---|---|---|
| 533 mm Mk IX* | 0,8 | 72 | 7,2 | 15 866 | 61 | 8 | 0 | 1 000 000 | |
| 533 mm Mk IX** | 0,8 | 72 | 7,2 | 15 533 | 62 | 10 | 12 000 | 1 200 000 |
 |
Firing Range Increase (%) | Maximum Firing Range (km) |
Research price (exp) |
Purchase price ( | |
|---|---|---|---|---|---|
| Mk VIII mod. 1 | 0 | 14 | 0 | 700 000 | |
| Mk VIII mod. 2 | 10 | 15,4 | 15 000 | 1 500 000 |
 |
Maximum Speed (knot) |
Research price (exp) |
Purchase price ( | |
|---|---|---|---|---|
| Propulsión: 80 000 CV | 32,5 | 0 | 500 000 |
Compatible Upgrades
| Slot 1 | [[File:wows icon_modernization_PCM030_MainWeapon_Mod_I_bb1e79efbcc73dfa03a6dd5ae173566ee691b77e3a6587389d6f7ea07eb03588.png", "local": "{\"default\": \"gui|44px|Modificación 1 del armamento principal|link=Ship:Upgrades#Modificaci.C3.B3n.C2.A01_del.C2.A0armamento_principal]] | [[File:wows icon_modernization_PCM031_SecondaryWeapon_Mod_I_5369d8b071df59a515906433ea1fff10a55841495258bcd04d3365467e61e4af.png", "local": "{\"default\": \"gui|44px|Modificación 1 del armamento auxiliar|link=Ship:Upgrades#Modificaci.C3.B3n.C2.A01_del.C2.A0armamento_auxiliar]] | [[File:wows icon_modernization_PCM032_PowderMagazine_Mod_I_9607d8ec91ddcca4a95443845b888fbd9de4cd81df5a30a199d400657a552017.png", "local": "{\"default\": \"gui|44px|Modificación 1 de la santabárbara|link=Ship:Upgrades#Modificaci.C3.B3n.C2.A01_de_la.C2.A0santab.C3.A1rbara]] | ||
|---|---|---|---|---|---|
| Slot 2 | [[File:wows icon_modernization_PCM006_MainGun_Mod_II_bffc35efc4e090487fd6110a10a2be1f5d51b7918303f724194817e698055412.png", "local": "{\"default\": \"gui|44px|Modificación 2 de la batería principal|link=Ship:Upgrades#Modificaci.C3.B3n.C2.A02_de_la.C2.A0bater.C3.ADa_principal]] | [[File:wows icon_modernization_PCM012_SecondaryGun_Mod_II_c87da07dc4aebb94da59f3df3f8c2934279decb9677334a1a7e4b1f1c9f9ad04.png", "local": "{\"default\": \"gui|44px|Modificación 1 de la batería secundaria|link=Ship:Upgrades#Modificaci.C3.B3n.C2.A01_de_la.C2.A0bater.C3.ADa_secundaria]] | [[File:wows icon_modernization_PCM018_AirDefense_Mod_III_d3f357c6dc4e5e627a86e17a16432cb38da32bb1b7999b4a7852371491511770.png", "local": "{\"default\": \"gui|44px|Modificación 1 de los cañones AA|link=Ship:Upgrades#Modificaci.C3.B3n.C2.A01_de_los.C2.A0ca.C3.B1ones_AA]] | [[File:wows icon_modernization_PCM033_Guidance_Mod_I_10c7521afe2d577c42618dd04cf6834f2be78cf6b64503844cf87793a5816484.png", "local": "{\"default\": \"gui|44px|Modificación 1 de los sistemas de tiro|link=Ship:Upgrades#Modificaci.C3.B3n.C2.A01_de_los.C2.A0sistemas_de_tiro]] | [[File:wows icon_modernization_PCM070_Torpedo_Mod_IV_9e34ebc4f1a15656201b4148e32870eb1c67ddb2fb1a0bc410406236b472d1dd.png", "local": "{\"default\": \"gui|44px|Modificación 1 de los tubos de torpedo|link=Ship:Upgrades#Modificaci.C3.B3n.C2.A01_de_los.C2.A0tubos_de_torpedo]] |
| Slot 4 | [[File:wows icon_modernization_PCM020_DamageControl_Mod_I_bbc708467bc8f1e6264ac88fb8999ea40660e4b0b94b59ab7b3f1a8b60539ed8.png", "local": "{\"default\": \"gui|44px|Modificación 1 del sistema de control de daños|link=Ship:Upgrades#Modificaci.C3.B3n.C2.A01_del.C2.A0sistema_de_control_de_da.C3.B1os]] | [[File:wows icon_modernization_PCM069_Movement_Mod_I_ca8429dcc45fdad36cdd474a13e5a289d6f7cf27ae32c9f30d42b72b9db493af.png", "local": "{\"default\": \"gui|44px|Protección de la sala de máquinas|link=Ship:Upgrades#Protecci.C3.B3n_de_la_sala_de_m.C3.A1quinas]] | |||
| Slot 5 | [[File:wows icon_modernization_PCM023_DamageControl_Mod_II_3c6aea0c5bccc94f1d8f1fa52662232afa007d784638ce6e981c8ad3457c63fa.png", "local": "{\"default\": \"gui|44px|Modificación 2 del sistema de control de daños|link=Ship:Upgrades#Modificaci.C3.B3n.C2.A02_del.C2.A0sistema_de_control_de_da.C3.B1os]] | [[File:wows icon_modernization_PCM025_SteeringGear_Mod_II_523c86ce4c7d228e73ee3d2cb406f4d78a205aa2453fec45b0925dec519bf7c5.png", "local": "{\"default\": \"gui|44px|Modificación 1 del aparato de gobierno|link=Ship:Upgrades#Modificaci.C3.B3n.C2.A01_del.C2.A0aparato_de_gobierno]] | [[File:wows icon_modernization_PCM089_DepthCharges_Mod_I_734ed2711a1c6aa8227fa258f81054dcc2db8aecf66e4baaf0006589181ceb33.png", "local": "{\"default\": \"gui|44px|Modificación 1 de las cargas de profundidad|link=Ship:Upgrades#Modificaci.C3.B3n.C2.A01_de_las_cargas_de_profundidad]] | ||
| Slot 6 | [[File:wows icon_modernization_PCM026_LookoutStation_Mod_I_9bdab08af77f5c612cec2a357353f7b60d37118aaab4763721dd53230f68943b.png", "local": "{\"default\": \"gui|44px|Sistema de vigilancia de torpedos|link=Ship:Upgrades#Sistema_de_vigilancia_de_torpedos]] | [[File:wows icon_modernization_PCM027_ConcealmentMeasures_Mod_I_bda1386ab237032301b6273e655a1998de5bfb50e2c8e59124c8a93d73093f0a.png", "local": "{\"default\": \"gui|44px|Modificación 1 del sistema de ocultación|link=Ship:Upgrades#Modificaci.C3.B3n.C2.A01_del.C2.A0sistema_de_ocultaci.C3.B3n]] | [[File:wows icon_modernization_PCM035_SteeringGear_Mod_III_9bbaf379d4027413eb48f3407a4374e40151f55611d71fac0a66d12a5d4e4434.png", "local": "{\"default\": \"gui|44px|Modificación 2 del aparato de gobierno|link=Ship:Upgrades#Modificaci.C3.B3n.C2.A02_del.C2.A0aparato_de_gobierno]] | [[File:wows icon_modernization_PCM072_AbilityWorktimeBoost_Mod_I_e6323cc6cf2a0c16e8a3a3ca4db0ceaebbdb868447435dbafea6f580b66ff101.png", "local": "{\"default\": \"gui|44px|Modificación 1 de los consumibles del barco|link=Ship:Upgrades#Modificaci.C3.B3n.C2.A01_de_los_consumibles_del_barco]] |
Player Opinion
Performance
Edinburgh will feel familiar to captains progressing up the British cruiser line; her four turrets of triple 152mm barrels are identical to the configuration of her immediate predecessor, Fiji. In point of fact, Edinburgh has only a few upgrades from Fiji, but those upgrades make a measurable difference in her effectiveness.
By now, veterans of the branch are accustomed to having access to the Repair Party consumable. Edinburgh is no different in this regard, though she has access to a much more potent version of the consumable; one that restores as much as 40% of her health pool per use. Neptune and Minotaur have heals of similar effectiveness, meaning that ships at the high end of the Royal Navy cruiser branch can be exceedingly difficult to sink if they are allowed to escape sustained fire with any health remaining. Like her predecessors, Edinburgh has the tools to make good that escape — should it become necessary — through her ability to equip the Smoke Generator consumable. Additionally, Edinburgh is the first ship in the line given access to Surveillance Radar. Though she must give up her access to Smoke Generator in order to have Surveillance Radar available, the combination of radar and Hydroacoustic Search make her an incredibly potent destroyer hunter. Any destroyers that find themselves within 9.0 km of a radar-equipped Edinburgh are in a very vulnerable position.
Her armor is improved over that of Fiji, and while she will stand up to heavy cruiser fire better than her predecessor, Edinburgh will still suffer when under fire from enemy battleships. Her torpedoes gain some extra range and are now capable of reaching targets at ranges out to 10 km, and her anti-aircraft damage per second is nearly double that of Fiji. She is a well-rounded cruiser, but one that must be played very carefully in order to maximize her ability to punish lighter enemy units while minimizing her exposure to fire from enemy capital ships.
Pros:
- Has access to an enhanced version of Repair Party that allows her to regenerate large amounts health.
- Highly flexible ship; mounts both Hydroacoustic Search by default, then can choose between Spotting Aircraft, Catapult Fighter, Smoke Generator, and Surveillance Radar.
- Solid anti-aircraft suite, especially with the Manual Fire Control for AA Armament commander skill.
- Good maneuverability; above average turning circle radius and rudder shift times.
Cons:
- Armor is largely for show and offers little real protection; incoming rounds larger than 203mm will penetrate Edinburgh easily.
- Really only effective against lighter enemy units, such as destroyers and other cruisers. Edinburgh barely registers as a threat to enemy battleships.
- Lightly-armored turrets are incapacitated more frequently than many of her contemporaries.
- Shortest main battery range of all Tier VIII cruisers.
Research
Optimal Configuration
There are a three key choices that dictate how Edinburgh will play: the upgrades in Slots 2 and 6, and which consumable she chooses to go along with Hydroacoustic Search.
Upgrades
Full Concealment Build: Captains who wish to be as stealthy as possible will want to equip Concealment System Modification 1 in Upgrade Slot 6. This gives Edinburgh has the capability - like her Russian counterpart Chapayev - to have a radar range that is equal to or exceeds her detectability radius (assuming her commander also has the Concealment Expert skill). Combined, these two upgrades lower her detection radius to 9.0 km, exactly the same as her radar range. This configuration of Edinburgh is a supreme destroyer hunter; if she is detected by something she can't see, then there's a destroyer already within range of her Surveillance Radar. Upgrade Slot 2 in this configuration is best fitted with Aiming Systems Modification 1 to ensure maximum accuracy against enemy destroyers while they are spotted.
Generalist Build: Players who wish to eschew Surveillance Radar for Smoke Generator will likely want to customize their Edinburgh a little more generally. For a build of this nature, AA Guns Modification 2 is recommended for Upgrade Slot 2 while Concealment System Modification 1 remains a solid choice for Upgrade Slot 6. Stacking Steering Gears Modifications 2 and 3 is also a very good choice for Upgrade Slots 5 and 6 in a more general build of the ship, giving Edinburgh a rudder shift time that has to be seen to be believed.
Commander Skills
Full Concealment Build: Level 4's Concealment Expert is the most important skill an Edinburgh commander can possess in this style of build. Prior to that, key skills are Expert Marksman at Level 2 and Superintendent at Level 3.
Generalist Build: Edinburgh captains that are less concerned with hunting enemy destroyers should invest points in their anti-aircraft suite. Priority Target is recommended at Level 1, as is Manual Fire Control for AA Armament at Level 4 (though Concealment Expert should be the next skill taken). Level 2's Expert Marksman and Level 3's Superintendent remain important skills.
| Recommended Commander Skills | ||||||||
|---|---|---|---|---|---|---|---|---|
| Cost (points) |
Endurance | Attack | Support | Versatility | ||||
| 1 |
★★★ |
★ |
|
|
|
|
★ |
|
| 2 |
★ |
★★ |
★★★ |
★ |
★★ |
|
★★★ |
★ |
| 3 |
★ |
★★ |
★ |
|
|
★★★ |
|
★★ |
| 4 |
|
|
|
|
|
★ |
★★ |
★★★ |
| Key: ★★★ - Extremely Useful ★★ - Frequently Useful ★ - Occasionally Useful No stars - Not Useful | ||||||||
Consumables
Players can equip the following consumables on this cruiser: Damage Control Party, Repair Party, Hydroacoustic Search, and a choice between Smoke Generator, Spotting Aircraft, Catapult Fighter, or Surveillance Radar.
At this Tier in the game, Captains who have opted for the Full Concealment Build and are focused on eradicating enemy destroyers should equip Surveillance Radar. All other builds should stick to Smoke Generator for maximum survivability. Catapult Fighter is still not recommended due to the same reason as for the preceding Tier ships, and Spotting Aircraft is not recommended due to the difficulty in shooting at targets at long range, as it is already fairly difficult to hit targets with Edinburgh's current range. Spending doubloons or credits on Repair Party II is highly recommended for the additional charge and reduced cooldown time, as Edinburgh is the first Royal Navy cruiser to have the special "Super Heal".
Camouflage
Type 1, 2, or 5 camouflage can be equipped for credits; Types 2 or 5 are recommended at a minimum to reduce the accuracy of incoming shells.
Players who wish to spend doubloons can equip Edinburgh with Type 18 camouflage that lowers her detection radius, reduces the accuracy of incoming shells, reduces her repair costs, and increases the amount of experience she earns.Gallery
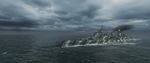
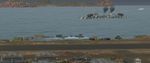
Moving into position.
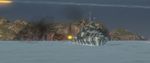
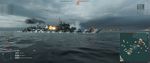
Edinburgh engages an enemy destroyer at close range, landing the killing blow.
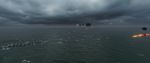
Edinburgh fires torpedoes individually at an enemy Yamato class battleship.
An enemy Yamato class battleship falls victim to a coordinated assault.
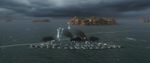
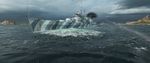
Edinburgh utilizes island cover to maintain concealment.

Torpedo bombers from an enemy Shokaku commit the attack.
A Shokaku torpedo attack is partially thwarted by Edinburgh's anti-air guns.
Edinburgh desperately dodges incoming fire.
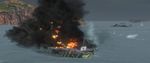
An Edinburgh takes a salvo of armor penetrating shells and dies.


Historical Info
.png)
Historical Gallery
.jpeg)
.jpeg)
.jpeg)
.jpeg)


.jpeg)

.jpeg)