Hindenburg

| Research price238000 exp |
| Purchase price19 600 000 |
| Hit Points51 900 |
| 203 mm L/60 SK C/344 х 3 pcs. |
| Rate of Fire6 shots/min. |
| Reload Time10 sec. |
| Rotation Speed8 deg./sec. |
| 180 Degree Turn Time22.5 sec. |
| Firing Range17.83 km. |
| Maximum Dispersion156 m. |
| HE Shell203 mm Spr.Gr. L/4.7 Kz. |
| Maximum HE Shell Damage2500 |
| Chance of Fire on Target Caused by HE Shell13 % |
| Initial HE Shell Velocity925 m./s. |
| HE Shell Weight122 kg. |
| AP Shell203 mm P.Spr.Gr. L/4.4 |
| Maximum AP Shell Damage5900 |
| Initial AP Shell Velocity925 m./s. |
| AP Shell Weight122 kg. |
| 105 mm L/65 Dop. L. C/318 х 2 pcs. |
| Firing Range6 km. |
| Rate of Fire17.91 shots/min. |
| Reload Time3.35 sec. |
| HE Shell105 mm Spr.Gr. Kz. |
| Maximum HE Shell Damage1200 |
| Initial HE Shell Velocity900 m./s. |
| Chance of Fire on Target Caused by HE Shel5 % |
| 533 mm Vierling4 х 4 pcs. |
| Rate of Fire0.67 shots/min. |
| Reload Time90 sec. |
| Rotation Speed25 deg./sec. |
| 180 Degree Turn Time7.2 sec. |
| TorpedoG7a T1 |
| Maximum Damage13 700 |
| Torpedo Speed64 knot |
| Torpedo Range6 km. |
| 55 mm L/77 Gerät 58 Zwilling7 х 2 pcs. |
| . . . Average Damage per Second170.8 |
| . . . Firing Range5.01 km. |
| 20 mm Flakvierling 382 х 4 pcs. |
| . . . Average Damage per Second12.8 |
| . . . Firing Range2.01 km. |
| 20 mm Flakvierling 387 х 4 pcs. |
| . . . Average Damage per Second42 |
| . . . Firing Range2.01 km. |
| 20 mm Flakzwilling 384 х 2 pcs. |
| . . . Average Damage per Second16.8 |
| . . . Firing Range2.01 km. |
| 55 mm L/77 Gerät 582 х 1 pcs. |
| . . . Average Damage per Second34.6 |
| . . . Firing Range5.01 km. |
| 105 mm L/65 Dop. L. C/318 х 2 pcs. |
| . . . Average Damage per Second132.8 |
| . . . Firing Range4.5 km. |
| Maximum Speed31.5 knot |
| Turning Circle Radius800 m. |
| Rudder Shift Time12.1 sec. |
| Surface Detectability Range16.02 km. |
| Air Detectability Range10.59 km. |

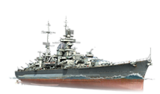
Hindenburg — German Tier X cruiser.
El barco fue desarrollado a partir de una serie de cruceros pesados alemanes. Al contrario que los barcos de las clases precedentes, poseía un mayor desplazamiento y cañones de la batería principal más potentes.
Modules
 |
Rate of Fire (shots/min) | 180 Degree Turn Time (sec) | Maximum Dispersion (m) | Maximum HE Shell Damage (HP) | Chance of Fire on Target Caused by HE Shell (%) | Maximum AP Shell Damage (HP) |
Research price (exp) |
Purchase price ( | |
|---|---|---|---|---|---|---|---|---|---|
| 203 mm/60 SK C/34 en una montura de torreta | 6,1 | 22,5 | 156 | 2500 | 13 | 5900 | 0 | 1 800 000 |
 |
Hit Points (HP) | Armor (mm) | Armor (mm) | Main Turrets (pcs.) | Secondary Gun Turrets (pcs.) | AA Mounts (pcs.) | Torpedo Tubes (pcs.) | Hangar Capacity (pcs.) |
Research price (exp) |
Purchase price ( | |
|---|---|---|---|---|---|---|---|---|---|---|---|
| Hindenburg (A) | 51 900 | 13 | 150 | 4 | 8 | 8/9/7/4/2 | 4 | 0 | 2 200 000 |
 |
Rate of Fire (shots/min) | Torpedo Tubes Reload Time (sec) | 180 Degree Turn Time (sec) | Maximum Damage (HP) | Torpedo Speed (knot) | Torpedo Range (km) |
Research price (exp) |
Purchase price ( | |
|---|---|---|---|---|---|---|---|---|---|
| G7a T1 | 0,7 | 90 | 7,2 | 13 700 | 64 | 6 | 0 | 260 000 |
 |
Firing Range Increase (%) | Maximum Firing Range (km) |
Research price (exp) |
Purchase price ( | |
|---|---|---|---|---|---|
| FKS Typ 10 Mod. 1 | 0 | 17,8 | 0 | 1 700 000 |
 |
Maximum Speed (knot) |
Research price (exp) |
Purchase price ( | |
|---|---|---|---|---|
| Propulsión: 155 000 CV | 31,5 | 0 | 1 400 000 |
Compatible Upgrades
| Slot 1 | [[File:wows icon_modernization_PCM030_MainWeapon_Mod_I_bb1e79efbcc73dfa03a6dd5ae173566ee691b77e3a6587389d6f7ea07eb03588.png", "local": "{\"default\": \"gui|44px|Modificación 1 del armamento principal|link=Ship:Upgrades#Modificaci.C3.B3n.C2.A01_del.C2.A0armamento_principal]] | [[File:wows icon_modernization_PCM031_SecondaryWeapon_Mod_I_5369d8b071df59a515906433ea1fff10a55841495258bcd04d3365467e61e4af.png", "local": "{\"default\": \"gui|44px|Modificación 1 del armamento auxiliar|link=Ship:Upgrades#Modificaci.C3.B3n.C2.A01_del.C2.A0armamento_auxiliar]] | [[File:wows icon_modernization_PCM032_PowderMagazine_Mod_I_9607d8ec91ddcca4a95443845b888fbd9de4cd81df5a30a199d400657a552017.png", "local": "{\"default\": \"gui|44px|Modificación 1 de la santabárbara|link=Ship:Upgrades#Modificaci.C3.B3n.C2.A01_de_la.C2.A0santab.C3.A1rbara]] | ||
|---|---|---|---|---|---|
| Slot 2 | [[File:wows icon_modernization_PCM006_MainGun_Mod_II_bffc35efc4e090487fd6110a10a2be1f5d51b7918303f724194817e698055412.png", "local": "{\"default\": \"gui|44px|Modificación 2 de la batería principal|link=Ship:Upgrades#Modificaci.C3.B3n.C2.A02_de_la.C2.A0bater.C3.ADa_principal]] | [[File:wows icon_modernization_PCM012_SecondaryGun_Mod_II_c87da07dc4aebb94da59f3df3f8c2934279decb9677334a1a7e4b1f1c9f9ad04.png", "local": "{\"default\": \"gui|44px|Modificación 1 de la batería secundaria|link=Ship:Upgrades#Modificaci.C3.B3n.C2.A01_de_la.C2.A0bater.C3.ADa_secundaria]] | [[File:wows icon_modernization_PCM018_AirDefense_Mod_III_d3f357c6dc4e5e627a86e17a16432cb38da32bb1b7999b4a7852371491511770.png", "local": "{\"default\": \"gui|44px|Modificación 1 de los cañones AA|link=Ship:Upgrades#Modificaci.C3.B3n.C2.A01_de_los.C2.A0ca.C3.B1ones_AA]] | [[File:wows icon_modernization_PCM033_Guidance_Mod_I_10c7521afe2d577c42618dd04cf6834f2be78cf6b64503844cf87793a5816484.png", "local": "{\"default\": \"gui|44px|Modificación 1 de los sistemas de tiro|link=Ship:Upgrades#Modificaci.C3.B3n.C2.A01_de_los.C2.A0sistemas_de_tiro]] | [[File:wows icon_modernization_PCM070_Torpedo_Mod_IV_9e34ebc4f1a15656201b4148e32870eb1c67ddb2fb1a0bc410406236b472d1dd.png", "local": "{\"default\": \"gui|44px|Modificación 1 de los tubos de torpedo|link=Ship:Upgrades#Modificaci.C3.B3n.C2.A01_de_los.C2.A0tubos_de_torpedo]] |
| Slot 3 | [[File:wows icon_modernization_PCM013_MainGun_Mod_III_c6e20a5a027888820aca2cd031ba5959d38bc828202d8066ece4030712df8bd8.png", "local": "{\"default\": \"gui|44px|Modificación 3 de la batería principal|link=Ship:Upgrades#Modificaci.C3.B3n.C2.A03_de_la.C2.A0bater.C3.ADa_principal]] | [[File:wows icon_modernization_PCM014_Torpedo_Mod_III_460876b51f5b3133f939c6ca7b0ec3be146a5ea6776695388f5cc3365de8a56f.png", "local": "{\"default\": \"gui|44px|Modificación 2 de los tubos de torpedo|link=Ship:Upgrades#Modificaci.C3.B3n.C2.A02_de_los.C2.A0tubos_de_torpedo]] | [[File:wows icon_modernization_PCM015_FireControl_Mod_II_5ca921f0d2091adf28b41b6ba5c580a6f18367edbeabab0d0e7c8ad486971ab9.png", "local": "{\"default\": \"gui|44px|Modificación 2 del sistema de control de tiro|link=Ship:Upgrades#Modificaci.C3.B3n.C2.A02_del_sistema_de_control_de_tiro]] | [[File:wows icon_modernization_PCM074_AuxiliaryArmament_Mod_I_6c88e35c308f597529e7bd744826e39242fdb3a3f0429b0a3b2fb7a219480498.png", "local": "{\"default\": \"gui|44px|Modificación 2 del armamento auxiliar|link=Ship:Upgrades#Modificaci.C3.B3n.C2.A02_del_armamento_auxiliar]] | |
| Slot 4 | [[File:wows icon_modernization_PCM020_DamageControl_Mod_I_bbc708467bc8f1e6264ac88fb8999ea40660e4b0b94b59ab7b3f1a8b60539ed8.png", "local": "{\"default\": \"gui|44px|Modificación 1 del sistema de control de daños|link=Ship:Upgrades#Modificaci.C3.B3n.C2.A01_del.C2.A0sistema_de_control_de_da.C3.B1os]] | [[File:wows icon_modernization_PCM069_Movement_Mod_I_ca8429dcc45fdad36cdd474a13e5a289d6f7cf27ae32c9f30d42b72b9db493af.png", "local": "{\"default\": \"gui|44px|Protección de la sala de máquinas|link=Ship:Upgrades#Protecci.C3.B3n_de_la_sala_de_m.C3.A1quinas]] | |||
| Slot 5 | [[File:wows icon_modernization_PCM023_DamageControl_Mod_II_3c6aea0c5bccc94f1d8f1fa52662232afa007d784638ce6e981c8ad3457c63fa.png", "local": "{\"default\": \"gui|44px|Modificación 2 del sistema de control de daños|link=Ship:Upgrades#Modificaci.C3.B3n.C2.A02_del.C2.A0sistema_de_control_de_da.C3.B1os]] | [[File:wows icon_modernization_PCM024_Engine_Mod_II_4b4f4c217cf5cf580f47ccbbf76ecede110c5143055c55ab45a82d19e87423fb.png", "local": "{\"default\": \"gui|44px|Modificación 1 de la propulsión|link=Ship:Upgrades#Modificaci.C3.B3n.C2.A01_de_la.C2.A0propulsi.C3.B3n]] | [[File:wows icon_modernization_PCM025_SteeringGear_Mod_II_523c86ce4c7d228e73ee3d2cb406f4d78a205aa2453fec45b0925dec519bf7c5.png", "local": "{\"default\": \"gui|44px|Modificación 1 del aparato de gobierno|link=Ship:Upgrades#Modificaci.C3.B3n.C2.A01_del.C2.A0aparato_de_gobierno]] | [[File:wows icon_modernization_PCM089_DepthCharges_Mod_I_734ed2711a1c6aa8227fa258f81054dcc2db8aecf66e4baaf0006589181ceb33.png", "local": "{\"default\": \"gui|44px|Modificación 1 de las cargas de profundidad|link=Ship:Upgrades#Modificaci.C3.B3n.C2.A01_de_las_cargas_de_profundidad]] | |
| Slot 6 | [[File:wows icon_modernization_PCM026_LookoutStation_Mod_I_9bdab08af77f5c612cec2a357353f7b60d37118aaab4763721dd53230f68943b.png", "local": "{\"default\": \"gui|44px|Sistema de vigilancia de torpedos|link=Ship:Upgrades#Sistema_de_vigilancia_de_torpedos]] | [[File:wows icon_modernization_PCM027_ConcealmentMeasures_Mod_I_bda1386ab237032301b6273e655a1998de5bfb50e2c8e59124c8a93d73093f0a.png", "local": "{\"default\": \"gui|44px|Modificación 1 del sistema de ocultación|link=Ship:Upgrades#Modificaci.C3.B3n.C2.A01_del.C2.A0sistema_de_ocultaci.C3.B3n]] | [[File:wows icon_modernization_PCM035_SteeringGear_Mod_III_9bbaf379d4027413eb48f3407a4374e40151f55611d71fac0a66d12a5d4e4434.png", "local": "{\"default\": \"gui|44px|Modificación 2 del aparato de gobierno|link=Ship:Upgrades#Modificaci.C3.B3n.C2.A02_del.C2.A0aparato_de_gobierno]] | [[File:wows icon_modernization_PCM072_AbilityWorktimeBoost_Mod_I_e6323cc6cf2a0c16e8a3a3ca4db0ceaebbdb868447435dbafea6f580b66ff101.png", "local": "{\"default\": \"gui|44px|Modificación 1 de los consumibles del barco|link=Ship:Upgrades#Modificaci.C3.B3n.C2.A01_de_los_consumibles_del_barco]] |
Player Opinion
Performance
Pros:
- Fast-reloading 203mm guns; not as fast as Des Moines, but with better base range and shell arcs.
- Excellent shell velocity and low gun arc makes hitting distant targets easier.
- Good range on her main battery guns, which can be boosted to 20.7 km by equipping Gun Fire Control System Modification 3.
- Best cruiser AP shell damage in the game; Hindenburg will punish any ship that is broadside to her, regardless of class.
- Strong AA armament, especially if a few modules or commander skill points are invested in improving the range.
- Decent torpedoes with good firing arcs.
- Armor scheme is deceptively sturdy; she is hard to citadel at medium and short range.
- Best Hydroacoustic Search in the game.
Cons:
- AP shells are near useless against targets that are well-angled.
- HE shell damage is lower than all other Tier X cruisers.
- Sluggish maneuverability and low maximum speed.
- Large size; Hindenburg is fairly easy for enemies to hit.
- Prone to citadel penetrations at long range, which makes her large detection radius a huge liability.
- Large detection radius for a cruiser — 16.0 km base — although this can be reduced to ~12 km with the right equipment modules and commander skills.
- Has to expose quite a bit of her broadside to bring all guns to bear.
Research
Optimal Configuration
As the pinnacle of the German cruiser line, Hindenburg offers more flexibility to her captain than any other top-tier cruiser in the game. She can be fitted out as an anti-aircraft platform rivaling that of Des Moines; she can boost her main battery range and rain shells on opponents from positions that make her difficult to hit; she can boost the rate of fire of her main battery significantly and turn her into one of the best damage dealers in the game. All of these options — and more — are available to Hindenburg captains, depending on which upgrades and commander skills they choose.
Upgrades
Upgrade Slot 3 is one of the primary determining factors in how Hindenburg will play. Her main battery can be fitted out for either maximum range with Gun Fire Control System Modification 2, or for maximum rate of fire with Main Battery Modification 3. Neither option is bad, though with a stock range of 17.8 km, the likelihood of hitting targets more than 20 km out with her shells is somewhat questionable. Most players opt for Main Battery Modification 3, lowering the reload time on her 203mm guns to a base of 8.8 seconds (which can be further improved with the Adrenaline Rush commander skill).
Commander Skills
| Recommended Commander Skills | ||||||||
|---|---|---|---|---|---|---|---|---|
| Cost (points) |
Endurance | Attack | Support | Versatility | ||||
| 1 |
★★★ |
★ |
|
|
★ |
|
★ |
|
| 2 |
|
★★ |
★★ |
|
|
|
★★★ |
★ |
| 3 |
★ |
|
|
|
★★ |
★★★ |
★★★ |
★ |
| 4 |
|
|
|
|
★★ |
★★ |
|
★★★ |
| Key: ★★★ - Extremely Useful ★★ - Frequently Useful ★ - Occasionally Useful No stars - Not Useful | ||||||||
Consumables
Hindenburg’s best-in-game Hydroacoustic Search is one of her strengths; the premium version is highly recommended for the reduced cool down. It allows her to hunt down destroyers in close proximity — particularly those shielded by smoke — and to warn friendly captains of incoming torpedoes in more than ample time to avoid them. Due to the rareness of carriers on high tiers it is generally preferable to Defensive AA Fire, although the odd carrier might ruin a match. Repair Party II is also recommended for the quicker cool down and extra charge; Hindenburg’s detectability radius means that she may come under concentrated fire from the enemy team. Quicker access to her health regeneration ability will improve her survivability greatly.
Camouflage
Type 1, 2, or 5 camouflage can be equipped for credits; Types 2 or 5 are recommended at a minimum to reduce the accuracy of incoming shells.
Players who wish to spend doubloons can equip Hindenburg with Type 20 camouflage that lowers her detection radius, reduces the accuracy of incoming shells, reduces her repair costs, increases her credit earnings, and increases the amount of experience she earns.
Signals
Signals boosting fire chance are recommended (see above). Sierra Mike is decent to increase her somewhat low top speed, but might lead to unpleasant surprises due to her sluggishness.
Recommended Signal Flags 
| |||||
|---|---|---|---|---|---|
| Combat | |||||
 ★★ |
 ★ |
 ★★★ |

|
 ★★★ |

|

|
 ★★★ |
 ★★★ |

|
 ★★ |

|
| Economic | |||||
 ★ |
 ★★ |
 ★★ |

|

| |
| Special | |||||
 ★ |

|

|
 ★★ |

| |
| Key: ★★★ - Extremely Useful ★★ - Frequently Useful ★ - Occasionally Useful No stars - Not Useful | |||||
Gallery
Historical Info
Historical Gallery
