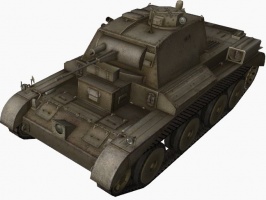
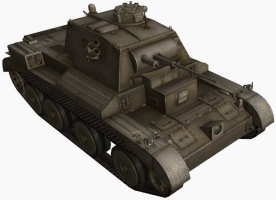
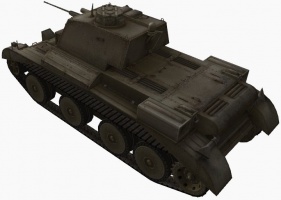
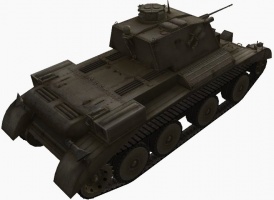
Cruiser Mk. III

|
Article requires additional modification The design and/or content of this article do not conform to wiki standards. Missing Content
|
Cruiser Mk. III
Mouse over "
| 38,000 |
| 37078 HP Hit Points |
| 14.19/14.57.78/17 t Weight Limit |
- 車長 (通訊員)
- 炮手
- 駕駛
- 裝填手
| 340395 hp Engine Power |
| 48/20 km/h Speed Limit |
| 3235 deg/s Traverse |
| 23.9650.77 hp/t Power/Wt Ratio |
| NoNo Pivot |
| // mm Hull Armor |
| 14/14/1414/12/14 mm Turret Armor |
AP
AP/APCR/HE Shells |
| 9//45/45/60 HP Damage |
| 27//49/71/23 mm Penetration |
|
102.3 r/m ▲
22.86 r/m Magazine-fed Gun ▲ Rate of Fire Magazine-fed Gun |
|
920.7 ▲
1028.7 Magazine-fed Gun
▲
Magazine-fed Gun
▼
Clip-fed Gun
▲ Damage Per Minute Clip-fed Gun |
|
0.53 m ▲
0.45 m With 50% Crew: 0.657 m ▲ Accuracy With 50% Crew: 0.557 m |
| 1.9 s 2.3 s Aim time |
| 4642 deg/s Turret Traverse |
| 360° Gun Arc |
| -15°/+20°-15°/+20° Elevation Arc |
| 720320 rounds Ammo Capacity |
| 2020 % Chance of Fire |
| 320 m 330 m View Range |
| 350 m 400 m Signal Range |
III
38000
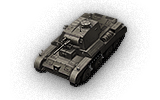
The Cruiser Mk. III is a [[英國|]] tier 3 輕型戰車.
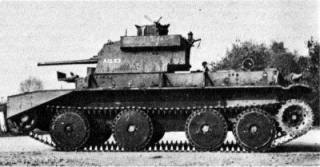
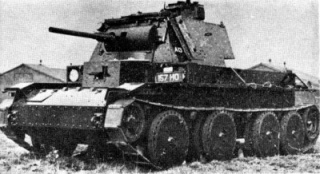
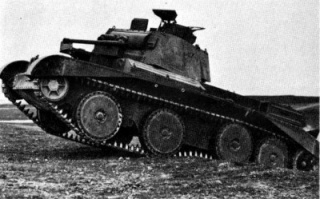
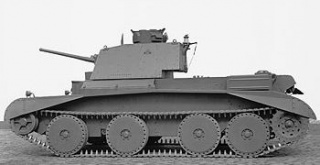
此車輛是以 M1931 Christie 戰車為基礎研發,之後由英國陸軍於 1936 年購買。車輛預計成為一輛高速、裝甲輕量化的突圍戰車。修改過後的設計被認為相當成功,並成為了其他巡航戰車的設計基礎。一共建造了 65 輛。此戰車在 1940–1941 年間投入了法國和北非的作戰。
The Cruiser Mk. III leads to the Cruiser Mk. IV.
Modules / Available Equipment and Consumables
Modules

炮管
| 等級 | 炮管 | 平均穿透力(毫米) | 射擊速率 | 100 公尺處擴散度 | 瞄準時間 | 經驗 | 重量 (噸) | 價格, | |
|---|---|---|---|---|---|---|---|---|---|
| I | 15 mm Machine Gun BESA | 27 | 9 | 102.38 | 0.53 | 1.9 | 0 | 70 | 1900 |
| III | QF 2-pdr Mk. IX | 64/121/23 | 45/45/60 | 22.22 | 0.4 | 2.3 | 300 | 130 | 6000 |
| IV | 40 mm Pom-Pom | 49/71/23 | 45/45/60 | 19.2 | 0.45 | 2.4 | 1000 | 160 | 20000 |

引擎
| 等級 | 引擎 | 引擎功率(匹馬力) | 碰撞時火災發生機率 | 經驗 | 重量 (噸) | 價格, |
|---|---|---|---|---|---|---|
| III | Nuffield Liberty Mk. II | 340 | 20 | 0 | 383 | 500 |
| IV | Nuffield Liberty Mk. III | 395 | 20 | 1100 | 383 | 11500 |

懸吊
| 等級 | 懸吊 | 負載限制 | 迴轉速度(度/秒) | 經驗 | 重量 (噸) | 價格, |
|---|---|---|---|---|---|---|
| II | Cruiser Mk. III | 14.5 | 32 | 0 | 4500 | 660 |
| III | Cruiser Mk. III* | 17 | 35 | 310 | 4500 | 1220 |

通訊設備
| 等級 | 通訊設備 | 通訊範圍(公尺) | 經驗 | 重量 (噸) | 價格, |
|---|---|---|---|---|---|
| III | WS No. 11 | 350 | 0 | 40 | 600 |
| V | WS No. 9 | 375 | 610 | 40 | 3600 |
| VI | WS No. 19 Mk. I | 400 | 1480 | 40 | 15000 |
Compatible Equipment
Compatible Consumables
Player Opinion
Pros and Cons
Pros:
- Good power/weight ratio
- Upgraded turret provides spaced armor
- High view range
- Excellent choice of guns
- Very high gun depression
Cons:
- Weak armour and below average HP
- Horrifyingly poor hull traverse at high speed
- Vulnerable to ammo rack damage from frontal shots, as ammo rack is located in the front
- Slow aiming speed for the pom-pom gun
- Auto cannons and HE shells are very effective against this tank
Performance
Stock, this tank turns poorly at high speed, similar to the USSR A-20. However, once you're going in the right direction you will reach top speed rather quickly thanks to the tanks engine power. With this tank you have to choose between two really good guns: On the one hand you have the Ordnance QF 2-Pounder Mark IX with probably the best mix of accuracy, penetration and damage that you can find in a tier 2 tank, able to penetrate all tanks up to tier IV from the front, with good alpha damage. This is one of the few non-tank destroyer mounted cannons that can consistently penetrate the T18s frontal armor plating, making this cannon a good counter to heavily armored enemy tanks. On the other hand you can use the semi-automatic 40mm Pom Pom gun which has a 4 shot magazine with devastating effect against close targets. The 40mm Pom-Pom can 1-drum kill almost every opponent at tier II, all Tier II-III tank destroyers, artillery up to tier IV and has adequate penetration against the targets that the Cruiser Mark III will meet. Beware of the T18, as its 75mm AT Howitzer M1A1 can one-shot this tank everywhere. The T18 can be penetrated by shooting the sloped upper glacis of the tank, but avoid the casemate as it can deflect some shots from the 40mm.
Compared to the Cruiser Mark I, while both tanks use the same weapons (besides the Mark III's stock 15mm machine gun), the Mark III has much better speed and mobility whereas the Mark I has even better gun handling. As a result, the Mark III plays more as a flanker while the Mark I is more suited to sniping.
Note that the 40mm Pom Pom has a ridiculously quick clip refire rate of 96rpm between shells, meaning that the entire clip's worth of 180 damage can be emptied in 1 second.
While it doesn't have much in the way of armour, it has very good gun depression, allowing it to easily hull down in hilly terrain. The second turret has spaced armour on the sides, and helps absorb HE damage, especially from the T18's nasty 75mm AT Howitzer M1A1.
One interesting thing to note is that every British radio, all the way up to tier 10, has the same weight. So, radio upgrades will never factor into any weight capacity considerations you may have when it comes to your British tanks.
Early Research
All guns can be mounted on the tank, even while stock, so first on the list is a gun upgrade. After that you should go for suspension and engine to slightly improve your hull traverse. After that's done, you may choose to research the upgraded turret, which provides faster aim times, or move up a Tier.
Suggested Equipment
Gallery
Historical Info
Development history
Orders for the Mk I and Mk II Cruiser tanks were restricted, since the British Army had decided to produce a more advanced and faster cruiser tank which would incorporate the Christie suspension designed by American inventor J. Walter Christie and have better armour. In 1936, General Martel, a pioneer in tank design who had published works on armoured warfare and pioneered the lightly armoured "tankette" to enhance infantry mobility, became Assistant Director of Mechanization at the War Office. Later that year Martel witnessed demonstrations of Soviet tank designs including the BT tank, which had been influenced by Christie's work. He urged the adoption of a tank that would use the suspension system and also follow Christie's practice of using a lightweight aircraft engine such as the Liberty Engine. The government authorized purchase and licensing of a Christie design via the Nuffield Organization rather than contact the Soviet authorities.
The vehicle obtained from Christie became the basis of the Cruiser Mk III (A13). It had to be extensively redesigned by Morris Commercial Cars as it was too small and had several faults Christie had not addressed. A new company Nuffield Mechanization & Aero Limited was formed for the development and production of the design. At a meeting of the General Staff, an official specification was determined. This included 30 mm (1.2 in) armour, a 2 pdr gun, road speed of 30 mph. A subsequent review of the specification by Martel and Hobart approved 30mm armour all round provided cross-country speed could be kept at 25 mph. Pending the delivery of the A13, an interim design was approved - of the A7, A9 and A10, the A9 was selected.
The first prototype (the A13-E1) was delivered in 1937. Following testing of the two prototypes, the A13 was ordered into production and a total of 65 were manufactured. The Mk III weighed 14 long tons (14,200 kg) had a crew of 4, a 340 hp engine which gave a top speed of 30 mph (48 km/h) and was armed with a 2 pounder gun and a machine gun. However, when it was introduced into service in 1937, the Army still lacked a formal tank division. Sixty five were built, the original order being for 50. The order was completed by mid 1939.
Combat history
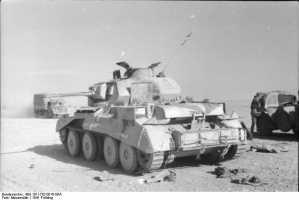
Like most British cruisers, the A 13 was fast but under armoured and proved unreliable mechanically. Most were lost in the French campaign in 1940, but a few were used in Greece and the North African campaign in 1940-41. The basic design was used for the Cruiser Mk IV. As part of the British Expeditionary Force sent to France, the Cruiser Mark II equipped units in the 1st Armoured Division. In the Western Desert 1940-1941 (Libya) they were in the units of the 7th Armoured Division.
Historical Gallery
