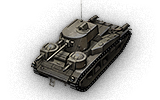
Vickers Medium Mk. III

|
Article requires additional modification The design and/or content of this article do not conform to wiki standards. Missing Content
|
Vickers Medium Mk. III

Mouse over "
| 40,000 |
| 475100 HP Hit Points |
| 17.5/187.17/19.5 t Weight Limit |
- 車長
- 炮手
- 駕駛
- 通訊員
- 通訊員
- 裝填手
| 180220 hp Engine Power |
| 48/16 km/h Speed Limit |
| 3032 deg/s Traverse |
| 10.2930.68 hp/t Power/Wt Ratio |
| NoNo Pivot |
| // mm Hull Armor |
| 14/14/1414/14/14 mm Turret Armor |
AP/APCR/HE
AP//HE Shells |
| 50/50/6570/70/95 HP Damage |
| 43/72/2357/72/29 mm Penetration |
|
20 r/m ▲
20 r/m Standard Gun ▲ Rate of Fire Standard Gun |
|
1000 ▲
Standard Gun
▼
Standard Gun
▲
1400 Standard Gun ▲
Standard Gun
▼
Standard Gun
▲ Damage Per Minute Standard Gun |
|
0.41 m ▲
0.44 m With 50% Crew: 0.508 m ▲ Accuracy With 50% Crew: 0.545 m |
| 2.1 s 1.7 s Aim time |
| 4040 deg/s Turret Traverse |
| 360° Gun Arc |
| -8°/+16°-8°/+16° Elevation Arc |
| 220160 rounds Ammo Capacity |
| 2020 % Chance of Fire |
| 310 m 330 m View Range |
| 250 m 375 m Signal Range |
III
40000
The Vickers Medium Mk. III is a [[英國|]] tier 3 中型戰車.
英國中型戰車,也稱為「16-噸」Vickers。 Vickers 於 1926 年到 1931 年間製造了三輛原型車。根據消息指出,雖然 1933 年中另製造了三輛以上的戰車,並一直服役到 1938 年為止,卻從未投入於作戰之中。
The MK III is rather slow, yet capable of dealing its share of damage due the quality of its guns. They have fairly good accuracy and a high rate of fire. Despite that, the armor is weak and the tank can be destroyed easily, especially with HE rounds or artillery fire. The Mk. III is well suited for shooting at distances and taking cover when the enemy has finally noticed you're a threat and starts to point his gun at you. Beware of the Cruiser Mk. II, T82, Alecto, Valentine AT and the Hetzer, for they can decimate you with their HE Might!
The Vickers Medium Mk. III marks the end of its medium line.
Modules / Available Equipment and Consumables
Modules

炮管
| 等級 | 炮管 | 平均穿透力(毫米) | 射擊速率 | 100 公尺處擴散度 | 瞄準時間 | 經驗 | 重量 (噸) | 價格, | |
|---|---|---|---|---|---|---|---|---|---|
| II | OQF 3-pdr Gun Mk. II | 43/72/23 | 50/50/65 | 20 | 0.41 | 2.1 | 0 | 250 | 3100 |
| III | QF 2-pdr Mk. IX | 64/121/23 | 45/45/60 | 28.57 | 0.36 | 1.7 | 300 | 130 | 6000 |
| IV | QF 6-pdr 8 cwt Mk. I | 57/72/29 | 70/70/95 | 18.18 | 0.44 | 2.1 | 1200 | 450 | 25000 |

引擎
| 等級 | 引擎 | 引擎功率(匹馬力) | 碰撞時火災發生機率 | 經驗 | 重量 (噸) | 價格, |
|---|---|---|---|---|---|---|
| III | 2x Armstrong Siddeley | 180 | 20 | 0 | 400 | 4550 |
| IV | 2x Rolls-Royce Phantom II | 220 | 20 | 850 | 680 | 10000 |

懸吊
| 等級 | 懸吊 | 負載限制 | 迴轉速度(度/秒) | 經驗 | 重量 (噸) | 價格, |
|---|---|---|---|---|---|---|
| II | Vickers Medium А6Е1 | 18 | 30 | 0 | 4000 | 670 |
| III | Vickers Medium А6Е3 | 19.5 | 32 | 350 | 4000 | 1800 |

通訊設備
| 等級 | 通訊設備 | 通訊範圍(公尺) | 經驗 | 重量 (噸) | 價格, |
|---|---|---|---|---|---|
| II | WS No. 14 | 250 | 0 | 40 | 0 |
| III | WS No. 11 | 350 | 100 | 40 | 600 |
| V | WS No. 9 | 375 | 610 | 40 | 3600 |
Compatible Equipment
Compatible Consumables
Player Opinion
Pros and Cons
Pros:
- Good rate of fire and excellent aim time
- Accurate gun
- Good penetration for its tier
- Accurate on the move
- Good speed limit.
Cons:
- Armor is an amusing joke
- Large and long sillhouette
- Speed limit is a lie due to weak engines
- Poor acceleration, although it maintains speed well
- Low alpha damage
Performance
This tank has six crew members, like the Cruiser Mk. II. Unfortunately, instead of two Gunners, it has two Radio Operators. The limited range of even the top radio on this tank means the second provides no worthwhile benefit. The new hull is far less boxy in shape, and slightly shorter in height, which allows this tank to use bushes a little more effectively. Even though the 6-pdr 8cwt QF Mark I gun carries over from the Mark II, it has a faster rate of fire, better accuracy, and faster aim time on this tank, especially with the second turret. Altogether, this makes the Mark III a much better sniper than previous models.
Early Research
- The 6-pdr 8cwt QF Mark I gun and the WS No. 11 radio carry over from the Vickers Medium Mark II and can be equipped immediately.
- Research the upgraded suspension first.
- Next research the second turret.
- Researching the 2x Rolls-Royce Phantom II engine will improve mobility.
- Go from there.
Suggested Equipment
![]()
![]()
![]()
![]()
Gallery


Historical Info
In 1926, the British War Office wanted to replace their existing Mark II tanks with a new design. In May the Royal Tank Corps Centre was asked for its opinion, which it submitted in July. One of the requirements was a weight limit of 15.5 tons, which led to the nickname "16-tonners". Other specifications included that it could transported by rail; a sufficient supply of lubrication oil to match the range of the tank (dictated by the fuel carried); a wireless set; a gun capable of defeating enemy armour at a range of at least a thousand yards; fuel tanks external to the main compartments and bottom armour sufficient to withstand heavy machine-gun fire when exposed while climbing a crest. Furthermore the machine should be as silent as possible, as with previous types the engine noise tended to incapacitate the crew.
The War Office added some extra requirements: a separate engine compartment; superior steering capacity and 13 millimetres frontal armour with 9 millimetres thickness for the other plates.
In September Vickers, given the order to build a prototype, proposed a first design based on the Vickers A1E1 Independent, with the fighting compartment in front and the engine compartment at the back. There would be a central two-man turret with a 3-pounder (47 mm) gun and a coaxial machine-gun; it was intended to house the commander and a special observer, each being provided a separate cupola. In the front of the hull were to be placed two secondary machine-gun turrets, each with a twin Vickers machine gun. At the back of the vehicle, behind the main turret a third machine-gun turret was intended, armed with an anti-aircraft (AA) weapon. A crew was needed of seven men. Maximum armour would be 13 millimetres and basis armour 6.5 millimetres, limiting the weight to fourteen tons. Riveted plates were used. The total fuel supply would be 120 imp gal (550 l) gallons: ten in a small tank inside, gravity feeding the engine; the remainder in external tanks on the fenders. Two engine options were indicated: a 120 hp engine would allow for a speed of 14 mph and a 180 hp engine would raise this to 20 mph (32 km/h).
The result was called A6. In March 1927 a wooden mock-up was presented and after approval a second and prototype were ordered which had to incorporate the new hydraulically operated Wilson epicyclic steering gearbox, the predecessor of the Merrit-Brown gearbox. By June 1928 both prototypes (A6E1 and A6E2) were presented to the Mechanized Warfare Experimental Establishment for trials. Vickers was on this occasion ordered to add armour skirts but keep within the weight limit even if it meant removing armour elsewhere. Meanwhile a third prototype had been ordered: A6E3.
A6E1, A6E2 and A6E3 were fitted with a Armstrong Siddeley air-cooled V8 180 hp engine giving a maximum speed of 26 mph. A6E2 was fitted with the Ricardo CI 180 hp engine but this was not satisfactory and the Armstrong-Siddeley refitted. A6E3 was later re-engined with the Thornycroft 6V 500 hp - a slow running marine engine. It was proposed to combine two Rolls-Royce Phantom engines with the Wilson transmission system on the A6E1, but in view of the costs this was rejected. A6E2 was eventually refitted with the AS V8 180 hp.
The guns were tested in July 1928. This proved that the twin-machine gun arrangement was unworkable; so the A6E3, then being constructed, was fitted with a simplified design with a single machine-gun; it also had single cupola on the centreline of the turret. The AA-turret was removed from A6E1. However it was also shown that the suspension and the gunnery arrangements were distinctly inferior to those of the Mark II. It was therefore decided to discontinue the development of the type and use the three vehicles merely as test-beds for the automotive parts. In 1929 Vickers submitted three alternative suspension designs, which were fitted to the respective prototypes; one of these, tried on A6E3, involved a fundamental reconstruction of the hull. None proved able to provide a stable gun platform. Only in 1934 a satisfactory type was fitted by a specialised firm.[1]
The disappointments in the A6 design led to a new design, the "Medium Mark III", being ordered in 1928 and constructed from 1930.[2] It was similar to the A6 design but featured a new turret and improved armour. The turret had a flat gun mantlet and a bulge at the back to hold the radio set. The secondary machine-gun turrets were moved more to the front to shift the centre of gravity of the entire vehicle forward to improve its stability. Larger brakes were fitted. In 1933 trials were completed of the first two prototypes. The type was reliable and provided a good gun platform. However, it still suffered from its bad suspension design: even though road speed increased to thirty miles per hour, during cross-country rides the bogies were often overloaded. Three Mark IIIs were built, one by Vickers and two by the Royal Ordnance Factory at Woolwich: Medium III E1, E2 and E3. The third had an improved suspension and the vehicles were in 1934 taken into use by the HQ of the Tank Brigade. However, no orders followed due to its high price; Medium III E2 was lost to a fire.
One of the Mark IIIs was fitted as a command vehicle with an extra radio aerial around the turret. This was used by Brigadier Percy Hobart for the Salisbury Plain exercises during 1934.[
Historical Gallery


