歡迎來到 Wargaming.net Wiki!
變換

Stuart I-IV

在2015年1月20日 (二) 09:14由所做的修訂版本
(差異) ←上個修訂 | 最新修訂 (差異) | 下一修訂→ (差異)
跳轉到: 導覽搜尋


newfile.png Article requires additional modification
The design and/or content of this article do not conform to wiki standards.
Missing Content
  • Gallery
  • Player Opinion: Equipment
  • Sources and External Links


,,


Stuart I-IV

Icon
nation | Light Tank | Tier III
Battle Tier
1234567891011
Overview
Mouse over "
Well, the ones further down, of course.
" for more information
43,500  Credits Cost
42589 HP Hit Points
12.78/12.95.1/14.5 t Weight Limit
Crew
  1. 車長 (裝填手)
  2. 炮手
  3. 駕駛
  4. 通訊員
Mobility
245262 hp Engine Power
58/20 km/h Speed Limit
4045 deg/s Traverse
19.1751.37 hp/t Power/Wt Ratio
NoNo Pivot
Armor
// mm Hull Armor
38.1/25.4/25.438.1/31.8/31.8 mm Turret Armor
Armament


{{#ifeq:ARMOR_PIERCING_CR|ARMOR_PIERCING||


{{#ifeq:HIGH_EXPLOSIVE|ARMOR_PIERCING||


AP/APCR/HE


{{#ifeq:ARMOR_PIERCING_CR|ARMOR_PIERCING||


{{#ifeq:HIGH_EXPLOSIVE|ARMOR_PIERCING||


AP/APCR/HE
Shells
40/40/5040/40/50 HP Damage
48/70/1956/78/19 mm Penetration


|


|}}

|


|}}


24 r/m 

Standard Gun

Reload Times
Nominal: 2.5 s
50% Crew: 3.1 s
75% Crew: 2.7 s
100% Crew: 2.4 s
Rammer: 2.16 s
Vents: 2.35 s
Both: 2.11 s
Both and BiA: 2.07 s
Both and Max Crew %: 1.98 s

See Crew, Consumables, or Equipment for more information.


|


|}}

|


|}}


24 r/m 

Standard Gun

Reload Times
Nominal: 2.5 s
50% Crew: 3.1 s
75% Crew: 2.7 s
100% Crew: 2.4 s
Rammer: 2.16 s
Vents: 2.35 s
Both: 2.11 s
Both and BiA: 2.07 s
Both and Max Crew %: 1.98 s

See Crew, Consumables, or Equipment for more information.
Rate of Fire


|


|}}

|


|}}


960

Standard Gun

Using Shell Type 1 (40 Damage):


Theoretical Damage Per Minute
Nominal DPM: 960
50% Crew: 774.8
75% Crew: 887.6
100% Crew: 1001.2
100% Crew
Vents: 1023.6
Rammer: 1112.4
Both: 1137.6
Both and BiA: 1162.8
Both and Max Crew %: 1213.2

Advantageous Damage Per Minute
First-shot DPM: 1000
50% Crew: 814.8
75% Crew: 927.6
100% Crew: 1041.2
100% Crew
Rammer: 1152.4
Vents: 1063.6
Both: 1177.6
Both and BiA: 1202.8
Both and Max Crew %: 1253.2

See here, here, or here for more information.

Standard Gun

Using Shell Type 2 (40 Damage):


Theoretical Damage Per Minute
Nominal DPM: 960
50% Crew: 774.8
75% Crew: 887.6
100% Crew: 1001.2
100% Crew
Vents: 1023.6
Rammer: 1112.4
Both: 1137.6
Both and BiA: 1162.8
Both and Max Crew %: 1213.2

Advantageous Damage Per Minute
First-shot DPM: 1000
50% Crew: 814.8
75% Crew: 927.6
100% Crew: 1041.2
100% Crew
Rammer: 1152.4
Vents: 1063.6
Both: 1177.6
Both and BiA: 1202.8
Both and Max Crew %: 1253.2

See here, here, or here for more information.

Standard Gun

Using Shell Type 3 (50 Damage):
With wholly penetrating hits

Theoretical Damage Per Minute
Nominal DPM: 1200
50% Crew: 968.5
75% Crew: 1109.5
100% Crew: 1251.5
100% Crew
Vents: 1279.5
Rammer: 1390.5
Both: 1422
Both and BiA: 1453.5
Both and Max Crew %: 1516.5

Advantageous Damage Per Minute
First-shot DPM: 1250
50% Crew: 1018.5
75% Crew: 1159.5
100% Crew: 1301.5
100% Crew
Rammer: 1440.5
Vents: 1329.5
Both: 1472
Both and BiA: 1503.5
Both and Max Crew %: 1566.5

See here, here, or here for more information.


|


|}}

|


|}}


960

Standard Gun

Using Shell Type 1 (40 Damage):


Theoretical Damage Per Minute
Nominal DPM: 960
50% Crew: 774.8
75% Crew: 887.6
100% Crew: 1001.2
100% Crew
Vents: 1023.6
Rammer: 1112.4
Both: 1137.6
Both and BiA: 1162.8
Both and Max Crew %: 1213.2

Advantageous Damage Per Minute
First-shot DPM: 1000
50% Crew: 814.8
75% Crew: 927.6
100% Crew: 1041.2
100% Crew
Rammer: 1152.4
Vents: 1063.6
Both: 1177.6
Both and BiA: 1202.8
Both and Max Crew %: 1253.2

See here, here, or here for more information.

Standard Gun

Using Shell Type 2 (40 Damage):


Theoretical Damage Per Minute
Nominal DPM: 960
50% Crew: 774.8
75% Crew: 887.6
100% Crew: 1001.2
100% Crew
Vents: 1023.6
Rammer: 1112.4
Both: 1137.6
Both and BiA: 1162.8
Both and Max Crew %: 1213.2

Advantageous Damage Per Minute
First-shot DPM: 1000
50% Crew: 814.8
75% Crew: 927.6
100% Crew: 1041.2
100% Crew
Rammer: 1152.4
Vents: 1063.6
Both: 1177.6
Both and BiA: 1202.8
Both and Max Crew %: 1253.2

See here, here, or here for more information.

Standard Gun

Using Shell Type 3 (50 Damage):
With wholly penetrating hits

Theoretical Damage Per Minute
Nominal DPM: 1200
50% Crew: 968.5
75% Crew: 1109.5
100% Crew: 1251.5
100% Crew
Vents: 1279.5
Rammer: 1390.5
Both: 1422
Both and BiA: 1453.5
Both and Max Crew %: 1516.5

Advantageous Damage Per Minute
First-shot DPM: 1250
50% Crew: 1018.5
75% Crew: 1159.5
100% Crew: 1301.5
100% Crew
Rammer: 1440.5
Vents: 1329.5
Both: 1472
Both and BiA: 1503.5
Both and Max Crew %: 1566.5

See here, here, or here for more information.
Damage Per Minute


|


|}}


0.46 m 

With 50% Crew: 0.57 m
With 75% Crew: 0.498 m
With 100% Crew: 0.441 m
With BiA: 0.431 m
With BiA and Vents: 0.422 m
Maximum possible: 0.404 m

For more details, see Crew


|


|}}


0.41 m 

With 50% Crew: 0.508 m
With 75% Crew: 0.443 m
With 100% Crew: 0.393 m
With BiA: 0.384 m
With BiA and Vents: 0.376 m
Maximum possible: 0.361 m

For more details, see Crew
Accuracy


|


|}}


1.8 s 

With 50% Crew: 2.23 s
With 75% Crew: 1.947 s
With 100% Crew: 1.726 s
With GLD: 1.569 s
With BiA: 1.688 s
With BiA and Vents: 1.651 s
With both and GLD: 1.501 s
Maximum possible: 1.439 s

For more details, see Crew or Equipment


|


|}}


1.7 s 

With 50% Crew: 2.106 s
With 75% Crew: 1.839 s
With 100% Crew: 1.63 s
With GLD: 1.482 s
With BiA: 1.594 s
With BiA and Vents: 1.559 s
With both and GLD: 1.418 s
Maximum possible: 1.359 s

For more details, see Crew or Equipment
Aim time
4048 deg/s Turret Traverse
360° Gun Arc
-10°/+20°-10°/+20° Elevation Arc
205185 rounds Ammo Capacity
General
1220 % Chance of Fire


280 m 

With 50% Crew: 220 m
With 75% Crew: 250 m
With 100% Crew: 280 m
With Recon and Situational Awareness: 294.2 m
With Coated Optics: 308 m
With Binocular Telescope: 350 m
Maximum possible: 400.8 m

For more details, see Skills or Equipment


330 m 

With 50% Crew: 259.3 m
With 75% Crew: 294.7 m
With 100% Crew: 330 m
With Recon and Situational Awareness: 346.7 m
With Coated Optics: 363 m
With Binocular Telescope: 412.5 m
Maximum possible: 472.4 m

For more details, see Skills or Equipment
View Range


|


|}}


350 m 

With 50% Crew: 282.5 m
With 75% Crew: 323.6 m
With 100% Crew: 365 m
With 100% Signal Boost: 420 m
When affected by 100% Relaying: 385 m
Maximum possible: 525.4 m

For more details, see Skills or Equipment


|


|}}


450 m 

With 50% Crew: 363.3 m
With 75% Crew: 416 m
With 100% Crew: 469.3 m
With 100% Signal Boost: 540 m
When affected by 100% Relaying: 495 m
Maximum possible: 675.5 m

For more details, see Skills or Equipment
Signal Range
Values are Stock - click for Top
Stuart I-IV


III

annoGB15_Stuart_I.png

43500

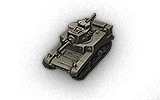
The Stuart I-IV is a [[英國|]] tier 3 輕型戰車.

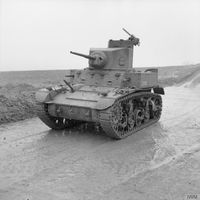
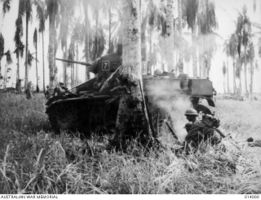
自 1941 年開始大量生產,並根據租借法案提供給英國。M3 到 M5A1 各型號共提供了 6,889 輛車給英國。M3 戰車在英國被命名為 Stuart I、同時 M3A1 版被命名為 Stuart III。車輛在西地里齊首次參與作戰。

The Stuart I-IV marks the end of its light line.

Modules / Available Equipment and Consumables

Modules

炮管

炮管

等級 炮管 平均穿透力(毫米) 射擊速率 100 公尺處擴散度 瞄準時間 經驗 重量 (噸) 價格,
II 37 mm Gun M5 48/70/19 40/40/50 24 0.46 1.8 0 78 2100
III QF 2-pdr Mk. IX 64/121/23 45/45/60 23.08 0.4 2 300 130 6000
III 37 mm Gun M6 56/78/19 40/40/50 24 0.41 1.7 350 82 8350
引擎

引擎

等級 引擎 引擎功率(匹馬力) 碰撞時火災發生機率 經驗 重量 (噸) 價格,
III Guiberson T-1020-4 245 12 0 331 5000
III Continental W-670-9A 262 20 190 256 5600
懸吊

懸吊

等級 懸吊 負載限制 迴轉速度(度/秒) 經驗 重量 (噸) 價格,
II Stuart I 12.9 40 0 3000 660
III Stuart IV 14.5 45 360 3000 1850
通訊設備

通訊設備

等級 通訊設備 通訊範圍(公尺) 經驗 重量 (噸) 價格,
III WS No. 11 350 0 40 600
V WS No. 9 375 610 40 3600
VI WS No. 19 Mk. I 400 1480 40 15000
VII WS No. 19 Mk. II 450 3600 40 21000

Compatible Equipment

Compatible Consumables

Player Opinion

Pros and Cons

Pros:


  • Is able to mount the excellent British 2-Pdr. gun, which performs exceedingly well at lower tiers.
  • High RoF on all guns.
  • Has adequate armor for its tier; the frontal armor will bounce most lower tier auto-cannons and machine-guns.
  • Good mobility and top speed when fully accelerated.
  • Relatively accurate guns


Cons:


  • Sluggish acceleration.
  • In comparison to its American counterpart, it is slower, less mobile, has a lower RoF and a poorer radio.
  • Has a boxy silhouette, making it an easy target to hit.
  • Still has the same armor as the M3 Stuart, meaning that if you're caught off guard and get flanked, your sides and rear will get ripped to pieces.


Performance

The Stuart I-IV it plays quite differently to its American counterpart, the M3 Stuart. It gains the OQF 2-pounder, which is better than the M3's 37mm M6. But where it gains in firepower, it loses in speed and radio range. It will take more time to get to its top speed compared to the M3 Stuart, and will not be able to contact allies of enemy positions from across large maps. Not only that, it still has the same armor as the original M3 Stuart, and is sluggish due to the weaker engine.

Stick to your friends and support by flanking enemies. Use the 2-pounder's excellent penetration and rate of fire to rip your enemy's side apart.


Early Research

  1. Radios will be available if you've played British tanks already. Mount it immediately.
  2. Research suspension and engine to gain much needed speed and maneuverability.
  3. Research turret. The 2-pounder is already available if you've played any of the British low tier 'Cruiser' tanks, so mount it too.
  4. Go from there.


Gallery

Historical Info

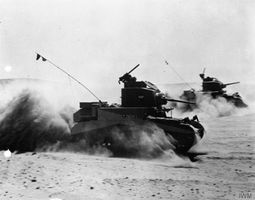
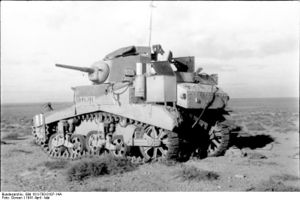
The British Army was the first to use the Light Tank M3 as the "General Stuart" in combat. From mid-November 1941 to the end of the year, about 170 Stuarts (in a total force of over 700 tanks) took part in Operation Crusader during the North Africa Campaign, with poor results. Although the high losses suffered by Stuart-equipped units during the operation had more to do with better tactics and training of the Afrika Korps than the apparent superiority of German armored fighting vehicles used in the North African campaign, the operation revealed that the M3 had several technical faults. Mentioned in the British complaints were the 37 mm M5 gun and poor internal layout. The two-man turret crew was a significant weakness, and some British units tried to fight with three-man turret crews. The Stuart also had a limited range, which was a severe problem in the highly mobile desert warfare as units often outpaced their supplies and were stranded when they ran out of fuel. On the positive side, crews liked its relatively high speed and mechanical reliability. The high reliability distinguished the Stuart from cruiser tanks of the period, in particular the Crusader, which composed a large portion of the British tank force in Africa up until 1942.


Historical Gallery


英國
輕型戰車


Cruiser Mk. I • M2 • Cruiser Mk. II • Light Mk. VIC • Valentine • Stuart I-IV • Cruiser Mk. III • Cruiser Mk. IV • Covenanter • A46 • Crusader • GSR 3301 Setter • FV1066 Senlac • LHMTV • GSOR3301 AVR FS • Manticore

中型戰車


Vickers Medium Mk. I • Vickers Medium Mk. II • Vickers Medium Mk. III • Matilda • Matilda LVT • Grant • AC 1 Sentinel • Cavalier • Valiant • Sherman III • Matilda Black Prince • Sherman Firefly • Cromwell • AC 4 Experimental • Cromwell B • Sherman VC Firefly • Comet • Centurion Mk. I • FV4202 • Chieftain/T95 • Centurion Mk. 5/1 RAAC • Chimera • Cobra • Centurion Mk. 7/1 • Centurion Action X

重型戰車


Churchill I • Excelsior • Churchill VII • TOG II* • Black Prince • FV201 (A45) • Charlemagne • Caliban • Gonsalo • Caernarvon • Caernarvon Action X • FV4201 Chieftain Proto • Conqueror • FV215b • Super Conqueror • T95/FV4201 Chieftain

驅逐戰車


Universal Carrier 2-pdr • Valentine AT • Alecto • Archer • AT 2 • Churchill Gun Carrier • Achilles • AT 8 • Excalibur • Challenger • AT 15A • AT 7 • GSOR 1008 • AT 15 • Charioteer • Turtle Mk. I • Tortoise • FV4004 Conway • FV215b (183) • FV4005 Stage II • FV217 Badger

Self-Propelled Guns


Loyd Gun Carriage • Sexton II • Sexton I • Birch Gun • Bishop • FV304 • Crusader 5.5-in. SP • FV207 • FV3805 • Conqueror Gun Carriage

輕型戰車
美國


T1 Cunningham • M2 Light Tank • T1E6 • T2 Light Tank • T7 Combat Car • M22 Locust • M3 Stuart • MTLS-1G14 • M5 Stuart • M24 Chaffee • M7 • M24E2 Super Chaffee • T21 • T37 • T71 CMCD • T71 DA • T92 • M41 Walker Bulldog • T49 • XM551 Sheridan

英國


Cruiser Mk. I • M2 • Cruiser Mk. II • Light Mk. VIC • Valentine • Stuart I-IV • Cruiser Mk. III • Cruiser Mk. IV • Covenanter • A46 • Crusader • GSR 3301 Setter • FV1066 Senlac • LHMTV • GSOR3301 AVR FS • Manticore

德國


Leichttraktor • Pz.Kpfw. II Ausf. D • MKA • Pz.Kpfw. 35 R • Pz.Kpfw. 38H 735 (f) • Pz.Kpfw. 35 (t) • Pz.Kpfw. I • Pz.Kpfw. II • 43 M. Toldi III • Pz.Kpfw. M 15 • Pz.Kpfw. 38 (t) • Pz.Kpfw. III Ausf. E • Pz.Kpfw. II Ausf. J • Pz.Kpfw. I Ausf. C • Pz.Kpfw. II Ausf. G • Pz.Kpfw. T 15 • Pz.Kpfw. 38 (t) n.A. • Pz.Kpfw. II Luchs • VK 16.02 Leopard • VK 28.01 mit 10,5 cm L/28 • VK 28.01 • Aufklärungspanzer Panther • Spähpanzer SP I C • leKpz M 41 90 mm • leKpz M 41 90 mm GF • HWK 12 • HWK 30 • Spähpanzer Ru 251 • Rheinmetall Panzerwagen

法國


Renault FT • D1 • AM 39 Gendron-Somua • AMR 35 • FCM 36 • Renault R35 • Hotchkiss H35 • AMX 38 • AMX 40 • AMX ELC bis • AMX 12 t • Panhard AMD 178B • AMX 13 75 • Hotchkiss EBR • AMX 13 57 • AMX 13 57 GF • Panhard EBR 75 (FL 10) • Panhard AML Lynx 6x6 • Bat.-Châtillon 12 t • ELC EVEN 90 • AMX 13 90 • Panhard EBR 90 • Panhard EBR 105 • AMX 13 105

蘇聯


MS-1 • BT-2 • T-45 • T-26 • T-60 • Tetrarch • BT-SV • LTP • M3 Light • BT-7 artillery • T-116 • BT-5 • T-127 • T-46 • T-70 • BT-7 • T-80 • Valentine II • A-20 • T-50 • MT-25 • T-50-2 • LTG • LTTB • LT-432 • T-54 ltwt. • T-100 LT

中國


Vickers Mk. E Type B • Type 2597 Chi-Ha • M5A1 Stuart • 59-16 • Type 64 • Type 62 • WZ-131 • WZ-132 • M41D • WZ-132A • WZ-132-1

日本


Renault Otsu • Type 95 Ha-Go • Type 97 Te-Ke • Type 97 Chi-Ha • Type 98 Ke-Ni • Type 5 Ke-Ho