Wargaming.net 위키에 오신 것을 환영합니다!
변수

113

이동: 둘러보기, 검색


newfile.png Article requires additional modification
The design and/or content of this article do not conform to wiki standards.
Missing Content
  • Sources and External Links


,


113

Icon
China | Heavy Tank | Tier X
Battle Tier
1234567891011
Overview
Mouse over "
Well, the ones further down, of course.
" for more information
6,100,000  Credits Cost
2300460 HP Hit Points
45/4826.14/48 t Weight Limit
Crew
  1. 전차장
  2. 포수
  3. 조종수
  4. 장전수 (무전수)
Mobility
750750 hp Engine Power
50/15 km/h Speed Limit
3636 deg/s Traverse
16.6728.69 hp/t Power/Wt Ratio
NoNo Pivot
Armor
// mm Hull Armor
290/180/80290/180/80 mm Turret Armor
Armament


{{#ifeq:HOLLOW_CHARGE|ARMOR_PIERCING||


{{#ifeq:HIGH_EXPLOSIVE|ARMOR_PIERCING||


AP/HEAT/HE


{{#ifeq:HOLLOW_CHARGE|ARMOR_PIERCING||


{{#ifeq:HIGH_EXPLOSIVE|ARMOR_PIERCING||


AP/HEAT/HE
Shells
440/440/530440/440/530 HP Damage
249/340/68249/340/68 mm Penetration


|


|}}

|


|}}


6 r/m 

Standard Gun

Reload Times
Nominal: 10 s
50% Crew: 12.39 s
75% Crew: 10.82 s
100% Crew: 9.59 s
Rammer: 8.63 s
Vents: 9.38 s
Both: 8.44 s
Both and BiA: 8.26 s
Both and Max Crew %: 7.91 s

See Crew, Consumables, or Equipment for more information.


|


|}}

|


|}}


6 r/m 

Standard Gun

Reload Times
Nominal: 10 s
50% Crew: 12.39 s
75% Crew: 10.82 s
100% Crew: 9.59 s
Rammer: 8.63 s
Vents: 9.38 s
Both: 8.44 s
Both and BiA: 8.26 s
Both and Max Crew %: 7.91 s

See Crew, Consumables, or Equipment for more information.
Rate of Fire


|


|}}

|


|}}


2640

Standard Gun

Using Shell Type 1 (440 Damage):


Theoretical Damage Per Minute
Nominal DPM: 2640
50% Crew: 2129.6
75% Crew: 2442
100% Crew: 2754.4
100% Crew
Vents: 2816
Rammer: 3062.4
Both: 3128.4
Both and BiA: 3198.8
Both and Max Crew %: 3335.2

Advantageous Damage Per Minute
First-shot DPM: 3080
50% Crew: 2569.6
75% Crew: 2882
100% Crew: 3194.4
100% Crew
Rammer: 3502.4
Vents: 3256
Both: 3568.4
Both and BiA: 3638.8
Both and Max Crew %: 3775.2

See here, here, or here for more information.

Standard Gun

Using Shell Type 2 (440 Damage):


Theoretical Damage Per Minute
Nominal DPM: 2640
50% Crew: 2129.6
75% Crew: 2442
100% Crew: 2754.4
100% Crew
Vents: 2816
Rammer: 3062.4
Both: 3128.4
Both and BiA: 3198.8
Both and Max Crew %: 3335.2

Advantageous Damage Per Minute
First-shot DPM: 3080
50% Crew: 2569.6
75% Crew: 2882
100% Crew: 3194.4
100% Crew
Rammer: 3502.4
Vents: 3256
Both: 3568.4
Both and BiA: 3638.8
Both and Max Crew %: 3775.2

See here, here, or here for more information.

Standard Gun

Using Shell Type 3 (530 Damage):
With wholly penetrating hits

Theoretical Damage Per Minute
Nominal DPM: 3180
50% Crew: 2565.2
75% Crew: 2941.5
100% Crew: 3317.8
100% Crew
Vents: 3392
Rammer: 3688.8
Both: 3768.3
Both and BiA: 3853.1
Both and Max Crew %: 4017.4

Advantageous Damage Per Minute
First-shot DPM: 3710
50% Crew: 3095.2
75% Crew: 3471.5
100% Crew: 3847.8
100% Crew
Rammer: 4218.8
Vents: 3922
Both: 4298.3
Both and BiA: 4383.1
Both and Max Crew %: 4547.4

See here, here, or here for more information.


|


|}}

|


|}}


2640

Standard Gun

Using Shell Type 1 (440 Damage):


Theoretical Damage Per Minute
Nominal DPM: 2640
50% Crew: 2129.6
75% Crew: 2442
100% Crew: 2754.4
100% Crew
Vents: 2816
Rammer: 3062.4
Both: 3128.4
Both and BiA: 3198.8
Both and Max Crew %: 3335.2

Advantageous Damage Per Minute
First-shot DPM: 3080
50% Crew: 2569.6
75% Crew: 2882
100% Crew: 3194.4
100% Crew
Rammer: 3502.4
Vents: 3256
Both: 3568.4
Both and BiA: 3638.8
Both and Max Crew %: 3775.2

See here, here, or here for more information.

Standard Gun

Using Shell Type 2 (440 Damage):


Theoretical Damage Per Minute
Nominal DPM: 2640
50% Crew: 2129.6
75% Crew: 2442
100% Crew: 2754.4
100% Crew
Vents: 2816
Rammer: 3062.4
Both: 3128.4
Both and BiA: 3198.8
Both and Max Crew %: 3335.2

Advantageous Damage Per Minute
First-shot DPM: 3080
50% Crew: 2569.6
75% Crew: 2882
100% Crew: 3194.4
100% Crew
Rammer: 3502.4
Vents: 3256
Both: 3568.4
Both and BiA: 3638.8
Both and Max Crew %: 3775.2

See here, here, or here for more information.

Standard Gun

Using Shell Type 3 (530 Damage):
With wholly penetrating hits

Theoretical Damage Per Minute
Nominal DPM: 3180
50% Crew: 2565.2
75% Crew: 2941.5
100% Crew: 3317.8
100% Crew
Vents: 3392
Rammer: 3688.8
Both: 3768.3
Both and BiA: 3853.1
Both and Max Crew %: 4017.4

Advantageous Damage Per Minute
First-shot DPM: 3710
50% Crew: 3095.2
75% Crew: 3471.5
100% Crew: 3847.8
100% Crew
Rammer: 4218.8
Vents: 3922
Both: 4298.3
Both and BiA: 4383.1
Both and Max Crew %: 4547.4

See here, here, or here for more information.
Damage Per Minute


|


|}}


0.37 m 

With 50% Crew: 0.458 m
With 75% Crew: 0.4 m
With 100% Crew: 0.355 m
With BiA: 0.347 m
With BiA and Vents: 0.339 m
Maximum possible: 0.325 m

For more details, see Crew


|


|}}


0.37 m 

With 50% Crew: 0.458 m
With 75% Crew: 0.4 m
With 100% Crew: 0.355 m
With BiA: 0.347 m
With BiA and Vents: 0.339 m
Maximum possible: 0.325 m

For more details, see Crew
Accuracy


|


|}}


2.8 s 

With 50% Crew: 3.469 s
With 75% Crew: 3.029 s
With 100% Crew: 2.685 s
With GLD: 2.441 s
With BiA: 2.626 s
With BiA and Vents: 2.569 s
With both and GLD: 2.335 s
Maximum possible: 2.238 s

For more details, see Crew or Equipment


|


|}}


2.8 s 

With 50% Crew: 3.469 s
With 75% Crew: 3.029 s
With 100% Crew: 2.685 s
With GLD: 2.441 s
With BiA: 2.626 s
With BiA and Vents: 2.569 s
With both and GLD: 2.335 s
Maximum possible: 2.238 s

For more details, see Crew or Equipment
Aim time
2626 deg/s Turret Traverse
360° Gun Arc
-7°/+18°-7°/+18° Elevation Arc
3434 rounds Ammo Capacity
General
1212 % Chance of Fire


400 m 

With 50% Crew: 314.3 m
With 75% Crew: 357.2 m
With 100% Crew: 400 m
With Recon and Situational Awareness: 420.2 m
With Coated Optics: 440 m
With Binocular Telescope: 500 m
Maximum possible: 572.6 m

For more details, see Skills or Equipment


400 m 

With 50% Crew: 314.3 m
With 75% Crew: 357.2 m
With 100% Crew: 400 m
With Recon and Situational Awareness: 420.2 m
With Coated Optics: 440 m
With Binocular Telescope: 500 m
Maximum possible: 572.6 m

For more details, see Skills or Equipment
View Range


|


|}}


750 m 

With 50% Crew: 605.4 m
With 75% Crew: 693.4 m
With 100% Crew: 782.2 m
With 100% Signal Boost: 900 m
When affected by 100% Relaying: 825 m
Maximum possible: 1125.9 m

For more details, see Skills or Equipment


|


|}}


750 m 

With 50% Crew: 605.4 m
With 75% Crew: 693.4 m
With 100% Crew: 782.2 m
With 100% Signal Boost: 900 m
When affected by 100% Relaying: 825 m
Maximum possible: 1125.9 m

For more details, see Skills or Equipment
Signal Range
Values are Stock - click for Top
113

Additional Statistics
(Top Configuration)

X

annoCh22_113.png

6100000

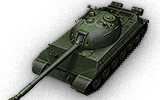
The 113 is a Chinese tier 10 heavy tank.

1963년, 113 전차 개발이 시작되었다. WZ-111의 대안으로 고안하였으며 중형전차 부품을 활용하였다. 하지만 주력 전차 개발이 시작되면서 기획안이 취소되었다.

One of several medium-heavy hybrids in tier X, the 113 brings hitpoints, armor, and firepower in a balanced package easily capable of keeping up with any group. Large and somewhat unwieldy, it relies on group dynamics rather than individual contribution and uses the strength of its allies to make it more effective in battle. A cooperative tank, the 113 acts as a force multiplier in its quest to accomplish the win.

The 113 marks the end of its Chinese heavy line.

Modules / Available Equipment and Consumables

Modules

주포

주포

단계 주포 평균 관통력 (mm) 연사력 100m에서의 분산도 조준 시간 일반 경험치 중량 (톤) 가격,
X 122 mm 60-122T 249/340/68 440/440/530 6 0.37 2.8 0 2757 300000
엔진

엔진

단계 엔진 엔진 출력 (마력) 충돌 시 화재 발생 확률 일반 경험치 중량 (톤) 가격,
X V-2-54SC 750 12 0 1045 25000
현가장치

현가장치

단계 현가장치 한계 중량 회전 속도 (도/초) 일반 경험치 중량 (톤) 가격,
X 113 48 36 0 10000 61350
무전기

무전기

단계 무전기 통신 범위 (m) 일반 경험치 중량 (톤) 가격,
X A-220B 750 0 40 54000

Compatible Equipment

Compatible Consumables

Player Opinion

Pros and Cons

Pros:


  • Good mobility, acceleration and high top speed
  • Balanced damage-per-shell and -per-minute, good dispersion values
  • Strong turret
  • Reliable, if not extremely thick, frontal armor


Cons:


  • Very poor gun depression
  • Very weak lower frontal plate, weak side armor
  • Subpar aim time


Performance

The 113 is a strange combo, featuring a low profile and very poor gun depression on a heavy tank, yet very high top speed for a heavy and very tough frontal armor. Because of this, it gets some of the best features from both medium and heavy tanks, turning it into a heavy medium of sorts. However, as the gun depression is very poor, making this tank work is a real challenge on some maps.

The 113 significantly different from its predecessors, mainly in that it plays more like a very beefy medium tank. Though while not being the best at either, it is both a good flanker as well as a frontline brawler, as long as one can find cover for the lower frontal plate, the upper plate will score tons of bounces and is a real threat when combined with its overall decent gun. The 113 is highly susceptible to artillery and the very poor gun depression can be difficult to adapt to. The 113 is fast enough to keep up with friendly medium wolfpacks, has a powerful gun, and is maneuverable enough to circle some slow enemy tanks. However, one of the most unique things about this tank is, it is a mere 2 degrees from auto-bouncing any AP round off its upper frontal plate. It can also be used in side-scraping, as long as your sides don't become too exposed.

The 113 may be unwelcoming and different to players who were used to the previous tanks in the line. It needs to be played significantly differently from its predecessors. However, if used correctly, the 113 can be an invaluable part of any team, be it in dishing out heavy damage or filling in for the crucial tasks of a medium, or even act as a replacement for a damage sponge.

Last to mention, because the 113 is so very rarely seen in random battles, often you'll have the upper hand on the enemy simply because they don't know how to deal with you.


Suggested Equipment


Improved VentilationTank Gun Rammer Vertical Stabilizer "Wet" Ammo Rack 


Gallery

Historical Info

Development of the model 113 was started in 1963, when it was obvious that the development of the WZ-111 was not heading in a good direction. Conceived as an alternative to the WZ-111, 113 and used parts, components and heritage of medium tanks, unlike WZ-111 which evolved from the Russian IS heavy tank series. Mass deployment of new main battle tank vehicles like T-55 and T-62 marked the end of all development, not only of model 113, but all Chinese heavy tank designs.


Historical Gallery


China
Light Tanks


Vickers Mk. E Type B • Type 2597 Chi-Ha • M5A1 Stuart • 59-16 • Type 64 • Type 62 • WZ-131 • WZ-132 • M41D • WZ-132A • WZ-132-1

Medium Tanks


Type T-34 • Type 58 • T-34-1 • Type 59 • T-34-2 • T-34-3 • 59-Patton • 122 TM • Type 59 G • WZ-120 • 121 • 121B

Heavy Tanks


IS-2 • WZ-111 • WZ-111 Alpine Tiger • 110 • 112 • WZ-111 model 1-4 • WZ-114 • 113 • 113 Beijing Opera • WZ-111 model 5A • WZ-111 Qilin

Tank Destroyers


T-26G FT • M3G FT • SU-76G FT • 60G FT • WZ-131G FT • T-34-2G FT • WZ-111-1G FT • WZ-120-1G FT • WZ-111G FT • WZ-120G FT • WZ-113G FT • 114 SP2

Self-Propelled Guns


Heavy Tanks
USA


T14 • T1 Heavy Tank • Pawlack Tank • M6 • King Tiger (Captured) • M-II-Y • T29 • Chrysler K • Chrysler K GF • T26E5 • T26E5 Patriot • M54 Renegade • T77 • M-III-Y • M-IV-Y • M6A2E1 • T32 • T34 • T34 B • AE Phase I • Concept 1B • M-VI-Y • M103 • T54E1 • M-V-Y • T110E5 • T57 Heavy Tank

UK


Churchill I • Excelsior • Churchill VII • TOG II* • Black Prince • FV201 (A45) • Charlemagne • Caliban • Gonsalo • Caernarvon • Caernarvon Action X • FV4201 Chieftain Proto • Conqueror • FV215b • Super Conqueror • T95/FV4201 Chieftain

Germany


Pz.Kpfw. B2 740 (f) • Durchbruchswagen 2 • Tiger 131 • VK 30.01 (P) • VK 36.01 (H) • VK 45.03 • Tiger I • Tiger (P) • VK 100.01 (P) • VK 168.01 (P) • VK 168.01 Mauerbrecher • VK 75.01 (K) • E 75 TS • Löwe • Tiger II • VK 45.02 (P) Ausf. A • E 75 • Mäuschen • VK 45.02 (P) Ausf. B • E 100 • Pz.Kpfw. VII • Maus • VK 72.01 (K)

France


B1 • BDR G1 B • ARL 44 • AMX M4 mle. 45 • AMX 50 100 • AMX M4 mle. 49 • AMX M4 mle. 49 Liberté • AMX 65 t • Somua SM • FCM 50 t • AMX 50 120 • Lorraine 50 t • AMX M4 mle. 51 • AMX 50 B • AMX M4 mle. 54

USSR


Churchill III • KV-220-2 • KV-220-2 Beta Test • KV-1 • KV-1 shielded • KV-1S • KV-2 • KV-2 (R) • KV-85 • Object 244 • T-150 • IS • KV-3 • KV-122 • IS-2M • IS-2 shielded • IS-2 • IS-3 • IS-6 • IS-6 B • KV-5 • KV-4 • IS-5 (Object 730) • IS-3A • IS-3A Peregrine • Kirovets-1 • KV-4 by Kreslavskiy • Object 252U Defender • Object 252U • IS-M • Object 703 Version II • IS-2-II • T-10 • Object 777 Version II • Object 257 • Object 705 • IS-3-II • ST-I • IS-4 • IS-7 • Object 260 • Object 705A • Object 277 • Object 279 early • ST-II • Object 780

China


IS-2 • WZ-111 • WZ-111 Alpine Tiger • 110 • 112 • WZ-111 model 1-4 • WZ-114 • 113 • 113 Beijing Opera • WZ-111 model 5A • WZ-111 Qilin

Japan


Type 91 Heavy • Type 95 Heavy • O-I Experimental • Heavy Tank No. VI • O-I • O-Ni • O-Ho • Type 4 Heavy • Type 5 Heavy