Wargaming.net 위키에 오신 것을 환영합니다!
변수

AT 2

이동: 둘러보기, 검색


newfile.png Article requires additional modification
The design and/or content of this article do not conform to wiki standards.
Missing Content
  • Sources and External Links


,,


AT 2

Icon
UK | TD | Tier V
Battle Tier
1234567891011
Overview
Mouse over "
Well, the ones further down, of course.
" for more information
425,000  Credits Cost
590118 HP Hit Points
40.95/4112.22/44 t Weight Limit
Crew
  1. 전차장 (무전수)
  2. 조종수
  3. 포수
  4. 장전수
Mobility
340395 hp Engine Power
20/10 km/h Speed Limit
1820 deg/s Traverse
8.332.32 hp/t Power/Wt Ratio
YesYes Pivot
Armor
// mm Hull Armor
Armament


{{#ifeq:ARMOR_PIERCING_CR|ARMOR_PIERCING||


{{#ifeq:HIGH_EXPLOSIVE|ARMOR_PIERCING||


AP/APCR/HE


{{#ifeq:ARMOR_PIERCING_CR|ARMOR_PIERCING||


{{#ifeq:HIGH_EXPLOSIVE|ARMOR_PIERCING||


AP/APCR/HE
Shells
75/75/10075/75/100 HP Damage
105/170/30110/180/30 mm Penetration


|


|}}

|


|}}


26.09 r/m 

Standard Gun

Reload Times
Nominal: 2.3 s
50% Crew: 2.85 s
75% Crew: 2.49 s
100% Crew: 2.21 s
Rammer: 1.99 s
Vents: 2.16 s
Both: 1.95 s
Both and BiA: 1.9 s
Both and Max Crew %: 1.82 s

See Crew, Consumables, or Equipment for more information.


|


|}}

|


|}}


26.09 r/m 

Standard Gun

Reload Times
Nominal: 2.3 s
50% Crew: 2.85 s
75% Crew: 2.49 s
100% Crew: 2.21 s
Rammer: 1.99 s
Vents: 2.16 s
Both: 1.95 s
Both and BiA: 1.9 s
Both and Max Crew %: 1.82 s

See Crew, Consumables, or Equipment for more information.
Rate of Fire


|


|}}

|


|}}


1956.75

Standard Gun

Using Shell Type 1 (75 Damage):


Theoretical Damage Per Minute
Nominal DPM: 1956.75
50% Crew: 1579.5
75% Crew: 1809
100% Crew: 2040.75
100% Crew
Vents: 2086.5
Rammer: 2267.25
Both: 2318.25
Both and BiA: 2370
Both and Max Crew %: 2472.75

Advantageous Damage Per Minute
First-shot DPM: 2031.75
50% Crew: 1654.5
75% Crew: 1884
100% Crew: 2115.75
100% Crew
Rammer: 2342.25
Vents: 2161.5
Both: 2393.25
Both and BiA: 2445
Both and Max Crew %: 2547.75

See here, here, or here for more information.

Standard Gun

Using Shell Type 2 (75 Damage):


Theoretical Damage Per Minute
Nominal DPM: 1956.75
50% Crew: 1579.5
75% Crew: 1809
100% Crew: 2040.75
100% Crew
Vents: 2086.5
Rammer: 2267.25
Both: 2318.25
Both and BiA: 2370
Both and Max Crew %: 2472.75

Advantageous Damage Per Minute
First-shot DPM: 2031.75
50% Crew: 1654.5
75% Crew: 1884
100% Crew: 2115.75
100% Crew
Rammer: 2342.25
Vents: 2161.5
Both: 2393.25
Both and BiA: 2445
Both and Max Crew %: 2547.75

See here, here, or here for more information.

Standard Gun

Using Shell Type 3 (100 Damage):
With wholly penetrating hits

Theoretical Damage Per Minute
Nominal DPM: 2609
50% Crew: 2106
75% Crew: 2412
100% Crew: 2721
100% Crew
Vents: 2782
Rammer: 3023
Both: 3091
Both and BiA: 3160
Both and Max Crew %: 3297

Advantageous Damage Per Minute
First-shot DPM: 2709
50% Crew: 2206
75% Crew: 2512
100% Crew: 2821
100% Crew
Rammer: 3123
Vents: 2882
Both: 3191
Both and BiA: 3260
Both and Max Crew %: 3397

See here, here, or here for more information.


|


|}}

|


|}}


1956.75

Standard Gun

Using Shell Type 1 (75 Damage):


Theoretical Damage Per Minute
Nominal DPM: 1956.75
50% Crew: 1579.5
75% Crew: 1809
100% Crew: 2040.75
100% Crew
Vents: 2086.5
Rammer: 2267.25
Both: 2318.25
Both and BiA: 2370
Both and Max Crew %: 2472.75

Advantageous Damage Per Minute
First-shot DPM: 2031.75
50% Crew: 1654.5
75% Crew: 1884
100% Crew: 2115.75
100% Crew
Rammer: 2342.25
Vents: 2161.5
Both: 2393.25
Both and BiA: 2445
Both and Max Crew %: 2547.75

See here, here, or here for more information.

Standard Gun

Using Shell Type 2 (75 Damage):


Theoretical Damage Per Minute
Nominal DPM: 1956.75
50% Crew: 1579.5
75% Crew: 1809
100% Crew: 2040.75
100% Crew
Vents: 2086.5
Rammer: 2267.25
Both: 2318.25
Both and BiA: 2370
Both and Max Crew %: 2472.75

Advantageous Damage Per Minute
First-shot DPM: 2031.75
50% Crew: 1654.5
75% Crew: 1884
100% Crew: 2115.75
100% Crew
Rammer: 2342.25
Vents: 2161.5
Both: 2393.25
Both and BiA: 2445
Both and Max Crew %: 2547.75

See here, here, or here for more information.

Standard Gun

Using Shell Type 3 (100 Damage):
With wholly penetrating hits

Theoretical Damage Per Minute
Nominal DPM: 2609
50% Crew: 2106
75% Crew: 2412
100% Crew: 2721
100% Crew
Vents: 2782
Rammer: 3023
Both: 3091
Both and BiA: 3160
Both and Max Crew %: 3297

Advantageous Damage Per Minute
First-shot DPM: 2709
50% Crew: 2206
75% Crew: 2512
100% Crew: 2821
100% Crew
Rammer: 3123
Vents: 2882
Both: 3191
Both and BiA: 3260
Both and Max Crew %: 3397

See here, here, or here for more information.
Damage Per Minute


|


|}}


0.41 m 

With 50% Crew: 0.508 m
With 75% Crew: 0.443 m
With 100% Crew: 0.393 m
With BiA: 0.384 m
With BiA and Vents: 0.376 m
Maximum possible: 0.361 m

For more details, see Crew


|


|}}


0.37 m 

With 50% Crew: 0.458 m
With 75% Crew: 0.4 m
With 100% Crew: 0.355 m
With BiA: 0.347 m
With BiA and Vents: 0.339 m
Maximum possible: 0.325 m

For more details, see Crew
Accuracy


|


|}}


1.7 s 

With 50% Crew: 2.106 s
With 75% Crew: 1.839 s
With 100% Crew: 1.63 s
With GLD: 1.482 s
With BiA: 1.594 s
With BiA and Vents: 1.559 s
With both and GLD: 1.418 s
Maximum possible: 1.359 s

For more details, see Crew or Equipment


|


|}}


1.7 s 

With 50% Crew: 2.106 s
With 75% Crew: 1.839 s
With 100% Crew: 1.63 s
With GLD: 1.482 s
With BiA: 1.594 s
With BiA and Vents: 1.559 s
With both and GLD: 1.418 s
Maximum possible: 1.359 s

For more details, see Crew or Equipment
Aim time
1820 deg/s Gun Traverse Speed
26° Gun Arc
-7°/+13°-7°/+13° Elevation Arc
115115 rounds Ammo Capacity
General
2020 % Chance of Fire


310 m 

With 50% Crew: 243.6 m
With 75% Crew: 276.8 m
With 100% Crew: 310 m
With Recon and Situational Awareness: 325.7 m
With Coated Optics: 341 m
With Binocular Telescope: 387.5 m
Maximum possible: 443.8 m

For more details, see Skills or Equipment


310 m 

With 50% Crew: 243.6 m
With 75% Crew: 276.8 m
With 100% Crew: 310 m
With Recon and Situational Awareness: 325.7 m
With Coated Optics: 341 m
With Binocular Telescope: 387.5 m
Maximum possible: 443.8 m

For more details, see Skills or Equipment
View Range


|


|}}


400 m 

With 50% Crew: 322.9 m
With 75% Crew: 369.8 m
With 100% Crew: 417.2 m
With 100% Signal Boost: 480 m
When affected by 100% Relaying: 440 m
Maximum possible: 600.5 m

For more details, see Skills or Equipment


|


|}}


550 m 

With 50% Crew: 444 m
With 75% Crew: 508.5 m
With 100% Crew: 573.6 m
With 100% Signal Boost: 660 m
When affected by 100% Relaying: 605 m
Maximum possible: 825.7 m

For more details, see Skills or Equipment
Signal Range
Values are Stock - click for Top


V

annoGB73_AT2.png

425000

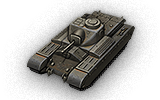
The AT 2 is a British tier 5 tank destroyer.

적 방어선을 돌파할 강습 전차로 설계되었다. 1943년 5월 15일에 설계가 완료되었으나 시제 전차는 제작되지 않았다. 이 기획안은 또 다른 중 강습 전차인 A39 Tortoise 개발을 위한 발판이 되었다.

The AT 2 is radically different from its predecessors, it's the first true British Tank Destroyer in its line. The AT 2 is very slow, boasts tough all-round armor, and has an increased hitpoint pool. The AT 2, unlike tank destroyers of other nations, is a front-line tank. It is most effective leading the team while drawing and deflecting enemy fire, albeit while moving slowly. The AT 2 is a spearhead breakthrough tank but absolutely requires supporting teammates; it has very poor viewrange and is extremely vulnerable to flanking. A flanked AT 2 should keep its armor towards the enemies in front, it must rely on its teammates to deal with the flank because its turning speed is just too slow.

The AT 2 leads to the AT 8, and the Achilles.

Modules / Available Equipment and Consumables

Modules

주포

주포

단계 주포 평균 관통력 (mm) 연사력 100m에서의 분산도 조준 시간 일반 경험치 중량 (톤) 가격,
IV QF 6-pdr AT Gun Mk. III 105/170/30 75/75/100 26.09 0.41 1.7 0 400 27000
V QF 6-pdr AT Gun Mk. V 110/180/30 75/75/100 26.09 0.37 1.7 3700 450 35000
V 3.7-inch AT Howitzer 47/110/30 370/280/100 8 0.49 2.3 2300 393 35000
엔진

엔진

단계 엔진 엔진 출력 (마력) 충돌 시 화재 발생 확률 일반 경험치 중량 (톤) 가격,
III Nuffield Liberty Mk. II 340 20 0 383 500
IV Nuffield Liberty Mk. III 395 20 1100 383 11500
현가장치

현가장치

단계 현가장치 한계 중량 회전 속도 (도/초) 일반 경험치 중량 (톤) 가격,
IV AT 2 41 18 0 11000 4050
V AT 2 Mk. II 44 20 2000 11000 9000
무전기

무전기

단계 무전기 통신 범위 (m) 일반 경험치 중량 (톤) 가격,
VI WS No. 19 Mk. I 400 0 40 15000
VII WS No. 19 Mk. II 450 3600 40 21000
VIII WS No. 19 Mk. III 550 4000 40 22000

Compatible Equipment

Compatible Consumables

Player Opinion

Pros and Cons

Pros:


  • Extremely strong all-around armor, capable of bouncing shots from even some tier VII tanks
  • Above average HP for a tier 5 TD
  • Great damage per minute
  • Very fast firing, quick aiming, and relatively accurate gun
  • High penetration APCR rounds


Cons:


  • Huge commander's cupola (although it's relatively strong)
  • Very weak gun mantlet with no armor behind it
  • Slowest tank destroyer of its tier, very slow traverse speed
  • Far below average firepower for a tier 5 TD, still having the same top gun options the tier 3 Valentine TD had
  • Close to uselessness in tier 7 matches


Performance

With very thick frontal and substantial rear and side armor, the AT 2 is an intimidating opponent. Even though this TD is extremely well armored, it has weakspots that are easy to hit up-close, a very slow top speed, and a sluggish traverse speed. Furthermore, its armor is weaker than advertised, especially around the gun mantlet and the upper glacis. It is very easy to get killed at close range, be it from weakspot-snipers or faster tanks. Do not get overconfident with the AT 2's armor, especially against tier 7s. Leading a slow charge with your frontal armor will lead your team to victory, but be sure you have tanks who can help defend your rear. In a Tier 5 battle, the AT 2's armor is very difficult to break and most shots to the rear and sides and be deflected with simple angling.

The accurate and rapid-firing 6-pounder gun offers good damage per minute and ensures no enemy wants to stay in your path. Do note that, due to very poor mobility and speed, once the AT 2 chooses a route it is committed to it for the rest of the battle. Always try to keep moving whenever possible, firstly because the AT 2 is an easy target for artillery and secondly because the AT 2 won't be able to keep with its team; or worse, discourage the team from pushing. The AT 2 is big and has a very poor camo value and is thus practically impossible to hide. This coupled with a very poor view range makes the AT 2 an ineffective camper. City maps that provide cover from arty and protection from flanking are the best places for the AT 2, while an open field is where you do not want to find yourself.

The AT 2 is very very slow, comparable to a Maus. Its top speed keeps it at a modest speed even when downhill; this limit also makes being pushed by allies ineffective. Furthermore, the weak engine power means running into trees and stone fences will result in a serious speed decrease. Speed is the biggest flaw of the AT 2 and makes it a tank that is reliant on its team to protect its rear and to spot for it. The AT 2's weaknesses can be minimized by playing with constant support. Once you manage to make it to the enemy you'll find the AT 2's excellent armor and good gun extremely rewarding.


Early Research

  • The 3.7-inch AT Howitzer and WS No. 19 Mk. II Radio carry over from the Alecto. Mount them immediately.
  • Research the QF 6-pdr AT Gun Mk. V and Nuffield Liberty Mk. III Engine in whichever order you want to.
  • Finally, research the AT 2 Mk. II Suspension.


Suggested Equipment


Tank Gun Rammer Improved VentilationCoated Optics Toolbox Spall Liner 


Gallery

Historical Info

AT-2 is a Nuffield Mechanizations Limited design from May 1943. Total weight was estimated at 41 tons, and the vehicle was running on torsion bar suspension. It was introduced along with the AT-1 design, which had a turret that could mount a 75 mm high velocity gun or a 95 mm howitzer. With AT-2, it was decided an assault tank doesn't need a turret and so it was replaced with a fully enclosed superstructure. Both designs shared the same hull, but since AT-2 was supposed to have a casemate construction, it should have been around 4 tons lighter, and considerably cheaper to produced compared to the AT-1.


Historical Gallery


UK
Light Tanks


Cruiser Mk. I • M2 • Cruiser Mk. II • Light Mk. VIC • Valentine • Stuart I-IV • Cruiser Mk. III • Cruiser Mk. IV • Covenanter • A46 • Crusader • GSR 3301 Setter • FV1066 Senlac • LHMTV • GSOR3301 AVR FS • Manticore

Medium Tanks


Vickers Medium Mk. I • Vickers Medium Mk. II • Vickers Medium Mk. III • Matilda • Matilda LVT • Grant • AC 1 Sentinel • Cavalier • Valiant • Sherman III • Matilda Black Prince • Sherman Firefly • Cromwell • AC 4 Experimental • Cromwell B • Sherman VC Firefly • Comet • Centurion Mk. I • FV4202 • Chieftain/T95 • Centurion Mk. 5/1 RAAC • Chimera • Cobra • Centurion Mk. 7/1 • Centurion Action X

Heavy Tanks


Churchill I • Excelsior • Churchill VII • TOG II* • Black Prince • FV201 (A45) • Charlemagne • Caliban • Gonsalo • Caernarvon • Caernarvon Action X • FV4201 Chieftain Proto • Conqueror • FV215b • Super Conqueror • T95/FV4201 Chieftain

Tank Destroyers


Universal Carrier 2-pdr • Valentine AT • Alecto • Archer • AT 2 • Churchill Gun Carrier • Achilles • AT 8 • Excalibur • Challenger • AT 15A • AT 7 • GSOR 1008 • AT 15 • Charioteer • Turtle Mk. I • Tortoise • FV4004 Conway • FV215b (183) • FV4005 Stage II • FV217 Badger

Self-Propelled Guns


Loyd Gun Carriage • Sexton II • Sexton I • Birch Gun • Bishop • FV304 • Crusader 5.5-in. SP • FV207 • FV3805 • Conqueror Gun Carriage

Tank Destroyers
USA


T3 HMC • T56 GMC • M8A1 • T40 • M10 Wolverine • T67 • T78 • M18 Hellcat • M36 Jackson • M56 Scorpion • T28 Concept • Super Hellcat • T25/2 • T25 AT • TS-5 • T28 • T28 Prototype • T30 • T95 • T110E3 • T110E4

UK


Universal Carrier 2-pdr • Valentine AT • Alecto • Archer • AT 2 • Churchill Gun Carrier • Achilles • AT 8 • Excalibur • Challenger • AT 15A • AT 7 • GSOR 1008 • AT 15 • Charioteer • Turtle Mk. I • Tortoise • FV4004 Conway • FV215b (183) • FV4005 Stage II • FV217 Badger

Germany


Panzerjäger I • Marder II • StuG III Ausf. B • Pz.Sfl. IC • Jagdpanzer 38(t) Hetzer • Marder 38T • StuG IV • Pz.Sfl. IVc • StuG III Ausf. G • Dicker Max • Jagdpanzer IV • Nashorn • E 25 • Krupp-Steyr Waffenträger • Jagdpanther • Sturer Emil • Ferdinand • Kanonenjagdpanzer 105 • Rheinmetall Skorpion G • Rheinmetall Skorpion • Jagdpanther II • 8,8 cm Pak 43 Jagdtiger • Rhm.-Borsig Waffenträger • Jagdtiger • Waffenträger auf Pz. IV • Grille 15 • Jagdpanzer E 100 • Waffenträger auf E 100

France


Renault FT AC • FCM 36 Pak 40 • Renault UE 57 • Somua SAu 40 • M10 RBFM • S35 CA • ARL V39 • AMX AC mle. 46 • AMX AC mle. 48 • AMX Canon d'assaut 105 • AMX 50 Foch • AMX 50 Foch (155) • AMX 50 Foch B

USSR


AT-1 • SU-76I • SU-85B • SU-76M • SU-85 • SU-85I • SU-100 • SU-100Y • ISU-122S • SU-152 • SU-100M1 • SU-122-44 • ISU-152 • ISU-130 • KV-4 KTTS • T-103 • SU-130PM • ISU-152K • SU-101 • K-91-PT • Object 704 • Object 263 • Object 268 • Object 268 Version V • Object 268 Version 4

China


T-26G FT • M3G FT • SU-76G FT • 60G FT • WZ-131G FT • T-34-2G FT • WZ-111-1G FT • WZ-120-1G FT • WZ-111G FT • WZ-120G FT • WZ-113G FT • 114 SP2

Japan