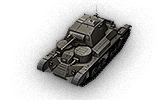
Cruiser Mk. I

|
Article requires additional modification The design and/or content of this article do not conform to wiki standards. Missing Content
|
Cruiser Mk. I

Mouse over "
| 0 |
| 25551 HP Hit Points |
| 12.75/13.55.74/13.5 t Weight Limit |
- 전차장
- 포수
- 포수
- 조종수
- 무전수
- 장전수
| 120120 hp Engine Power |
| 35/12 km/h Speed Limit |
| 3535 deg/s Traverse |
| 9.4120.91 hp/t Power/Wt Ratio |
| NoNo Pivot |
| // mm Hull Armor |
| 14/12/1414/12/14 mm Turret Armor |
AP/APCR/HE
AP/APCR/HE Shells |
| 45/45/6045/45/60 HP Damage |
| 40/65/2335/58/23 mm Penetration |
|
16.67 r/m ▲
17.92 r/m Standard Gun ▲ Rate of Fire Magazine-fed Gun |
|
750.15 ▲
Standard Gun
▼
Standard Gun
▲
806.4 Standard Gun ▲
Magazine-fed Gun
▼
Clip-fed Gun
▲ Damage Per Minute Clip-fed Gun |
|
0.48 m ▲
0.52 m With 50% Crew: 0.595 m ▲ Accuracy With 50% Crew: 0.644 m |
| 2.5 s 2.5 s Aim time |
| 3232 deg/s Turret Traverse |
| 360° Gun Arc |
| -15°/+20°-15°/+20° Elevation Arc |
| 120180 rounds Ammo Capacity |
| 2020 % Chance of Fire |
| 280 m 280 m View Range |
| 250 m 250 m Signal Range |
I
0
The Cruiser Mk. I is a British tier 1 light tank.
영국 병기고의 첫 순항 전차이다. 빅커스사가 1934년에 개발을 시작하였다. 총 125대가 1936년부터 1937년까지 양산되었다.
The first tank on one of the two branches of the heavy tank branch. This tank may be light, but it is a combat tank and as such it is slow and packs reasonable firepower, with a selection of two guns: an accurate and fast-firing 2-pounder, or a 40mm semi-automatic with good damage.
The Cruiser Mk. I leads to the Cruiser Mk. II.
Modules / Available Equipment and Consumables
Modules

주포
| 단계 | 주포 | 평균 관통력 (mm) | 연사력 | 100m에서의 분산도 | 조준 시간 | 일반 경험치 | 중량 (톤) | 가격, | |
|---|---|---|---|---|---|---|---|---|---|
| I | QF 2-pdr Mk. IX prototype | 40/65/23 | 45/45/60 | 16.67 | 0.48 | 2.5 | 0 | 130 | 0 |
| II | 40 mm Pom-Pom prototype | 35/58/23 | 45/45/60 | 18.64 | 0.52 | 2.5 | 90 | 160 | 3000 |

엔진
| 단계 | 엔진 | 엔진 출력 (마력) | 충돌 시 화재 발생 확률 | 일반 경험치 | 중량 (톤) | 가격, |
|---|---|---|---|---|---|---|
| I | Rolls-Royce Phantom | 120 | 20 | 0 | 340 | 0 |

현가장치
| 단계 | 현가장치 | 한계 중량 | 회전 속도 (도/초) | 일반 경험치 | 중량 (톤) | 가격, |
|---|---|---|---|---|---|---|
| I | A9 Mk. I | 13.5 | 35 | 0 | 3000 | 0 |

무전기
| 단계 | 무전기 | 통신 범위 (m) | 일반 경험치 | 중량 (톤) | 가격, |
|---|---|---|---|---|---|
| II | WS No. 14 | 250 | 0 | 40 | 0 |
Compatible Equipment
Compatible Consumables
Player Opinion
Pros and Cons
Pros:
- Very good stock gun
- Insane penetration with the stock gun using APCR, comparable to tier 5 guns
- 2 Gunners, which is good if you decide to keep the tank
- Extreme gun depression, one of the best in the game
- Great gun handling with both guns
Cons:
- Very weak armor
- Poor speed
- Lacks agility
Performance
This tank is rather slow, with a top speed of only 40 km/h, and it is certainly not agile either. Combined with its weak armor, you will die quickly if caught in the open. However, this tank does have an excellent stock gun, which is both accurate and fast-firing. You can also use the 40mm Pom Pom gun, which is a semi-automatic cannon and can deal extremely high damage with 4 fast shots, but it is only suited for close range. Given the Cruiser Mk. 1's armor values, close quarter fights are not advisable. Plus, the stock gun has better penetration and the same damage values, therefore you have no real reason to want to spend money on the 40mm. This tank can be very rewarding when played in a support role, staying behind the front line and supporting the main force by picking off enemy tanks with its rather accurate gun.
Compared to the Cruiser Mark III, both tanks have the same guns, but the Mark I has better gun handling while the Mark III has better speed and mobility. As a result, the Mark I plays more like a sniper, while the Mark III is better off flanking.
Early Research
- Research the AEC Type 179 engine first for much needed horsepower.
- Next research the upgraded suspension for improved maneuverability and weight capacity.
- You might want a good radio to know where it is that your allies need fire support.
- Go from there.
Suggested Equipment
![]()
![]()
![]()
Gallery


Historical Info
Cruiser, Mk I (A9) was a British cruiser tank of the interwar period. It was the first cruiser tank: a fast tank designed to bypass the main enemy lines and engage the enemy's lines of communication, along with enemy tanks. TheCruiser Mk II was a heavier armoured adaptation of the Mark I developed at much the same time.
Development history
In 1936 the British War Office designated two different kinds of tanks for future development: heavily armoured infantry tanksto be used in close co-operation with infantry during attacks, and fast mobile cruiser tanks designed to make forays deep into enemy territory. In 1934 Sir John Carden of Vickers-Armstrong was asked to provide a "reasonably cheap tank" as a replacement for some of the mediums then in use. The pilot model of his design was finished in 1936 and given the designation A9E1. It incorporated the best features of the earlier Mk III Light Tank, and was powered by a commercial petrol engine. However, this was still in the time of the Great depression and the tank had a number of cost-cutting measures applied. It was the first British tank to have a centrally located turret and to have powered traverse. The system was by Nash & Thompson and similar to that being introduced on the Vickers Wellington bomber aircraft. The armour was light with a maximum of 14 mm thickness, many armour faces were vertical, and there were numerous shot traps but it could achieve 25 mph and carried the new high velocity 2pdr gun.
The driver's compartment and the fighting compartments were not separated. As well as the turret armament, which consisted of a QF 2-pounder (40 mm) gun and a coaxial Vickers machine gun, there were two small turrets either side of the driver's compartment, each sporting one more machine-gun. Both these smaller turrets were permanently manned, which gave the tank a total crew of 6 (Commander, gunner, loader, driver and two machine-gunners).The A9E1 was tested against other designs and -although lacking in some areas - in 1937 it was accepted as an interim design until a Christie suspension cruiser tank could be delivered. An order was placed for 125. Seventy-five were built byHarland and Wolff, and the other 50 were built by Vickers. Originally a Rolls-Royce car engine was used, but this proved underpowered and was replaced by an AEC bus engine.
The later Valentine Infantry tank essentially used the same lower hull and suspension, though with considerably more armour. The A9 weighed 12 tons, was 5.8 metres long, 2.65 metres high, 2.5 metres wide, and had a top speed of 25 mph on road and 15 mph off. Its maximum road range was 150 miles. The ammunition load was 100 2-pounder rounds and a total of 3,000 rounds for the three Vickers machine guns.
Combat history
The Mark I cruiser began to be delivered in January 1939. The Cruiser was an effective tank in the French, Greek and early North African campaigns. The 2 pdr gun was lethal against the early Italian tanks encountered during the North African campaign and could hold its own against Rommel's early Panzer IIs and IIIs. The A9's 2-pounder gun could also breach the 20 – 30 mm of protective steel on later opponents such as the Panzer III ausf D and the Panzer IVausf D variants. It was effective until the Germans introduced the more thickly armoured Panzer IV ausf E variant to the desert in Spring 1941. However, the minimal armour made the A9 an easy kill for most Axis anti-tank weapons. Also problematic was the lack of High Explosive shells for the 2 pdr gun and even worse the lack of AP for the 95 mm gun on the Close Support version. Another issue was that the areas around the front machine gun turrets created a frontal surface that was more vulnerable to enemy fire than it would have been had it been a flat plate, let alone a sloped glacis. The mechanical unreliability of the Cruiser was also a disadvantage. In particular, tracks were easily slewed causing difficulties.
Variants
Mark I (A9)’’
- Used by the 1st Armoured Division in the Battle of France (1940). Used by the 2nd and 7th Armoured Divisions in North Africa until 1941.
Mark I CS
- Had a 3.7 inch (94 mm) /L15 breech-loaded mortar instead of the 2-pounder gun. 40 rounds, mostly smoke, were carried.
Historical Gallery


