Covenanter
Covenanter

Mouse over "
| 410,000 |
| 510108 HP Hit Points |
| 18.15/18.28.63/20.5 t Weight Limit |
- 전차장 (무전수)
- 포수
- 조종수
- 장전수
| 300400 hp Engine Power |
| 55/22 km/h Speed Limit |
| 3840 deg/s Traverse |
| 16.5346.35 hp/t Power/Wt Ratio |
| NoNo Pivot |
| // mm Hull Armor |
| 39/19.5/2539/19.5/25 mm Turret Armor |
AP/APCR/HE
HE/HEAT Shells |
| 50/50/60175/110/60 HP Damage |
| 78/121/2338/100/23 mm Penetration |
|
28.57 r/m ▲
15 r/m Standard Gun ▲ Rate of Fire Standard Gun |
|
1428.5 ▲
Standard Gun
▼
Standard Gun
▲
2625 Standard Gun ▲
Standard Gun ▼
Standard Gun
▲ Damage Per Minute Standard Gun
|
|
0.36 m ▲
0.49 m With 50% Crew: 0.446 m ▲ Accuracy With 50% Crew: 0.607 m |
| 1.7 s 2.3 s Aim time |
| 4848 deg/s Turret Traverse |
| 360° Gun Arc |
| -15°/+25°-15°/+20° Elevation Arc |
| 26088 rounds Ammo Capacity |
| 2020 % Chance of Fire |
| 330 m 350 m View Range |
| 375 m 550 m Signal Range |
V
410000
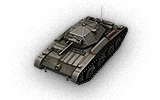
The Covenanter is a British tier 5 light tank.
대향 피스톤 엔진, 정면 냉각기, 용접 공정 등 여러 혁신적 설계를 채용한 신형 순항 전차로 1939년 4월 17일에 생산이 시작되었다. 기본형 4종이 총 1,771대 양산되었으며 대부분 훈련 용도로 사용되었다.
The Covenanter is an above average paced tank that is well suited for small incursions, covering the flanks from enemy incursions, or with dealing with lower tier tanks or other scouts. The turret design drops the spaced armor in exchange for sloped armor on the sides. Unfortunately, the Covenanter has very weak rear armor, and when hit the engine will almost always burst into flames.
The Covenanter leads to the Crusader.
Modules / Available Equipment and Consumables
Modules

주포
| 단계 | 주포 | 평균 관통력 (mm) | 연사력 | 100m에서의 분산도 | 조준 시간 | 일반 경험치 | 중량 (톤) | 가격, | |
|---|---|---|---|---|---|---|---|---|---|
| IV | QF 2-pdr Mk. X | 78/121/23 | 50/50/60 | 28.57 | 0.36 | 1.7 | 0 | 130 | 6000 |
| IV | 40 mm Pom-Pom | 49/71/23 | 45/45/60 | 36.92 | 0.41 | 1.7 | 1000 | 160 | 20000 |
| IV | QF 40 mm Mk. VI Bofors | 86/112/23 | 60/60/75 | 33.33 | 0.41 | 1.9 | 1200 | 470 | 24000 |
| IV | OQF 3-inch Howitzer Mk. I | 38/100/23 | 175/110/60 | 13.95 | 0.53 | 2.3 | 2100 | 116 | 30000 |

엔진
| 단계 | 엔진 | 엔진 출력 (마력) | 충돌 시 화재 발생 확률 | 일반 경험치 | 중량 (톤) | 가격, |
|---|---|---|---|---|---|---|
| IV | Meadows D.A.V. | 300 | 20 | 0 | 724 | 9000 |
| IV | Meadows D.A.V. O.C. | 400 | 20 | 900 | 724 | 11200 |

현가장치
| 단계 | 현가장치 | 한계 중량 | 회전 속도 (도/초) | 일반 경험치 | 중량 (톤) | 가격, |
|---|---|---|---|---|---|---|
| IV | Covenanter Mk. I | 18.2 | 38 | 0 | 4500 | 3000 |
| V | Covenanter Mk. III | 20.5 | 40 | 1900 | 4500 | 8400 |

무전기
| 단계 | 무전기 | 통신 범위 (m) | 일반 경험치 | 중량 (톤) | 가격, |
|---|---|---|---|---|---|
| V | WS No. 9 | 375 | 0 | 40 | 3600 |
| VI | WS No. 19 Mk. I | 400 | 1480 | 40 | 15000 |
| VII | WS No. 19 Mk. II | 450 | 3600 | 40 | 21000 |
| VIII | WS No. 19 Mk. III | 550 | 4000 | 40 | 22000 |
Compatible Equipment
Compatible Consumables
Player Opinion
Pros and Cons
Pros:
- Fast reload
- Good accuracy
- Fast & maneuverable tank
- Good gun depression
- QF 2-pdr Mk. X has high penetration and low cost for APCR shells
Cons:
- Weak guns
- Engine almost always catches fire when hit
- Slow traverse speed
- Weak armor
Performance
The Covenanter does best when it's able to flank an enemy and dish out damage on the sides. It outpaces almost all other tier IV light and medium tanks, thanks to its higher top speed and increased maneuverability compared with earlier British light tanks. The thin front armor was fixed with 0.8.2 and the sloped front armor is effective now. Hits to the rear are a serious problem as they frequently result in engine damage. This provides even further encouragement for you to get up on an enemy's sides or circle slower targets. Slugging it out head-on is the worst way to make use of this tank.
It has a very good rate of fire and aim time, but the gun's penetration won't get you far if you try dealing with more than that. The Covenanter tends to be useless when dealing with heavy tanks of tier 4 and above - however, when using the 2pdr Mk. X and flanking them, it is possible to penetrate even a KV-1 if you have the right shot. The Covenanter's strength lies in its mobility, outflanking and distracting heavy targets to deprive them of track movement while the other tanks destroy them, or simply to deal with any other target that attempts to cross your defense.
Despite the mobility, this tank is very hard to turn in place. Short turns will be impossible at high speed. Because of this, attacking while the opponent is busy with another tank will give you a much better chance of survival.
Early Research
- The 40 mm Pom Pom and the WS No. 19 Mk. I and Mk. II radios carry over from the A13 Mk. II Cr. Tank Mk. IV and can be installed immediately. The QF 40 mm Mk. VI gun also carries over, but it requires the second turret.
- The stock suspension is maxed out from the get-go. You can't even mount equipment. However, the second engine, the second turret, nor the OQF 3-inch Howitzer Mk. I require any additional weight capacity, so you can't go wrong no matter what you choose.
- Option 1: Research the OQF 3-inch Howitzer Mk. I.
- Option 2: Research the second turret first if you know you want the QF 40 mm Mk. VI auto-cannon. There is no decrease in traverse speed, so there's no downside to the turret. You'll also need to either research the upgraded suspension or add the Enhanced Christie Suspension equipment to increase the weight capacity.
- Option 3: Researching the Meadows D.A.V. O.C. engine will provide an additional 60 horsepower, but at the cost of increasing the chance of fire to a whopping 40%! Nevertheless, you'll want the extra 60 horsepower.
- Go from there.
- It's a good idea to research the WS No. 19 Mk. III before moving on to the next tank.
Suggested Equipment
![]()
![]()
![]()
![]()
Gallery


Historical Info
Designed by London, Midland and Scottish Railway as a better armoured replacement for the Cruiser Mark IV, it was ordered into production in 1939 before pilot models were built. Problems with the design only became apparent after production was under way.
Although it equipped British armoured divisions in the home defence and training roles, poor engine cooling made it unfit for use overseas in hot climates and it never saw combat. In 1943 it was declared obsolete after more than 1,700 had been built.
Development
A pilot model. Note radiator covers at the left front. Note also the Valentine-type gun mantlet. Most production Covenanters had a different type of mantlet.
In 1938, the War Office had issued a requirement for a new, better armoured "heavy" cruiser tank to replace the Cruiser IV. Nuffield's A16 (and the A14) design was found to be too expensive, and in 1939 a cheaper and lighter cruiser tank - under General Staff specification A13 Mk III Cruiser Mark V - was chosen to be developed. It had nothing apart from Christie suspension in common with the other A13 specifications.
The initial specification required a QF 2 pounder gun, at least one machine gun, the same A13 Christie suspension in a lower hull, epicyclic steering transmission and "armour standard" of 30 mm. The 30 mm referred to any vertical plate having to be 30 mm thick, angled surfaces (through the principles of sloped armour) could be thinner so long as they were at least as effective as a 30 mm thick vertical plate.
From these a design using many sloped surfaces was chosen to keep the weight low. To keep the silhouette low the suspension used cranked arms and a low profile engine was envisaged. The engine to specifically designed for it was to deliver at least 300 hp. The Wilson transmission and steering of the A16 would be used.
Design work was by the London, Midland and Scottish Railway Company (LMS). They had no prior experience in the design and production of fighting vehicles, they had been invited to participate under a Government policy that British companies should develop necessary skills in expectation of war. The design assumed a welded hull rather than the usual rivetting. The turret was designed by Nuffield, with Henry Meadows designing a new low profile engine for it. On 17 April, before even a single prototype was produced, the first 100 vehicles were ordered from the LMSR. Additional orders soon followed, with English Electric and Leyland Motors joining the production effort, for a final production total of 1,771 Covenanters. Nuffield was also approached, but preferred to design its own offspring of the A13 line, which became the Cruiser Mk. VI Crusader.
Due to the expectations of an imminent war, the design was ordered "off the drawing board". The expectation was that two pilot models would serve for testing and results applied to the production lines.
To meet the engine requirement, a horizontally opposed 12-cylinder design was used. Although flat, it was wide and left no room for radiators in the engine compartment, and so the radiators were situated at the front of the vehicle. The unusual arrangement, although tested in mockup form first, when combined with the rushed design process resulted in serious problems with engine cooling. Even when the systems were redesigned there were problems, and the piping from engine to the radiators heated the fighting compartment. These problems meant that the Covenanter would not be employed in the North African Campaign. Instead, Crusader and American tanks were sent to Africa, while the Covenanters remained in the British Isles.
LMS advised a return to rivetted construction due to doubts about its strength, and rather than risk delays due to a lack of welders, this was accepted. The welded design used two layers of armour plate, the inner being of steel that would weld readily without losing its properties. This two-plate system was retained when the design reverted to rivetted construction. The use of rivetting, along with steel wheels instead of the intended aluminium, and a increase in armour specification to 40 mm to the front of hull and turret increased the weight to a level where the tank suspension was already at maximum load, leaving no room for later development of the design.
A further change was made to the transmission. Rather than risk the availability of the combined Wilson transmission and steering affecting production, the A13 "crash" gear box was used with epicyclic steering units. This had the knock-on effect of a reduced size of cooling fan for the transmission compartment.
The contracts were placed with the manufacturers in 1939. The pilot model (with welded hull) was tested with a favourable outcome in 1940; though the second pilot had cooling issues. The first deliveries of production vehicles were not until after the battle of Dunkirk. Production of turrets lagged behind that of hulls. Although the Covenanter was needed at the time, production continued even when newer better tank designs were waiting for space on production lines.
By late 1943 the Covenanter was considered too weakly armed and armoured to deal with new German tanks. It was decided that neither problem could be addressed without significant changes in the design, so the tank was declared obsolete and all vehicles except the bridgelayer variant were to be scrapped.
Active service
Covenanters of the 2nd (Armoured) Irish Guards, Guards Armoured Division, during an inspection (3 March 1942)
Except for a few trial vehicles, Covenanters were never deployed outside of the British Isles. The Covenanter was used to re-equip the British 1st Armoured Division (six armoured regiments in two brigades) which had lost most of its tanks in the Fall of France. When the 1st was sent to Egypt, the tanks were transferred to the 9th Armoured Division.
Eventually a handful of vehicles were sent to the desert for service trials and were allocated to the REME for maintenance and evaluation. It is not clear if these tanks were ever used in combat although the unit markings indicate they may have been deployed alongside Kingforce with their new 6 pounder-equipped Churchill Mk III tanks.
Covenanters were also used to equip the Guards Armoured Division in 1942 and elements of the 1st Polish Armoured Division when it was formed in the UK; they were replaced before these units were sent to the front-line, except for a few bridgelayers both divisions retained and used in their advance through Belgium and the Netherlands. The only Covenanter gun armed tank known to have been lost to enemy action was that destroyed by a German air raid on 31 May 1942 in Canterbury.
The Covenanter was declared obsolete in 1943 with orders for the tanks to be scrapped, except for those modified for auxiliary roles.
The Observation Post tanks were issued to artillery units to carry Forward Observation Officers for Royal Artillery batteries. In an armoured division, there were two OP tanks for each RHA or field battery. Medium gun batteries had just one. Command tanks were similar to OP tanks, but had only two No. 19 sets - one on the regiment radio net and the other on the brigade net.
Covenanter Bridgelayers were used by the 1st Czechoslovak Armoured Brigade during the Siege of Dunkirk from October 1944 to May 1945. The bridgelayer version was also used by the 4th Armoured Brigade of the Australian Army at Bougainville and Balikpapan during the Pacific Campaign in 1945.
Historical Gallery


Sources and External Links