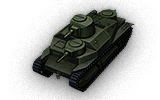
Type 95 Heavy
La conception et/ou le contenu de l'article ne sont pas conformes aux standards du wiki.
Contenu manquant :
- Galerie
- Avis des joueurs : avantages
- Avis des joueurs : inconvénients
- Avis des joueurs : Performance
- Avis des joueurs : Équipement
- Historique
- Galerie historique
- Sources et Liens Externes
Type 95 Heavy

Survoller à la sourie "
[Valeurs du jeu; Valeurs actuelles
- Commandant (Chargeur)
- Pilote de char
- Tireur
- Opérateur radio
- Opérateur radio
IV
166000
Le Type 95 Heavy est un char lourd Japonais de rang 4.
Le char lourd japonais Type 95 a été développé sur la base du Type 91. Ce véhicule à plusieurs tourelles de la période d'entre-deux-guerres incorporait certains éléments de chars allemands et italiens. La tourelle principale disposait d'un canon de 70 mm. En plus, le véhicule comportait un canon de 37 mm et deux mitrailleuses de 6,5 mm. Quatre prototypes ont été fabriqués.
Le Type 95 Heavy marque la fin de la branche des lourds Japonais.
Modules / Équipements et Consommables disponibles
Modules

Canons
| Rang | Canon | Pénétration moyenne (mm) |
Dégâts moyens (PS) |
Cadence de tir (coups/minute) |
Dispersion (à 100m) |
Temps de visée (s) |
Poids (kg) |
Prix (
| |
|---|---|---|---|---|---|---|---|---|---|
| IV | 7.5 cm Tank Gun Type 99 | 71/100/38 | 110/110/175 | 18.18 | 0.4 | 2.3 | 543 | 29000 | |
| III | 7 cm Gun Type 94 | 30/90/35 | 100/100/160 | 18.18 | 0.42 | 2.3 | 325 | 9500 |

Moteurs
| Rang | Moteur | Puissance moteur (ch) |
Probabilité d'incendie à l'impact (%) |
Poids (kg) |
Prix (
| |
|---|---|---|---|---|---|---|
| III | BMW IV Kai | 250 | 20 | 290 | 7800 | |
| IV | BMW IV Kai Ni | 290 | 20 | 290 | 10300 |

Suspensions
| Rang | Suspension | Charge maximale (t) |
Vitesse de rotation (deg/s) |
Rmin | Poids (kg) |
Prix (
| |
|---|---|---|---|---|---|---|---|
| III | Type 95 | 29.6 | 28 | B/2 | 6000 | 1800 | |
| IV | Type 95 No. 2~4 | 32 | 30 | B/2 | 6000 | 4700 |

Radios
| Rang | Radio | Portée du signal radio (m) |
Poids (kg) |
Prix (
| |
|---|---|---|---|---|---|
| II | Type 94 Mk. 4 Otsu | 300 | 40 | 0 | |
| IV | Type 94 Mk. 4 Hei | 350 | 90 | 2350 | |
| VI | Type 96 Mk. 4 Bo | 425 | 50 | 14000 |
Équipements Compatibles

![]()
![]()
![]()
Consommables Compatibles
![]()
![]()
![]()
![]()
![]()
![]()
![]()
![]()
![]()
![]()
![]()
![]()
![]()
![]()
![]()
![]()
![]()
![]()
![]()
![]()
Galerie
L'histoirique de ce char n'a pas été trouvée
| Chars Légers | IRenault Otsu • IIType 95 Ha-Go • IIType 97 Te-Ke • IIIType 97 Chi-Ha • IIIType 98 Ke-Ni • IVType 5 Ke-Ho |
| Chars Moyens | IIChi-Ni • IIType 89 I-Go/Chi-Ro • IVType 1 Chi-He • VType 3 Chi-Nu • VType 3 Chi-Nu Kai • VIType 4 Chi-To • VIIType 5 Chi-Ri • VIIISTA-1 • VIIISTA-2 • IXType 61 • XSTB-1 |
| Chars Lourds | IIIType 91 Heavy • IVType 95 Heavy • VO-I Experimental • VIHeavy Tank No. VI • VIO-I • VIIO-Ni • VIIIO-Ho • IXType 4 Heavy • XType 5 Heavy |
| Chasseurs de chars | |
| Canons AM |