Churchill I
GB08_Churchill_I (Stock)
| 340000 Price |
| 650 Hit Points |
| 38.41 / 39 kgWeight |
- Commander
| 177.8/63.5/50.8Hull Armor(front/sides/rear, mm) |
| 101.6/88.9/88.9Turret Armor(front/sides/rear, mm) |
| 300 h.p.Engine Power |
| 25.7 km/hSpeed Limit |
| 20 deg/secTraverse Speed |
| 50 Standard Shell Damage |
| 78 mmStandard Shell Penetration |
| 2.1 Gun Loading |
| 34 deg/secTurret Traverse Speed |
| 330 mView Range |
| 400 mSignal Range |
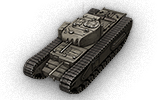
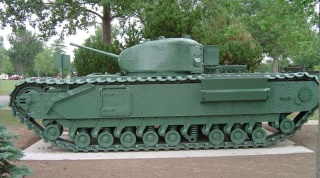
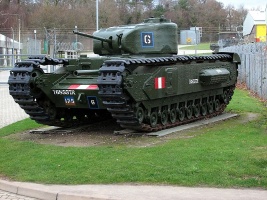
Following the Rule of "Infantry tanks" and just like the Matilda, the Churchill is one slow moving warhorse, but despite that, its top guns boast excellent performance, and it has the thickest frontal armor for its tier. It's an exceptional defender, as it is capable of dealing with any tank that crosses its path up front. Unfortunately the Churchill I has its tracks exposed, increasing its likelihood of becoming tracked. As stock the Churchill's weapon is way under par for a tier V heavy tank. However, with the top gun Vickers 75 mm HV, the Churchill is more than capable of taking on a T1 Heavy Tank or KV-1. The Churchill can be a very fun tank to play, and prove a formidable enemy in the battle field. Most players might find this tank slow and vulnerable to flanking, but as long as you have medium tanks and another heavy covering you, the Churchill I can push flanks and keep enemies at bay with its quick RoF.
Churchill I
Stock
| Level | Turret | Weight (t) | Turret Armor (front/sides/rear, mm) | Gun Traverse Speed (deg/s) | View Range (m) | |
|---|---|---|---|---|---|---|
 |
IV | Churchill I | 7200 | 101.6/88.9/88.9 | 34 | 330 |
| Level | Gun | Weight (t) | Average Penetration (mm) | Rate of Fire | Dispersion at 100 m | Aiming Time | ||
|---|---|---|---|---|---|---|---|---|
 |
IV | QF 2-pdr Mk. X | 130 | 78/121/23 | 50/50/60 | 28.57 | 0.36 | 1.7 |
| Level | Engine | Weight (t) | Engine Power (h.p.) | Chance of Fire on Impact | |
|---|---|---|---|---|---|
 |
IV | Meadows D.A.V. | 724 | 300 | 20 |
| Level | Suspension | Weight (t) | Load Limit | Traverse Speed (deg/s) | |
|---|---|---|---|---|---|
 |
IV | Churchill I | 8150 | 39 | 20 |
| Level | Radio | Weight (t) | Signal Range (m) | |
|---|---|---|---|---|
 |
VI | WS No. 19 Mk. I | 0 | 400 |
Churchill Mk I*
Attack
| Level | Turret | Weight (t) | Turret Armor (front/sides/rear, mm) | Gun Traverse Speed (deg/s) | View Range (m) | |
|---|---|---|---|---|---|---|
 |
IV | Churchill I | 7200 | 101.6/88.9/88.9 | 34 | 330 |
| Level | Gun | Weight (t) | Average Penetration (mm) | Rate of Fire | Dispersion at 100 m | Aiming Time | ||
|---|---|---|---|---|---|---|---|---|
 |
IV | OQF 3-inch Howitzer Mk. I | 116 | 38/100/23 | 175/110/60 | 15 | 0.53 | 2.1 |
| Level | Engine | Weight (t) | Engine Power (h.p.) | Chance of Fire on Impact | |
|---|---|---|---|---|---|
 |
IV | Meadows D.A.V. | 724 | 300 | 20 |
| Level | Suspension | Weight (t) | Load Limit | Traverse Speed (deg/s) | |
|---|---|---|---|---|---|
 |
IV | Churchill I | 8150 | 39 | 20 |
| Level | Radio | Weight (t) | Signal Range (m) | |
|---|---|---|---|---|
 |
VII | WS No. 19 Mk. II | 0 | 450 |
Churchill Mk II
Health
| Level | Turret | Weight (t) | Turret Armor (front/sides/rear, mm) | Gun Traverse Speed (deg/s) | View Range (m) | |
|---|---|---|---|---|---|---|
 |
V | Churchill III | 7500 | 88.9/88.9/76.2 | 34 | 350 |
| Level | Gun | Weight (t) | Average Penetration (mm) | Rate of Fire | Dispersion at 100 m | Aiming Time | ||
|---|---|---|---|---|---|---|---|---|
 |
IV | QF 6-pdr Mk. III | 400 | 105/170/30 | 75/75/100 | 27.27 | 0.43 | 1.9 |
| Level | Engine | Weight (t) | Engine Power (h.p.) | Chance of Fire on Impact | |
|---|---|---|---|---|---|
 |
IV | Bedford Twin-Six | 1531 | 350 | 20 |
| Level | Suspension | Weight (t) | Load Limit | Traverse Speed (deg/s) | |
|---|---|---|---|---|---|
 |
V | Churchill III | 8150 | 43 | 22 |
| Level | Radio | Weight (t) | Signal Range (m) | |
|---|---|---|---|---|
 |
VII | WS No. 19 Mk. II | 0 | 450 |
Churchill Mk II*
Recon
| Level | Turret | Weight (t) | Turret Armor (front/sides/rear, mm) | Gun Traverse Speed (deg/s) | View Range (m) | |
|---|---|---|---|---|---|---|
 |
V | Churchill III | 7500 | 88.9/88.9/76.2 | 34 | 350 |
| Level | Gun | Weight (t) | Average Penetration (mm) | Rate of Fire | Dispersion at 100 m | Aiming Time | ||
|---|---|---|---|---|---|---|---|---|
 |
V | QF 6-pdr Gun Mk. V | 450 | 110/180/30 | 75/75/100 | 27.27 | 0.41 | 1.9 |
| Level | Engine | Weight (t) | Engine Power (h.p.) | Chance of Fire on Impact | |
|---|---|---|---|---|---|
 |
IV | Bedford Twin-Six | 1531 | 350 | 20 |
| Level | Suspension | Weight (t) | Load Limit | Traverse Speed (deg/s) | |
|---|---|---|---|---|---|
 |
V | Churchill III | 8150 | 43 | 22 |
| Level | Radio | Weight (t) | Signal Range (m) | |
|---|---|---|---|---|
 |
VIII | WS No. 19 Mk. III | 0 | 550 |
Churchill Mk III
Attack
| Level | Turret | Weight (t) | Turret Armor (front/sides/rear, mm) | Gun Traverse Speed (deg/s) | View Range (m) | |
|---|---|---|---|---|---|---|
 |
V | Churchill III | 7500 | 88.9/88.9/76.2 | 34 | 350 |
| Level | Gun | Weight (t) | Average Penetration (mm) | Rate of Fire | Dispersion at 100 m | Aiming Time | ||
|---|---|---|---|---|---|---|---|---|
 |
V | 75 mm Gun Mk. V | 500 | 91/144/38 | 110/110/175 | 20 | 0.42 | 1.9 |
| Level | Engine | Weight (t) | Engine Power (h.p.) | Chance of Fire on Impact | |
|---|---|---|---|---|---|
 |
IV | Bedford Twin-Six | 1531 | 350 | 20 |
| Level | Suspension | Weight (t) | Load Limit | Traverse Speed (deg/s) | |
|---|---|---|---|---|---|
 |
V | Churchill III | 8150 | 43 | 22 |
| Level | Radio | Weight (t) | Signal Range (m) | |
|---|---|---|---|---|
 |
VIII | WS No. 19 Mk. III | 0 | 550 |
Churchill Mk V
Attack
| Level | Turret | Weight (t) | Turret Armor (front/sides/rear, mm) | Gun Traverse Speed (deg/s) | View Range (m) | |
|---|---|---|---|---|---|---|
 |
V | Churchill III | 7500 | 88.9/88.9/76.2 | 34 | 350 |
| Level | Gun | Weight (t) | Average Penetration (mm) | Rate of Fire | Dispersion at 100 m | Aiming Time | ||
|---|---|---|---|---|---|---|---|---|
 |
VI | 75 mm Vickers HV | 591 | 145/202/38 | 135/135/175 | 12.5 | 0.36 | 2.3 |
| Level | Engine | Weight (t) | Engine Power (h.p.) | Chance of Fire on Impact | |
|---|---|---|---|---|---|
 |
IV | Bedford Twin-Six | 1531 | 350 | 20 |
| Level | Suspension | Weight (t) | Load Limit | Traverse Speed (deg/s) | |
|---|---|---|---|---|---|
 |
V | Churchill III | 8150 | 43 | 22 |
| Level | Radio | Weight (t) | Signal Range (m) | |
|---|---|---|---|---|
 |
VIII | WS No. 19 Mk. III | 0 | 550 |
Compatible Equipment
Compatible Consumables
Player Opinion
Pros and Cons
Pros:
- Very good camouflage stat
- Very good view range
- Not bad at sidescraping, but turret ruins the armor
Cons:
- Vulnerable tracks; minimal portions of the armor are maximum thickness
- Slow and low maneuverability with large profile
- Terrible gun depression when using the top gun
- The entire Turret is a big and well known armor-weakspot
Performance
The first drawback most players would notice about the Churchill, are that its initial guns do poor damage and penetration compared to other tanks of its tier and while they do have a high rate of fire, players will still find this a nuisance. Luckily, this problem is solved when the tank mounts the 75 mm Mk.V gun. Thus, players facing Churchills should take note of what gun the Churchill has, for the tank will perform very differently depending on the type of gun. A stock Churchill will perform quite poorly, but a fully upgraded Churchill will be an absolute menace to the lower tiers and can easily damage higher tiers. That said the 6-pounder should not be entirely ruled out as a gun choice. It offers better stats than the same gun on the premium Churchill III, and more importantly does not have the awful gun depression of the 75 mm. You will stuggle to do much in tier 7 matches using it though, so be prepared to bring some APCR if you want to go this route.
Another thing to be concerned about with this tank is its speed, which is abysmal. Once the Churchill player sets off in a certain direction, it will be rather difficult to change their path as the Churchill's top speed won't get them there in time. Instead, players should consider where their allies are going and where they can be of most use. Players should not pick long paths as the battle will be over before the Churchill can get to its destination. However, do not hesitate too much when deciding where to go initially or the battle will be over before you can support.
The turret, while having a decent traverse rate, will not be able to contend with multiple targets.Churchill players should be constantly aware of their surroundings and protect their vulnerable sides by finding cover, turning to face the enemy, or keep moving. In short, never take a Churchill head on, Churchills should always take their enemies head on.
A final problem to the Churchill is its size. SPGs should focus Churchills defending choke points, even a glancing hit on the Churchill's side will take out its tracks, leaving it a sitting duck and its slow speed means that an experienced SPG player can predict the Churchill's course. So either pick spots that are hard for artillery to hit, or keep moving.
Take note, that when cornering, or doing tight turns, the Churchill's tracks will be exposed long before its turret and gun, allowing enemies to potentially cause devastating damage on your exposed parts. Instead, players should take corners from far off the edge and angle themselves diagonally when taking the turn, this way it will be harder for hidden enemies to make penetrate the tank due the high angle of the tank's tracks and mantlet, and will allow its gun to be exposed to inflict damage. This strategy is valid on all Churchill Tank Models.
However, on the positive side the Churchill I is an excellent spearhead leader in Tier-5 max games. The thick frontal armor of the Churchill is almost impenetrable by most weaker tanks. You can use this to your advantage in city maps for defending choke points and act as a mobile cover for your teammate in battle. Moreover, the 75mm HV gun is an excellent gun at lower tiers even in close quarters combat due to its impressive rate of fire and excellent penetration. Beware that the side of the Churchill is much less armored and can be proved fatal when flanked.
In Tier 5+ games, the Churchill's armor cannot protect itself as much as Tier-5 max games. You should use the tank's excellent 75 mm cannon to snipe enemies far away and try to avoid head to head combat, if possible. If you find yourself stuck in a head to head situation, try to retreat and suppress the enemy using your better RoF. Remember although the 75 mm is powerful your armor isn't, leading a spearhead charge is the WORST use of this tank in Tier 5+ games. It should really be played as a support, taking up a sniping or secondary position and raining down lead on higher tier tanks. Most tier VI mediums and even some tier VI heavies and VII mediums can still be reliably penetrated by this tanks gun, provided you find a good spot and know the weakpoints.
Early Research
- The WS-19 MkII radio carries over from the Matilda and the Valentine.
- If you came from the Matilda, you can equip the OQF 3-inch Howitzer Mk. I, otherwise you will need to research it, so you can equip it while you research the tracks and turret/guns.
- You will need to research the tracks next, because the 2nd turret + 6 pounder/75mm combination is too heavy for the original tracks.
- Research turret upgrade next, don't equip it unless you came from Valentine and already have the better guns (it is weaker than the original turret).
- If you came from the Matilda, research the better guns and equip them together with the 2nd turret.
- Go from there.
Historical Info
Nomenclature
There is some a ambiguity regarding whom the tank is named after. It may have been named after Winston Churchill, who was Prime Minister of the United Kingdom and Minister of Defense at the time, and had been involved with the development of the tank as a weapon during the First World War. Alternatively, and fitting in with other British tank names, it may have been named after John Churchill, 1st Duke of Marlborough, an ancestor of Winston Churchill and the leader of the British Army in the War of the Spanish Succession . Winston himself reportedly thanked the manufacturers for naming it after his ancestor. However, the duality in the attribution may also have been intentional.
Development history
A20
Initially specified before the outbreak of the Second World War the (General Staff designation) A20 was to be the replacement for the Matilda II and Valentine infantry tanks. In accordance with British infantry tank doctrine and based on the expected needs of World War I-style trench warfare, the tank was required to be capable of navigating shell-cratered ground, demolishing infantry obstacles such as barbed wire, and attacking fixed enemy defences; for these purposes, great speed and heavy armament was not required.
The vehicle was specified initially to be armed with two QF 2 pounder guns each located in a side sponson, with a coaxial BESA machine gun. A third BESA and a smoke projector would be fitted in the front hull. The specification was revised to prefer a turret with 60 mm of armour to protect against ordinary shells from the German 37 mm gun. Outline drawings were produced based on using the A12 Matilda turret and the engine of the Covenanter tank. Detail design and construction of the A20 was given to the Belfast shipbuilders Harland and Wolff who completed four prototypes by June 1940. During the construction period the armament was reconsidered which including fitting either a 6 pounder or a French 75 mm gun in the forward hull. In the end a 3-inch howitzer was chosen. The A20 designs were short-lived however, as at roughly the same time the emergency evacuation of the British Expeditionary Force from Dunkirk occurred. At 43 tons, with a 300 hp flat-12 Meadows engine, the A20 had limited power compared to the 18 ton Covenanter. This was a less serious limitation than it might appear, owing to the British distinction between the high-speed cruiser tanks and the slow-speed infantry tanks. Vauxhall were approached to see if they could build the A20 and one example was sent to Vauxhall at Luton to see if they could provide an alternative engine. To this end they developed a flat-12 petrol engine. For speed of production, this engine was based on a Bedford six-cylinder lorry engine, giving rise to its name of "Twin-Six". Although still a sidevalve engine, the engine was developed with high squish pistons, dual ignition and sodium-cooled exhaust valves in Stellite seats to give 350 bhp.
A22
With France conquered, the scenario of trench warfare in Northern Europe was no longer applicable and the design was revised by Dr. H.E. Merritt, Director of Tank Design at Woolwich Arsenal, based on the combat witnessed in Poland and France. These new specifications, for the A22 or Infantry Tank Mark IV, were given to Vauxhall in June 1940. With German invasion looking imminent and the United Kingdom having lost most of its military vehicles in the evacuation from France, the War Office specified that the A22 had to enter production within the year. By July 1940 the design was complete and by December of that year the first prototypes were completed; in June 1941, almost exactly a year as specified, the first Churchill tanks began rolling off the production line. A leaflet from the manufacturer was added to the User Handbook which stated that it had great confidence in the fundamental design of the tank but that the model had been put into production without time for proper honing and that improvements would be made in time. “ ....Fighting vehicles are urgently required, and instructions have been received to proceed with the vehicle as it is rather than hold up production. All those things which we know are not as they should be will be put right... ”
The document then covered for each area of the tank affected, the fault, precautions to avoid the fault and what was being done to correct the problem.
This hasty development had not come without cost though, as there had been little in the way of testing and the Churchill was plagued with mechanical faults. Most apparent was that the Churchill's engine was underpowered and unreliable, and difficult to access for servicing. Another serious shortcoming was the tank's weak armament, the 2 pounder (40 mm) gun, which was improved by the addition of a 3 inch howitzer in the hull (the Mk IICS had the howitzer in the turret) to deliver an HE shell albeit not on a howitzer's usual high trajectory. These flaws contributed to the tank's poor performance in its first use in combat, the disastrous Dieppe Raid in August, 1942.
Production of a turret to carry the QF 6 pounder gun began in 1941 but problems with the plate used in an all-welded design led to an alternative cast turret also being produced. These formed the distinction between Mark III and Mark IV. The poor performance of the Churchill nearly caused production to be ceased in favour of the upcoming Cromwell tank; it was saved by the successful use of the Mk III at the Second Battle of El Alamein in October 1942. The second major improvement in the Churchill's design, the Mk VII saw first used in the Battle of Normandy in 1944. The Mk VII improved on the already heavy armour of the Churchill with a wider chassis and the 75 mm gun which had been introduced on the Mk VI. It was primarily this variant, the A22F, which served through the remainder of war and was re-designated as A42 in 1945. The Churchill was notable for its versatility and was utilized in numerous specialist roles.
Design features
The hull was made up of simple flat plates which were initially bolted together and were welded in later models. The hull was split into four compartments: the driver's position at the front, then the fighting compartment including the turret, the engine compartment, and the gearbox compartment. The suspension was fitted under the two large "panniers" on either side of the hull, the track running over the top. There were eleven bogies either side, each carrying two 10-inch wheels. Only nine of the bogies were taking the vehicle weight normally, the front coming into play when the vehicle nosed into the ground or against an obstacle, the rear acting in part as a track tensioner. Due to the number of wheels, the tank could survive losing several without much in the way of adverse effects as well as traversing steeper terrain obstacles. As the tracks ran around the panniers, escape hatches in the side could be incorporated into the design. These were retained throughout the revisions of the Churchill and were of particular use when the Churchill was adopted as the AVRE. The Bedford Vehicles engine was effectively two engines in horizontally opposed configuration ("flat twelve") on a common crankshaft. There were four Solex carburettors each on a separate manifold that fed three cylinders formed as a single cylinder head. The elements of the engine and ancillary components were laid out so they could be reached for maintenance through the engine deck covers. Air for the engine was drawn from the fighting compartment through air cleaners. Cooling air was drawn into the engine compartment through louvres on the sides, across the radiators and through the engine compartment by a fan driven by the clutch. This fan blew the air over the gearbox and out the rear of the hull. By opening a flap between the fighting compartment and the engine compartment this airflow could be used to remove fumes produced by firing the armament. The 1,296 cubic inch capacity engine was rated at 350 bhp at 2,000 rpm delivering 960 lb·ft (1,300 N·m) over an engine speed range from 800 to 1,600 rpm.
The gearbox featured a regenerative steering system that was controlled by a tiller bar instead of the more commonplace brake levers or a steering wheel. The tiller was connected with servo assistance, hydraulically to the steering brakes. The Churchill was also the first tank to utilise the Merritt-Brown gearbox, which allowed the tank to be steered by changing the relative speeds of the two tracks; this effect became more pronounced with each lower gear, ultimately allowing the tank to perform a "neutral turn" when no gear was engaged where it could fully turn on its own axis. There were final reduction gears, of the planetary type, in the driving wheels. The first turrets were of cast construction and were rounded in shape, providing sufficient space to accommodate the relatively small 2 pounder gun. To fulfil its role as an infantry support vehicle the first models were equipped with a 3 inch howitzer in the hull in a layout very similar to the French Char B. This enabled the tank to deliver a useful high-explosive capability while retaining the antitank capabilities of the 2 pounder. However, like other multi-gun tanks, it was limited by a poor fire arc - the entire tank had to be turned to change the aim of the hull gun. The Mk II dispensed with the howitzer and replaced it with a bow machine gun and on the Mk III, the 2 pounder was replaced with the 6 pounder, significantly increasing the tank's anti-tank capabilities. The tank underwent field modification in North Africa with several Churchills being fitted with the 75 mm gun of destroyed M4 Shermans. These "NA75" variants were used in Italy. The use of the 75 mm, which was inferior as an anti-tank weapon to the 6 pounder but better as an all-around gun was soon made standard on successive versions.
Churchills made use of the Vickers Tank Periscope MK.IV. In the Mark VII, the driver had two periscopes as well as a vision port in the hull front that could be opened. The hull gunner had a single periscope as well as the sighting telescope on the BESA mounting. In the turret the gunner and loader each had single periscope and the commander had two fitted in his hatch cupola. The armour on the Churchill, often considered its most important feature, was originally specified to a minimum of 16 millimetres (0.63 in) and a maximum of 102 millimetres (4.0 in); this was increased with the Mk VII to a range from 25 millimetres (0.98 in) to 152 millimetres (6.0 in). Though this armour was considerably thicker than its rivals (including the German Tiger I tank, but not the Tiger II) it was not sloped, reducing its effectiveness. Earlier models were given extra armour by the expedient of welding extra plates on. On the Mark VII, the hull front armour was made up of a lower angled piece of 5.5 in (140 mm), a nearly flat 2.25 in (57 mm) plate and a vertical 6 inch plate. The hull sides, were for the most part, 3.75 in (95 mm). The rear was 2 in (51 mm) and the hull top 0.525 in (13.3 mm). The turret of the Mark VII was 6 in (150 mm) to the front and 3.75 in (95 mm) for the other sides. The turret roof was 0.79 (20 mm) thick. Plate was specified as IT 80, the cast sections as IT 90.
A22F The A22F, also known as "Heavy Churchill" was a major revision of the design. The most significant part was the use of welding instead of rivetted construction. Welding had been considered earlier for the Churchill but until its future was assured this was no more than testing techniques and hulls at the firing ranges. What welding reduced in the overall weight (estimates were around 4%), the thicker armour of the A22F made up for. Welding also required fewer man-hours in construction. The hull doors changed from square to round which reduced stresses. A new turret went with the new hull. The sides, which included a flared base to protect the turret ring, were a single casting while the roof which did not need to be so thick was a plate fitted to the top.
Since the engines on the Churchill were never upgraded, the tank became increasingly slower as additional armour and armament was equipped and weight increased; while the Mk I weighed 39,118 kg (40 long tons) and the Mk III weighed 39,626 kg, the Mk VII weighed 40,643 kg. This caused a reduction in maximum speed of the tank from its original 26 kilometres per hour (16 mph) down to 20.5 kilometres per hour (12.7 mph). The engines also suffered from many mechanical problems.
Another problem was the tank's relatively small turret that prevented the use of powerful weapons; definitive versions of the tank were armed with either the QF 6 pounder or the derivative QF 75 mm gun, both having reasonable powers against armoured and soft targets respectively but with limited performance against the other. Although earlier Churchills could outgun many contemporary German medium tanks, like the Panzer IV with the short-barrel 75 mm gun and the Panzer III's 50 mm gun, with its 6 pounder, and the thick armour of all Churchill models could usually withstand several hits from any German anti-tank gun, in late war Germans had 75 mm high-velocity cannons as their main armament and increased protection, against which the Churchills' own guns often lacked sufficient armour penetration to fight back effectively.
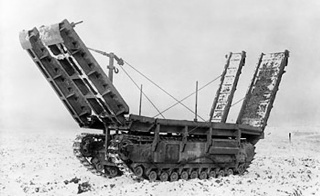
The Churchill had many variations, including many specialised modifications. The most significant change to the Churchill was that it was up-gunned from 2 pounder to 6 pounder and then 75 mm guns over the course of the war. By the war's end, the late model Churchill Mk VII had exceptional amounts of armour - considerably more than the German Tiger tank. However, the firepower weakness was never fully addressed. The Mark VII turret that was designed for the 75 mm gun was of composite construction - cast with top and bottom plates welded into position.
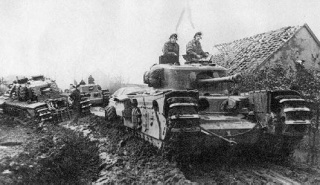
It is important to note that, despite its weaknesses, the Churchill had a significant advantage that was apparent throughout its career. Due to its multiple bogie suspension, it could cross terrain obstacles that most other tanks of its era could not. This feat served well, especially during the fighting in Normandy particularly the capture of Hill 309 between the 30 and 31 July 1944 in operation Bluecoat conducted by VIII Corps.
Historical Gallery
Sources and External Links
| Light Tanks | IICruiser Mk. I • IICruiser Mk. III • IIICruiser Mk. IV • IIICruiser Mk. II • IVValentine • IVCovenanter • VCrusader |
| Medium Tanks | IVickers Medium Mk. I • IIVickers Medium Mk. II • IIIVickers Medium Mk. III • IVMatilda • VMatilda Black Prince • VICromwell • VICromwell Knight • VIIComet • VIIICenturion Mk. I • IXCenturion Mk. 7/1 • XFV4202 |
| Heavy Tanks | VChurchill I • VExcelsior • VIChurchill VII • VITOG II* • VIIBlack Prince • VIIICaernarvon • IXConqueror • XFV215b |
| Tank Destroyers | IIUniversal Carrier 2-pdr • IIIValentine AT • IVAlecto • VAT 2 • VIChurchill Gun Carrier • VIAT 8 • VIIAT 15A • VIIAT 7 • VIIIAT 15 • IXTortoise • XFV215b (183) |
| Self-Propelled Artillery | IILoyd Gun Carriage • IIISexton II • IIISexton I • IVBirch Gun • VBishop • VIFV304 • VIICrusader 5.5-in. SP • VIIIFV207 • IXFV3805 • XConqueror Gun Carriage |
| USA | VT14 • VT1 Heavy Tank • VIM6 • VIIT29 • VIIIM6A2E1 • VIIIT32 • VIIIT34 • IXM103 • XT110E5 • XT57 Heavy Tank |
| UK | VChurchill I • VExcelsior • VIChurchill VII • VITOG II* • VIIBlack Prince • VIIICaernarvon • IXConqueror • XFV215b |
| Germany | IVPz.Kpfw. B2 740 (f) • IVDurchbruchswagen 2 • VVK 30.01 (H) • VIVK 36.01 (H) • VIIPz.Kpfw. VI Tiger • VIIPz.Kpfw. VI Tiger (P) • VIIILöwe • VIIIPz.Kpfw. Tiger II • VIIIVK 45.02 (P) Ausf. A • IXE-75 • IXVK 45.02 (P) Ausf. B • XE-100 • XMaus |
| France | IVB1 • VBDR G1 B • VIARL 44 • VIIAMX M4 mle. 45 • VIIIAMX 50 100 • VIIIFCM 50 t • VIIIFCM 50 t Liberté • IXAMX 50 120 • XAMX 50 B |
| USSR | VChurchill III • VKV-1S • VKV-220 • VKV-1 • VIKV-2 • VIKV-85 • VIT-150 • VIIIS • VIIKV-3 • VIIIIS-3 • VIIIIS-6 • VIIIKV-5 • VIIIKV-4 • IXIS-8 • IXST-I • XIS-4 • XIS-7 |
| China | VIIIS-2 • VIII110 • VIII112 • IXWZ-111 model 1-4 • X113 |
| Japan | |
| Czechoslovakia | |
| Sweden |
