Shokaku
| Revision as of 20:58, 4 January 2018 | Revision as of 15:45, 14 May 2019 | |||
14 intermediate revisions by 4 users not shown | ||||
| Line 3: | Line 3: | |||
| |Anno=<!-- you can write below short description for the ship. it will replace default once. --> | |Anno=<!-- you can write below short description for the ship. it will replace default once. --> | |||
| ? | The | + | The notorious heavy aircraft carrier whose design stemmed from the experience gained in building the ''Hiryu''-class carriers. Compared to her predecessor, ''Shōkaku'' came with reinforced anti-aircraft armament, a larger air group and somewhat improved armor. During the course of World War II, the ship's AA capabilities were significantly enhanced. <br><br>{{Model3DViewer|0f0a58e666614c6dba1c1d9d2a32385b}} | |
| |Performance=<!-- write text about performance in battles below --> | |Performance=<!-- write text about performance in battles below --> | |||
| ? | + | Shokaku is more of a anti-BB, cruiser carrier in its role as it lacks HE bombs of the Americans or the fast rockets of the British. Also it has one of the weakest planes with low health pools. This is a serious disadvantage compared to the Lexington or the Implacable as tier 8~10 battles intoduce cruisers and battleships with stong AA. Concealment of planes, use of islands to block AA are essential to keep up the air attacks till late in the game. Any vital mistakes that leads to annhiliation of squadrons will leave playes with only 1 or 2 planes per squadron. <br /> | ||
| + | The attack aircraft has a very tight aiming circle and is useful for targeting all ship types. It also plays a vital role in attacking destroyers. <br /> | |||
| + | When fully upgraded, player can attack 4 times with double torpedoes per time. The torpedo range, speed and damage is excellent. With a full concealment build, players could drop their payload almost the instance the planes are spotted. The downside is that the planes are one of the weakest of all tier VIII carriers, and players need to utilize the long range of the torpedoes for longer duration of its usage. <br /> | |||
| + | Unlike most carriers, the Shokaku uses AP dive bombers. German battleships, cruisers; French battleships; Soviet battleships; American cruisers are good candidates for citadel hits. But keep in mind that these planes are very weak and using against the beforementioned targets may not be viable from early on in the match. Use islands and target HE saturated ships for finishing or devastating blows. As the AP fuse need time to arm, using against destroyers are quite ineffective. The aiming mechanism is different from USN dive bombers as the aiming circle initially dip backward slightly before moving forward at the very last minute. This can be useful if the player overshoot the target's momentum, but with less possibility of a citadel hit. | |||
| |Pros=<!-- write list of positive points below. use * as in ordinary wiki-list. --> | |Pros=<!-- write list of positive points below. use * as in ordinary wiki-list. --> | |||
| ? | ||||
| ? | ||||
| * More armored than her predecessor. | * More armored than her predecessor. | |||
| ? | * | + | * AP b0mbs can deal huge amounts of damage to select enemy ships. | |
| ? | * | + | * Good torpedo bombers torps with 55 kts and 5.6k range | |
| ? | * Difficult to | + | * Better AA protection. | |
| + | * Difficult-to-hit citadel; the hitbox is located well below the waterline. | |||
| * 34 knot top speed means easier relocation when necessary. | * 34 knot top speed means easier relocation when necessary. | |||
| + | * Excellent concealment for CV and planes. | |||
| |Cons=<!-- write list of negative points below. use * as in ordinary wiki-list. --> | |Cons=<!-- write list of negative points below. use * as in ordinary wiki-list. --> | |||
| ? | ||||
| ? | ||||
| ? | ||||
| ? | ||||
| * Loses a lot of speed during turns. | * Loses a lot of speed during turns. | |||
| * Very vulnerable to dive bomb attacks. | * Very vulnerable to dive bomb attacks. | |||
| + | * Limited capability to hunt destroyers | |||
| + | * Planes with one of the lowest health pools even with commander skills | |||
| + | * AP bombs only effective against selected targets in very special circumstances(low AA) | |||
| + | * Dropping torpedos from maximum distance has a very low success rate, combined with the low health pool of planes, making it less of an advantage. | |||
| + | ||||
| |Research=<!-- write text about priority sequence of research below --> | |Research=<!-- write text about priority sequence of research below --> | |||
| This is a suggested research path: | This is a suggested research path: | |||
| ? | # | + | # B7A Ryusei (Torpedo or AP bomber of choice) | |
| ? | # | + | # N1K2-J Shiden-Kai | |
| ? | # | + | # Hull(B) for better resistance against CV sniping. | |
| ? | + | |||
| ? | ||||
| |OptimalConfiguration=<!-- write some general text about selection of optimal configuration below (optional)--> | |OptimalConfiguration=<!-- write some general text about selection of optimal configuration below (optional)--> | |||
| Line 39: | Line 41: | |||
| The recommended upgrades for ''{{#var:ship_name}}'' are as follows: | The recommended upgrades for ''{{#var:ship_name}}'' are as follows: | |||
| *'''Slot 1''': {{Air Groups Modification 1}} | *'''Slot 1''': {{Air Groups Modification 1}} | |||
| ? | *'''Slot 2''': {{ | + | *'''Slot 2''': {{Aircraft Engines Modification 1}} | |
| ? | *'''Slot 3''': {{ | + | *'''Slot 3''': {{Torpedo Bombers Modification 1}} | |
| ? | *'''Slot 4''': {{ | + | *'''Slot 4''': {{Torpedo Bombers Modification 2}} or {{Dive Bombers Modification 2}} | |
| ? | *'''Slot 5''': {{Concealment System Modification 1}} | + | *'''Slot 5''': {{Concealment System Modification 1}} | |
| ? | '''Upgrade Slot 3''' | + | '''Upgrade Slot 3''' offers the choice of {{AA Guns Modification 1}} for playes wanting to increase the AA firepower of the carrier itself. But the extra 2 flak burst it provides is questionable in its effectiveness. | |
| ? | '''Upgrade Slot 5''' offers players {{Concealment System Modification 1}}, which stacks with [[Ship:Commander#Concealment_Expert|Concealment Expert]] and | + | '''Upgrade Slot 5''' offers players {{Concealment System Modification 1}}, which stacks with [[Ship:Commander#Concealment_Expert|Concealment Expert]] and camouflage to bring ''{{#var:ship_name}}''`s torpedo bombers' concealment down to 6.1k. This means players can start their drop well beyond the detection range of the planes and surpirse ships with 5.4k range torpedoes. However, if players are losing planes faster then they anticipate, they should go for {{Flight Control Modification 1}}. | |
| |CommanderSkills=<!-- write text about best set of Commander Skills below --> | |CommanderSkills=<!-- write text about best set of Commander Skills below --> | |||
| ? | ''{{#var:ship_name}}'' uses the standard | + | ''{{#var:ship_name}}'' uses the standard Japanese carrier captain skill setup. Emphasis should be on skills that increase the survivability of the planes. Whether the player should take 'Sight Stabilization' or 'Concealment Expert' first is of preference. If the player is well accustomed to dropping their ammunition precisely, then taking concealment first will offer them new experience. | |
| ? | ||||
| ? | ||||
| ? | Any skills that are related to an enemy vessel firing on your carrier are not useful, as the cost-benefit of investing in survivability skills is not worth the minimal benefit they offer. ''{{#var:ship_name}}'' is large and unarmored, and will not survive an attack by any ship larger than a destroyer. ''{{#var:ship_name}}'' captains must position their ship near friendlies | + | Any skills that are related to an enemy vessel firing on your carrier are not useful, as the cost-benefit of investing in survivability skills is not worth the minimal benefit they offer. ''{{#var:ship_name}}'' is large and unarmored, and will not survive an attack by any ship larger than a destroyer. ''{{#var:ship_name}}'' captains must position their ship near friendlies or behind islands, away from enemy fire. | |
| + | ||||
| {{Commander Skills | {{Commander Skills | |||
| ? | | Priority Target = | + | | Priority Target = 1 | |
| | Preventative Maintenance = | | Preventative Maintenance = | |||
| | Expert Loader = | | Expert Loader = | |||
| ? | | | + | | Air Supremacy = 3 | |
| | Direction Center for Catapult Aircraft = | | Direction Center for Catapult Aircraft = | |||
| ? | | | + | | Improved Engine Boost = 2 | |
| | Incoming Fire Alert = | | Incoming Fire Alert = | |||
| ? | | | + | | Last Gasp = 2 | |
| | High Alert = | | High Alert = | |||
| | Jack of All Trades = | | Jack of All Trades = | |||
| | Expert Marksman = | | Expert Marksman = | |||
| ? | | Torpedo Acceleration = | + | | Torpedo Acceleration = 2 | |
| | Smoke Screen Expert = | | Smoke Screen Expert = | |||
| ? | | | + | | Improved Engines = 3 | |
| | Adrenaline Rush = | | Adrenaline Rush = | |||
| | Last Stand = | | Last Stand = | |||
| ? | | Survivability Expert = | + | | Survivability Expert = 3 | |
| | Basics of Survivability = | | Basics of Survivability = | |||
| ? | | Torpedo Armament Expertise = | + | | Torpedo Armament Expertise = | |
| ? | | | + | | Aircraft Armor = 3 | |
| | Basic Firing Training = 1 | | Basic Firing Training = 1 | |||
| | Superintendent = | | Superintendent = | |||
| ? | | Demolition Expert = | + | | Demolition Expert = 1 | |
| | Vigilance = | | Vigilance = | |||
| Line 87: | Line 88: | |||
| | Fire Prevention = | | Fire Prevention = | |||
| | Inertia Fuse for HE Shells = | | Inertia Fuse for HE Shells = | |||
| ? | | | + | | Sight Stabilization = 3 | |
| ? | | Advanced Firing Training = | + | | Advanced Firing Training = | |
| ? | | Manual Fire Control for AA Armament = | + | | Manual Fire Control for AA Armament = | |
| | Radio Position Finding = | | Radio Position Finding = | |||
| ? | | Concealment Expert = | + | | Concealment Expert = 3 | |
| }} | }} | |||
| Line 97: | Line 98: | |||
| ''{{#var:ship_name}}'' has access to the following consumables: | ''{{#var:ship_name}}'' has access to the following consumables: | |||
| * '''Slot 1:''' {{Damage Control Party}} | * '''Slot 1:''' {{Damage Control Party}} | |||
| ? | * '''Slot 2:''' {{ | + | * '''Slot 2:''' {{Fighter I}} | |
| + | ||||
| + | All aircraft carrier consumables are automatically activated.<br /> | |||
| + | ||||
| + | '''Attack Aircraft:''' | |||
| + | * '''Slot 1:''' {{Engine Cooling}} 2 | |||
| + | * '''Slot 2:''' {{Patrol Fighter}} 3 | |||
| + | ||||
| + | '''Torpedo Bombers:''' | |||
| + | * '''Slot 1:''' {{Engine Cooling}} 2 | |||
| + | * '''Slot 2:''' {{Patrol Fighter}} 3 | |||
| + | * '''Slot 3:''' {{Repair I}} 4 | |||
| ? | + | '''Bombers:''' | ||
| + | * '''Slot 1:''' {{Engine Cooling}} 2 | |||
| + | * '''Slot 2:''' {{Patrol Fighter}} 3 | |||
| |Camouflage=<!-- write text about useful camouflage below --> | |Camouflage=<!-- write text about useful camouflage below --> | |||
| Line 106: | Line 120: | |||
| Players who wish to spend doubloons can equip ''{{#var:ship_name}}'' with [[Ship:Camouflage#Permanent_Camouflage|Type 18 camouflage]] that lowers her detection radius, reduces the accuracy of incoming shells, reduces cost of post-battle service, and increases the amount of experience she earns. | Players who wish to spend doubloons can equip ''{{#var:ship_name}}'' with [[Ship:Camouflage#Permanent_Camouflage|Type 18 camouflage]] that lowers her detection radius, reduces the accuracy of incoming shells, reduces cost of post-battle service, and increases the amount of experience she earns. | |||
| ? | ''{{#var:ship_name}}'' also has an alternate premium camouflage called "The Great Gorgon", in which she appears as she does during the Halloween scenario "[[ | + | ''{{#var:ship_name}}'' also has an alternate premium camouflage called "The Great Gorgon", in which she appears as she does during the Halloween scenario "[[Sunray in the Darkness]]". | |
| |Signals=<!-- write text about best set of signals below --> | |Signals=<!-- write text about best set of signals below --> | |||
| ? | As a carrier, ''{{#var:ship_name}}'' | + | As a carrier, ''{{#var:ship_name}}'' Players should mount Equal Speed Charlie London ({{Equal Speed Charlie London|Size=18px}}), Zulu Hotel ({{Zulu Hotel|Size=18px}}), and, for the last two: November Echo Setteseven ({{November Echo Setteseven|Size=18px}}) and Juliet Whiskey Unaone ({{Juliet Whiskey Unaone|Size=18px}}). | |
| ? | + | |||
| {{Signal Flags | {{Signal Flags | |||
| Line 142: | Line 155: | |||
| |Gallery=<!-- write below list of files without tags. description (if necessary) for each should be separated with | --><gallery> | |Gallery=<!-- write below list of files without tags. description (if necessary) for each should be separated with | --><gallery> | |||
| File:ShokStart.jpg|The flight deck is packed with aircraft prepared to sortie. | File:ShokStart.jpg|The flight deck is packed with aircraft prepared to sortie. | |||
| ? | File:FighterDeparts.jpg|A fighter departs | + | File:FighterDeparts.jpg|A fighter departs ''Shōkaku''. | |
| File:ShokAblaze.jpg|Fire alarm. | File:ShokAblaze.jpg|Fire alarm. | |||
| </gallery> | </gallery> | |||
| Line 164: | Line 177: | |||
| ====Performance==== | ====Performance==== | |||
| ? | :34 knots at 160,000 shaft horsepower | + | :34 knots at 160,000 shaft horsepower | |
| :9,700nm at 18 knots | :9,700nm at 18 knots | |||
| Line 192: | Line 205: | |||
| ===Historical Inaccuracies=== | ===Historical Inaccuracies=== | |||
| ? | * ''Shokaku''’s actual aircraft complement consisted of 27 Mitsubishi A6M5 "Zeros", 30 Yokosuka D4Y "Suiseis" and 18 Nakajima B6N "Tenzans" prior to the Battle of the Philippine Sea. Her sister ship, ''Zuikaku'', carried 16 Mitsubishi A6M2s, 28 Mitsubishi A6M5s, 7 Yokosuka D4Ys & 15 Nakajima B6Ns at Leyte Gulf in October 1944. | + | * ''Shōkaku''’s overall dark gray paint scheme is missing. | |
| ? | * Development of the Yokosuka D4Y2 began in October 1944; the last surviving '' | + | * Light and dark green camouflage was applied to aircraft carriers in mid-1944 after the battle of the Philippine Sea; ''Shokaku'' was sunk during the battle of the Philippine Sea. | |
| + | * ''Shōkaku''’s actual aircraft complement consisted of 27 Mitsubishi A6M5 "Zeros", 30 Yokosuka D4Y "Suiseis" and 18 Nakajima B6N "Tenzans" prior to the Battle of the Philippine Sea. Her sister ship, ''Zuikaku'', carried 16 Mitsubishi A6M2s, 28 Mitsubishi A6M5s, 7 Yokosuka D4Ys & 15 Nakajima B6Ns at Leyte Gulf in October 1944. | |||
| + | * Development of the Yokosuka D4Y2 began in October 1944; the last surviving ''Shōkaku''-class aircraft carrier, ''Zuikaku'', was sunk that same month. | |||
| * The N1K5-A designation is fictitious. The actual N1K5 only existed as a project and was intended as a high-altitude interceptor. | * The N1K5-A designation is fictitious. The actual N1K5 only existed as a project and was intended as a high-altitude interceptor. | |||
| * Carrier-based versions of the Kawanishi N1K only existed as prototypes of which only three were built in total. | * Carrier-based versions of the Kawanishi N1K only existed as prototypes of which only three were built in total. | |||
Revision as of 15:45, 14 May 2019

| Research price161000 exp |
| Purchase price11,500,000 |
| Hit Points50,100 |
| 127 mm/40 Type 89 on a Model A1 mount6 х 2 pcs. |
| Firing Range4.5 km. |
| Rate of Fire12 shots/min. |
| Reload Time5 sec. |
| HE Shell127 mm HE Type0 |
| Maximum HE Shell Damage2,100 |
| Initial HE Shell Velocity725 m./s. |
| Chance of Fire on Target Caused by HE Shell8 % |
| 127 mm/40 Type 89 on a Model A1 Mod.3 mount2 х 2 pcs. |
| Firing Range4.5 km. |
| Rate of Fire10 shots/min. |
| Reload Time6 sec. |
| HE Shell127 mm HE Type0 |
| Maximum HE Shell Damage2,100 |
| Initial HE Shell Velocity725 m./s. |
| Chance of Fire on Target Caused by HE Shell8 % |
| 127 mm/40 Type 89 on a Model A1 mount6 х 2 pcs. |
| . . . Average Damage per Second60.6 |
| . . . Firing Range5.01 km. |
| 127 mm/40 Type 89 on a Model A1 Mod.3 mount2 х 2 pcs. |
| . . . Average Damage per Second20.2 |
| . . . Firing Range5.01 km. |
| 25 mm/60 Type 96 on a single mount36 х 1 pcs. |
| . . . Average Damage per Second64.8 |
| . . . Firing Range2.49 km. |
| Maximum Speed34 knot |
| Turning Circle Radius1 130 m. |
| Rudder Shift Time18.3 sec. |
| Surface Detectability Range12.06 km. |
| Air Detectability Range9.58 km. |

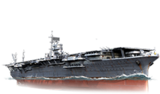
Shōkaku — Japanese Tier VIII aircraft сarrier.
The notorious heavy aircraft carrier whose design stemmed from the experience gained in building the Hiryu-class carriers. Compared to her predecessor, Shōkaku came with reinforced anti-aircraft armament, a larger air group and somewhat improved armor. During the course of World War II, the ship's AA capabilities were significantly enhanced.
Modules
 |
Hit Points (HP) | Armor (mm) | Armor (mm) | Main Turrets (pcs.) | Secondary Gun Turrets (pcs.) | AA Mounts (pcs.) | Torpedo Tubes (pcs.) | Hangar Capacity (pcs.) |
Research price (exp) |
Purchase price ( | |
|---|---|---|---|---|---|---|---|---|---|---|---|
| Shōkaku (A) | 50,100 | 6 | 215 | 2/6 | 36/2/6 | 0 | 1,200,000 | ||||
| Shōkaku (B) | 51,400 | 6 | 215 | 2/6 | 32/20/2/6 | 27,000 | 3,000,000 |
 |
Speed (knot) | IDS_SHIP_PARAM_SQUADRON_MED_DAMAGE (HP/min) | IDS_SHIP_PARAM_SQUADRON_AMMO_AMOUNT | Hit Points (HP) |
Research price (exp) |
Purchase price ( | |
|---|---|---|---|---|---|---|---|
| A6M5 Zero | 144 | 1,330 | 0 | 600,000 | |||
| N1K2-J Shiden-Kai | 151 | 1,390 | 18,000 | 1,500,000 |
 |
Maximum Torpedo Damage (HP) | Speed (knot) | Hit Points (HP) |
Research price (exp) |
Purchase price ( | |
|---|---|---|---|---|---|---|
| B6N Tenzan | 7,233 | 133 | 1,600 | 0 | 600,000 | |
| B7A Ryūsei | 7,233 | 137 | 1,670 | 18,000 | 1,500,000 |
 |
Maximum Bomb Damage (HP) | Speed (knot) | Hit Points (HP) |
Research price (exp) |
Purchase price ( | |
|---|---|---|---|---|---|---|
| D4Y3 Suisei | 142 | 1,580 | 0 | 600,000 | ||
| B7A Ryūsei | 145 | 1,650 | 18,000 | 1,500,000 |
 |
Maximum Speed (knot) |
Research price (exp) |
Purchase price ( | |
|---|---|---|---|---|
| Propulsion: 152,000 hp | 34 | 0 | 500,000 |
Compatible Upgrades
| Slot 1 |
|||||
|---|---|---|---|---|---|
| Slot 2 |
|||||
| Slot 3 |
|||||
| Slot 4 |
|||||
| Slot 5 |
Player Opinion
Performance
Shokaku is more of a anti-BB, cruiser carrier in its role as it lacks HE bombs of the Americans or the fast rockets of the British. Also it has one of the weakest planes with low health pools. This is a serious disadvantage compared to the Lexington or the Implacable as tier 8~10 battles intoduce cruisers and battleships with stong AA. Concealment of planes, use of islands to block AA are essential to keep up the air attacks till late in the game. Any vital mistakes that leads to annhiliation of squadrons will leave playes with only 1 or 2 planes per squadron.
The attack aircraft has a very tight aiming circle and is useful for targeting all ship types. It also plays a vital role in attacking destroyers.
When fully upgraded, player can attack 4 times with double torpedoes per time. The torpedo range, speed and damage is excellent. With a full concealment build, players could drop their payload almost the instance the planes are spotted. The downside is that the planes are one of the weakest of all tier VIII carriers, and players need to utilize the long range of the torpedoes for longer duration of its usage.
Pros:
- More armored than her predecessor.
- AP b0mbs can deal huge amounts of damage to select enemy ships.
- Good torpedo bombers torps with 55 kts and 5.6k range
- Better AA protection.
- Difficult-to-hit citadel; the hitbox is located well below the waterline.
- 34 knot top speed means easier relocation when necessary.
- Excellent concealment for CV and planes.
Cons:
- Loses a lot of speed during turns.
- Very vulnerable to dive bomb attacks.
- Limited capability to hunt destroyers
- Planes with one of the lowest health pools even with commander skills
- AP bombs only effective against selected targets in very special circumstances(low AA)
- Dropping torpedos from maximum distance has a very low success rate, combined with the low health pool of planes, making it less of an advantage.
Research
This is a suggested research path:
- B7A Ryusei (Torpedo or AP bomber of choice)
- N1K2-J Shiden-Kai
- Hull(B) for better resistance against CV sniping.
Optimal Configuration
Upgrades
The recommended upgrades for Shōkaku are as follows:
- Slot 1: Air Groups Modification 1

- Slot 2: Aircraft Engines Modification 1

- Slot 3: Torpedo Bombers Modification 1

- Slot 4: Torpedo Bombers Modification 2
 or
or 
This page or file is marked for deletion for the following reason(s): 'Bombers Modification 2' is the correct name. Do not use it!
Upgrade Slot 3 offers the choice of AA Guns Modification 1
 for playes wanting to increase the AA firepower of the carrier itself. But the extra 2 flak burst it provides is questionable in its effectiveness.
Upgrade Slot 5 offers players Concealment System Modification 1
 , which stacks with Concealment Expert and camouflage to bring Shōkaku`s torpedo bombers' concealment down to 6.1k. This means players can start their drop well beyond the detection range of the planes and surpirse ships with 5.4k range torpedoes. However, if players are losing planes faster then they anticipate, they should go for Flight Control Modification 1
  .
.
Commander Skills
Shōkaku uses the standard Japanese carrier captain skill setup. Emphasis should be on skills that increase the survivability of the planes. Whether the player should take 'Sight Stabilization' or 'Concealment Expert' first is of preference. If the player is well accustomed to dropping their ammunition precisely, then taking concealment first will offer them new experience.
Any skills that are related to an enemy vessel firing on your carrier are not useful, as the cost-benefit of investing in survivability skills is not worth the minimal benefit they offer. Shōkaku is large and unarmored, and will not survive an attack by any ship larger than a destroyer. Shōkaku captains must position their ship near friendlies or behind islands, away from enemy fire.
Recommended Commander Skills 
Cost
(points)Endurance Attack Support Versatility
1
★


★★★


★★


★★
2


★★


★★★


3

★★★


★★★

★


★

4


★★★


★★★
Key: ★★★ - Extremely Useful ★★ - Frequently Useful ★ - Occasionally Useful No stars - Meh Χ - Not recommended Consumables
Shōkaku has access to the following consumables:
- Slot 1: Damage Control Party

- Slot 2: Template:Fighter I
All aircraft carrier consumables are automatically activated.
Attack Aircraft:
- Slot 1: Engine Cooling
 2
2
- Slot 2: Patrol Fighter
 3
3
Torpedo Bombers:
- Slot 1: Engine Cooling 2
- Slot 2: Patrol Fighter 3
- Slot 3: Template:Repair I 4
Bombers:
- Slot 1: Engine Cooling 2
- Slot 2: Patrol Fighter 3
Camouflage
Type 1, 2, or 5 camouflage can be equipped for credits; Types 1 or 5 are recommended at a minimum to reduce detectibility range.
Players who wish to spend doubloons can equip Shōkaku with Type 18 camouflage that lowers her detection radius, reduces the accuracy of incoming shells, reduces cost of post-battle service, and increases the amount of experience she earns.
Shōkaku also has an alternate premium camouflage called "The Great Gorgon", in which she appears as she does during the Halloween scenario "Sunray in the Darkness".
Signals
As a carrier, Shōkaku Players should mount Equal Speed Charlie London (🚫), Zulu Hotel (🚫), and, for the last two: November Echo Setteseven (
 ) and Juliet Whiskey Unaone (
 ).
).
Recommended Signal Flags 
Combat 


★★★


★★★

★


Note: Use of the Juliet Charlie signal makes detonation impossible.
Gallery

The flight deck is packed with aircraft prepared to sortie.
A fighter departs Shōkaku.
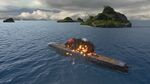
Fire alarm.
Historical Info
- Slot 1: Damage Control Party


Historical Gallery


.jpg)


| Japan | IV Hōshō • VI Ryūjō • VIII Shōkaku • VIII Kaga |
| U.K. | IV Hermes • VI Furious • VI Ark Royal |
| France | VI Béarn |
| U.S.S.R. | IV Komsomolets • VI Serov • VIII Pobeda • VIII Chkalov |
| U.S.A. | IV Langley • VI Independence • VI Ranger • VIII Yorktown • VIII Lexington • VIII Enterprise |
| Germany | IV Rhein • VI Weser • VI Erich Loewenhardt |
| Pan-Asia | VIII Sanzang |
| Spain | |
| Europe | |
| Netherlands | |
| Italy | VIII Aquila |
| Commonwealth | |
| Pan-America |