Amagi
| 410 mm/45 3rd Year Type5 х 2 pcs. |
| Rate of Fire2 shots/min. |
| Reload Time30 sec. |
| Rotation Speed4.3 deg./sec. |
| 180 Degree Turn Time41.86 sec. |
| Firing Range18.07 km. |
| Maximum Dispersion227 m. |
| HE Shell410 mm HE Type0 |
| Maximum HE Shell Damage6500 |
| Chance of Fire on Target Caused by HE Shell30 % |
| Initial HE Shell Velocity805 m./s. |
| HE Shell Weight938.5 kg. |
| AP Shell410 mm AP/APC Type91 |
| Maximum AP Shell Damage12 600 |
| Initial AP Shell Velocity806 m./s. |
| AP Shell Weight1020 kg. |
| 140 mm/50 3rd Year Type16 х 1 pcs. |
| Firing Range5 km. |
| Rate of Fire7.5 shots/min. |
| Reload Time8 sec. |
| AP Shell140 mm AP Type2 |
| Maximum AP Shell Damage2700 |
| Initial AP Shell Velocity850 m./s. |
| 127 mm/40 Type89 A18 х 2 pcs. |
| Firing Range5 km. |
| Rate of Fire10 shots/min. |
| Reload Time6 sec. |
| HE Shell127 mm HE Type0 |
| Maximum HE Shell Damage2100 |
| Initial HE Shell Velocity725 m./s. |
| Chance of Fire on Target Caused by HE Shel8 % |
| 127 mm/40 Type89 A18 х 2 pcs. |
| . . . Average Damage per Second80.8 |
| . . . Firing Range5.01 km. |
| 25 mm/60 Type96 mod. 142 х 1 pcs. |
| . . . Average Damage per Second75.6 |
| . . . Firing Range3.09 km. |
| 13 mm/76 Type93 Quad12 х 4 pcs. |
| . . . Average Damage per Second58.8 |
| . . . Firing Range1.2 km. |
| Maximum Speed28.05 knot |
| Turning Circle Radius870 m. |
| Rudder Shift Time20.8 sec. |
| Surface Detectability Range17.28 km. |
| Air Detectability Range13.71 km. |
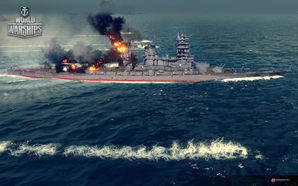
Amagi — Japanese Tier VIII battleship.
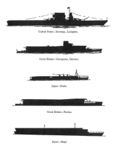
Con el estallido de la Primera Guerra Mundial, Japón empezó a diseñar cruceros de batalla. Entre 1916 y 1918, se desarrollaron unas 20 variantes de un proyecto de borrador preliminar. Como consecuencia de la Conferencia Naval de Washington, la construcción de acorazados se canceló, pero a Japón se le permitió convertir dos cruceros de batalla en portaaviones. La conversión del Amagi comenzó en 1923, pero el casco que se estaba fabricando en Yokosuka quedó destruido por el gran terremoto de Kanto.
Modules
Compatible Upgrades
| Slot 1 |
||||
|---|---|---|---|---|
| Slot 2 |
||||
| Slot 3 |
||||
| Slot 4 |
||||
| Slot 5 |
Player Opinion
Performance
What can be said as the final gameplay deviation for the Japanese battleship branch, Amagi is one ship at her tier you might be impressed with. Sporting five dual mount turrets with each packing a pair of 410mm guns, Amagi is literally unmatched in terms of raw broadside weight despite being a reformatted battlecruiser although to be fair, her upgraded hull retrofits and reformats her into a fast battleship much like what happens to her battlecruiser colleague that had a reformat the Kongo. Her main batteries and fast speed can match or destroy any post-dreadnought battleship at high tiers, dominate dreadnoughts if she's the top tier by dealing heavy damage per salvo should they connect and as well as run down cruisers with her fast speed. However, despite the solid appearance and heavy broadside weight, Amagi can only take so much punishment before she breaks and its inadvisable to heavily invest in your armor or even prolonging shot per shot trading and the AA suite can only do so much to defend herself from aerial assaults.
Move in, fire off a heavy broadside and sail away to a new location to rinse and repeat, that is the Amagi.Pros:
- Heaviest broadside weight at her tier with ten 410mm guns in five dual mount turrets.
- Fast speed.
- Angling can bring about surprising bounces and/or mitigate heavy damage .
- Good health pool.
- Fairly accurate guns; combined with her broadside, one salvo can potentially destroy anything even up to Tier X.
- Powerful secondary battery that can send out 110 shells per minute per side.
- Absurd HE values.
- Decent AA suite.
- Final hull has a immense bulge.
- Immense AP number stacking when hitting enemy broadsides.
Cons:
- Rather underwhelming firing range of only 20km compared to her Tier VIII battleship colleagues, North Carolina and Bismarck.
- Battlecruiser armor is still very vulnerable to battleships that catch her side.
- Slow rudder shift combined with large turning radius will give you a hard time to maneuver against torpedoes.
- Despite her secondary battery, she cannot duel battleships at close range because of her poor armor and maneuverability.
- Main batteries often gets knocked out.
- Rather high detection radius.
- Decent AA but it is bubbled. Expect the planes to get close enough.
Optimal Configuration
Upgrades
Amagi is a very modular ship that can be built in a variety of ways to suite a player's needs. Usually, as with most higher tier Japanese battleships, they can either have their already excellent gun handling improved, or her formidable secondaries.
Main Gun + Stealth Hybrid Build: This build can turn Amagi into a dangerous and surprisingly stealthy ship. Given Amagi`s limited armor, Main Armaments Modification 1 is the prime candidate for slot 1. For slot 2,Aiming Systems Modification 1 is one of the core items of this build, as the improved accuracy makes her already powerful broadside even more lethal. The other core item of this build is Concealment System Modification 1 in slot 5, one of the primary items for any stealth build. Concealment System Modification 1 combined with the proper camouflage and the Concealment Expert commander skill can bring Amagi`s detection range down to 13km, compared to her original surface detection range of 17km.</
Secondary Build: The more dangerous but exhilarating choice way of building Amagi is a secondary-focused build. For slot 1, Auxiliary Armaments Modification 1 is the strongest choice as it improves the surviveability of both her secondaries and her AA guns. Secondary Battery Modification 2 is the key choice with slot 2, as the range bonus from this plus the Advanced Firing Training commander skill and the signal flag Mike Yankee Soxisix can give Amagi a total secondary range of 7.6km, and the dispersion reductions from this mod, the signal flag and the Manual Fire Control for Secondary Armament gives these secondaries -85% total dispersion, making them brutally efficient at dispatching enemy ships, especially cruisers and destroyers, at close range.
For the other three slots, Damage Control System Modification 1 is the best choice for slot 3 to increase Amagi`s overall surviveability, and for slot 4 both Damage Control System Modification 2 is good for further improving her surviveability, or Steering Gears Modification 2 can work as well, given that Amagi has the worst rudder shift time of her tier, tied with North Carolina. For slot 5, if the player has gone with the Main Gun + Stealth Hybrid Build, Concealment System Modification 1 is the must-have choice, but for the Secondary Build Target Acquisition System Modification 1 is the better choice to help spot enemy ships and torpedoes sooner.
Commander Skills
| Recommended Commander Skills | ||||||||
|---|---|---|---|---|---|---|---|---|
| Cost (points) |
Endurance | Attack | Support | Versatility | ||||
| 1 |
★ |
★★ |
★ |
|
★★ |
|
★ |
|
| 2 |
★★ |
★ |
★★★ |
|
|
|
★★ |
★ |
| 3 |
★★ |
|
|
|
★★ |
★★★ |
★ |
★ |
| 4 |
★ |
★★ |
★ |
|
★★★ |
★★ |
★ |
★★★ |
| Key: ★★★ - Extremely Useful ★★ - Frequently Useful ★ - Occasionally Useful No stars - Not Useful | ||||||||
Consumables
Players can equip the following consumables on Amagi: Damage Control Party, Repair Party, and a choice between Spotting Aircraft and Catapult Fighter. It is strongly recommended to take the Premium versions of Damage Control Party and Repair Party to maximize surviveability.
Camouflage
Type 1, 2, or 5 camouflage can be equipped for credits; Types 2 or 5 are recommended at a minimum to reduce the accuracy of incoming shells.
Players who wish to spend doubloons can equip Amagi with Type 18 camouflage that lowers her detection radius, reduces the accuracy of incoming shells, reduces her repair costs, increases her credit earnings, and increases the amount of experience she earns.
Signals
As with all battleships, Amagi comes with 8 signal flag slots. The three most important flags are India Delta, Juliet Yankee Bissotwo and India Yankee; all of which will improve your surviveability. If the captain goes with the Secondary Build, the addition of Mike Yankee Soxisix will further improve the performance of Amagi’s secondaries. Another good signal flag to bring would be November Echo Setteseven, to give Amagi`s AA a slight further increase for self-protection.Gallery
Historical Info
Historical Gallery
| Destroyers | II Tachibana |
| Cruisers | I Hashidate • II Chikuma • III Tenryū • III Katori |
| Battleships | II Mikasa |
| Aircraft Carriers | IV [[Ship:Hōshō (< 23.01.2019)|Hōshō (< 23.01.2019)]] • IV Hōshō • V [[Ship:Zuihō (< 23.01.2019)|Zuihō (< 23.01.2019)]] • VI [[Ship:Ryūjō (< 23.01.2019)|Ryūjō (< 23.01.2019)]] • VI Ryūjō • VII [[Ship:Hiryū (< 23.01.2019)|Hiryū (< 23.01.2019)]] • VII [[Ship:Kaga (< 23.01.2019)|Kaga (< 23.01.2019)]] • VIII [[Ship:Shōkaku (< 23.01.2019)|Shōkaku (< 23.01.2019)]] • VIII Shōkaku • VIII Kaga |


