Shimakaze

| Research price223000 exp |
| Purchase price19 300 000 |
| Hit Points17 900 |
| 127 mm/50 3rd Year Type mod. D3 х 2 pcs. |
| Rate of Fire10.45 shots/min. |
| Reload Time5.74 sec. |
| Rotation Speed7.9 deg./sec. |
| 180 Degree Turn Time22.78 sec. |
| Firing Range11.37 km. |
| Maximum Dispersion100 m. |
| HE Shell127 mm HE Type1 |
| Maximum HE Shell Damage1800 |
| Chance of Fire on Target Caused by HE Shell7 % |
| Initial HE Shell Velocity915 m./s. |
| HE Shell Weight23 kg. |
| AP Shell127 mm AP Type0 |
| Maximum AP Shell Damage2200 |
| Initial AP Shell Velocity915 m./s. |
| AP Shell Weight23 kg. |
| 610 mm Quintuple3 х 5 pcs. |
| Rate of Fire0.4 shots/min. |
| Reload Time150 sec. |
| Rotation Speed25 deg./sec. |
| 180 Degree Turn Time7.2 sec. |
| TorpedoType93 |
| Maximum Damage20 967 |
| Torpedo Speed62 knot |
| Torpedo Range20.01 km. |
| 127 mm/50 3rd Year Type mod. D3 х 2 pcs. |
| . . . Average Damage per Second30.3 |
| . . . Firing Range5.01 km. |
| 25 mm/60 Type96 mod. 114 х 1 pcs. |
| . . . Average Damage per Second25.2 |
| . . . Firing Range3.09 km. |
| 25 mm/60 Type96 Twin mod. 11 х 2 pcs. |
| . . . Average Damage per Second5 |
| . . . Firing Range3.09 km. |
| 25 mm/60 Type96 Triple mod. 12 х 3 pcs. |
| . . . Average Damage per Second12.2 |
| . . . Firing Range3.09 km. |
| Maximum Speed39 knot |
| Turning Circle Radius690 m. |
| Rudder Shift Time3 sec. |
| Surface Detectability Range7.56 km. |
| Air Detectability Range4.23 km. |

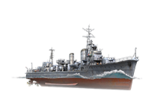
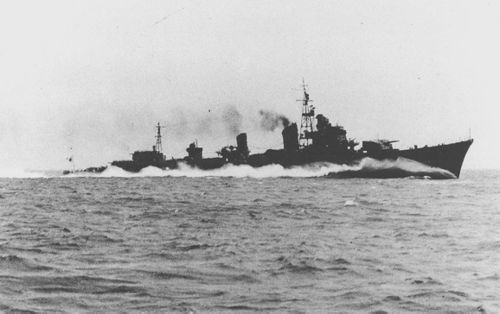
Shimakaze — Japanese Tier X destroyer.
Shimakaze, hull number 125, was an experimental destroyer, envisioned as the new generation of destroyer design for the Imperial Japanese Navy, born from the 1939 4th Naval Armaments Supplement Programme. Bigger and greater in tonnage than previous types, she carried a larger, higher pressure powerplant than her predecessors, which resulted in the highest speed of any Imperial Japanese destroyer, along with the largest torpedo broadside of any previous destroyer, whilst still carrying a typical compliment of main guns.
Modules
 |
Rate of Fire (shots/min) | 180 Degree Turn Time (sec) | Maximum Dispersion (m) | Maximum HE Shell Damage (HP) | Chance of Fire on Target Caused by HE Shell (%) | Maximum AP Shell Damage (HP) |
Research price (exp) |
Purchase price ( | |
|---|---|---|---|---|---|---|---|---|---|
| 127 mm/50 Tipo tercer año en una montura Tipo D | 10,5 | 22,8 | 100 | 2150 | 9 | 2200 | 0 | 1 700 000 |
 |
Hit Points (HP) | Armor (mm) | Armor (mm) | Main Turrets (pcs.) | Secondary Gun Turrets (pcs.) | AA Mounts (pcs.) | Torpedo Tubes (pcs.) | Hangar Capacity (pcs.) |
Research price (exp) |
Purchase price ( | |
|---|---|---|---|---|---|---|---|---|---|---|---|
| Shimakaze | 17 900 | 6 | 20 | 3 | 14/1/2/3 | 3 | 0 | 2 000 000 |
 |
Rate of Fire (shots/min) | Torpedo Tubes Reload Time (sec) | 180 Degree Turn Time (sec) | Maximum Damage (HP) | Torpedo Speed (knot) | Torpedo Range (km) |
Research price (exp) |
Purchase price ( | |
|---|---|---|---|---|---|---|---|---|---|
| Tipo F3 | 0,5 | 131 | 7,2 | 21 366 | 76 | 8 | 30 000 | 2 500 000 | |
| Tipo 93 mod. 3 | 0,4 | 153 | 7,2 | 23 766 | 67 | 12 | 30 000 | 2 500 000 | |
| Tipo 93 | 0,4 | 150 | 7,2 | 20 966 | 62 | 20 | 0 | 2 500 000 |
 |
Firing Range Increase (%) | Maximum Firing Range (km) |
Research price (exp) |
Purchase price ( | |
|---|---|---|---|---|---|
| Tipo 10 mod. 1 | 0 | 0 | 1 100 000 |
 |
Maximum Speed (knot) |
Research price (exp) |
Purchase price ( | |
|---|---|---|---|---|
| Propulsión: 75 000 CV | 39 | 0 | 1 650 000 |
Compatible Upgrades
| Slot 1 |
|||||
|---|---|---|---|---|---|
| Slot 2 |
|||||
| Slot 3 |
|||||
| Slot 4 |
|||||
| Slot 5 |
|||||
| Slot 6 |
Player Opinion
Performance
As the pinnacle of the Japanese Destroyer tech-tree, the Shimakaze epitomizes the play-style of the main line of ships: a long-range torpedo boat with solid – albeit slightly underwhelming – artillery.
The fundamental flavor of this ship are the unmatched volume of torpedoes that can be launched at once, giving rise to the nickname "Skillakaze"; therefore players must consider which torpedoes they wish to use, as it will affect the manner in which the ship will be utilized. It must be understood that the torpedoes individually are not as good as other nation's. The high range Type 93 torpedoes have an impressive range, but the torpedo detectability range of them is exceptionally poor at 2.5 km and this coupled with the lower than typical speed means landing hits is extremely challenging. The other two options are far more viable; the Type 93 mod 3 of 12km range has an on-par high speed, significantly lower detection and the strongest punch of any torpedo; The Type F3 of 8km range has outstanding, unrivaled speed, and a quicker reload, but at the cost of slightly worse detection and lower damage. The latter choice leads itself to very risky gameplay, but they are much more likely to land on a target, whereas the former 12km option leads itself to metered, conservative gameplay. With any option great care must be taken on positioning the ship safely to launch, and in considering and predicting the enemy's expected movements.
Yūgumo and Shimakaze are the two 12.7cm-gun Japanese destroyers that enjoy relatively good gun reload and acceptable turret traverse speeds, and thus can be utilized as a reasonably acceptable gunnery platform. This is not in line with some popular conceptions about Japanese destroyers. It is worth noting that whilst the reload is acceptable and the gun's range is excellent, the damage-dealing capability will always lag behind other lines of destroyers, so more than ever direct gun trades are not advisable. Japanese torpedoes have the highest flooding chance, so using the guns to light fires and damage modules before and after torpedo attacks can form a very effective and integrated playstyle. Great care must be paid to enemy formations, especially in the case of hydro-acoustic search, radar, and enemy aircraft, as well as other ships.
In the hands of a cunning but cautious hunter, the Shimakaze can be made to shine.Pros:
- Excellent speed of 39 knots; significantly faster than all other modern Japanese destroyers.
- Type 93 mod. 3 torpedoes have the highest damage of any tech-tree researchable torpedo.
- Full broadside salvo of fifteen torpedoes makes it extremely formidable at closer ranges.
- Decent gun firing range.
- Absurd torpedo potential damage — over 350,000 — with Type 93 mod. 3 torpedoes.
- Fast rudder time, like other Japanese destroyers.
Cons:
- All torpedoes are significantly inferior in detectablity than other nations.
- Whilst decent, the artillery can be hard to use at higher ranges and isn't suitable for direct confrontation against other nation destroyers.
- Relatively high surface detection range (7.6 km), especially compared to previous Japanese destroyers.
- Poor turning radius
- Long torpedo reload time.
- Somewhat poor torpedo launch arcs.
- Very fragile, module incapacitations will be a common occurrence when hit.
- Poor AA, especially in the long range auras.
- Main armament placement is poorly suited for offensive engagements.
- Wide torpedo spread is only suitable for engaging broadside-on ships.
Research
Optimal Configuration
Upgrades
Being a Tier X ship, Shimakaze has access to all six Upgrade Slots, with some flexibility in choice to allow preference to a particular play-style. For Upgrade Slot 1, Main Armaments Modification 1 is the best choice. For Upgrade Slot 2, Aiming Systems Modification 1 is the best choice. Upgrade Slot 3 will have some variety. Captains can take Torpedo Tubes Modification 3 to decrease the torpedo reload time, which is good for a torpedo build. Alternatively, captains can take Gun Fire Control System Modification 2 to increase the maximum firing range of primary artillery, which is good for a gun build. It's worth noting that as of the last concealment overhaul, your detect ability whilst shooting is exactly equal to your maximum gun range, so excessive gun range may be a hindrance. For Upgrade Slot 4, the recommended choice is Propulsion Modification 1, which reduces the chance of engine incapacitation so captains don’t lose Shimakaze’s advantage of speed. Although, Damage Control System Modification 1 is still a viable choice, as it decreases risk of fire and flooding. Upgrade Slot 5 also presents two good choices. Captains can pick Propulsion Modification 2 to increase acceleration to max speed; further taking advantage of her speed. Otherwise, pick Steering Gears Modification 2 for faster rudder shift time to increase the overall maneuverability of the ship. For Upgrade Slot 6, Concealment Systems Modification 1 is the best choice.
Commander Skills
| Recommended Commander Skills | ||||||||
|---|---|---|---|---|---|---|---|---|
| Cost (points) |
Endurance | Attack | Support | Versatility | ||||
| 1 |
★ |
★★★ |
|
|
|
|
|
|
| 2 |
|
★ |
★★ |
★ |
★ |
|
★★ |
★★★ |
| 3 |
★ |
★★★ |
★★★ |
|
★ |
★★★ |
|
★★ |
| 4 |
|
|
|
|
★ |
|
★★ |
★★★ |
| Key: ★★★ - Extremely Useful ★★ - Frequently Useful ★ - Occasionally Useful No stars - Not Useful | ||||||||
Consumables
Shimakaze gets three consumables: Damage Control Party, Smoke Generator, and Engine Boost. It is recommended to take premium versions of all consumables that have the resources to spare, but for those captains, whom are cash-strapped, prioritize Smoke Generator II. As it goes, a spotted DD is a dead DD; therefore having premium Smoke Generator will provide more chances to disappear from a disadvantageous situation.
Camouflage
Shimakaze has access to Type 1, 2, 5, or 6 Camouflage; the first three acquired via credits. Types 1 or 5 are recommended at a minimum as they reduce detectability range by sea. Players who wish to spend doubloons can equip Shimakaze with Type 20 Camouflage, which lowers her detection radius, reduces accuracy of incoming shells, increases credits & experience earned in battle, and decreases post-battle costs.
Signals
The choice of which Signal Flags to mount will confer to the individual preference of each captain, and are subject to great variation, although there are certain flags which are worth the further emphasis. Captains should mount India Yankee to decrease time to extinguish fires, mount November Foxtrot to decrease reload time of consumables, and mount Sierra Mike to increase the ship's maximum speed. To make their torpedoes more potent, captains should mount Juliet Whisky Unaone to increase chance of causing flooding and Juliet Charlie to mitigate risk to magazine detonation from mounting the former flag. If captains wish to buff their primary artillery, they are encouraged to mount Victor Lima + India X-ray to increase fire chance to HE shells.Gallery
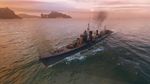
Shimakaze prepares for battle.
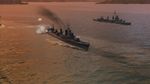
Shimakaze launches her torpedoes at enemy battleships.
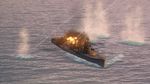
The destroyer attempts to dodge incoming fire.
Historical Info
Historical Gallery
References
Wikipedia - Shimakaze Class Destroyer
| Destroyers | II Tachibana |
| Cruisers | I Hashidate • II Chikuma • III Tenryū • III Katori |
| Battleships | II Mikasa |
| Aircraft Carriers | IV [[Ship:Hōshō (< 23.01.2019)|Hōshō (< 23.01.2019)]] • IV Hōshō • V [[Ship:Zuihō (< 23.01.2019)|Zuihō (< 23.01.2019)]] • VI [[Ship:Ryūjō (< 23.01.2019)|Ryūjō (< 23.01.2019)]] • VI Ryūjō • VII [[Ship:Hiryū (< 23.01.2019)|Hiryū (< 23.01.2019)]] • VII [[Ship:Kaga (< 23.01.2019)|Kaga (< 23.01.2019)]] • VIII [[Ship:Shōkaku (< 23.01.2019)|Shōkaku (< 23.01.2019)]] • VIII Shōkaku • VIII Kaga |
| N/A | IX Groningen |
| U.S.A. | II Sampson • II Smith |
| Commonwealth | III Vampire |
| N/A | II Tátra • III Romulus • IV Klas Horn • V Visby • V Muavenet • V Kalmar |
| Germany | II V-25 • III G-101 • IV V-170 • V T-22 • VI Ernst Gaede • VI T-61 |
| U.S.S.R. | II Storozhevoi • III Derzki • IV Izyaslav • V Gremyashchy |
| Italy | II Curtatone • III Nazario Sauro • IV Turbine • V Maestrale • VI Aviere • VI Leone |
| N/A | VI Juruá |
| Japan | II Tachibana |
| U.K. | II Medea • III Valkyrie • III Campbeltown |
| France | II Enseigne Gabolde • III Fusilier • IV Bourrasque • V L'Adroit • V Jaguar • V Siroco |
| Pan-Asia | II Longjiang • III Phra Ruang • IV Shenyang • V Jianwei • VI Fushun • VI Anshan |
| N/A | X Álvaro de Bazán |