¡Bienvenido a la Wiki de Wargaming.net!
Variantes
Otros idiomas

Ibuki

Saltar a: navegación, buscar
Ibuki_wows_main.jpg
Cruiser | Japan | Tier IX
Tech Tree Position
Mogami
Arrow_down.png
Ibuki_icon_small.png
Arrow_down.png
Zaō
stock
 top
General
Research price151000 exp
Purchase price12 500 000 Creditos
Hit Points35 100 
Aircraft
Main Battery
203 mm/50 3rd Year Type mod. E5 х 2 pcs.
Rate of Fireshots/min.
Reload Time15 sec.
Rotation Speeddeg./sec.
180 Degree Turn Time30 sec.
Firing Range15.04 km.
Maximum Dispersion127 m.
HE Shell203 mm HE Type0 
Maximum HE Shell Damage3300 
Chance of Fire on Target Caused by HE Shell17 %
Initial HE Shell Velocity840 m./s.
HE Shell Weight125.85 kg.
AP Shell203 mm AP Type91 
Maximum AP Shell Damage4700 
Initial AP Shell Velocity840 m./s.
AP Shell Weight125.85 kg.
Secondary Armament #1
100 mm/65 Type984 х 2 pcs.
Firing Rangekm.
Rate of Fire20.98 shots/min.
Reload Time2.86 sec.
HE Shell100 mm HE Type98 
Maximum HE Shell Damage1700 
Initial HE Shell Velocity1000 m./s.
Chance of Fire on Target Caused by HE Shel%
Torpedo Tubes
610 mm Quad4 х 4 pcs.
Rate of Fire0.59 shots/min.
Reload Time101 sec.
Rotation Speed25 deg./sec.
180 Degree Turn Time7.2 sec.
TorpedoType90 mod. 1 
Maximum Damage17 233 
Torpedo Speed62 knot
Torpedo Range9.99 km.
AA Defense
25 mm/60 Type96 mod. 128 х 1 pcs.
. . . Average Damage per Second50.4 
. . . Firing Range3.09 km.
25 mm/60 Type96 Triple mod. 112 х 3 pcs.
. . . Average Damage per Second73.2 
. . . Firing Range3.09 km.
100 mm/65 Type984 х 2 pcs.
. . . Average Damage per Second83.2 
. . . Firing Range5.01 km.
Maneuverability
Maximum Speed35 knot
Turning Circle Radius770 m.
Rudder Shift Time9.5 sec.
Concealment
Surface Detectability Range12.6 km.
Air Detectability Range8.55 km.
Battle Levels
12345678910
Wows_anno_flag_japan.png
IX
Ship_PJSC012_Ibuki_1944.png
12 500 000

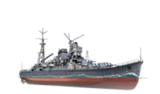
Ibuki — Japanese Tier IX cruiser.

Developed from the Mogami-class ships. Ibuki retained the powerful artillery and torpedo armament of her predecessors, but received advanced armor and a reinforced AA system.

Modules

link=Ship: Rate of Fire
(shots/min)
180 Degree Turn Time
(sec)
Maximum Dispersion
(m)
Maximum HE Shell Damage
(HP)
Chance of Fire on Target Caused by HE Shell
(%)
Maximum AP Shell Damage
(HP)
Research price
(exp)
Purchase price
(Creditos)
203 mm/50 Tipo tercer año N.º 2 en una torreta Modelo E4,4301273300174700 01 000 000
link=Ship: Hit Points
(HP)
Armor
(mm)
Armor
(mm)
Main Turrets
(pcs.)
Secondary Gun Turrets
(pcs.)
AA Mounts
(pcs.)
Torpedo Tubes
(pcs.)
Hangar Capacity
(pcs.)
Research price
(exp)
Purchase price
(Creditos)
Ibuki (A)35 1006140544/12/284 01 100 000
Ibuki (B)39 0006140546/6/44 42 0003 000 000
link=Ship: Rate of Fire
(shots/min)
Torpedo Tubes Reload Time
(sec)
180 Degree Turn Time
(sec)
Maximum Damage
(HP)
Torpedo Speed
(knot)
Torpedo Range
(km)
Research price
(exp)
Purchase price
(Creditos)
Tipo 90 mod. 10,61017,217 2336210 01 300 000
Tipo 93 mod. 20,51127,220 9666710 20 0001 800 000
link=Ship: Firing Range Increase
(%)
Maximum Firing Range
(km)
Research price
(exp)
Purchase price
(Creditos)
Tipo 9 mod. 1015 0800 000
Tipo 9 mod. 21016,5 22 0002 000 000
link=Ship: Maximum Speed
(knot)
Research price
(exp)
Purchase price
(Creditos)
Propulsión: 152 000 CV35 0800 000

Compatible Upgrades

 Slot 1  [[File:wows icon_modernization_PCM030_MainWeapon_Mod_I_bb1e79efbcc73dfa03a6dd5ae173566ee691b77e3a6587389d6f7ea07eb03588.png", "local": "{\"default\": \"gui|44px|Modificación 1 del armamento principal|link=Ship:Upgrades#Modificaci.C3.B3n.C2.A01_del.C2.A0armamento_principal]] [[File:wows icon_modernization_PCM031_SecondaryWeapon_Mod_I_5369d8b071df59a515906433ea1fff10a55841495258bcd04d3365467e61e4af.png", "local": "{\"default\": \"gui|44px|Modificación 1 del armamento auxiliar|link=Ship:Upgrades#Modificaci.C3.B3n.C2.A01_del.C2.A0armamento_auxiliar]] [[File:wows icon_modernization_PCM032_PowderMagazine_Mod_I_9607d8ec91ddcca4a95443845b888fbd9de4cd81df5a30a199d400657a552017.png", "local": "{\"default\": \"gui|44px|Modificación 1 de la santabárbara|link=Ship:Upgrades#Modificaci.C3.B3n.C2.A01_de_la.C2.A0santab.C3.A1rbara]]
 Slot 2  [[File:wows icon_modernization_PCM006_MainGun_Mod_II_bffc35efc4e090487fd6110a10a2be1f5d51b7918303f724194817e698055412.png", "local": "{\"default\": \"gui|44px|Modificación 2 de la batería principal|link=Ship:Upgrades#Modificaci.C3.B3n.C2.A02_de_la.C2.A0bater.C3.ADa_principal]] [[File:wows icon_modernization_PCM012_SecondaryGun_Mod_II_c87da07dc4aebb94da59f3df3f8c2934279decb9677334a1a7e4b1f1c9f9ad04.png", "local": "{\"default\": \"gui|44px|Modificación 1 de la batería secundaria|link=Ship:Upgrades#Modificaci.C3.B3n.C2.A01_de_la.C2.A0bater.C3.ADa_secundaria]] [[File:wows icon_modernization_PCM018_AirDefense_Mod_III_d3f357c6dc4e5e627a86e17a16432cb38da32bb1b7999b4a7852371491511770.png", "local": "{\"default\": \"gui|44px|Modificación 1 de los cañones AA|link=Ship:Upgrades#Modificaci.C3.B3n.C2.A01_de_los.C2.A0ca.C3.B1ones_AA]] [[File:wows icon_modernization_PCM033_Guidance_Mod_I_10c7521afe2d577c42618dd04cf6834f2be78cf6b64503844cf87793a5816484.png", "local": "{\"default\": \"gui|44px|Modificación 1 de los sistemas de tiro|link=Ship:Upgrades#Modificaci.C3.B3n.C2.A01_de_los.C2.A0sistemas_de_tiro]] [[File:wows icon_modernization_PCM070_Torpedo_Mod_IV_9e34ebc4f1a15656201b4148e32870eb1c67ddb2fb1a0bc410406236b472d1dd.png", "local": "{\"default\": \"gui|44px|Modificación 1 de los tubos de torpedo|link=Ship:Upgrades#Modificaci.C3.B3n.C2.A01_de_los.C2.A0tubos_de_torpedo]]
 Slot 3  [[File:wows icon_modernization_PCM013_MainGun_Mod_III_c6e20a5a027888820aca2cd031ba5959d38bc828202d8066ece4030712df8bd8.png", "local": "{\"default\": \"gui|44px|Modificación 3 de la batería principal|link=Ship:Upgrades#Modificaci.C3.B3n.C2.A03_de_la.C2.A0bater.C3.ADa_principal]] [[File:wows icon_modernization_PCM014_Torpedo_Mod_III_460876b51f5b3133f939c6ca7b0ec3be146a5ea6776695388f5cc3365de8a56f.png", "local": "{\"default\": \"gui|44px|Modificación 2 de los tubos de torpedo|link=Ship:Upgrades#Modificaci.C3.B3n.C2.A02_de_los.C2.A0tubos_de_torpedo]] [[File:wows icon_modernization_PCM015_FireControl_Mod_II_5ca921f0d2091adf28b41b6ba5c580a6f18367edbeabab0d0e7c8ad486971ab9.png", "local": "{\"default\": \"gui|44px|Modificación 2 del sistema de control de tiro|link=Ship:Upgrades#Modificaci.C3.B3n.C2.A02_del_sistema_de_control_de_tiro]] [[File:wows icon_modernization_PCM074_AuxiliaryArmament_Mod_I_6c88e35c308f597529e7bd744826e39242fdb3a3f0429b0a3b2fb7a219480498.png", "local": "{\"default\": \"gui|44px|Modificación 2 del armamento auxiliar|link=Ship:Upgrades#Modificaci.C3.B3n.C2.A02_del_armamento_auxiliar]]
 Slot 4  [[File:wows icon_modernization_PCM020_DamageControl_Mod_I_bbc708467bc8f1e6264ac88fb8999ea40660e4b0b94b59ab7b3f1a8b60539ed8.png", "local": "{\"default\": \"gui|44px|Modificación 1 del sistema de control de daños|link=Ship:Upgrades#Modificaci.C3.B3n.C2.A01_del.C2.A0sistema_de_control_de_da.C3.B1os]] [[File:wows icon_modernization_PCM069_Movement_Mod_I_ca8429dcc45fdad36cdd474a13e5a289d6f7cf27ae32c9f30d42b72b9db493af.png", "local": "{\"default\": \"gui|44px|Protección de la sala de máquinas|link=Ship:Upgrades#Protecci.C3.B3n_de_la_sala_de_m.C3.A1quinas]]
 Slot 5  [[File:wows icon_modernization_PCM023_DamageControl_Mod_II_3c6aea0c5bccc94f1d8f1fa52662232afa007d784638ce6e981c8ad3457c63fa.png", "local": "{\"default\": \"gui|44px|Modificación 2 del sistema de control de daños|link=Ship:Upgrades#Modificaci.C3.B3n.C2.A02_del.C2.A0sistema_de_control_de_da.C3.B1os]] [[File:wows icon_modernization_PCM024_Engine_Mod_II_4b4f4c217cf5cf580f47ccbbf76ecede110c5143055c55ab45a82d19e87423fb.png", "local": "{\"default\": \"gui|44px|Modificación 1 de la propulsión|link=Ship:Upgrades#Modificaci.C3.B3n.C2.A01_de_la.C2.A0propulsi.C3.B3n]] [[File:wows icon_modernization_PCM025_SteeringGear_Mod_II_523c86ce4c7d228e73ee3d2cb406f4d78a205aa2453fec45b0925dec519bf7c5.png", "local": "{\"default\": \"gui|44px|Modificación 1 del aparato de gobierno|link=Ship:Upgrades#Modificaci.C3.B3n.C2.A01_del.C2.A0aparato_de_gobierno]] [[File:wows icon_modernization_PCM087_AirSupport_Mod_I_d26ea96903bf2c47669142777cfa61b0285e652ce26304ed9502bc8de35d0ded.png", "local": "{\"default\": \"gui|44px|Modificación 1 del ataque aéreo|link=Ship:Upgrades#Modificaci.C3.B3n.C2.A01_del_ataque_a.C3.A9reo]]
 Slot 6  [[File:wows icon_modernization_PCM026_LookoutStation_Mod_I_9bdab08af77f5c612cec2a357353f7b60d37118aaab4763721dd53230f68943b.png", "local": "{\"default\": \"gui|44px|Sistema de vigilancia de torpedos|link=Ship:Upgrades#Sistema_de_vigilancia_de_torpedos]] [[File:wows icon_modernization_PCM027_ConcealmentMeasures_Mod_I_bda1386ab237032301b6273e655a1998de5bfb50e2c8e59124c8a93d73093f0a.png", "local": "{\"default\": \"gui|44px|Modificación 1 del sistema de ocultación|link=Ship:Upgrades#Modificaci.C3.B3n.C2.A01_del.C2.A0sistema_de_ocultaci.C3.B3n]] [[File:wows icon_modernization_PCM035_SteeringGear_Mod_III_9bbaf379d4027413eb48f3407a4374e40151f55611d71fac0a66d12a5d4e4434.png", "local": "{\"default\": \"gui|44px|Modificación 2 del aparato de gobierno|link=Ship:Upgrades#Modificaci.C3.B3n.C2.A02_del.C2.A0aparato_de_gobierno]] [[File:wows icon_modernization_PCM072_AbilityWorktimeBoost_Mod_I_e6323cc6cf2a0c16e8a3a3ca4db0ceaebbdb868447435dbafea6f580b66ff101.png", "local": "{\"default\": \"gui|44px|Modificación 1 de los consumibles del barco|link=Ship:Upgrades#Modificaci.C3.B3n.C2.A01_de_los_consumibles_del_barco]]

Player Opinion

Performance

Ibuki is basically a 'repeat' of the Mogami design that has effectively solved her predecessor's shortcomings if we look at it in the engineering aspect. As a cruiser, she's a more beefy Mogami in most cases.

What you have learned in Mogami, Ibuki capitalizes and her range allows you to gain the initiative in shooting first. Her armor is no slouch as she can take more punishment than her predecessor although her colleague the Baltimore is more durable and it is also worth mentioning that the ABC-XY turret layout, despite having ten guns in five dual mount turrets, cannot match the Dmitri Donskoi in turrets and barrel number but rather has the most heaviest broadside of any Tier IX cruiser which can be used to great effect, and combined with her range and proper usage due to her rather impressive concealment, can be a force to be reckoned with in the right hands.

Pros:

  • Impressive detection range at her tier
  • The cruiser has practically the heaviest broadside weight at her tier
  • Fast
  • The AA suite is surprisingly good if kitted
  • Good set of guns
  • Can mount a spotter plane to further increase range
  • Reasonable stock grind
  • Faster torpedoes

Cons:

  • Basically a more pudgy tier 9 Mogami
  • Retains the same inconvenient torpedo placement
  • Shell speed is slightly slower than predecessor despite both ships carrying the same gun
  • Cannot mount radar consumable
  • The AA suite damage leaves something to be desired
  • Worst HP in its tier, you cannot take ANY punishment.

Research

It is suggested to equip Hull B as soon as possible for the AA suite improvements, survivability and mobility upgrades then the GFCS, but if you wish to focus on the gunnery aspect as Ibuki does not have any guns to research, forego the hull with the GFCS first.

A suggested kit for the cruiser if one is content with the anti-surface capabilities: slot 1 - AA gun and secondary survivability, slot 2 - AA gun range, slot 3 - AA gun potency, slot 4 - damage control 1, slot 5 - rudder shift, slot 6 - concealment module if you wish to remain hidden in order to get close enough to be effective, or acquisition module if you feel that detection is far more important

Optimal Configuration


Commander Skills

Gallery

Historical Info

Historical Gallery


Ships of Japan
Destroyers  II TachibanaDoblones • II Umikaze • II Tachibana LimaDoblones • III Wakatake • IV Isokaze • V Minekaze • V FūjinDoblones • V KamikazeDoblones • V Kamikaze RDoblones • V Mutsuki • VI Fubuki • VI Hatsuharu • VI ShinonomeDoblones • VII Akatsuki • VII Shiratsuyu • VII YūdachiDoblones • VIII Akizuki • VIII Kagerō • VIII AsashioDoblones • VIII HSF Harekaze IIDoblones • VIII Asashio BDoblones • VIII HSF HarekazeDoblones • VIII AL YukikazeDoblones • IX Yūgumo • IX Kitakaze • X Shimakaze • X Harugumo • X Hayate •  Yamagiri 
Cruisers  I Hashidate • II Chikuma • III Tenryū • III KatoriDoblones • IV YūbariDoblones • IV Kuma • IV Iwaki AlphaDoblones • V Furutaka • V Agano • V YahagiDoblones • VI Aoba • VI Gokase • VII Myōkō • VII Omono • VII Tokachi • VII MayaDoblones • VII ARP Myōkō • VII ARP AshigaraDoblones • VII ARP Haguro • VII Southern DragonDoblones • VII Eastern DragonDoblones • VII ARP Nachi • VIII Mogami • VIII ToneDoblones • VIII AtagoDoblones • VIII Shimanto • VIII Atago BDoblones • VIII ARP Takao • VIII ARP MayaDoblones • IX Ibuki • IX Takahashi • IX Azuma • IX AL AzumaDoblones • X Zaō • X Yodo • X Yoshino • X Yoshino B • X Kitakami 
Battleships  II MikasaDoblones • III Kawachi • IV Myōgi • IV IshizuchiDoblones • V Kongō • V ARP Kongō • V ARP Kirishima • V ARP Haruna • V ARP Hiei • V HSF HieiDoblones • VI Fusō • VI MutsuDoblones • VI IseDoblones • VII Nagato • VII AshitakaDoblones • VII HyūgaDoblones • VIII Amagi • VIII KiiDoblones • VIII Ignis PurgatioDoblones • VIII RagnarokDoblones • IX Izumo • IX Musashi • IX HizenDoblones • IX IwamiDoblones • X Yamato • X Shikishima • X ARP Yamato •  Satsuma 
Aircraft Carriers  IV Hōshō • VI Ryūjō • VIII Shōkaku • VIII KagaDoblones • VIII Kaga BDoblones • X Hakuryū •  Sekiryu
Cruisers
Japan  I Hashidate • II Chikuma • III Tenryū • III KatoriDoblones • IV YūbariDoblones • IV Kuma • IV Iwaki AlphaDoblones • V Furutaka • V Agano • V YahagiDoblones • VI Aoba • VI Gokase • VII Myōkō • VII Omono • VII Tokachi • VII MayaDoblones • VII ARP Myōkō • VII ARP AshigaraDoblones • VII ARP Haguro • VII Southern DragonDoblones • VII Eastern DragonDoblones • VII ARP Nachi • VIII Mogami • VIII ToneDoblones • VIII AtagoDoblones • VIII Shimanto • VIII Atago BDoblones • VIII ARP Takao • VIII ARP MayaDoblones • IX Ibuki • IX Takahashi • IX Azuma • IX AL AzumaDoblones • X Zaō • X Yodo • X Yoshino • X Yoshino B • X Kitakami 
U.S.A.  I Erie • II Chester • II AlbanyDoblones • III St. Louis • III CharlestonDoblones • IV Phoenix • V Omaha • V MarbleheadDoblones • V Marblehead LimaDoblones • VI Pensacola • VI Dallas • VII AtlantaDoblones • VII New Orleans • VII Helena • VII IndianapolisDoblones • VII Atlanta BDoblones • VII BoiseDoblones • VII FlintDoblones • VIII Baltimore • VIII Cleveland • VIII WichitaDoblones • VIII AnchorageDoblones • VIII CongressDoblones • VIII RochesterDoblones • VIII San DiegoDoblones • VIII AL MontpelierDoblones • IX Buffalo • IX Seattle • IX Vallejo • IX Alaska • IX TulsaDoblones • IX Alaska BDoblones • X Des Moines • X Worcester • X Puerto Rico • X Salem • X Austin •  Annapolis 
Pan-Asia  I Chengan • V Chungking • VI Rahmat • VI HuangheDoblones • VII Chumphon • VIII Harbin • VIII IrianDoblones • VIII WukongDoblones • IX Sejong • IX DalianDoblones • X Jinan 
Germany  I Hermelin • II Dresden • II EmdenDoblones • III Kolberg • IV Karlsruhe • V Königsberg • VI Nürnberg • VI Admiral Graf SpeeDoblones • VI Leipzig • VI HSF Admiral Graf SpeeDoblones • VII Yorck • VII MünchenDoblones • VII WeimarDoblones • VIII Admiral Hipper • VIII Prinz EugenDoblones • VIII MainzDoblones • VIII Cross of DornDoblones • IX Roon • IX Siegfried • IX Ägir • IX Admiral Schröder • X Hindenburg •  Clausewitz 
N/A  I Gryf 
U.S.S.R.  I Orlan • II DianaDoblones • II Diana LimaDoblones • II Novik • III AuroraDoblones • III Bogatyr • III OlegDoblones • III VaryagDoblones • III AL AvroraDoblones • IV Svietlana • V MurmanskDoblones • V Kotovsky • V Krasny KrymDoblones • V MikoyanDoblones • V KirovDoblones • VI Budyonny • VI MolotovDoblones • VI Admiral MakarovDoblones • VII Shchors • VII LazoDoblones • VIII Chapayev • VIII Tallinn • VIII Mikhail KutuzovDoblones • VIII OchakovDoblones • VIII Pyotr BagrationDoblones • VIII Bagration • IX Dmitri Donskoi • IX Riga • IX Kronshtadt • X Moskva • X Alexander Nevsky • X Petropavlovsk • X Stalingrad • X Smolensk • X Sevastopol 
U.K.  I Black Swan • II Weymouth • III Caledon • IV Danae • V Emerald • V Hawkins • V ExeterDoblones • VI Leander • VI Devonshire • VI LondonDoblones • VI DidoDoblones • VII Fiji • VII Surrey • VII BelfastDoblones • VIII Edinburgh • VIII Albemarle • VIII CheshireDoblones • VIII Tiger '59Doblones • VIII Belfast '43Doblones • VIII HampshireDoblones • IX Neptune • IX Drake • X Minotaur • X Goliath • X Plymouth • X Gibraltar • X Monmouth •  Edgar 
Italy  I Eritrea • II Nino Bixio • III Taranto • IV Alberto di Giussano • V Raimondo Montecuccoli • V GenovaDoblones • VI Trento • VI Duca d'AostaDoblones • VII Zara • VII Duca degli AbruzziDoblones • VII GoriziaDoblones • VIII Amalfi • IX Brindisi • X Venezia • X Napoli 
N/A  I Van Kinsbergen • II Gelderland • III Java • IV De Ruyter • V Celebes • VI Kijkduin • VII Eendracht • VIII Haarlem • VIII De Zeven ProvinciënDoblones • IX Johan de Witt • X Gouden Leeuw 
France  I Bougainville • II Jurien de la Gravière • III Friant • IV Duguay-Trouin • V Émile Bertin • VI La Galissonnière • VI De GrasseDoblones • VII Algérie • VII ToulonDoblones • VIII Charles Martel • VIII Cherbourg • VIII BayardDoblones • IX Saint-Louis • IX Brest • IX CarnotDoblones • X Henri IV • X Marsella • X Colbert •  Condé 
Commonwealth  VI PerthDoblones • VI MysoreDoblones 
N/A  VI CanariasDoblones 
N/A  II Almirante AbreuDoblones • VII Nueve de JulioDoblones