Kagero

| Research price115000 exp |
| Purchase price9 100 000 |
| Hit Points13 300 |
| 127 mm/50 3rd Year Type3 х 2 pcs. |
| Rate of Fire8.51 shots/min. |
| Reload Time7.05 sec. |
| Rotation Speed6.9 deg./sec. |
| 180 Degree Turn Time26.09 sec. |
| Firing Range8.55 km. |
| Maximum Dispersion79 m. |
| HE Shell127 mm HE Type1 |
| Maximum HE Shell Damage1800 |
| Chance of Fire on Target Caused by HE Shell7 % |
| Initial HE Shell Velocity915 m./s. |
| HE Shell Weight23 kg. |
| AP Shell127 mm AP Type0 |
| Maximum AP Shell Damage2200 |
| Initial AP Shell Velocity915 m./s. |
| AP Shell Weight23 kg. |
| 610 mm Quad2 х 4 pcs. |
| Rate of Fire0.59 shots/min. |
| Reload Time101 sec. |
| Rotation Speed25 deg./sec. |
| 180 Degree Turn Time7.2 sec. |
| TorpedoType90 mod. 1 |
| Maximum Damage17 233 |
| Torpedo Speed62 knot |
| Torpedo Range9.99 km. |
| 25 mm/60 Type96 mod. 14 х 1 pcs. |
| . . . Average Damage per Second7.2 |
| . . . Firing Range3.09 km. |
| 25 mm/60 Type96 Triple mod. 13 х 3 pcs. |
| . . . Average Damage per Second18.3 |
| . . . Firing Range3.09 km. |
| Maximum Speed35 knot |
| Turning Circle Radius640 m. |
| Rudder Shift Time4 sec. |
| Surface Detectability Range6.84 km. |
| Air Detectability Range3.84 km. |

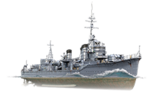
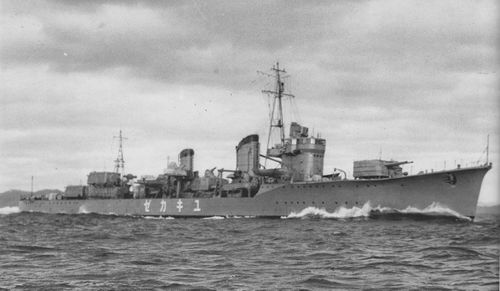
Kagerō — Japanese Tier VIII destroyer.
Due to a good balance of her main characteristics, Kagero was the most successful destroyer design in the Imperial Japanese Navy. She had extremely long-range, high-speed, oxygen-fueled torpedoes that made her considerably superior to all ships of her type in terms of torpedo armament power.
Modules
 |
Rate of Fire (shots/min) | 180 Degree Turn Time (sec) | Maximum Dispersion (m) | Maximum HE Shell Damage (HP) | Chance of Fire on Target Caused by HE Shell (%) | Maximum AP Shell Damage (HP) |
Research price (exp) |
Purchase price ( | |
|---|---|---|---|---|---|---|---|---|---|
| 127 mm/50 Tipo tercer año en una montura Tipo C | 8,5 | 26,1 | 79 | 2150 | 9 | 2200 | 0 | 590 000 |
 |
Hit Points (HP) | Armor (mm) | Armor (mm) | Main Turrets (pcs.) | Secondary Gun Turrets (pcs.) | AA Mounts (pcs.) | Torpedo Tubes (pcs.) | Hangar Capacity (pcs.) |
Research price (exp) |
Purchase price ( | |
|---|---|---|---|---|---|---|---|---|---|---|---|
| Kagerō (A) | 13 300 | 6 | 20 | 3 | 4/3 | 2 | 0 | 610 000 | |||
| Kagerō (B) | 15 100 | 6 | 20 | 3 | 10 | 2 | 21 000 | 1 600 000 |
 |
Rate of Fire (shots/min) | Torpedo Tubes Reload Time (sec) | 180 Degree Turn Time (sec) | Maximum Damage (HP) | Torpedo Speed (knot) | Torpedo Range (km) |
Research price (exp) |
Purchase price ( | |
|---|---|---|---|---|---|---|---|---|---|
| Tipo 90 mod. 1 | 0,6 | 101 | 7,2 | 17 233 | 62 | 10 | 0 | 1 300 000 | |
| Tipo 93 mod. 2 | 0,5 | 112 | 7,2 | 20 966 | 67 | 10 | 20 000 | 1 800 000 |
 |
Firing Range Increase (%) | Maximum Firing Range (km) |
Research price (exp) |
Purchase price ( | |
|---|---|---|---|---|---|
| Tipo 8 mod. 1 | 0 | 0 | 350 000 | ||
| Tipo 8 mod. 2 | 0 | 8000 | 780 000 |
 |
Maximum Speed (knot) |
Research price (exp) |
Purchase price ( | |
|---|---|---|---|---|
| Propulsión: 52 000 CV | 35 | 0 | 600 000 |
Compatible Upgrades
| Slot 1 |
|||||
|---|---|---|---|---|---|
| Slot 2 |
|||||
| Slot 3 |
|||||
| Slot 4 |
|||||
| Slot 5 |
Player Opinion
Performance
Dropping down from Tier IX as a part of the Japanese destroyer line changes in Update 0.5.15, Kagero now fills Fubuki’s old spot at Tier VIII. Fans of the old Fubuki and new captains who have moved up from Akatsuki will find Kagero familiar in many ways. Both should be accustomed to the A-X-Y turret arrangement of the main battery, her handling characteristics are nearly identical (similar turning circle radius and rudder shift time), and her anti-aircraft suite is still hardly worth mentioning. So, what's new?
For starters, Kagero’s guns reload faster, though they do give up some range to those of Akatsuki and pre-0.5.15 Fubuki. This gives her more of a fighting chance when cornered by an enemy gunboat destroyer (such as Benson), especially if said enemy is already wounded. With that said, however, captains who have progressed this far up the line should know by now when to hang in a gun duel against an enemy destroyer and when discretion is the better part of valor; never court a gunfight with an American or Russian destroyer with lots of health. Kagero’s detection radius is improved over both old Fubuki and Akatsuki; not only can she can equip Concealment Module 1 (as a Tier VIII ship), but her base detection radius of 6.8 km is the lowest of all high-tier Japanese destroyers.
Kagero has some fairly glaring deficiencies compared to her counterparts at Tier VIII, though. Her speed is fairly pedestrian, her anti-aircraft guns are ineffective at shooting down enemy planes, and her main battery reload and turret traverse times are painfully slow. Just like Akatsuki, captains are likely to miss the tremendous tactical flexibility of Fubuki’s three torpedo launchers. As nasty as her upgraded torpedoes are — and they hit very, very hard — their reload time means that getting off more than a few salvos in a match is tough. Luckily, Kagero can give up Smoke Generator in exchange for Torpedo Reload Booster. This allows her to force a 30 second reload time on her torpedoes once every six minutes (or four, with the premium version). Given her best-in-tier detection radius, this will be a worthwhile gamble for many captains.
The Japanese destroyer line becomes challenging to excel in at high tiers, but Kagero provides all the tools necessary for captains to do just that; they need only bring patience and a willingness to learn how to handle her.Pros:
- Lowest detection range of all Tier VIII destroyers.
- Fast, powerful torpedoes that hit like freight trains.
- Good handling; same turning circle as her predecessors, quick rudder shift.
Cons:
- Mediocre top speed of 35 knots.
- Main battery is slightly improved from Akatsuki, but is still nothing special.
- Painfully long torpedo reload time, regardless of which torpedoes are equipped.
Research
Optimal Configuration
Upgrades
As a Tier VIII ship, Kagero gains access to Upgrade Slot 6; Concealment System Modification 1 is the logical choice for the new slot. Her other upgrade recommendations remain largely as they were for Akatsuki: Main Armaments Modification 1 in Upgrade Slot 1, Aiming Systems Modification 1 or Main Battery Modification 2 in Upgrade Slot 2, and Propulsion Modifications 1 and 2 in Upgrade Slot 4 and Upgrade Slot 5, respectively.
Commander Skills
| Recommended Commander Skills | ||||||||
|---|---|---|---|---|---|---|---|---|
| Cost (points) |
Endurance | Attack | Support | Versatility | ||||
| 1 |
★ |
★★★ |
|
|
|
|
|
|
| 2 |
★ |
★★ |
★ |
★ |
★ |
|
★★ |
★★★ |
| 3 |
★★ |
★★ |
★★ |
|
|
★★★ |
|
★★ |
| 4 |
|
|
★ |
|
★★ |
|
★★ |
★★★ |
| Key: ★★★ - Extremely Useful ★★ - Frequently Useful ★ - Occasionally Useful No stars - Not Useful | ||||||||
Consumables
Kagero captains must choose between equipping Smoke Generator and a downgraded version of the Torpedo Reload Booster consumable that Shiratsuyu and Akizuki have access to. Whichever one is chosen, captains are encouraged to invest the credits (or doubloons) in the premium version. As ever, investing in Damage Control Party II is also highly recommended. Engine Boost II might be worthwhile for captains without Smoke Generator; otherwise, the free version should be more than adequate.
Camouflage
Type 1, 2, or 5 camouflage can be equipped for credits; Types 1 or 5 are recommended at a minimum to reduce detectibility range.
Players who wish to spend doubloons can equip Kagero with Type 18 camouflage that lowers her detection radius, reduces the accuracy of incoming shells, reduces her repair costs, and increases the amount of experience she earns.Gallery
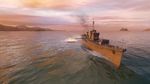
Kagero fires her torpedoes at incoming enemy ships.
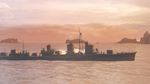
Kagero launches torpedoes at an enemy Tirpitz and Friedrich der Große from within her smokescreen.
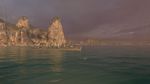
Kagero speeds towards the enemy capture point under the cover of a cyclone.


Historical Info
Historical Gallery


References
- Stille, M. Wright, P. (2013). Imperial Japanese Navy Destroyers 1919-45 (2): Asashio to Tachibana Classes. London, UK: Osprey Publishing Ltd.
- Chesneau, R., Gardiner, R. (1980). Conway’s All the World’s Fighting Ships, 1922-1946. London, UK: Conway Maritime Press.
| Destroyers | II Tachibana |
| Cruisers | I Hashidate • II Chikuma • III Tenryū • III Katori |
| Battleships | II Mikasa |
| Aircraft Carriers | IV [[Ship:Hōshō (< 23.01.2019)|Hōshō (< 23.01.2019)]] • IV Hōshō • V [[Ship:Zuihō (< 23.01.2019)|Zuihō (< 23.01.2019)]] • VI [[Ship:Ryūjō (< 23.01.2019)|Ryūjō (< 23.01.2019)]] • VI Ryūjō • VII [[Ship:Hiryū (< 23.01.2019)|Hiryū (< 23.01.2019)]] • VII [[Ship:Kaga (< 23.01.2019)|Kaga (< 23.01.2019)]] • VIII [[Ship:Shōkaku (< 23.01.2019)|Shōkaku (< 23.01.2019)]] • VIII Shōkaku • VIII Kaga |
| N/A | IX Groningen |
| U.S.A. | II Sampson • II Smith |
| Commonwealth | III Vampire |
| N/A | II Tátra • III Romulus • IV Klas Horn • V Visby • V Muavenet • V Kalmar |
| Germany | II V-25 • III G-101 • IV V-170 • V T-22 • VI Ernst Gaede • VI T-61 |
| U.S.S.R. | II Storozhevoi • III Derzki • IV Izyaslav • V Gremyashchy |
| Italy | II Curtatone • III Nazario Sauro • IV Turbine • V Maestrale • VI Aviere • VI Leone |
| N/A | VI Juruá |
| Japan | II Tachibana |
| U.K. | II Medea • III Valkyrie • III Campbeltown |
| France | II Enseigne Gabolde • III Fusilier • IV Bourrasque • V L'Adroit • V Jaguar • V Siroco |
| Pan-Asia | II Longjiang • III Phra Ruang • IV Shenyang • V Jianwei • VI Fushun • VI Anshan |
| N/A | X Álvaro de Bazán |