¡Bienvenido a la Wiki de Wargaming.net!
Variantes
Otros idiomas

Zao

Saltar a: navegación, buscar
Zaō_wows_main.jpg
Cruiser | Japan | Tier X
Tech Tree Position
Ibuki
Arrow_down.png
Zaō_icon_small.png
stock
 top
General
Research price238000 exp
Purchase price20 000 000 Creditos
Hit Points40 800 
Aircraft
Main Battery
203 mm/50 18th Year Type4 х 3 pcs.
Rate of Fire4.38 shots/min.
Reload Time13.7 sec.
Rotation Speeddeg./sec.
180 Degree Turn Time36 sec.
Firing Range16.23 km.
Maximum Dispersion136 m.
HE Shell203 mm HE Type1 
Maximum HE Shell Damage3400 
Chance of Fire on Target Caused by HE Shell19 %
Initial HE Shell Velocity920 m./s.
HE Shell Weight155 kg.
AP Shell203 mm AP Type92 
Maximum AP Shell Damage5400 
Initial AP Shell Velocity920 m./s.
AP Shell Weight155 kg.
Secondary Armament #1
100 mm/65 Type986 х 2 pcs.
Firing Rangekm.
Rate of Fire20 shots/min.
Reload Timesec.
HE Shell100 mm HE Type98 
Maximum HE Shell Damage1700 
Initial HE Shell Velocity1000 m./s.
Chance of Fire on Target Caused by HE Shel%
Torpedo Tubes
610 mm Quintuple4 х 5 pcs.
Rate of Fire0.43 shots/min.
Reload Time141 sec.
Rotation Speed25 deg./sec.
180 Degree Turn Time7.2 sec.
TorpedoType F3 
Maximum Damage21 367 
Torpedo Speed76 knot
Torpedo Range8.01 km.
AA Defense
25 mm/60 Type96 mod. 120 х 1 pcs.
. . . Average Damage per Second36 
. . . Firing Range3.09 km.
40 mm Bofors "Chi" Type989 х 2 pcs.
. . . Average Damage per Second99 
. . . Firing Range3.51 km.
25 mm/60 Type96 Triple mod. 111 х 3 pcs.
. . . Average Damage per Second67.1 
. . . Firing Range3.09 km.
100 mm/65 Type986 х 2 pcs.
. . . Average Damage per Second124.8 
. . . Firing Range5.01 km.
Maneuverability
Maximum Speed34.5 knot
Turning Circle Radius840 m.
Rudder Shift Time7.7 sec.
Concealment
Surface Detectability Range12.6 km.
Air Detectability Range9.33 km.
Battle Levels
12345678910
Wows_anno_flag_japan.png
X
Ship_PJSC034_Zao_1944.png
20 000 000

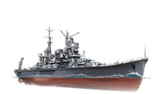
Zaō — Japanese Tier X cruiser.

A very powerful cruiser in all respects. Compared with the preceding classes of heavy cruisers, Zao had a greater number of main battery and AA guns, thick armor and a reinforced torpedo armament.

Modules

link=Ship: Rate of Fire
(shots/min)
180 Degree Turn Time
(sec)
Maximum Dispersion
(m)
Maximum HE Shell Damage
(HP)
Chance of Fire on Target Caused by HE Shell
(%)
Maximum AP Shell Damage
(HP)
Research price
(exp)
Purchase price
(Creditos)
203 mm/50 Tipo tercer año N.º 2 en una torreta triple4,4361363400195400 02 100 000
link=Ship: Hit Points
(HP)
Armor
(mm)
Armor
(mm)
Main Turrets
(pcs.)
Secondary Gun Turrets
(pcs.)
AA Mounts
(pcs.)
Torpedo Tubes
(pcs.)
Hangar Capacity
(pcs.)
Research price
(exp)
Purchase price
(Creditos)
Zaō (A)44 90016203469/11/20/64 02 800 000
link=Ship: Rate of Fire
(shots/min)
Torpedo Tubes Reload Time
(sec)
180 Degree Turn Time
(sec)
Maximum Damage
(HP)
Torpedo Speed
(knot)
Torpedo Range
(km)
Research price
(exp)
Purchase price
(Creditos)
Tipo 93 mod. 30,41717,223 7666712 30 0002 500 000
Tipo F30,61047,221 366768 02 500 000
link=Ship: Firing Range Increase
(%)
Maximum Firing Range
(km)
Research price
(exp)
Purchase price
(Creditos)
Tipo 10 mod. 1016,2 01 600 000
link=Ship: Maximum Speed
(knot)
Research price
(exp)
Purchase price
(Creditos)
Propulsión: 159 000 CV34,5 01 400 000

Compatible Upgrades

 Slot 1  [[File:wows icon_modernization_PCM030_MainWeapon_Mod_I_bb1e79efbcc73dfa03a6dd5ae173566ee691b77e3a6587389d6f7ea07eb03588.png", "local": "{\"default\": \"gui|44px|Modificación 1 del armamento principal|link=Ship:Upgrades#Modificaci.C3.B3n.C2.A01_del.C2.A0armamento_principal]] [[File:wows icon_modernization_PCM031_SecondaryWeapon_Mod_I_5369d8b071df59a515906433ea1fff10a55841495258bcd04d3365467e61e4af.png", "local": "{\"default\": \"gui|44px|Modificación 1 del armamento auxiliar|link=Ship:Upgrades#Modificaci.C3.B3n.C2.A01_del.C2.A0armamento_auxiliar]] [[File:wows icon_modernization_PCM032_PowderMagazine_Mod_I_9607d8ec91ddcca4a95443845b888fbd9de4cd81df5a30a199d400657a552017.png", "local": "{\"default\": \"gui|44px|Modificación 1 de la santabárbara|link=Ship:Upgrades#Modificaci.C3.B3n.C2.A01_de_la.C2.A0santab.C3.A1rbara]]
 Slot 2  [[File:wows icon_modernization_PCM006_MainGun_Mod_II_bffc35efc4e090487fd6110a10a2be1f5d51b7918303f724194817e698055412.png", "local": "{\"default\": \"gui|44px|Modificación 2 de la batería principal|link=Ship:Upgrades#Modificaci.C3.B3n.C2.A02_de_la.C2.A0bater.C3.ADa_principal]] [[File:wows icon_modernization_PCM012_SecondaryGun_Mod_II_c87da07dc4aebb94da59f3df3f8c2934279decb9677334a1a7e4b1f1c9f9ad04.png", "local": "{\"default\": \"gui|44px|Modificación 1 de la batería secundaria|link=Ship:Upgrades#Modificaci.C3.B3n.C2.A01_de_la.C2.A0bater.C3.ADa_secundaria]] [[File:wows icon_modernization_PCM018_AirDefense_Mod_III_d3f357c6dc4e5e627a86e17a16432cb38da32bb1b7999b4a7852371491511770.png", "local": "{\"default\": \"gui|44px|Modificación 1 de los cañones AA|link=Ship:Upgrades#Modificaci.C3.B3n.C2.A01_de_los.C2.A0ca.C3.B1ones_AA]] [[File:wows icon_modernization_PCM033_Guidance_Mod_I_10c7521afe2d577c42618dd04cf6834f2be78cf6b64503844cf87793a5816484.png", "local": "{\"default\": \"gui|44px|Modificación 1 de los sistemas de tiro|link=Ship:Upgrades#Modificaci.C3.B3n.C2.A01_de_los.C2.A0sistemas_de_tiro]] [[File:wows icon_modernization_PCM070_Torpedo_Mod_IV_9e34ebc4f1a15656201b4148e32870eb1c67ddb2fb1a0bc410406236b472d1dd.png", "local": "{\"default\": \"gui|44px|Modificación 1 de los tubos de torpedo|link=Ship:Upgrades#Modificaci.C3.B3n.C2.A01_de_los.C2.A0tubos_de_torpedo]]
 Slot 3  [[File:wows icon_modernization_PCM013_MainGun_Mod_III_c6e20a5a027888820aca2cd031ba5959d38bc828202d8066ece4030712df8bd8.png", "local": "{\"default\": \"gui|44px|Modificación 3 de la batería principal|link=Ship:Upgrades#Modificaci.C3.B3n.C2.A03_de_la.C2.A0bater.C3.ADa_principal]] [[File:wows icon_modernization_PCM014_Torpedo_Mod_III_460876b51f5b3133f939c6ca7b0ec3be146a5ea6776695388f5cc3365de8a56f.png", "local": "{\"default\": \"gui|44px|Modificación 2 de los tubos de torpedo|link=Ship:Upgrades#Modificaci.C3.B3n.C2.A02_de_los.C2.A0tubos_de_torpedo]] [[File:wows icon_modernization_PCM015_FireControl_Mod_II_5ca921f0d2091adf28b41b6ba5c580a6f18367edbeabab0d0e7c8ad486971ab9.png", "local": "{\"default\": \"gui|44px|Modificación 2 del sistema de control de tiro|link=Ship:Upgrades#Modificaci.C3.B3n.C2.A02_del_sistema_de_control_de_tiro]] [[File:wows icon_modernization_PCM074_AuxiliaryArmament_Mod_I_6c88e35c308f597529e7bd744826e39242fdb3a3f0429b0a3b2fb7a219480498.png", "local": "{\"default\": \"gui|44px|Modificación 2 del armamento auxiliar|link=Ship:Upgrades#Modificaci.C3.B3n.C2.A02_del_armamento_auxiliar]]
 Slot 4  [[File:wows icon_modernization_PCM020_DamageControl_Mod_I_bbc708467bc8f1e6264ac88fb8999ea40660e4b0b94b59ab7b3f1a8b60539ed8.png", "local": "{\"default\": \"gui|44px|Modificación 1 del sistema de control de daños|link=Ship:Upgrades#Modificaci.C3.B3n.C2.A01_del.C2.A0sistema_de_control_de_da.C3.B1os]] [[File:wows icon_modernization_PCM069_Movement_Mod_I_ca8429dcc45fdad36cdd474a13e5a289d6f7cf27ae32c9f30d42b72b9db493af.png", "local": "{\"default\": \"gui|44px|Protección de la sala de máquinas|link=Ship:Upgrades#Protecci.C3.B3n_de_la_sala_de_m.C3.A1quinas]]
 Slot 5  [[File:wows icon_modernization_PCM023_DamageControl_Mod_II_3c6aea0c5bccc94f1d8f1fa52662232afa007d784638ce6e981c8ad3457c63fa.png", "local": "{\"default\": \"gui|44px|Modificación 2 del sistema de control de daños|link=Ship:Upgrades#Modificaci.C3.B3n.C2.A02_del.C2.A0sistema_de_control_de_da.C3.B1os]] [[File:wows icon_modernization_PCM024_Engine_Mod_II_4b4f4c217cf5cf580f47ccbbf76ecede110c5143055c55ab45a82d19e87423fb.png", "local": "{\"default\": \"gui|44px|Modificación 1 de la propulsión|link=Ship:Upgrades#Modificaci.C3.B3n.C2.A01_de_la.C2.A0propulsi.C3.B3n]] [[File:wows icon_modernization_PCM025_SteeringGear_Mod_II_523c86ce4c7d228e73ee3d2cb406f4d78a205aa2453fec45b0925dec519bf7c5.png", "local": "{\"default\": \"gui|44px|Modificación 1 del aparato de gobierno|link=Ship:Upgrades#Modificaci.C3.B3n.C2.A01_del.C2.A0aparato_de_gobierno]] [[File:wows icon_modernization_PCM087_AirSupport_Mod_I_d26ea96903bf2c47669142777cfa61b0285e652ce26304ed9502bc8de35d0ded.png", "local": "{\"default\": \"gui|44px|Modificación 1 del ataque aéreo|link=Ship:Upgrades#Modificaci.C3.B3n.C2.A01_del_ataque_a.C3.A9reo]]
 Slot 6  [[File:wows icon_modernization_PCM026_LookoutStation_Mod_I_9bdab08af77f5c612cec2a357353f7b60d37118aaab4763721dd53230f68943b.png", "local": "{\"default\": \"gui|44px|Sistema de vigilancia de torpedos|link=Ship:Upgrades#Sistema_de_vigilancia_de_torpedos]] [[File:wows icon_modernization_PCM027_ConcealmentMeasures_Mod_I_bda1386ab237032301b6273e655a1998de5bfb50e2c8e59124c8a93d73093f0a.png", "local": "{\"default\": \"gui|44px|Modificación 1 del sistema de ocultación|link=Ship:Upgrades#Modificaci.C3.B3n.C2.A01_del.C2.A0sistema_de_ocultaci.C3.B3n]] [[File:wows icon_modernization_PCM035_SteeringGear_Mod_III_9bbaf379d4027413eb48f3407a4374e40151f55611d71fac0a66d12a5d4e4434.png", "local": "{\"default\": \"gui|44px|Modificación 2 del aparato de gobierno|link=Ship:Upgrades#Modificaci.C3.B3n.C2.A02_del.C2.A0aparato_de_gobierno]] [[File:wows icon_modernization_PCM072_AbilityWorktimeBoost_Mod_I_e6323cc6cf2a0c16e8a3a3ca4db0ceaebbdb868447435dbafea6f580b66ff101.png", "local": "{\"default\": \"gui|44px|Modificación 1 de los consumibles del barco|link=Ship:Upgrades#Modificaci.C3.B3n.C2.A01_de_los_consumibles_del_barco]]

Player Opinion

Performance

The Zao, by all means of appearance and handling, can be considered the very pinnacle of what the Japanese might have expected with their heavy cruisers as she has potent guns in the form of twelve 203's in four triple mount turrets, a reasonable array of secondary batteries, an impressive AA suite for a Japanese heavy cruiser and ergonomics. Called by veteran Alpha Testers and Closed Beta Testers by her old name "Senjo", she is essentially the other side of the cruiser pinnacle: hard hitting shells with flatter and faster speeds at the cost of slow rate of fire. What she cannot overwhelm with unloading lots of ordnance at, she demolishes with damage if the shells ever punch through and there are rare cases that only this heavy cruiser was able to deal glancing damage to the mighty Yamato.

However, as stealthy as she is, the Zao cannot take an enduring beating as she can NOT trade shell for shell with her peers as she has the longest reload of 13 seconds which will be a detriment to brawls and adding the fact her turrets turn fairly slower as a consequence to her glaring ergonomic advantages. The torpedoes are insanely fast and packs a considerable punch where in they have the potential to destroy the toughest battleships with a single salvo should all torpedoes connect. However, it has two disadvantages to the player: its very VERY limited launch arc due to the tube location close to the stern and the fact that this blazing fast speed comes at an 8km range which means you literally need to swoop in like an eagle, dump your torpedoes while turning away then get out of dodge which can cost you more HP than you bargain for. Though Zao may not be able to stand out with a very high profile that long compared to her colleagues Moskva, Hindenburg and Des Moines, she uses her ability to gain the initiative in firing first and with the fast shell velocity means most rounds are guaranteed to connect. Another edge is her rather potent HE which has a fairly high chance to set ships on fire which means if her already impressive AP does not cut it anymore, her HE shells will do the job quite nicely, especially when dealing with tough targets like battleships or easily snipe fast running destroyers such as the notorious Khabarovsk.

A summary of one of the Zao's playstyle can be said into a quote: "hide until opportunity presents itself, strike like you intend to cripple them, vanish like you never existed"

Pros:

  • Four triple mount turrets that give her good broadside.
  • Very tight grouping of shells, even at range.
  • The AA suite is reasonable.
  • Fast shell velocity.
  • Low detection range for a Tier X cruiser.
  • Fast cruiser of 34.5 knots
  • Good concealment values; a fully kitted captain will have the initiative in shooting first
  • Good shooting angles for both X and Y turrets
  • Fastest torpedoes at her tier
  • Very potent torpedo damage

Cons:

  • Longest load time out of all tier 10 cruisers at 13.7 seconds
  • Questionable turning circle
  • Tubes are located very near the stern which may limit torpedo runs.
  • Torpedoes have an 8 km range.
  • Lowest HP among her peers
  • Slow turret traverse which will limit reactive aiming
  • Tubes are fairly easy to incapacitate or destroy
  • Consumables are rather bland compared to other cruisers in her tier.

Research

None, as the ship is elite when bought.

Optimal Configuration


Commander Skills

Gallery

Historical Info

Historical Gallery


Ships of Japan
Destroyers  II TachibanaDoblones • II Umikaze • II Tachibana LimaDoblones • III Wakatake • IV Isokaze • V Minekaze • V FūjinDoblones • V KamikazeDoblones • V Kamikaze RDoblones • V Mutsuki • VI Fubuki • VI Hatsuharu • VI ShinonomeDoblones • VII Akatsuki • VII Shiratsuyu • VII YūdachiDoblones • VIII Akizuki • VIII Kagerō • VIII AsashioDoblones • VIII HSF Harekaze IIDoblones • VIII Asashio BDoblones • VIII HSF HarekazeDoblones • VIII AL YukikazeDoblones • IX Yūgumo • IX Kitakaze • X Shimakaze • X Harugumo • X Hayate •  Yamagiri 
Cruisers  I Hashidate • II Chikuma • III Tenryū • III KatoriDoblones • IV YūbariDoblones • IV Kuma • IV Iwaki AlphaDoblones • V Furutaka • V Agano • V YahagiDoblones • VI Aoba • VI Gokase • VII Myōkō • VII Omono • VII Tokachi • VII MayaDoblones • VII ARP Myōkō • VII ARP AshigaraDoblones • VII ARP Haguro • VII Southern DragonDoblones • VII Eastern DragonDoblones • VII ARP Nachi • VIII Mogami • VIII ToneDoblones • VIII AtagoDoblones • VIII Shimanto • VIII Atago BDoblones • VIII ARP Takao • VIII ARP MayaDoblones • IX Ibuki • IX Takahashi • IX Azuma • IX AL AzumaDoblones • X Zaō • X Yodo • X Yoshino • X Yoshino B • X Kitakami 
Battleships  II MikasaDoblones • III Kawachi • IV Myōgi • IV IshizuchiDoblones • V Kongō • V ARP Kongō • V ARP Kirishima • V ARP Haruna • V ARP Hiei • V HSF HieiDoblones • VI Fusō • VI MutsuDoblones • VI IseDoblones • VII Nagato • VII AshitakaDoblones • VII HyūgaDoblones • VIII Amagi • VIII KiiDoblones • VIII Ignis PurgatioDoblones • VIII RagnarokDoblones • IX Izumo • IX Musashi • IX HizenDoblones • IX IwamiDoblones • X Yamato • X Shikishima • X ARP Yamato •  Satsuma 
Aircraft Carriers  IV Hōshō • VI Ryūjō • VIII Shōkaku • VIII KagaDoblones • VIII Kaga BDoblones • X Hakuryū •  Sekiryu
Cruisers
Japan  I Hashidate • II Chikuma • III Tenryū • III KatoriDoblones • IV YūbariDoblones • IV Kuma • IV Iwaki AlphaDoblones • V Furutaka • V Agano • V YahagiDoblones • VI Aoba • VI Gokase • VII Myōkō • VII Omono • VII Tokachi • VII MayaDoblones • VII ARP Myōkō • VII ARP AshigaraDoblones • VII ARP Haguro • VII Southern DragonDoblones • VII Eastern DragonDoblones • VII ARP Nachi • VIII Mogami • VIII ToneDoblones • VIII AtagoDoblones • VIII Shimanto • VIII Atago BDoblones • VIII ARP Takao • VIII ARP MayaDoblones • IX Ibuki • IX Takahashi • IX Azuma • IX AL AzumaDoblones • X Zaō • X Yodo • X Yoshino • X Yoshino B • X Kitakami 
U.S.A.  I Erie • II Chester • II AlbanyDoblones • III St. Louis • III CharlestonDoblones • IV Phoenix • V Omaha • V MarbleheadDoblones • V Marblehead LimaDoblones • VI Pensacola • VI Dallas • VII AtlantaDoblones • VII New Orleans • VII Helena • VII IndianapolisDoblones • VII Atlanta BDoblones • VII BoiseDoblones • VII FlintDoblones • VIII Baltimore • VIII Cleveland • VIII WichitaDoblones • VIII AnchorageDoblones • VIII CongressDoblones • VIII RochesterDoblones • VIII San DiegoDoblones • VIII AL MontpelierDoblones • IX Buffalo • IX Seattle • IX Vallejo • IX Alaska • IX TulsaDoblones • IX Alaska BDoblones • X Des Moines • X Worcester • X Puerto Rico • X Salem • X Austin •  Annapolis 
Pan-Asia  I Chengan • V Chungking • VI Rahmat • VI HuangheDoblones • VII Chumphon • VIII Harbin • VIII IrianDoblones • VIII WukongDoblones • IX Sejong • IX DalianDoblones • X Jinan 
Germany  I Hermelin • II Dresden • II EmdenDoblones • III Kolberg • IV Karlsruhe • V Königsberg • VI Nürnberg • VI Admiral Graf SpeeDoblones • VI Leipzig • VI HSF Admiral Graf SpeeDoblones • VII Yorck • VII MünchenDoblones • VII WeimarDoblones • VIII Admiral Hipper • VIII Prinz EugenDoblones • VIII MainzDoblones • VIII Cross of DornDoblones • IX Roon • IX Siegfried • IX Ägir • IX Admiral Schröder • X Hindenburg •  Clausewitz 
N/A  I Gryf 
U.S.S.R.  I Orlan • II DianaDoblones • II Diana LimaDoblones • II Novik • III AuroraDoblones • III Bogatyr • III OlegDoblones • III VaryagDoblones • III AL AvroraDoblones • IV Svietlana • V MurmanskDoblones • V Kotovsky • V Krasny KrymDoblones • V MikoyanDoblones • V KirovDoblones • VI Budyonny • VI MolotovDoblones • VI Admiral MakarovDoblones • VII Shchors • VII LazoDoblones • VIII Chapayev • VIII Tallinn • VIII Mikhail KutuzovDoblones • VIII OchakovDoblones • VIII Pyotr BagrationDoblones • VIII Bagration • IX Dmitri Donskoi • IX Riga • IX Kronshtadt • X Moskva • X Alexander Nevsky • X Petropavlovsk • X Stalingrad • X Smolensk • X Sevastopol 
U.K.  I Black Swan • II Weymouth • III Caledon • IV Danae • V Emerald • V Hawkins • V ExeterDoblones • VI Leander • VI Devonshire • VI LondonDoblones • VI DidoDoblones • VII Fiji • VII Surrey • VII BelfastDoblones • VIII Edinburgh • VIII Albemarle • VIII CheshireDoblones • VIII Tiger '59Doblones • VIII Belfast '43Doblones • VIII HampshireDoblones • IX Neptune • IX Drake • X Minotaur • X Goliath • X Plymouth • X Gibraltar • X Monmouth •  Edgar 
Italy  I Eritrea • II Nino Bixio • III Taranto • IV Alberto di Giussano • V Raimondo Montecuccoli • V GenovaDoblones • VI Trento • VI Duca d'AostaDoblones • VII Zara • VII Duca degli AbruzziDoblones • VII GoriziaDoblones • VIII Amalfi • IX Brindisi • X Venezia • X Napoli 
N/A  I Van Kinsbergen • II Gelderland • III Java • IV De Ruyter • V Celebes • VI Kijkduin • VII Eendracht • VIII Haarlem • VIII De Zeven ProvinciënDoblones • IX Johan de Witt • X Gouden Leeuw 
France  I Bougainville • II Jurien de la Gravière • III Friant • IV Duguay-Trouin • V Émile Bertin • VI La Galissonnière • VI De GrasseDoblones • VII Algérie • VII ToulonDoblones • VIII Charles Martel • VIII Cherbourg • VIII BayardDoblones • IX Saint-Louis • IX Brest • IX CarnotDoblones • X Henri IV • X Marsella • X Colbert •  Condé 
Commonwealth  VI PerthDoblones • VI MysoreDoblones 
N/A  VI CanariasDoblones 
N/A  II Almirante AbreuDoblones • VII Nueve de JulioDoblones