Furutaka

| Preço de Pesquisa11500 xp |
| Preço de Compra1 370 000 |
| Pontos de Energia28 300 |
| IDS_PJGM144_200MM50_TYPE_E_RF3 х 2 pçs. |
| Taxa de Fogo2.73 tiros/min. |
| Tempo de Recarga22 seg. |
| Velocidade de Rotação6 graus/seg. |
| Tempo para Virar 180 Graus30 sec. |
| Distância Máxima12.62 km. |
| Dispersão Máxima109 m. |
| Projétil HE200 mm HE Common Type4 |
| Dano Máximo do Projétil HE3 300 |
| Chance de Incendiar com HE17 % |
| Velocidade Inicial do Projétil HE870 m/s |
| Peso do Projétil HE110 kg. |
| Projétil AP200 mm AP Type5 |
| Dano Máximo do Projétil AP4 500 |
| Velocidade Inicial do Projétil AP870 m/s |
| Peso do Projétil AP110 kg. |
| 76 mm /40 3rd Year Type em uma torreta simples4 х 1 pçs. |
| Distância Máxima4.3 km. |
| Taxa de Fogo17.14 tiros/min. |
| Tempo de Recarga3.5 seg. |
| Projétil HE76 mm HE Mk2 |
| Dano Máximo do Projétil HE1 300 |
| Velocidade inicial do Projétil HE680 m/s |
| Chance de Incendiar com HE5 % |
| 610 mm Quádruplo2 х 4 pçs. |
| Taxa de Fogo0.67 tiros/min. |
| Tempo de Recarga90 seg. |
| Velocidade de Rotação25 graus/seg. |
| Tempo Para Virar 180 Graus7.2 seg. |
| TorpedoType8 |
| Dano Máximo14 600 |
| Velocidade do Torpedo63 nós |
| Distância Máxima dos Torpedos6 km. |
| 76 mm /40 3rd Year Type em uma torreta simples4 х 1 pcs. |
| . . . Dano Médio por Segundo6.4 |
| . . . Distância Máxima3 km. |
| 13 mm/76 Type 93 em uma torreta dupla4 х 2 pcs. |
| . . . Dano Médio por Segundo8 |
| . . . Distância Máxima1.2 km. |
| 7.7 mm/80 Type 92 em uma torreta simples2 х 1 pcs. |
| . . . Dano Médio por Segundo3.2 |
| . . . Distância Máxima0.99 km. |
| Velocidade Máxima34.5 nós |
| Raio da curva750 m. |
| Tempo de virada do leme9.2 seg. |
| Distância de detecção em Superfície11.87 km. |
| Distância de detecção no Ar5.78 km. |

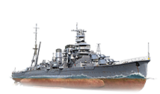
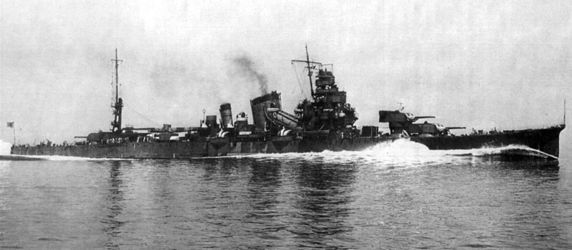
Furutaka — Cruzador Japonês Tier V.
A powerful scout cruiser employed to carry out reconnaissance operations and to protect battleship fleets from enemy light naval forces. Furutaka’s primary distinction from her predecessors was an enhanced artillery armament featuring a pyramid arrangement of turret mounts.
Módulos
 |
Taxa de Disparo (tiros/min) | Tempo de Virada de 180º (seg) | Dispersão Máxima (m) | Maximum HE Shell Damage (HP) | Chance of Fire on Target Caused by HE Shell (%) | Maximum AP Shell Damage (HP) |
Preço de Pesquisa (XP) |
Preço de Compra ( | |
|---|---|---|---|---|---|---|---|---|---|
| 200 mm/50 3rd Year Type No 1 em uma torre Model E2 | 2,7 | 30 | 109 | 3 300 | 17 | 4 500 | 0 | 130 000 | |
| 203 mm/50 3rd Year Type No 2 em uma torre Model E2 | 4 | 30 | 109 | 3 300 | 17 | 4 700 | 3 200 | 320 000 |
 |
Pontos de Vida (HP) | Armor (mm) | Armor (mm) | Torres Principais (pcs.) | Torres Secundárias de Canhões (pcs.) | AA Montadas (pcs.) | Tubos de Torpedos (pcs.) | Hangar Capacity (pcs.) |
Preço de Pesquisa (XP) |
Preço de Compra ( | |
|---|---|---|---|---|---|---|---|---|---|---|---|
| Furutaka (A) | 28 300 | 6 | 105 | 3 | 4 | 2/4/4 | 2 | 0 | 150 000 | ||
| Furutaka (B) | 30 700 | 6 | 105 | 3 | 4 | 2/4/4 | 2 | 6 300 | 480 000 |
 |
Taxa de Disparo (tiros/min) | Torpedo Tubes Reload Time (seg) | Tempo de Virada de 180º (seg) | Dano Máximo (HP) | Velocidade do Torpedo (nós) | Alcance do Torpedo (km) |
Preço de Pesquisa (XP) |
Preço de Compra ( | |
|---|---|---|---|---|---|---|---|---|---|
| Type8 | 0,7 | 90 | 7,2 | 14 600 | 63 | 6 | 0 | 120 000 | |
| Type8 mod. 2 | 0,6 | 94 | 7,2 | 16 266 | 59 | 10 | 3 600 | 400 000 |
 |
IDS_SHIP_PARAM_SUO_INCREASE_DIST (%) | Maximum Firing Range (km) |
Preço de Pesquisa (XP) |
Preço de Compra ( | |
|---|---|---|---|---|---|
| Type5 mod. 1 | 0 | 0 | 100 000 | ||
| Type5 mod. 2 | 0 | 2 400 | 260 000 |
 |
Velocidade Máxima (nós) |
Preço de Pesquisa (XP) |
Preço de Compra ( | |
|---|---|---|---|---|
| Propulsão: 102.000 hp | 34,5 | 0 | 90 000 |
Atualizações Compatíveis
| Slot 1 | |||||
|---|---|---|---|---|---|
| Slot 2 | |||||
| Slot 3 |
Opinião dos Jogadores
Performance
The first heavy cruiser within Japan's cruiser tree and one of the first heavy cruisers in the game, Furutaka carries a powerful complement of six 203mm guns after upgrading from the 200mm, allowing her to deal with anything she encounters. While slow-firing, their large caliber and accuracy allows Furutaka captains to deal large amounts of damage in a single salvo. Fully upgraded, her guns have a range of 13.9km, while her torpedoes can hit 10km after researching the improved range. A common tactic is to close in on an isolated target and launch all available torpedoes before turning around to disengage. While she is faster than most cruisers at her tier, she rapidly slows down when turning, as such you will be the most vulnerable when turning to run away from the opponent.
If possible, captain's are recommended to remain undetected, as Furutaka's poor armor prevents her from tanking damage effectively. Avoid getting drawn into a close range gunfight at all costs, as Furutaka will almost always lose. The ship excels most when firing at unsuspecting targets from a distance. Despite her poor armor, playing Furutaka plays more like a strike cruiser rather than a typical heavy cruiser. Often the best way to play the cruiser, especially in higher tier battles, is to find a battleship or destroyer to support.
Furutaka's weak armor can be compensated for by conducting evasive maneuvers and angling. While her hull can withstand armor piercing shells from other cruisers when angled, most battleships will have little to no problem over-matching most sections of the ship.Prós:
- Very thick central deck armor (48 mm): even the biggest AP shells can ricochet.
- Powerful, accurate guns for her tier with large firing arcs on all turrets.
- HE shells have a high fire chance, great penetration, and damage.
- Superb torpedo bulges that make the citadel rather small.
- Powerful torpedoes with good range, speed, and damage.
- Torpedo mounts have excellent firing angles compared to higher tier Japanese cruisers.
- Fastest turret traverse of all Japanese heavy cruisers.
- Reasonable fast with a fast rudder shift time.
Contras:
- Very lightly armored for a heavy cruiser, takes large chunks of damage from anything being fired at her.
- Due to her larger gun caliber, the ship has a longer reload time than most other cruisers at her tier.
- Despite the torpedo protection covering most of the citadel, it is useless against shells fired by ships larger than a destroyer.
- Poor main battery firing range at 13.9km.
- Stock guns has the 3rd longest reload time of any cruiser in the game at 21 seconds.
- The ship’s anti-aircraft armament is weak and leaves the ship vulnerable to carrier strikes.
Pesquisar
Melhor Configuração
Atualizações
The recommended upgrades for Furutaka are as follows:
- Slot 1: Predefinição:Main Armaments Modification 1 keeps the guns and torpedo tubes active and firing.
- Slot 2: Predefinição:Damage Control System Modification 1 makes the ship more resistant to fires and flooding.
- Slot 3: Predefinição:Main Battery Modification 2 makes her guns more comfortable and saves a skill point that would otherwise be spent on Grease the Gears to improve her gun handling. Predefinição:Aiming Systems Modification 1 gives her guns more accuracy and is an option.
Habilidades de Comandante
The key skills for Furutaka include Grease the Gears at Level 1, Priority Target at Level 2, Adrenaline Rush at Level 3, and Concealment Expert at Level 4. Captains who use the ship’s torpedoes often may also wish to invest in one or more of the torpedo skills if they have points remaining after investing in her main guns and concealment. The AA skills, particularly Expert AA Marksman, are almost always a good choice for leftover skill points on cruisers. While Pyrotechnician could be taken at Level 2 to improve her shells' fire chances, her rate of fire is too low to properly take advantage of the relative small boost to fire chance per shell. Captains may also with to invest in Top Grade Gunner to improve the slow rate of fire when they find themselves unable to drop off detection using her concealment.
Predefinição:Commander Skills 3 CR
Consumíveis
Furutaka equips the following consumables:
- Slot 1: Damage Control Party

- Slot 2: Hydroacoustic Search

- Slot 3: Caça

Sinais
Furutaka captains should mount the standard flags to improve the ship's performance in battle. To improve upon the ship's armaments, India X-Ray (![]() ), Victor Lima (
), Victor Lima (![]() ), and Juliet Whiskey Unaone (
), and Juliet Whiskey Unaone (![]() ) flags are recommended to increase the fire chance and flooding chances respectively. To improve the ship’s survivability, captains should mount November Foxtrot (
) flags are recommended to increase the fire chance and flooding chances respectively. To improve the ship’s survivability, captains should mount November Foxtrot (![]() ) and India Yankee (
) and India Yankee (![]() ) flags. Sierra Mike (
) flags. Sierra Mike (![]() ) flags are recommended to increase the ship’s already high top speed. Lastly, economic and special signal flags can be mounted to improve the ship’s economic gains per battle.
) flags are recommended to increase the ship’s already high top speed. Lastly, economic and special signal flags can be mounted to improve the ship’s economic gains per battle.
Sinais de Combate Recomendados 
| |||||
|---|---|---|---|---|---|
 ★ |
 ★★ |

|
 ★ |
 ★★★ |
 ★★ |
 ★ |
 ★ |
 ★★ |
 ★★★ |
 ★★ |

|

|

| ||||
Notas:
| |||||
| Legenda: ★★★ - Extremamente Útil ★★ - Frequentemente Útil ★ - Ocasionalmente Útil Sem estrelas - Não é Útil | |||||
Galeria
Informações Históricas
Galeria Histórica

Referências
Predefinição:WoWS Ship Changelog Insert
| Contratorpedeiros |
II Tachibana |
| Cruzadores |
I Hashidate • II Chikuma • III Tenryū • III Katori |
| Encouraçados |
II Mikasa |
| Porta-Aviões |
IV [[Ship:Hōshō (< 23.01.2019)|Hōshō (< 23.01.2019)]] • IV Hōshō • V [[Ship:Zuihō (< 23.01.2019)|Zuihō (< 23.01.2019)]] • VI [[Ship:Ryūjō (< 23.01.2019)|Ryūjō (< 23.01.2019)]] • VI Ryūjō • VII [[Ship:Hiryū (< 23.01.2019)|Hiryū (< 23.01.2019)]] • VII [[Ship:Kaga (< 23.01.2019)|Kaga (< 23.01.2019)]] • VIII [[Ship:Shōkaku (< 23.01.2019)|Shōkaku (< 23.01.2019)]] • VIII Shōkaku • VIII Kaga |