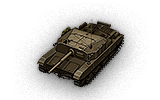
Semovente M43 Bassotto
| |
This article requires additional modification. The design and/or content of this article do not conform to wiki standards.
|
Semovente M43 Bassotto

Mouse over "
[Client Values; Actual values in
| 890,000 |
| 600120 HP Hit Points |
| 14.5/15.24.27/17 t Weight Limit |
- Commander (Gunner)
- Driver
- Loader (Radio Operator)
| 145300 hp Engine Power |
| 35/15 km/h Speed Limit |
| 4246 deg/s Traverse |
| 1070.26 hp/t Power/Wt Ratio |
| NoNo Pivot |
| // mm Hull Armor |
AP/HEAT/HE
HE/HEAT Shells |
66/3200/147
720/4800/147 Shell Cost |
| 110/110/175440/360/175 HP Damage |
| 127/175/70105/230/70 mm Penetration |
|
20 r/m ▲
7.5 r/m Standard Gun ▲ Rate of Fire Standard Gun |
|
2200 ▲
Standard Gun
▼
Standard Gun
▲
3300 Standard Gun ▲
Standard Gun ▼
Standard Gun
▲ Damage Per Minute Standard Gun
|
|
0.35 m ▲
0.44 m With 50% Crew: 0.445 m ▲ Accuracy With 50% Crew: 0.56 m |
| 1.7 s 3.7 s Aim time |
| 2626 deg/s Gun Traverse Speed |
| 36° Gun Arc |
| -10°/+16°-10°/+15° Elevation Arc |
| 7055 rounds Ammo Capacity |
| 1520 % Chance of Fire |
| 360 m 360 m View Range |
| 310 m 415 m Signal Range |
VI
890000
The Semovente M43 Bassotto is an Italian tier 6 tank destroyer.
In April of 1942, the Italian command came up with the idea to develop an assault tank destroyer with a 105 mm howitzer on the chassis of the Carro Armato P 40 heavy tank. The project was developing rather slowly, so instead, officials decided to use the improved chassis of the mass-produced Carro Armato M 15/42 for a new vehicle. This vehicle featured a 105 mm howitzer with a length of 23 calibers. The prototype was completed in January 1943, and it became the first Italian vehicle to be partially welded. The serial model, designated Semovente da 105/25 M43, received a 25 caliber gun and a newly designed hull and cabin. Before Italy's capitulation on September 8, 1943, 30 vehicles had already been manufactured and sent to military units. Later these vehicles all fell into the hands of the Germans, who set up and continued production. Between 1943 and 1944, 121 more vehicles were produced.
The Bassotto (Italian for "dachshund") is the Tier VI version of the new Italian tank destroyer line introduced in Update 1.81 in summer 2022. It has at least one excellent main gun, mediocre armor and mobility, and superb concealment. Like the M41 before it the Bassotto is the proverbial glass cannon.
The Semovente M43 Bassotto leads to the SMV CC-56.
Modules / Available Equipment and Consumables
Modules

Guns
| Tier | Gun | Penetration (mm) |
Damage (HP) |
Rate of fire (rounds/minute) |
Dispersion (m/100m) |
Aiming time (s) |
Weight (kg) |
Price (
| |
|---|---|---|---|---|---|---|---|---|---|
| VII | Cannone da 102/40 | 175/215/45 | 360/360/440 | 6.19 | 0.4 | 2.3 | 1600 | 78000 | |
| VII | Cannone da 90/53 S. | 165/195/45 | 240/240/320 | 8.75 | 0.42 | 2.7 | 1700 | 75000 | |
| VII | Cannone da 105/25 | 105/230/70 | 440/360/175 | 7.5 | 0.44 | 3.7 | 1500 | 82000 | |
| V | Cannone da 75/34 S. | 127/175/70 | 110/110/175 | 20 | 0.35 | 1.7 | 400 | 35000 |

Engines
| Tier | Engine | Engine Power (hp) |
Chance of Fire on Impact (%) |
Weight (kg) |
Price (
| |
|---|---|---|---|---|---|---|
| III | SPA 15T | 145 | 15 | 875 | 5200 | |
| IV | SPA 19TB mod. 43 | 250 | 20 | 1000 | 11500 | |
| V | Maybach HL 120 S. | 300 | 20 | 920 | 15500 |

Suspensions
| Tier | Suspension | Load Limit (т) |
Traverse Speed (gr/sec) |
Rmin | Weight (kg) |
Price (
| |
|---|---|---|---|---|---|---|---|
| V | Semovente M43 | 15.2 | 42 | B/2 | 1500 | 9000 | |
| VI | Semovente M44 | 17 | 46 | B/2 | 1540 | 14200 |

Radios
| Tier | Radio | Signal Range (m) |
Weight (kg) |
Price (
| |
|---|---|---|---|---|---|
| III | R.F. 1 C.A. | 310 | 17 | 620 | |
| VI | R.F. 2 C.A. | 415 | 35 | 8200 |
Compatible Equipment

![]()


![]()
![]()
![]()
![]()
![]()


![]()

![]()

Compatible Consumables
![]()
![]()
![]()
![]()
![]()
![]()
![]()
![]()
![]()
![]()
![]()
![]()
![]()
![]()

![]()
![]()
![]()
![]()
![]()
![]()
Player Opinion
Pros and Cons
Pros:
Amongst all Tier VI tank destroyers . . .
- A choice of two viable guns, maybe three
- It's a low target, can be hard to hit at range
- Best stationary concealment (including while firing) in Tier VI
- Best hull traverse speed and good reverse speed
Cons:
- The commander is also the gunner -- both skill sets must be squeezed into one crew member, or a few tough decisions need to be made
- Fragile -- thin armor and low health
- Poor top forward speed
Performance
The Semovente M43 Bassotto plays much like its predecessor, the Semovente M41: maneuvering to get shots into the enemy -- or waiting in ambush -- and letting them have it . . . all the while remaining as unseen as you reasonably can.
The stock gun is essentially the same as the top gun on the M41 with a different name and three small improvements -- gun depression is better by two degrees (but elevation loses six degrees), horizontal gun traverse widens by two degrees, and accuracy improves by 0.02. And it's actually not such a terrible gun for Tier VI if you're willing to load the gold when needed -- it has a high rate of fire and still has the third-highest DPM in its class. Penetration is the lowest, but its special rounds do 175mm, which is good enough to punch through most targets. Compared to the other three guns below, this one allows the tank as a whole to have more mobility and concealment.
The Cannone da 90/53 S is arguably more powerful than the stock gun but a less powerful version of the third gun below. Compared to the next gun it's weaker almost across the board but does have a bit better gun depression. It's not really a viable option if you have the next gun unlocked but it gives you a taste of its high alpha, and most players probably prefer it over the stock gun.
The third gun -- the Cannone da 120/40 -- is a beast (and should be considered the default "top" gun even though technically it isn't). Its average alpha of 360 is more than triple that of the stock gun; only the Su-100 and its premium "Y" variant bring more instant pain. Its standard pen -- 175mm -- is just as good as the gold pen of the stock gun, and DPM is a little higher. Gun depression, horizontal traverse, aim time, and accuracy are all worse but still workable; only the gun depression of five degrees can be a handicap at times.
The final choice is a derp cannon with four times the stock gun's alpha (440). High explosive penetration is 105, which is the kind of HE pen that wouldn't look out of place on a Tier X tank. Naturally rate of fire and accuracy are lower but not overly so, but horizontal traverse gains another two degrees and gun depression is a healthy 10 degrees, letting you work ridge lines and increasing the firing positions you can make use of.
But the punch line on this gun is its aim time of 3.7 seconds, increasing the chances of missing shots because the enemy moved into cover or one of your teammates killed your target first, which can be rather annoying . . . and everyone has Sixth Sense now so this gun may be almost useless in the current meta. But a 100% crew and Brothers in Arms is a good start; adding a Gun Laying Drive and Improved Ventilation brings aim time down to 3.25s, and you can push it just below three seconds with the right bond equipment.
The Bassotto's armor protection is almost non existent -- you have enough frontal armor to somewhat attenuate HE shells but just about all other shells are going to hurt you for full damage. Health is also the lowest in class -- only 600, usually in just two or three hits you're dead.
Concealment is your best defense, and the Bassotto has the best stationary concealment -- including while firing -- for Tier VI (the Jagdpanzer IV being the previous stealth champion). You can get your stationary-while-firing concealment to above 14%, use this to your advantage.
Compared to the M41 there's almost no change in mobility, but you do have a bit more specific power, so despite being in a slightly larger vehicle with 50% more armor you can get up those hills just a little better.
View range is 10 meters better at 360m -- good enough to put on a Binocular Telescope and get just past the magic 445m render range threshold; everything added beyond that is icing on the cake.
The Bassotto's crew setup -- Commander (Gunner), Driver, Loader (Radio Operator) -- doesn't quite match the crew of the only premium Italian TD currently in the game -- the SMV CC-64 Vipera -- but can still be made to work by supplying a gunner for the Vipera from one of your other Italian TD's. On the Bassotto note that your Commander is also your Gunner, putting more skill demands on them (same story with the Loader). Also note that the crew requirements for the Bassotto are exactly the same as the M41, which makes it convenient if you choose to "upgrade" your M41 crew into this one.
The Semovente M43 Bassotto is the other glass cannon in the Italian Tank destroyer line. You have little armor and health so it's very important to -- as a rule -- stay at mid-long ranges and not get shot, even at the expense of missing out on doing some damage. Overall it's a fun tank to play; dishing out big hits is quite gratifying.
Early Research
The top radio and SPA 19TB mod. 43 engine should already be researched from the M41, purchase and mount them immediately. The stock tracks also allow whatever equipment you like so add these a well.
All that's left is a choice between the top engine or one of the larger guns. The stock tracks can also handle the Maybach HL 120 S. engine but a suspension upgrade is required for any of the other guns. Get the gun you think you'd be most happy with (adding the better suspension when needed), then the engine, then the rest of the guns.
Documented Tank and Crew Builds
Equipment recommendations parallel the M41's: a Binocular Telescope is recommended -- with a 100% commander this will get your view range up to 450m, not including skills and other equipment. Combine this with your choice of Improved Ventilation, Camouflage Net, or Low-Noise Exhaust to leverage your excellent concealment, and/or a Turbocharger to augment the Bassotto's poor forward mobility and good reverse speed. (With the larger main guns a Gun Rammer is not a good choice -- you will very seldom be able to fire twice at the same target appearance; most enemies will either be destroyed or take cover before you can hit them again, wasting that extra DPM.)
Recommended skills are the usual for any stealthy tank destroyer -- Concealment, Brothers in Arms, Situational Awareness, and Recon.
External Reviews and Opinions
Gallery
History for this tank not found
| Light Tanks | IFiat 3000 • IIL6/40 |
| Medium Tanks | IIM14/41 • IIIM15/42 • IVP26/40 • VP.43 • VIP.43 bis • VIIP.43 ter • VIIIProgetto M35 mod. 46 • VIIIP.44 Pantera • IXPrototipo Standard B • XProgetto M40 mod. 65 • XCarro da Combattimento 45 t |
| Heavy Tanks | VIICarro d'assalto P.88 • VIIIProgetto CC55 mod. 54 • VIIIBisonte C45 • IXProgetto C50 mod. 66 • XRinoceronte |
| Tank Destroyers | VSemovente M41 • VISemovente M43 Bassotto • VIISMV CC-56 • VIIISMV CC-64 Vipera • VIIISMV CC-67 • IXControcarro 1 Mk. 2 • XControcarro 3 Minotauro |
| Self-Propelled Artillery |