Welcome to Wargaming.net Wiki!
Variants

T20

Jump to: navigation, search


Ambox_important.png This article requires additional modification.
The design and/or content of this article do not conform to wiki standards.

Missing Content:

  • Historical Gallery


T20

AnnoA07_T20.png
Battle Tier
1234567891011
Overview
Mouse over "
Well, the ones further down, of course.
" for more information
[Client Values; Actual values in
Specifically, the mismatch in crew values caused by commander's 10% crew skill bonus. Outside of a crew of 1 commander only, 100% crew is a fiction. The client values, given for 100% crew, will normally be taken into battle with 110% crew skill members aside from specific functions, causing their actual performance to deviate from the expected client value. These differences are taken into account in tooltip boxes.
]
1,340,000  Credits Cost
1000300 HP Hit Points
28.89/3016.78/34 t Weight Limit
Crew
  1. Commander
  2. Gunner
  3. Driver
  4. Radio Operator
  5. Loader
Mobility
520560 hp Engine Power
56/20 km/h Speed Limit
3737 deg/s Traverse
1833.37 hp/t Power/Wt Ratio
NoNo Pivot
Armor
// mm Hull Armor
88.9/63.5/63.588.9/63.5/63.5 mm Turret Armor
Armament


{{#ifeq:ARMOR_PIERCING_CR|ARMOR_PIERCING||


{{#ifeq:HIGH_EXPLOSIVE|ARMOR_PIERCING||


AP/APCR/HE


{{#ifeq:ARMOR_PIERCING_CR|ARMOR_PIERCING||


{{#ifeq:HIGH_EXPLOSIVE|ARMOR_PIERCING||


AP/APCR/HE
Shells


96/2800/68


255/4400/255
Shell Cost
115/115/185240/240/320 HP Damage
128/177/38160/243/45 mm Penetration


|


|}}

|


|}}


14.29 r/m 

Standard Gun

Reload Times
Nominal: 4.2 s
50% Crew: 5.2 s
75% Crew: 4.54 s
100% Crew: 4.03 s
Rammer: 3.63 s
Vents: 3.94 s
Both: 3.55 s
Both and BiA: 3.47 s
Both and Max Crew %: 3.33 s

See Crew, Consumables, or Equipment for more information.


|


|}}

|


|}}


6.38 r/m 

Standard Gun

Reload Times
Nominal: 9.4 s
50% Crew: 11.64 s
75% Crew: 10.17 s
100% Crew: 9.01 s
Rammer: 8.11 s
Vents: 8.81 s
Both: 7.93 s
Both and BiA: 7.76 s
Both and Max Crew %: 7.44 s

See Crew, Consumables, or Equipment for more information.
Rate of Fire


|


|}}

|


|}}


1643.35

Standard Gun

Using Shell Type 1 (115 Damage):


Theoretical Damage Per Minute
Nominal DPM: 1643.35
50% Crew: 1327.1
75% Crew: 1519.15
100% Crew: 1713.5
100% Crew
Vents: 1752.6
Rammer: 1904.4
Both: 1946.95
Both and BiA: 1989.5
Both and Max Crew %: 2075.75

Advantageous Damage Per Minute
First-shot DPM: 1758.35
50% Crew: 1442.1
75% Crew: 1634.15
100% Crew: 1828.5
100% Crew
Rammer: 2019.4
Vents: 1867.6
Both: 2061.95
Both and BiA: 2104.5
Both and Max Crew %: 2190.75

See here, here, or here for more information.

Standard Gun

Using Shell Type 2 (115 Damage):


Theoretical Damage Per Minute
Nominal DPM: 1643.35
50% Crew: 1327.1
75% Crew: 1519.15
100% Crew: 1713.5
100% Crew
Vents: 1752.6
Rammer: 1904.4
Both: 1946.95
Both and BiA: 1989.5
Both and Max Crew %: 2075.75

Advantageous Damage Per Minute
First-shot DPM: 1758.35
50% Crew: 1442.1
75% Crew: 1634.15
100% Crew: 1828.5
100% Crew
Rammer: 2019.4
Vents: 1867.6
Both: 2061.95
Both and BiA: 2104.5
Both and Max Crew %: 2190.75

See here, here, or here for more information.

Standard Gun

Using Shell Type 3 (185 Damage):
With wholly penetrating hits

Theoretical Damage Per Minute
Nominal DPM: 2643.65
50% Crew: 2134.9
75% Crew: 2443.85
100% Crew: 2756.5
100% Crew
Vents: 2819.4
Rammer: 3063.6
Both: 3132.05
Both and BiA: 3200.5
Both and Max Crew %: 3339.25

Advantageous Damage Per Minute
First-shot DPM: 2828.65
50% Crew: 2319.9
75% Crew: 2628.85
100% Crew: 2941.5
100% Crew
Rammer: 3248.6
Vents: 3004.4
Both: 3317.05
Both and BiA: 3385.5
Both and Max Crew %: 3524.25

See here, here, or here for more information.


|


|}}

|


|}}


1531.2

Standard Gun

Using Shell Type 1 (240 Damage):


Theoretical Damage Per Minute
Nominal DPM: 1531.2
50% Crew: 1236
75% Crew: 1416
100% Crew: 1596
100% Crew
Vents: 1632
Rammer: 1773.6
Both: 1814.4
Both and BiA: 1852.8
Both and Max Crew %: 1934.4

Advantageous Damage Per Minute
First-shot DPM: 1771.2
50% Crew: 1476
75% Crew: 1656
100% Crew: 1836
100% Crew
Rammer: 2013.6
Vents: 1872
Both: 2054.4
Both and BiA: 2092.8
Both and Max Crew %: 2174.4

See here, here, or here for more information.

Standard Gun

Using Shell Type 2 (240 Damage):


Theoretical Damage Per Minute
Nominal DPM: 1531.2
50% Crew: 1236
75% Crew: 1416
100% Crew: 1596
100% Crew
Vents: 1632
Rammer: 1773.6
Both: 1814.4
Both and BiA: 1852.8
Both and Max Crew %: 1934.4

Advantageous Damage Per Minute
First-shot DPM: 1771.2
50% Crew: 1476
75% Crew: 1656
100% Crew: 1836
100% Crew
Rammer: 2013.6
Vents: 1872
Both: 2054.4
Both and BiA: 2092.8
Both and Max Crew %: 2174.4

See here, here, or here for more information.

Standard Gun

Using Shell Type 3 (320 Damage):
With wholly penetrating hits

Theoretical Damage Per Minute
Nominal DPM: 2041.6
50% Crew: 1648
75% Crew: 1888
100% Crew: 2128
100% Crew
Vents: 2176
Rammer: 2364.8
Both: 2419.2
Both and BiA: 2470.4
Both and Max Crew %: 2579.2

Advantageous Damage Per Minute
First-shot DPM: 2361.6
50% Crew: 1968
75% Crew: 2208
100% Crew: 2448
100% Crew
Rammer: 2684.8
Vents: 2496
Both: 2739.2
Both and BiA: 2790.4
Both and Max Crew %: 2899.2

See here, here, or here for more information.
Damage Per Minute


|


|}}


0.43 m 

With 50% Crew: 0.533 m
With 75% Crew: 0.465 m
With 100% Crew: 0.412 m
With BiA: 0.403 m
With BiA and Vents: 0.394 m
Maximum possible: 0.378 m

For more details, see Crew


|


|}}


0.38 m 

With 50% Crew: 0.471 m
With 75% Crew: 0.411 m
With 100% Crew: 0.364 m
With BiA: 0.356 m
With BiA and Vents: 0.349 m
Maximum possible: 0.334 m

For more details, see Crew
Accuracy


|


|}}


2.3 s 

With 50% Crew: 2.849 s
With 75% Crew: 2.488 s
With 100% Crew: 2.205 s
With GLD: 2.005 s
With BiA: 2.157 s
With BiA and Vents: 2.11 s
With both and GLD: 1.918 s
Maximum possible: 1.839 s

For more details, see Crew or Equipment


|


|}}


2.3 s 

With 50% Crew: 2.849 s
With 75% Crew: 2.488 s
With 100% Crew: 2.205 s
With GLD: 2.005 s
With BiA: 2.157 s
With BiA and Vents: 2.11 s
With both and GLD: 1.918 s
Maximum possible: 1.839 s

For more details, see Crew or Equipment
Aim time
4442 deg/s Turret Traverse
360° Gun Arc
-10°/+25°-10°/+25° Elevation Arc
8548 rounds Ammo Capacity
General
2020 % Chance of Fire


370 m 

With 50% Crew: 290.7 m
With 75% Crew: 330.4 m
With 100% Crew: 370 m
With Recon and Situational Awareness: 388.7 m
With Coated Optics: 407 m
With Binocular Telescope: 462.5 m
Maximum possible: 529.7 m

For more details, see Skills or Equipment


390 m 

With 50% Crew: 306.4 m
With 75% Crew: 348.2 m
With 100% Crew: 390 m
With Recon and Situational Awareness: 409.7 m
With Coated Optics: 429 m
With Binocular Telescope: 487.5 m
Maximum possible: 558.3 m

For more details, see Skills or Equipment
View Range


|


|}}


395 m 

With 50% Crew: 318.9 m
With 75% Crew: 365.2 m
With 100% Crew: 412 m
With 100% Signal Boost: 474 m
When affected by 100% Relaying: 434.5 m
Maximum possible: 593 m

For more details, see Skills or Equipment


|


|}}


615 m 

With 50% Crew: 496.5 m
With 75% Crew: 568.6 m
With 100% Crew: 641.4 m
With 100% Signal Boost: 738 m
When affected by 100% Relaying: 676.5 m
Maximum possible: 923.2 m

For more details, see Skills or Equipment
Signal Range
Values are Stock - click for Top

Additional Statistics
(Top Configuration)

Camouflage

  • Stationary: 16.3%
  • When Moving: 12.6%
  • When Firing: 4.3%


Terrain Resistance

  • On Hard Ground: 0.96
  • On Medium Ground: 1.06
  • On Soft Ground: 1.63


Dispersion Change Values

  • Turret Contribution
  • Rotation: 0.12
  • Shot Recoil: 3.36
  • Suspension Contribution
  • Acceleration: 0.19
  • Turning: 0.19


With 100% Crew

VII

AnnoA07_T20.png

1340000

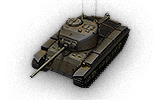
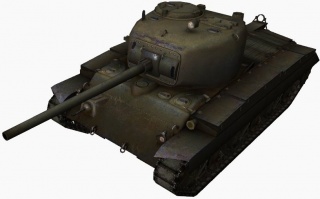
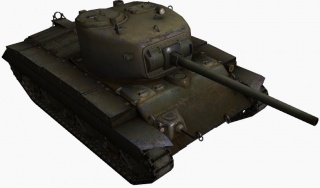
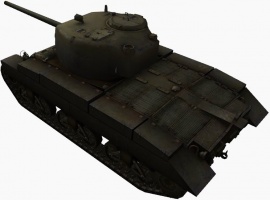
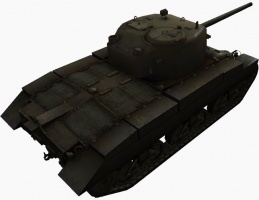
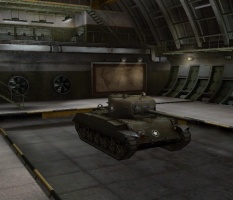
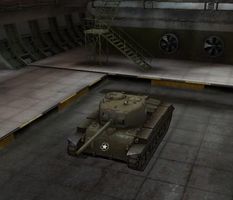
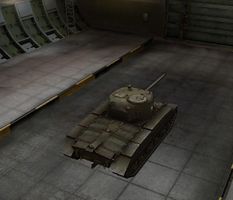
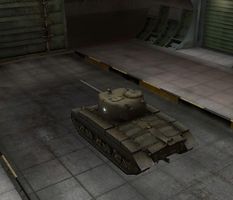
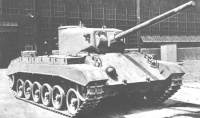
The T20 is an American tier 7 medium tank.

The first in a series of 1942–1943 U.S. medium tank designs intended as replacements for the M4 Sherman. The first prototype was produced in May 1943, and trials went on until 1944. The vehicle was not approved for mass production, but subsequent prototypes, the T22 and T23, were created on the basis of this development. They, in turn, served as precursors of the T25 and T26. Eventually, the M26 Pershing emerged on their basis and was adopted for service.

Much like the M4A3E8 Sherman, the T20 lacks significant armor. Able to sneak around the battlefield the T20 is an excellent support tank and able to switch between engagements in very short time. Its thin armor is a serious weakness and caution must be taken to avoid enemy fire whenever possible. Pick different strategies to match different opponents: flank heavy tanks, ambush and brawl mediums, track and destroy lights. Passive scouting is also viable when other scouts are not available.

The T20 leads to the T69, and the M26 Pershing.

Modules / Available Equipment and Consumables

Modules

Ico_gun_alpha.png

Guns

Tier Gun Penetration
(mm)
Damage
(HP)
Rate of fire
(rounds/minute)
Dispersion
(m/100m)
Aiming time
(s)
Weight
(kg)
Price
(Credits)

VI 76 mm Gun M1A1 128/177/38 115/115/185 14.29 0.43 2.3 1567 50330
VI 76 mm Gun M1A2 128/177/38 115/115/185 18.18 0.38 1.9 1590 62000
VII 90 mm Gun M3 160/243/45 240/240/320 6.38 0.38 2.3 2050 81000
V 105 mm M4 53/102/38 410/350/185 7.5 0.55 2.3 2600 40300

Ico_engine_alpha.png

Engines

Tier Engine Engine Power
(hp)
Chance of Fire on Impact
(%)
Weight
(kg)
Price
(Credits)

VII Ford GAA 520 20 569 36000
VII Ford GAN 560 20 569 37200

Ico_suspension_alpha.png

Suspensions

Tier Suspension Load Limit
(т)
Traverse Speed
(gr/sec)
Rmin Weight
(kg)
Price
(Credits)

VI HVSS T48 30 37 B/2 5400 11900
VII HVSS T51 34 37 B/2 5400 17900

Ico_radio_alpha.png

Radios

Tier Radio Signal Range
(m)
Weight
(kg)
Price
(Credits)

IX SCR 506 615 110 33600
VI SCR 508 395 100 21600

Compatible Equipment

Low Noise Exhaust System Class 2 Vertical Stabilizer Class 2 Medium Spall Liner Camouflage Net Class 2 Coated Optics Class 2 Stabilizing Equipment System Experimental Optics Wear-Resistant Gun Laying Drive Improved Configuration Venting System Innovative Loading System Enhanced Gun Laying Drive Class 2 Improved Hardening Class 2 Additional Grousers Class 2 Modified Configuration Class 2 Improved Rotation Mechanism Class 2 Improved Aiming Class 2 Improved Ventilation Class 2 Binocular Telescope Class 2 Gun Rammer Class 2 Turbocharger Class 2 

Compatible Consumables

Stabilizer Greasing Automatic Fire Extinguisher Natural Cover Optical Calibration Case of Cola Aim Tuning Experienced Firefighters 100-octane Gasoline 105-octane Gasoline Manual Fire Extinguisher Pre-Battle Maintenance Vent Purge Large First Aid Kit Large Repair Kit Duty Comes First Shell Organizer Orderly Ammo Rack Focus on Target Increased Focus Small First Aid Kit Small Repair Kit Gearbox Intricacy Steady Hand Combat Course 


Player Opinion

Pros and Cons

Pros:


  • Good alpha damage and above average penetration (especially with APCR), without suffering from poor gun handling or aim time
  • Good speed allows the T20 to charge at distracted enemies, unload a shell and evade retaliation
  • Excellent gun depression
  • Great view range for its tier
  • Low profile gives it very good concealment value


Cons:


  • Almost nonexistent armor
  • Ammo rack is very fragile
  • Next-to-worst damage-per-minute output for Tier VII mediums
  • Significant agility downgrade from M4A3E8, although really good speed and acceleration
  • Shell velocity somewhat slow


Performance

The T20 is very different from the M4A3E8 Sherman which preceded it. They are both generally mobile, with good gun depression and have no real armor to speak of. However the three main differences of the T20 are its inferior hull traverse, especially at speed; greater speed limits allowing for faster relocation; lower silhouette; high-alpha, high-penetrating, low rate-of-fire gun. This makes the T20's play style markedly different from the Easy Eight.

The hull traverse is noticeably sluggish at 37 degrees per second, which doesn't compare favorably with the 40 deg./sec. on the M4A3E8. This is increasingly noticeable when the T20 is turning at full-speed. It tends to lose speed far more rapidly than an Easy Eight in a turn, making it less suited to running circles around slow heavy tanks. However it's still very capable of doing so if needed -- the M4A3E8 is just better at it. It should be noted that the turret traverse on the T20 is better, at 44 deg./sec., which compares favorably to the 39 deg./sec. on the Easy Eight.

A striking difference between the two vehicles is the fact the T20 has a much smaller profile than the M4A3E8. Combined with its 10 degrees of gun depression it can assume hull-down positions reliably at range, and is a significantly smaller target -- an important factor for a medium that relies on avoiding shells. However it lacks a significant gun mantlet, and this reduces its hull-down trading performance considerably compared to the Easy Eight for its tier.

However, the biggest difference between the T20 and the M4A3E8 is the fact the T20 can receive the 90mm M3 main gun, which boasts vastly superior alpha damage and 32mm of extra penetration, but a very slow rate of fire. The premium HVAP ammunition allows it to punch through the fronts of IS-3 tanks with ease. The only real downside is that the reload is slow compared to other American tanks armed with the 90mm M3 and its longer-barreled derivatives. Making your shots count is vital, unlike the Easy Eight where the high rate of fire makes up for misses. Therefore the T20 is best played with a peek-a-boom style where you pull straight out, fire, and duck behind cover after shooting.

The T20 can utilize terrain very well with its high gun depression; good fire control and alpha damage means it only needs minimal exposure. Its mobility should be used to avoid enemy fire and flank them. It can circle slow heavies as well, although the M4A3E8 may be better in this role as it traverses faster. Late in the battle you can rely on your top speed to hunt artillery or reset the cap.

Also, be aware of the excellent view range and camouflage values on this tank -- you can easily see many tanks before they ever catch wind of you as long as you remain hidden.

Boasting 390m of view range, equivalent to the best of Tier VI light tanks, the T20 can be an excellent passive scouter if need be, and the concealment values are great too, it having the same size as the T21, a Tier VI American light tank. Use this advantage to gain sight lines over the map and deal spotting damage as well as shots from your excellent gun.

Repair skills are highly recommended and at least 2 crew should be fully trained in this. A tracked T20 will receive heavy fire and shells from artillery, so Repair skills are essential for survival. If playing as a mid-range sniper with the above-average accurate 90mm some Concealment skills will help greatly, allowing you to know when to relocate and hide better. If using the T20 as a flanker, Snap Shot and Smooth Ride/Off-Road Driving will reduce accuracy penalties and increase mobility even more. Once all off these skills are acquired, Brother in Arms is recommended which will increase every desirable stat on your tank even more.

The T20, like many American vehicles, is a versatile machine which can be used as a sniper or a flanker. Regardless of setup, a Gun Rammer is a necessity, since the T20 has the slowest reload time of all American tanks with the 90mm M3 and its derivatives, excluding the time it takes a T69's autoloader to reload. However the other two slots are up to your own choosing. Flankers can opt for a Vertical Stabilizer and Coated Optics for optimal accuracy on the move. Snipers can go for Enhanced Gun Laying Drive, Camouflage Net, and Binocular Telescope or Coated Optics. Alternatively Vents are viable option for an overall boost to crew abilities.

The T20's crew setup -- Commander, Gunner, Driver, Radio Operator, Loader -- matches a plethora of premium American mediums: the Eagle 7, Fury, M46 FL, M46 KR, M4 Improved, M4A2E4, Ram II, T23E3, T25 Pilot 1, T26E4 SuperPershing, and the Thunderbolt -- you can more or less use one crew for all these tanks; the only thing to consider is what their crew skills are compared to how you drive them.

Overall the T20 is a great asset and threat when played correctly, and should not be underestimated. Considered by many as the best Tier VII medium for good reason, it possesses many of the strengths one desires from a medium tank and can be a pleasure to play.


Early Research

  • The 76mm Gun M1A2 carries over from both the M4A3E8 Sherman and the M4A3E2 Sherman Jumbo. Install the M1A2 and the familiar SCR 506 radio immediately
  • First research the Ford GAN engine
  • Then research the upgraded suspension
  • Now research the second turret, and then the 90mm gun. (Even if you don't intend to use the 90mm gun it is vitally important to unlock it now, because you will need it on the Pershing)


Suggested Equipment


Improved VentilationTank Gun Rammer Vertical Stabilizer Camouflage Net Coated Optics Binocular Telescope Enhanced Gun Laying Drive 


External Reviews and Opinions

Gallery

Historical Info

T-20 prototype vehicle

Much like other armies at the time, the U.S. Army envisioned two main roles for tanks: infantry support and breakthrough exploitation. From 1942 until the end of World War II, both roles were covered in the main by the M4 Sherman, which was better suited for the latter "cavalry" role. The infantry would have preferred a better protected and better armed vehicle, even at a price of less mobility. In late 1942, U.S. Army Ordnance started to work on an "infantry-oriented" design which was supposed to be more versatile than the British infantry tanks. During the next two years, various prototypes were built under the designations T20, T22, T23, T25, and T26. Starting with the T20, the Ordnance Department initially developed three series of improved medium tank prototypes, the T20, T22, and T23. The main differences between the T20, T22, and T23 lay in the choice of transmission. The T20 used a torque converter fluid drive, the T22 a 5-speed mechanical drive similar to the M4 drive, and the T23 used an electric drive. Additionally, the T20 had an early version of the HVSS suspension later employed on the M4 Sherman, whereas the T20E3 had torsion-bar suspension. All moved the transmission to the rear of the vehicle, eliminating the need for a drive-shaft running the length of the vehicle. The drive-shaft used in the M3 & M4 vehicles forced the turret to be mounted higher, thus increasing the vehicle height.

T-20E3, prototype vehicle
However, the initial success of the M4 led the Army Ground Forces command to believe that there was no urgent need for a new tank. Even with the appearance of the heavy Tiger and medium Panther tanks, the AGF did not alter its position, believing both tanks would be fielded in relatively small numbers. AGF was correct about the Tiger, a specialized heavy tank that was never encountered in large numbers. The Panther, first encountered in small numbers at Anzio, however, was built in very large numbers and formed half the German tank strength in Normandy. Also, according to the Army doctrine of the time, tanks were not supposed to engage other tanks; this was the remit of tank destroyers, more mobile armored vehicles with powerful guns, such as the M10 Wolverine. As a result, the development of the new tank was slow. When the Allies invaded western Europe during Operation Overlord in June 1944, the M4 still formed the bulk of American tank units. It quickly became clear that the tank destroyer doctrine failed in the field and that the up-gunned Sherman was unable to engage the Panther on equal terms. Efforts were made to speed up development, but the tank, by now called the T26 and dubbed Pershing, reached the battlefield only in February 1945 and saw very little action in WWII.


Historical Accuracy Errata

The following are consensus errors or inconsistencies which have been identified with the configuration of the vehicle in question and conflict with information available on the public record. The causes for these divergences in the game are normally not disclosed and may be rooted in game balance.

The 90 mm gun was only mounted on the T25 which had a Pershing turret and a slightly enlarged hull. Its configuration on the T20 is fake.
  • 75 mm M3 autoloader and 3-inch M7 gun are missing. Both were planned but never constructed. Along with the 76 mm M1, these three guns were only considered for the T20 series. The 105 mm howitzer configuration is fake.
  • Its engine is considerably more powerful than in reality, with 560 hp compared to the historical 470.
  • Torsion bar suspension is missing. This model, armed with the 76 mm M1, was known as the T20E3.


USA
Light Tanks IT1 Cunningham IIM2 Light Tank IIT1E6 IIT2 Light Tank IIT7 Combat Car IIIM22 Locust IIIM3 Stuart IIIMTLS-1G14 IVM5 Stuart VM24 Chaffee VM7 VIM24E2 Super Chaffee VIT21 VIT37 VIIT71 CMCD VIIT71 DA VIIIT92 VIIIM41 Walker Bulldog IXT49 XXM551 Sheridan
Medium Tanks IIT2 Medium Tank IIIConvert. Medium Tank T3 IIIM2 Medium Tank IVT6 Medium IVM3 Lee VM4 Improved VM4A2E4 Sherman VM4A1 Sherman VRam II VIM4A3E8 Fury VIM4A3E8 Thunderbolt VII VIM4A3E8 Sherman VIM4A3E2 Sherman Jumbo VIIT26E3 Eagle 7 VIIT20 VIIT23E3 VIIIT25 Pilot Number 1 VIIITL-1 LPC VIIIT42 VIIIASTRON Rex 105 mm VIIIAMBT VIIIM46 Patton KR VIIIM26 Pershing VIIIT26E4 SuperPershing VIIIT69 VIIIT95E2 IXM46 Patton XM48A5 Patton XM60 XT95E6
Heavy Tanks VT14 VT1 Heavy Tank VIPawlack Tank VIM6 VIIKing Tiger (Captured) VIIM-II-Y VIIT29 VIIIChrysler K VIIIChrysler K GF VIIIT26E5 VIIIT26E5 Patriot VIIIM54 Renegade VIIIT77 VIIIM-III-Y VIIIM-IV-Y VIIIM6A2E1 VIIIT32 VIIIT34 VIIIT34 B IXAE Phase I IXConcept 1B IXM-VI-Y IXM103 IXT54E1 XM-V-Y XT110E5 XT57 Heavy Tank
Tank Destroyers IIT3 HMC IIIT56 GMC IVM8A1 IVT40 VM10 Wolverine VT67 VIT78 VIM18 Hellcat VIM36 Jackson VIIM56 Scorpion VIIT28 Concept VIISuper Hellcat VIIT25/2 VIIT25 AT VIIITS-5 VIIIT28 VIIIT28 Prototype IXT30 IXT95 XT110E3 XT110E4
Self-Propelled Artillery IIT1 HMC IIIT18 HMC IIIM7 Priest IVT82 HMC IVM37 VM41 HMC VIM44 VIIM12 VIIIM40/M43 IXM53/M55 XT92 HMC
Medium Tanks
USA IIT2 Medium Tank IIIConvert. Medium Tank T3 IIIM2 Medium Tank IVT6 Medium IVM3 Lee VM4 Improved VM4A2E4 Sherman VM4A1 Sherman VRam II VIM4A3E8 Fury VIM4A3E8 Thunderbolt VII VIM4A3E8 Sherman VIM4A3E2 Sherman Jumbo VIIT26E3 Eagle 7 VIIT20 VIIT23E3 VIIIT25 Pilot Number 1 VIIITL-1 LPC VIIIT42 VIIIASTRON Rex 105 mm VIIIAMBT VIIIM46 Patton KR VIIIM26 Pershing VIIIT26E4 SuperPershing VIIIT69 VIIIT95E2 IXM46 Patton XM48A5 Patton XM60 XT95E6
UK IVickers Medium Mk. I IIVickers Medium Mk. II IIIVickers Medium Mk. III IVMatilda IVMatilda LVT IVGrant IVAC 1 Sentinel VCavalier VValiant VSherman III VMatilda Black Prince VISherman Firefly VICromwell VIAC 4 Experimental VICromwell B VISherman VC Firefly VIIComet VIIICenturion Mk. I VIIIFV4202 VIIIChieftain/T95 VIIICenturion Mk. 5/1 RAAC VIIIChimera IXCobra IXCenturion Mk. 7/1 XCenturion Action X
Germany IIIGroßtraktor - Krupp IIIPz.Kpfw. IV Ausf. A IIIPz.Kpfw. S35 739 (f) IVPz.Kpfw. III Ausf. J IVPz.Kpfw. IV Ausf. D IVVK 20.01 (D) VPz.Kpfw. III Ausf. K VTurán III prototípus VPz.Kpfw. IV Ausf. H Ankou VPz.Kpfw. III/IV VPz.Kpfw. IV hydrostat. VPz.Kpfw. V/IV VPz.Kpfw. V/IV Alpha VPz.Kpfw. IV Ausf. H VPz.Kpfw. T 25 VVK 30.01 (H) VIPz.Kpfw. IV Schmalturm VIVK 30.01 (D) VIVK 30.02 (M) VIIPanther/M10 VIIPanther VIIVK 30.02 (D) VIIIPanther mit 8,8 cm L/71 VIIIPanzer 58 VIIISchwarzpanzer 58 VIIIPanzer 58 Mutz VIIIM48A2 Räumpanzer VIIIKampfpanzer 07 RH VIIIIndien-Panzer VIIIPanther II IXE 50 IXT 55A IXKampfpanzer 50 t IXKunze Panzer IXLeopard Prototyp A XE 50 Ausf. M XLeopard 1
France IIID2 IIISomua S35 IVSARL 42 VRenault G1 VIBretagne Panther VIM4A1 FL 10 VIIIBat.-Châtillon Bourrasque VIIIAltProto AMX 30 VIIILorraine 40 t VIIIAMX Chasseur de chars VIIIM4A1 Revalorisé IXAMX 30 1er prototype IXChar Futur 4 IXBat.-Châtillon 25 t AP XBat.-Châtillon 25 t XAMX 30 B
USSR IIIT-29 IVA-32 IVT-28E with F-30 IVT-34 with L-11 IVT-28 VMatilda IV VT-34 shielded VM4-85 VT-34 VIA-43 VIT-34-85M VIT-34-85 Rudy VILoza's M4-A2 Sherman VIT-34-85 VIIA-44 VIIKV-13 VIIT-43 VIIT-44-122 VIIIObject 416 VIIIT-54 first prototype VIIIT-44-100 Igrovoy VIIIT-44-100 (R) VIIISTG VIIISTG Guard VIIIObject 274a VIIIT-44 IXObject 430 Version II IXObject 430 IXT-54 XObject 140 XObject 907 XT-22 medium XK-91 XObject 430U XT-62A
China VType T-34 VIType 58 VIIT-34-1 VIIIType 59 VIIIT-34-2 VIIIT-34-3 VIII59-Patton VIII122 TM VIIIType 59 G IXWZ-120 X121 X121B
Japan IIChi-Ni IIType 89 I-Go/Chi-Ro IVType 1 Chi-He VType 3 Chi-Nu VType 3 Chi-Nu Kai VIType 4 Chi-To VIIType 5 Chi-Ri VIIISTA-1 VIIISTA-2 IXType 61 XSTB-1
Czechoslovakia IVST vz. 39 VŠkoda T 24 VIŠkoda T 40 VIŠkoda T 25 VIIKonštrukta T-34/100 VIIITVP VTU Koncept VIIIŠkoda T 27 IXŠkoda T 50 XTVP T 50/51
Sweden IVLago VStrv m/42 VIStrv m/42-57 Alt A.2 VIStrv 74 VIILeo VIIIStrv 81 VIIIPrimo Victoria VIIILansen C VIIIUDES 14 Alt 5 IXUDES 16 XUDES 15/16
Italy IIM14/41 IIIM15/42 IVP26/40 VP.43 VIP.43 bis VIIP.43 ter VIIIProgetto M35 mod. 46 VIIIP.44 Pantera IXPrototipo Standard B XProgetto M40 mod. 65 XCarro da Combattimento 45 t
Poland V25TP KSUST II VDS PZInż VIPudel VI40TP Habicha VIT-34-85 Rudy VIB.U.G.I. VIICS-44 VIIICS-52 LIS VIIICS-53 IXCS-59 XCS-63
ja:Tank:A07 T20