Welcome to Wargaming.net Wiki!
Variants

M-VI-Y

Jump to: navigation, search


Ambox_important.png This article requires additional modification.
The design and/or content of this article do not conform to wiki standards.

Missing Content:

  • Gallery
  • History


M-VI-Y

AnnoA144_M_VI_Y.png
Battle Tier
1234567891011
Overview
Mouse over "
Well, the ones further down, of course.
" for more information
[Client Values; Actual values in
Specifically, the mismatch in crew values caused by commander's 10% crew skill bonus. Outside of a crew of 1 commander only, 100% crew is a fiction. The client values, given for 100% crew, will normally be taken into battle with 110% crew skill members aside from specific functions, causing their actual performance to deviate from the expected client value. These differences are taken into account in tooltip boxes.
]
3,620,000  Credits Cost
1700360 HP Hit Points
45.36/4626.03/50 t Weight Limit
Crew
  1. Commander (Radio Operator)
  2. Gunner
  3. Driver
  4. Loader
Mobility
690780 hp Engine Power
40/15 km/h Speed Limit
2628 deg/s Traverse
15.2129.97 hp/t Power/Wt Ratio
YesYes Pivot
Armor
// mm Hull Armor
304.8/88.9/38.1330.2/101.6/50.8 mm Turret Armor
Armament


{{#ifeq:HOLLOW_CHARGE|ARMOR_PIERCING||


{{#ifeq:HIGH_EXPLOSIVE|ARMOR_PIERCING||


APCR/HEAT/HE


{{#ifeq:HOLLOW_CHARGE|ARMOR_PIERCING||


{{#ifeq:HIGH_EXPLOSIVE|ARMOR_PIERCING||


AP/HEAT/HE
Shells


455/4000/245


1060/4400/900
Shell Cost
240/240/320400/400/515 HP Damage
223/290/45243/300/60 mm Penetration


|


|}}

|


|}}


9.68 r/m 

Standard Gun

Reload Times
Nominal: 6.2 s
50% Crew: 7.68 s
75% Crew: 6.71 s
100% Crew: 5.94 s
Rammer: 5.35 s
Vents: 5.81 s
Both: 5.23 s
Both and BiA: 5.11 s
Both and Max Crew %: 4.9 s

See Crew, Consumables, or Equipment for more information.


|


|}}

|


|}}


5.26 r/m 

Standard Gun

Reload Times
Nominal: 11.4 s
50% Crew: 14.12 s
75% Crew: 12.33 s
100% Crew: 10.93 s
Rammer: 9.84 s
Vents: 10.69 s
Both: 9.62 s
Both and BiA: 9.41 s
Both and Max Crew %: 9.02 s

See Crew, Consumables, or Equipment for more information.
Rate of Fire


|


|}}

|


|}}


2323.2

Standard Gun

Using Shell Type 1 (240 Damage):


Theoretical Damage Per Minute
Nominal DPM: 2323.2
50% Crew: 1874.4
75% Crew: 2148
100% Crew: 2424
100% Crew
Vents: 2479.2
Rammer: 2692.8
Both: 2755.2
Both and BiA: 2815.2
Both and Max Crew %: 2937.6

Advantageous Damage Per Minute
First-shot DPM: 2563.2
50% Crew: 2114.4
75% Crew: 2388
100% Crew: 2664
100% Crew
Rammer: 2932.8
Vents: 2719.2
Both: 2995.2
Both and BiA: 3055.2
Both and Max Crew %: 3177.6

See here, here, or here for more information.

Standard Gun

Using Shell Type 2 (240 Damage):


Theoretical Damage Per Minute
Nominal DPM: 2323.2
50% Crew: 1874.4
75% Crew: 2148
100% Crew: 2424
100% Crew
Vents: 2479.2
Rammer: 2692.8
Both: 2755.2
Both and BiA: 2815.2
Both and Max Crew %: 2937.6

Advantageous Damage Per Minute
First-shot DPM: 2563.2
50% Crew: 2114.4
75% Crew: 2388
100% Crew: 2664
100% Crew
Rammer: 2932.8
Vents: 2719.2
Both: 2995.2
Both and BiA: 3055.2
Both and Max Crew %: 3177.6

See here, here, or here for more information.

Standard Gun

Using Shell Type 3 (320 Damage):
With wholly penetrating hits

Theoretical Damage Per Minute
Nominal DPM: 3097.6
50% Crew: 2499.2
75% Crew: 2864
100% Crew: 3232
100% Crew
Vents: 3305.6
Rammer: 3590.4
Both: 3673.6
Both and BiA: 3753.6
Both and Max Crew %: 3916.8

Advantageous Damage Per Minute
First-shot DPM: 3417.6
50% Crew: 2819.2
75% Crew: 3184
100% Crew: 3552
100% Crew
Rammer: 3910.4
Vents: 3625.6
Both: 3993.6
Both and BiA: 4073.6
Both and Max Crew %: 4236.8

See here, here, or here for more information.


|


|}}

|


|}}


2104

Standard Gun

Using Shell Type 1 (400 Damage):


Theoretical Damage Per Minute
Nominal DPM: 2104
50% Crew: 1700
75% Crew: 1944
100% Crew: 2196
100% Crew
Vents: 2244
Rammer: 2440
Both: 2496
Both and BiA: 2552
Both and Max Crew %: 2660

Advantageous Damage Per Minute
First-shot DPM: 2504
50% Crew: 2100
75% Crew: 2344
100% Crew: 2596
100% Crew
Rammer: 2840
Vents: 2644
Both: 2896
Both and BiA: 2952
Both and Max Crew %: 3060

See here, here, or here for more information.

Standard Gun

Using Shell Type 2 (400 Damage):


Theoretical Damage Per Minute
Nominal DPM: 2104
50% Crew: 1700
75% Crew: 1944
100% Crew: 2196
100% Crew
Vents: 2244
Rammer: 2440
Both: 2496
Both and BiA: 2552
Both and Max Crew %: 2660

Advantageous Damage Per Minute
First-shot DPM: 2504
50% Crew: 2100
75% Crew: 2344
100% Crew: 2596
100% Crew
Rammer: 2840
Vents: 2644
Both: 2896
Both and BiA: 2952
Both and Max Crew %: 3060

See here, here, or here for more information.

Standard Gun

Using Shell Type 3 (515 Damage):
With wholly penetrating hits

Theoretical Damage Per Minute
Nominal DPM: 2708.9
50% Crew: 2188.75
75% Crew: 2502.9
100% Crew: 2827.35
100% Crew
Vents: 2889.15
Rammer: 3141.5
Both: 3213.6
Both and BiA: 3285.7
Both and Max Crew %: 3424.75

Advantageous Damage Per Minute
First-shot DPM: 3223.9
50% Crew: 2703.75
75% Crew: 3017.9
100% Crew: 3342.35
100% Crew
Rammer: 3656.5
Vents: 3404.15
Both: 3728.6
Both and BiA: 3800.7
Both and Max Crew %: 3939.75

See here, here, or here for more information.
Damage Per Minute


|


|}}


0.36 m 

With 50% Crew: 0.446 m
With 75% Crew: 0.389 m
With 100% Crew: 0.345 m
With BiA: 0.338 m
With BiA and Vents: 0.33 m
Maximum possible: 0.317 m

For more details, see Crew


|


|}}


0.38 m 

With 50% Crew: 0.471 m
With 75% Crew: 0.411 m
With 100% Crew: 0.364 m
With BiA: 0.356 m
With BiA and Vents: 0.349 m
Maximum possible: 0.334 m

For more details, see Crew
Accuracy


|


|}}


2 s 

With 50% Crew: 2.478 s
With 75% Crew: 2.163 s
With 100% Crew: 1.918 s
With GLD: 1.743 s
With BiA: 1.875 s
With BiA and Vents: 1.835 s
With both and GLD: 1.668 s
Maximum possible: 1.599 s

For more details, see Crew or Equipment


|


|}}


2.5 s 

With 50% Crew: 3.097 s
With 75% Crew: 2.704 s
With 100% Crew: 2.397 s
With GLD: 2.179 s
With BiA: 2.344 s
With BiA and Vents: 2.293 s
With both and GLD: 2.085 s
Maximum possible: 1.998 s

For more details, see Crew or Equipment
Aim time
2830 deg/s Turret Traverse
360° Gun Arc
-10°/+20°-10°/+20° Elevation Arc
6038 rounds Ammo Capacity
General
2020 % Chance of Fire


370 m 

With 50% Crew: 290.7 m
With 75% Crew: 330.4 m
With 100% Crew: 370 m
With Recon and Situational Awareness: 388.7 m
With Coated Optics: 407 m
With Binocular Telescope: 462.5 m
Maximum possible: 529.7 m

For more details, see Skills or Equipment


390 m 

With 50% Crew: 306.4 m
With 75% Crew: 348.2 m
With 100% Crew: 390 m
With Recon and Situational Awareness: 409.7 m
With Coated Optics: 429 m
With Binocular Telescope: 487.5 m
Maximum possible: 558.3 m

For more details, see Skills or Equipment
View Range


|


|}}


410 m 

With 50% Crew: 322.1 m
With 75% Crew: 366.1 m
With 100% Crew: 410 m
With 100% Signal Boost: 492 m
When affected by 100% Relaying: 451 m
Maximum possible: 590 m

For more details, see Skills or Equipment


|


|}}


745 m 

With 50% Crew: 585.3 m
With 75% Crew: 665.2 m
With 100% Crew: 745 m
With 100% Signal Boost: 894 m
When affected by 100% Relaying: 819.5 m
Maximum possible: 1072 m

For more details, see Skills or Equipment
Signal Range
Values are Stock - click for Top


IX

AnnoA144_M_VI_Y.png

3620000

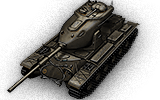
The M-VI-Y is an American tier 9 heavy tank.

The M-VI-Y is one of the projects put forward by H.L. Yoh Company Inc. as a part of the program for developing promising tanks. The project had a number of technical solutions, the most prominent of which was using a so-called reserve track. With it, the tank could move even if the main one was destroyed. The tank was never built.

The M-VI-Y leads to the M-V-Y.

Modules / Available Equipment and Consumables

Modules

Ico_gun_alpha.png

Guns

Tier Gun Penetration
(mm)
Damage
(HP)
Rate of fire
(rounds/minute)
Dispersion
(m/100m)
Aiming time
(s)
Weight
(kg)
Price
(Credits)

VIII 90 mm Gun T208 (rifled) 223/290/45 240/240/320 10 0.35 1.9 1481 127000
IX 105 mm Gun T254 Y VI 251/315/53 320/320/420 7.23 0.35 2 1123 175000
IX 120 mm American British Gun 243/300/60 400/400/515 5.26 0.38 2.5 1610 224000

Ico_engine_alpha.png

Engines

Tier Engine Engine Power
(hp)
Chance of Fire on Impact
(%)
Weight
(kg)
Price
(Credits)

VIII Continental AOSI-1195-5 Y VI A 690 20 998 50000
IX Continental AOSI-1195-5 Y VI B 780 20 998 83000

Ico_suspension_alpha.png

Suspensions

Tier Suspension Load Limit
(т)
Traverse Speed
(gr/sec)
Rmin Weight
(kg)
Price
(Credits)

VIII M-VI-Y A 46 26 0 11000 32000
IX M-VI-Y B 50 28 0 11000 63400

Ico_radio_alpha.png

Radios

Tier Radio Signal Range
(m)
Weight
(kg)
Price
(Credits)

VI AN/GRC-3 410 120 21600
X AN/GRC-7 745 120 54000

Compatible Equipment

Low Noise Exhaust System Class 1 Vertical Stabilizer Class 1 Heavy Spall Liner Camouflage Net Class 2 Coated Optics Class 1 Stabilizing Equipment System Experimental Optics Wear-Resistant Gun Laying Drive Improved Configuration Venting System Innovative Loading System Enhanced Gun Laying Drive Class 1 Improved Hardening Class 1 Additional Grousers Class 1 Modified Configuration Class 1 Improved Rotation Mechanism Class 1 Improved Aiming Class 1 Improved Ventilation Class 1 Binocular Telescope Class 1 Gun Rammer Class 1 Turbocharger Class 1 

Compatible Consumables

Stabilizer Greasing Automatic Fire Extinguisher Natural Cover Optical Calibration Case of Cola Aim Tuning Experienced Firefighters 100-octane Gasoline 105-octane Gasoline Manual Fire Extinguisher Pre-Battle Maintenance Vent Purge Large First Aid Kit Large Repair Kit Duty Comes First Shell Organizer Orderly Ammo Rack Focus on Target Increased Focus Small First Aid Kit Small Repair Kit Gearbox Intricacy Steady Hand Combat Course 


Player Opinion

Pros and Cons

Pros:


  • Decent mobility, on par with slower mediums
  • Excellent rate of fire with the T254 Y 105mm
  • Good AP pen at 251mm with the T254 Y 105mm
  • Excellent accuracy with the T254 Y 105mm (.34 with a 100% crew)
  • 10 degrees of gun depression


Cons:


  • Poor armour for a tier 9 heavy
  • Huge obvious weakspots on the turret that are difficult to hide
  • Poor pen on the 120mm at 243mm
  • Horrible moving dispersions at .22 requiring Vertical Stabilizers


Performance

Despite the M-VI-Y's daunting armour shape, the cupolas are massive targets that will be easily shot by most tanks and penned with ease. The top 120mm gun is worse than a Conqueror in every regard and should be avoided, as it is not required to research for the Tank:A143 M V Y and is not shared. The top 105mm gun is the best option overall, as it offers superior penetration and good rate of fire. The M-VI-Y's firepower in one-for-one trades with the 105mm is subpar with only 320 alpha damage, it is imperative to shoot twice or immobilise an enemy vehicle to put the great DPM to use. The good base accuracy combined with the excellent reload speed can make the M-VI-Y rather comfortable at medium and long range where other heavy tanks and mediums may struggle. The M-VI-Y's mediocre mobility combined with lackluster armour forces it to play as a slow medium, even with a turbo it maxes out at 45kph which is tolerable but is noticeably slower than tanks like the M46 Patton or Type 61. It is best suited to play as a supporting tank that can track enemy vehicles and reap assistance.


Suggested Equipment


Tank Gun Rammer Vertical Stabilizer Improved HardeningTurbo Charger


Gallery

History for this tank not found

Historical Gallery


USA
Light Tanks IT1 Cunningham IIM2 Light Tank IIT1E6 IIT2 Light Tank IIT7 Combat Car IIIM22 Locust IIIM3 Stuart IIIMTLS-1G14 IVM5 Stuart VM24 Chaffee VM7 VIM24E2 Super Chaffee VIT21 VIT37 VIIT71 CMCD VIIT71 DA VIIIT92 VIIIM41 Walker Bulldog IXT49 XXM551 Sheridan
Medium Tanks IIT2 Medium Tank IIIConvert. Medium Tank T3 IIIM2 Medium Tank IVT6 Medium IVM3 Lee VM4 Improved VM4A2E4 Sherman VM4A1 Sherman VRam II VIM4A3E8 Fury VIM4A3E8 Thunderbolt VII VIM4A3E8 Sherman VIM4A3E2 Sherman Jumbo VIIT26E3 Eagle 7 VIIT20 VIIT23E3 VIIIT25 Pilot Number 1 VIIITL-1 LPC VIIIT42 VIIIASTRON Rex 105 mm VIIIAMBT VIIIM46 Patton KR VIIIM26 Pershing VIIIT26E4 SuperPershing VIIIT69 VIIIT95E2 IXM46 Patton XM48A5 Patton XM60 XT95E6
Heavy Tanks VT14 VT1 Heavy Tank VIPawlack Tank VIM6 VIIKing Tiger (Captured) VIIM-II-Y VIIT29 VIIIChrysler K VIIIChrysler K GF VIIIT26E5 VIIIT26E5 Patriot VIIIM54 Renegade VIIIT77 VIIIM-III-Y VIIIM-IV-Y VIIIM6A2E1 VIIIT32 VIIIT34 VIIIT34 B IXAE Phase I IXConcept 1B IXM-VI-Y IXM103 IXT54E1 XM-V-Y XT110E5 XT57 Heavy Tank
Tank Destroyers IIT3 HMC IIIT56 GMC IVM8A1 IVT40 VM10 Wolverine VT67 VIT78 VIM18 Hellcat VIM36 Jackson VIIM56 Scorpion VIIT28 Concept VIISuper Hellcat VIIT25/2 VIIT25 AT VIIITS-5 VIIIT28 VIIIT28 Prototype IXT30 IXT95 XT110E3 XT110E4
Self-Propelled Artillery IIT1 HMC IIIT18 HMC IIIM7 Priest IVT82 HMC IVM37 VM41 HMC VIM44 VIIM12 VIIIM40/M43 IXM53/M55 XT92 HMC
Heavy Tanks
USA VT14 VT1 Heavy Tank VIPawlack Tank VIM6 VIIKing Tiger (Captured) VIIM-II-Y VIIT29 VIIIChrysler K VIIIChrysler K GF VIIIT26E5 VIIIT26E5 Patriot VIIIM54 Renegade VIIIT77 VIIIM-III-Y VIIIM-IV-Y VIIIM6A2E1 VIIIT32 VIIIT34 VIIIT34 B IXAE Phase I IXConcept 1B IXM-VI-Y IXM103 IXT54E1 XM-V-Y XT110E5 XT57 Heavy Tank
UK VChurchill I VExcelsior VIChurchill VII VITOG II* VIIBlack Prince VIIFV201 (A45) VIIICharlemagne VIIICaliban VIIIGonsalo VIIICaernarvon VIIICaernarvon Action X IXFV4201 Chieftain Proto IXConqueror XFV215b XSuper Conqueror XT95/FV4201 Chieftain
Germany IVPz.Kpfw. B2 740 (f) IVDurchbruchswagen 2 VITiger 131 VIVK 30.01 (P) VIVK 36.01 (H) VIIVK 45.03 VIITiger I VIITiger (P) VIIIVK 100.01 (P) VIIIVK 168.01 (P) VIIIVK 168.01 Mauerbrecher VIIIVK 75.01 (K) VIIIE 75 TS VIIILöwe VIIITiger II VIIIVK 45.02 (P) Ausf. A IXE 75 IXMäuschen IXVK 45.02 (P) Ausf. B XE 100 XPz.Kpfw. VII XMaus XVK 72.01 (K)
France IVB1 VBDR G1 B VIARL 44 VIIAMX M4 mle. 45 VIIIAMX 50 100 VIIIAMX M4 mle. 49 VIIIAMX M4 mle. 49 Liberté VIIIAMX 65 t VIIISomua SM VIIIFCM 50 t IXAMX 50 120 IXLorraine 50 t IXAMX M4 mle. 51 XAMX 50 B XAMX M4 mle. 54
USSR VChurchill III VKV-220-2 VKV-220-2 Beta Test VKV-1 VKV-1 shielded VIKV-1S VIKV-2 VIKV-2 (R) VIKV-85 VIObject 244 VIT-150 VIIIS VIIKV-3 VIIKV-122 VIIIS-2M VIIIS-2 shielded VIIIS-2 VIIIIS-3 VIIIIS-6 VIIIIS-6 B VIIIKV-5 VIIIKV-4 VIIIIS-5 (Object 730) VIIIIS-3A VIIIIS-3A Peregrine VIIIKirovets-1 VIIIKV-4 Kreslavskiy VIIIObject 252U Defender VIIIObject 252U VIIIIS-M VIIIObject 703 Version II VIIIIS-2-II IXT-10 IXObject 777 Version II IXObject 257 IXObject 705 IXIS-3-II IXST-I XIS-4 XIS-7 XObject 260 XObject 705A XObject 277 XObject 279 early XST-II XObject 780
China VIIIS-2 VIIIWZ-111 VIIIWZ-111 Alpine Tiger VIII110 VIII112 IXWZ-111 model 1-4 IXWZ-114 X113 X113 Beijing Opera XWZ-111 model 5A XWZ-111 Qilin
Japan IIIType 91 Heavy IVType 95 Heavy VO-I Experimental VIHeavy Tank No. VI VIO-I VIIO-Ni VIIIO-Ho IXType 4 Heavy XType 5 Heavy
Czechoslovakia VIIŠkoda T 45 VIIVz. 44-1 VIIIŠkoda T 56 VIIITNH 105/1000 IXTNH T Vz. 51 XVz. 55
Sweden VIIIEmil I VIIIEMIL 1951 VIIIBofors Tornvagn IXEmil II IXStrv K XKranvagn
Italy VIICarro d'assalto P.88 VIIIProgetto CC55 mod. 54 VIIIBisonte C45 IXProgetto C50 mod. 66 XRinoceronte
Poland VII45TP Habicha VIII50TP prototyp VIII53TP Markowskiego IX50TP Tyszkiewicza X60TP Lewandowskiego
ja:Tank:A144 M VI Y