Welcome to Wargaming.net Wiki!
Variants

113

Jump to: navigation, search


113

AnnoCh22_113.png
Battle Tier
1234567891011
Overview
Mouse over "
Well, the ones further down, of course.
" for more information
[Client Values; Actual values in
Specifically, the mismatch in crew values caused by commander's 10% crew skill bonus. Outside of a crew of 1 commander only, 100% crew is a fiction. The client values, given for 100% crew, will normally be taken into battle with 110% crew skill members aside from specific functions, causing their actual performance to deviate from the expected client value. These differences are taken into account in tooltip boxes.
]
6,100,000  Credits Cost
2300460 HP Hit Points
45/4826.14/48 t Weight Limit
Crew
  1. Commander
  2. Gunner
  3. Driver
  4. Loader (Radio Operator)
Mobility
750750 hp Engine Power
50/15 km/h Speed Limit
3636 deg/s Traverse
16.6728.69 hp/t Power/Wt Ratio
NoNo Pivot
Armor
// mm Hull Armor
290/180/80290/180/80 mm Turret Armor
Armament


{{#ifeq:HOLLOW_CHARGE|ARMOR_PIERCING||


{{#ifeq:HIGH_EXPLOSIVE|ARMOR_PIERCING||


AP/HEAT/HE


{{#ifeq:HOLLOW_CHARGE|ARMOR_PIERCING||


{{#ifeq:HIGH_EXPLOSIVE|ARMOR_PIERCING||


AP/HEAT/HE
Shells


1065/4800/630


1065/4800/630
Shell Cost
440/440/530440/440/530 HP Damage
249/340/68249/340/68 mm Penetration


|


|}}

|


|}}


6 r/m 

Standard Gun

Reload Times
Nominal: 10 s
50% Crew: 12.39 s
75% Crew: 10.82 s
100% Crew: 9.59 s
Rammer: 8.63 s
Vents: 9.38 s
Both: 8.44 s
Both and BiA: 8.26 s
Both and Max Crew %: 7.91 s

See Crew, Consumables, or Equipment for more information.


|


|}}

|


|}}


6 r/m 

Standard Gun

Reload Times
Nominal: 10 s
50% Crew: 12.39 s
75% Crew: 10.82 s
100% Crew: 9.59 s
Rammer: 8.63 s
Vents: 9.38 s
Both: 8.44 s
Both and BiA: 8.26 s
Both and Max Crew %: 7.91 s

See Crew, Consumables, or Equipment for more information.
Rate of Fire


|


|}}

|


|}}


2640

Standard Gun

Using Shell Type 1 (440 Damage):


Theoretical Damage Per Minute
Nominal DPM: 2640
50% Crew: 2129.6
75% Crew: 2442
100% Crew: 2754.4
100% Crew
Vents: 2816
Rammer: 3062.4
Both: 3128.4
Both and BiA: 3198.8
Both and Max Crew %: 3335.2

Advantageous Damage Per Minute
First-shot DPM: 3080
50% Crew: 2569.6
75% Crew: 2882
100% Crew: 3194.4
100% Crew
Rammer: 3502.4
Vents: 3256
Both: 3568.4
Both and BiA: 3638.8
Both and Max Crew %: 3775.2

See here, here, or here for more information.

Standard Gun

Using Shell Type 2 (440 Damage):


Theoretical Damage Per Minute
Nominal DPM: 2640
50% Crew: 2129.6
75% Crew: 2442
100% Crew: 2754.4
100% Crew
Vents: 2816
Rammer: 3062.4
Both: 3128.4
Both and BiA: 3198.8
Both and Max Crew %: 3335.2

Advantageous Damage Per Minute
First-shot DPM: 3080
50% Crew: 2569.6
75% Crew: 2882
100% Crew: 3194.4
100% Crew
Rammer: 3502.4
Vents: 3256
Both: 3568.4
Both and BiA: 3638.8
Both and Max Crew %: 3775.2

See here, here, or here for more information.

Standard Gun

Using Shell Type 3 (530 Damage):
With wholly penetrating hits

Theoretical Damage Per Minute
Nominal DPM: 3180
50% Crew: 2565.2
75% Crew: 2941.5
100% Crew: 3317.8
100% Crew
Vents: 3392
Rammer: 3688.8
Both: 3768.3
Both and BiA: 3853.1
Both and Max Crew %: 4017.4

Advantageous Damage Per Minute
First-shot DPM: 3710
50% Crew: 3095.2
75% Crew: 3471.5
100% Crew: 3847.8
100% Crew
Rammer: 4218.8
Vents: 3922
Both: 4298.3
Both and BiA: 4383.1
Both and Max Crew %: 4547.4

See here, here, or here for more information.


|


|}}

|


|}}


2640

Standard Gun

Using Shell Type 1 (440 Damage):


Theoretical Damage Per Minute
Nominal DPM: 2640
50% Crew: 2129.6
75% Crew: 2442
100% Crew: 2754.4
100% Crew
Vents: 2816
Rammer: 3062.4
Both: 3128.4
Both and BiA: 3198.8
Both and Max Crew %: 3335.2

Advantageous Damage Per Minute
First-shot DPM: 3080
50% Crew: 2569.6
75% Crew: 2882
100% Crew: 3194.4
100% Crew
Rammer: 3502.4
Vents: 3256
Both: 3568.4
Both and BiA: 3638.8
Both and Max Crew %: 3775.2

See here, here, or here for more information.

Standard Gun

Using Shell Type 2 (440 Damage):


Theoretical Damage Per Minute
Nominal DPM: 2640
50% Crew: 2129.6
75% Crew: 2442
100% Crew: 2754.4
100% Crew
Vents: 2816
Rammer: 3062.4
Both: 3128.4
Both and BiA: 3198.8
Both and Max Crew %: 3335.2

Advantageous Damage Per Minute
First-shot DPM: 3080
50% Crew: 2569.6
75% Crew: 2882
100% Crew: 3194.4
100% Crew
Rammer: 3502.4
Vents: 3256
Both: 3568.4
Both and BiA: 3638.8
Both and Max Crew %: 3775.2

See here, here, or here for more information.

Standard Gun

Using Shell Type 3 (530 Damage):
With wholly penetrating hits

Theoretical Damage Per Minute
Nominal DPM: 3180
50% Crew: 2565.2
75% Crew: 2941.5
100% Crew: 3317.8
100% Crew
Vents: 3392
Rammer: 3688.8
Both: 3768.3
Both and BiA: 3853.1
Both and Max Crew %: 4017.4

Advantageous Damage Per Minute
First-shot DPM: 3710
50% Crew: 3095.2
75% Crew: 3471.5
100% Crew: 3847.8
100% Crew
Rammer: 4218.8
Vents: 3922
Both: 4298.3
Both and BiA: 4383.1
Both and Max Crew %: 4547.4

See here, here, or here for more information.
Damage Per Minute


|


|}}


0.37 m 

With 50% Crew: 0.458 m
With 75% Crew: 0.4 m
With 100% Crew: 0.355 m
With BiA: 0.347 m
With BiA and Vents: 0.339 m
Maximum possible: 0.325 m

For more details, see Crew


|


|}}


0.37 m 

With 50% Crew: 0.458 m
With 75% Crew: 0.4 m
With 100% Crew: 0.355 m
With BiA: 0.347 m
With BiA and Vents: 0.339 m
Maximum possible: 0.325 m

For more details, see Crew
Accuracy


|


|}}


2.8 s 

With 50% Crew: 3.469 s
With 75% Crew: 3.029 s
With 100% Crew: 2.685 s
With GLD: 2.441 s
With BiA: 2.626 s
With BiA and Vents: 2.569 s
With both and GLD: 2.335 s
Maximum possible: 2.238 s

For more details, see Crew or Equipment


|


|}}


2.8 s 

With 50% Crew: 3.469 s
With 75% Crew: 3.029 s
With 100% Crew: 2.685 s
With GLD: 2.441 s
With BiA: 2.626 s
With BiA and Vents: 2.569 s
With both and GLD: 2.335 s
Maximum possible: 2.238 s

For more details, see Crew or Equipment
Aim time
2626 deg/s Turret Traverse
360° Gun Arc
-7°/+18°-7°/+18° Elevation Arc
3434 rounds Ammo Capacity
General
1212 % Chance of Fire


400 m 

With 50% Crew: 314.3 m
With 75% Crew: 357.2 m
With 100% Crew: 400 m
With Recon and Situational Awareness: 420.2 m
With Coated Optics: 440 m
With Binocular Telescope: 500 m
Maximum possible: 572.6 m

For more details, see Skills or Equipment


400 m 

With 50% Crew: 314.3 m
With 75% Crew: 357.2 m
With 100% Crew: 400 m
With Recon and Situational Awareness: 420.2 m
With Coated Optics: 440 m
With Binocular Telescope: 500 m
Maximum possible: 572.6 m

For more details, see Skills or Equipment
View Range


|


|}}


750 m 

With 50% Crew: 589.3 m
With 75% Crew: 669.7 m
With 100% Crew: 750 m
With 100% Signal Boost: 900 m
When affected by 100% Relaying: 825 m
Maximum possible: 1079.2 m

For more details, see Skills or Equipment


|


|}}


750 m 

With 50% Crew: 589.3 m
With 75% Crew: 669.7 m
With 100% Crew: 750 m
With 100% Signal Boost: 900 m
When affected by 100% Relaying: 825 m
Maximum possible: 1079.2 m

For more details, see Skills or Equipment
Signal Range
Values are Stock - click for Top
113

Additional Statistics
(Top Configuration)

Camouflage

  • Stationary: 6.6%
  • When Moving: 3.4%
  • When Firing: 1.4%


Terrain Resistance

  • On Hard Ground: 1.25
  • On Medium Ground: 1.34
  • On Soft Ground: 2.59


Dispersion Change Values

  • Turret Contribution
  • Rotation: 0.08
  • Shot Recoil: 3.84
  • Suspension Contribution
  • Acceleration: 0.18
  • Turning: 0.18


With 100% Crew

X

AnnoCh22_113.png

6100000

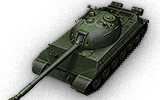
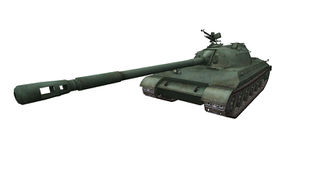
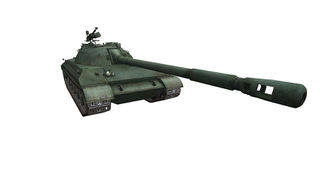
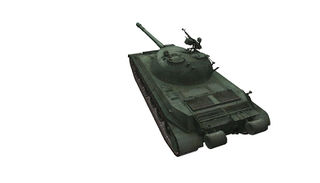
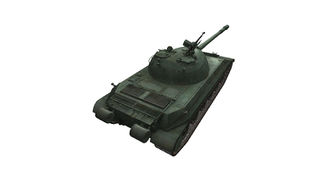
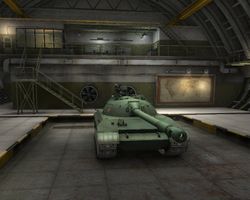
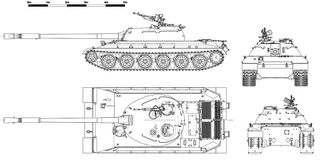
The 113 is a Chinese tier 10 heavy tank.

Development on model 113 was started in 1963. The vehicle was conceived as an alternative to the WZ-111 and used parts and components of medium tanks. However, the project was canceled due to the development of main battle tanks.

Initially introduced as the sole final tank in Chinese heavy tank line. The 113 is an odd continuation from the WZ-111-1-4. It has a gun caliber downgrade from a 130mm to a 122mm and can be a huge turn off for player looking forward to a hard hitting heavy tank similar to the IS-7. Other hard stats such as only having 120mm of frontal hull armor, a 122mm gun that is fitted on the tier IX WZ-120 medium tank makes this tank seem mediocre, however, the 113 is a beast in its own right. It is one of the few "Heavy-Medium" tanks in the game, combining the best of both worlds, with decent sloped armor protection and a hard hitting gun, while still featuring medium tank like mobility. The 113 can easily keep up with allied medium tank and provide high alpha damage and armor for you less well-armored medium allies and can act like a medium tank, flanking enemy tanks and engaging in close range brawling. This heavy tank is definitely familiar feel for medium tank drivers and is a blast to play.

The 113 was removed from the tech tree and received collector's vehicle status, and will be unlocked and available for purchase when player has researched any tier 10 Chinese tanks in tech tree.

The 113 marks the end of its Chinese heavy line.

Modules / Available Equipment and Consumables

Modules

Ico_gun_alpha.png

Guns

Tier Gun Penetration
(mm)
Damage
(HP)
Rate of fire
(rounds/minute)
Dispersion
(m/100m)
Aiming time
(s)
Weight
(kg)
Price
(Credits)

X 122 mm 60-122T 249/340/68 440/440/530 6 0.37 2.8 2757 300000

Ico_engine_alpha.png

Engines

Tier Engine Engine Power
(hp)
Chance of Fire on Impact
(%)
Weight
(kg)
Price
(Credits)

X V-2-54SC 750 12 1045 25000

Ico_suspension_alpha.png

Suspensions

Tier Suspension Load Limit
(т)
Traverse Speed
(gr/sec)
Rmin Weight
(kg)
Price
(Credits)

X 113 48 36 B/2 10000 61350

Ico_radio_alpha.png

Radios

Tier Radio Signal Range
(m)
Weight
(kg)
Price
(Credits)

X A-220B 750 40 54000

Compatible Equipment

Low Noise Exhaust System Class 1 Vertical Stabilizer Class 1 Heavy Spall Liner Camouflage Net Class 2 Coated Optics Class 1 Stabilizing Equipment System Experimental Optics Wear-Resistant Gun Laying Drive Improved Configuration Venting System Innovative Loading System Enhanced Gun Laying Drive Class 1 Improved Hardening Class 1 Additional Grousers Class 1 Modified Configuration Class 1 Improved Rotation Mechanism Class 1 Improved Aiming Class 1 Improved Ventilation Class 1 Binocular Telescope Class 1 Gun Rammer Class 1 Turbocharger Class 1 

Compatible Consumables

Stabilizer Greasing Automatic Fire Extinguisher Natural Cover Optical Calibration Aim Tuning Experienced Firefighters Manual Fire Extinguisher Pre-Battle Maintenance Vent Purge Large First Aid Kit Large Repair Kit Duty Comes First Shell Organizer Quality Oil Orderly Ammo Rack Focus on Target Improved Combat Rations Removed Speed Governor Increased Focus Small First Aid Kit Small Repair Kit Gearbox Intricacy Steady Hand Combat Course 


Player Opinion

Pros and Cons

Pros:


  • Good DPM, can break 3k with the appropriate equipment and consumables
  • Decent gun depression when aiming to the hull sides (-7 degrees)
  • Reasonably accurate for a 122mm gun
  • Good armor - steeply angled upper glacis and very tough, rounded turret
  • Good speed and overall mobility for a heavy tank


Cons:


  • Long aim time
  • Poor camouflage, as is typical for a heavy tank
  • Low ammo capacity
  • Vulnerable ammo rack and fuel tank modules
  • Poorly armored lower glacis


Performance

The 113 is rather unique compared to other Tier 10 heavy tanks in that it strongly resembles its medium counterpart the 121, albeit with improved armor at the expense of mobility. It is what many would call a "medium/heavy" hybrid, a tank that combines traits from both classes and, in this specific case, something of a heavily armed and armored medium tank.

In terms of firepower, the 113 enjoys good DPM and excellent premium penetration - 340mm HEAT, as is fairly common among Tier 10 medium and heavy tanks, and is a staple for top tier Chinese tanks. Its standard AP shells are also plenty serviceable, though their penetration is on the low side for Tier 10 heavy tank standards, requiring some careful aiming to not waste shots, which is the last thing one would want to do on this tank given the 113's underwhelming ammo capacity of only 34 rounds total.

Armor-wise, this tank has an interesting feature - its upper glacis, while thin, is sloped to such an extent that even with the gun's measly -5 degrees of gun depression it can achieve an auto-ricochet angle. Combined with the extremely tough and rounded turret, this makes the 113 quite stiff to dislodge from viable hull-down positions or cover where the hull can be at least partially covered (especially the lower glacis, which is a major weak spot on the 113). Do note however that this tank has a very low profile, so taller tanks can face hug it and shoot on the upper glacis from above, negating its angling and achieving easy penetrations. Lastly, though obviously, being a heavy tank the 113 has underwhelming camouflage.

Another feature that makes the 113 stand out compared to other Tier 10 heavy tanks is its mobility. It has a good top speed and engine power, as well as a reasonably quick hull traverse speed. This allows it to reach key positions faster than any of the slower, more lumbering heavy tanks, or even keep up with friendly medium tanks in a flanking play. This superior flexibility is not lost to players with good situational awareness, and allows the 113 to rush to important locations on the map whenever needed.

Overall, the 113 is, essentially, an inferior counterpart to the infamous Russian Object 430U, and plays a similar role in battle. Its speed allows it to reach key positions faster than several other heavy tanks, or to follow friendly mediums and "bully" enemy tanks thanks to its armor and firepower.


Early Research

Currently the 113 can only be unlocked after researching any of the Chinese Tier 10 tech tree tanks. It has no researchable modules and comes elite on purchase.


Suggested Equipment


Improved VentilationTank Gun Rammer Vertical Stabilizer 


External Reviews and Opinions

Gallery

Historical Info

Development of the model 113 was started in 1963, when it was obvious that the development of the WZ-111 was not heading in a good direction. Conceived as an alternative to the WZ-111, the 113 used parts and components off of medium tanks, unlike WZ-111 which evolved from the Russian IS heavy tank series. Mass deployment of new main battle tank vehicles like T-55 and T-62 marked the end of the development, not only for the model 113, but for all Chinese heavy tank designs.


Historical Gallery


China
Light Tanks IIVickers Mk. E Type B IIIType 2597 Chi-Ha IVM5A1 Stuart VI59-16 VIType 64 VIIType 62 VIIWZ-131 VIIIWZ-132 VIIIM41D IXWZ-132A XWZ-132-1
Medium Tanks VType T-34 VIType 58 VIIT-34-1 VIIIType 59 VIIIT-34-2 VIIIT-34-3 VIII59-Patton VIII122 TM VIIIType 59 G IXWZ-120 X121 X121B
Heavy Tanks VIIIS-2 VIIIWZ-111 VIIIWZ-111 Alpine Tiger VIII110 VIII112 IXWZ-111 model 1-4 IXWZ-114 X113 X113 Beijing Opera XWZ-111 model 5A XWZ-111 Qilin
Tank Destroyers IIT-26G FT IIIM3G FT IVSU-76G FT V60G FT VIWZ-131G FT VIIT-34-2G FT VIIIWZ-111-1G FT VIIIWZ-120-1G FT IXWZ-111G FT IXWZ-120G FT XWZ-113G FT X114 SP2
Self-Propelled Artillery
Heavy Tanks
USA VT14 VT1 Heavy Tank VIPawlack Tank VIM6 VIIKing Tiger (Captured) VIIM-II-Y VIIT29 VIIIChrysler K VIIIChrysler K GF VIIIT26E5 VIIIT26E5 Patriot VIIIM54 Renegade VIIIT77 VIIIM-III-Y VIIIM-IV-Y VIIIM6A2E1 VIIIT32 VIIIT34 VIIIT34 B IXAE Phase I IXConcept 1B IXM-VI-Y IXM103 IXT54E1 XM-V-Y XT110E5 XT57 Heavy Tank
UK VChurchill I VExcelsior VIChurchill VII VITOG II* VIIBlack Prince VIIFV201 (A45) VIIICharlemagne VIIICaliban VIIIGonsalo VIIICaernarvon VIIICaernarvon Action X IXFV4201 Chieftain Proto IXConqueror XFV215b XSuper Conqueror XT95/FV4201 Chieftain
Germany IVPz.Kpfw. B2 740 (f) IVDurchbruchswagen 2 VITiger 131 VIVK 30.01 (P) VIVK 36.01 (H) VIIVK 45.03 VIITiger I VIITiger (P) VIIIVK 100.01 (P) VIIIVK 168.01 (P) VIIIVK 168.01 Mauerbrecher VIIIVK 75.01 (K) VIIIE 75 TS VIIILöwe VIIITiger II VIIIVK 45.02 (P) Ausf. A IXE 75 IXMäuschen IXVK 45.02 (P) Ausf. B XE 100 XPz.Kpfw. VII XMaus XVK 72.01 (K)
France IVB1 VBDR G1 B VIARL 44 VIIAMX M4 mle. 45 VIIIAMX 50 100 VIIIAMX M4 mle. 49 VIIIAMX M4 mle. 49 Liberté VIIIAMX 65 t VIIISomua SM VIIIFCM 50 t IXAMX 50 120 IXLorraine 50 t IXAMX M4 mle. 51 XAMX 50 B XAMX M4 mle. 54
USSR VChurchill III VKV-220-2 VKV-220-2 Beta Test VKV-1 VKV-1 shielded VIKV-1S VIKV-2 VIKV-2 (R) VIKV-85 VIObject 244 VIT-150 VIIIS VIIKV-3 VIIKV-122 VIIIS-2M VIIIS-2 shielded VIIIS-2 VIIIIS-3 VIIIIS-6 VIIIIS-6 B VIIIKV-5 VIIIKV-4 VIIIIS-5 (Object 730) VIIIIS-3A VIIIIS-3A Peregrine VIIIKirovets-1 VIIIKV-4 Kreslavskiy VIIIObject 252U Defender VIIIObject 252U VIIIIS-M VIIIObject 703 Version II VIIIIS-2-II IXT-10 IXObject 777 Version II IXObject 257 IXObject 705 IXIS-3-II IXST-I XIS-4 XIS-7 XObject 260 XObject 705A XObject 277 XObject 279 early XST-II XObject 780
China VIIIS-2 VIIIWZ-111 VIIIWZ-111 Alpine Tiger VIII110 VIII112 IXWZ-111 model 1-4 IXWZ-114 X113 X113 Beijing Opera XWZ-111 model 5A XWZ-111 Qilin
Japan IIIType 91 Heavy IVType 95 Heavy VO-I Experimental VIHeavy Tank No. VI VIO-I VIIO-Ni VIIIO-Ho IXType 4 Heavy XType 5 Heavy
Czechoslovakia VIIŠkoda T 45 VIIVz. 44-1 VIIIŠkoda T 56 VIIITNH 105/1000 IXTNH T Vz. 51 XVz. 55
Sweden VIIIEmil I VIIIEMIL 1951 VIIIBofors Tornvagn IXEmil II IXStrv K XKranvagn
Italy VIICarro d'assalto P.88 VIIIProgetto CC55 mod. 54 VIIIBisonte C45 IXProgetto C50 mod. 66 XRinoceronte
Poland VII45TP Habicha VIII50TP prototyp VIII53TP Markowskiego IX50TP Tyszkiewicza X60TP Lewandowskiego
ja:Tank:Ch22 113